Convert an LOB into a monoline policy
Last updated: April 7, 2026
Overview
In some situations, you may need to remove a line of business (LOB) from a package policy. If the insured no longer needs the LOB, you would simply cancel the policy if midterm or remove it from the package at renewal. However, if the insured still needs the LOB, you can convert it into its own monoline policy. This scenario typically happens when:
A carrier requires the coverage to be written separately.
The client moves a single LOB to a different carrier.
Only one LOB is renewing while others remain unchanged.
The LOB needs different effective dates, limits, or underwriting terms.
You need clearer reporting or commission tracking for a specific coverage.
Converting the LOB ensures your policy structure accurately reflects how coverage is written and maintained. This article provides instructions and considerations for this conversion process.
Identify the package policy
Confirm the LOB exists on the package policy before creating the monoline policy.
Use Global Search to locate and open the original package policy that contains the LOBs.

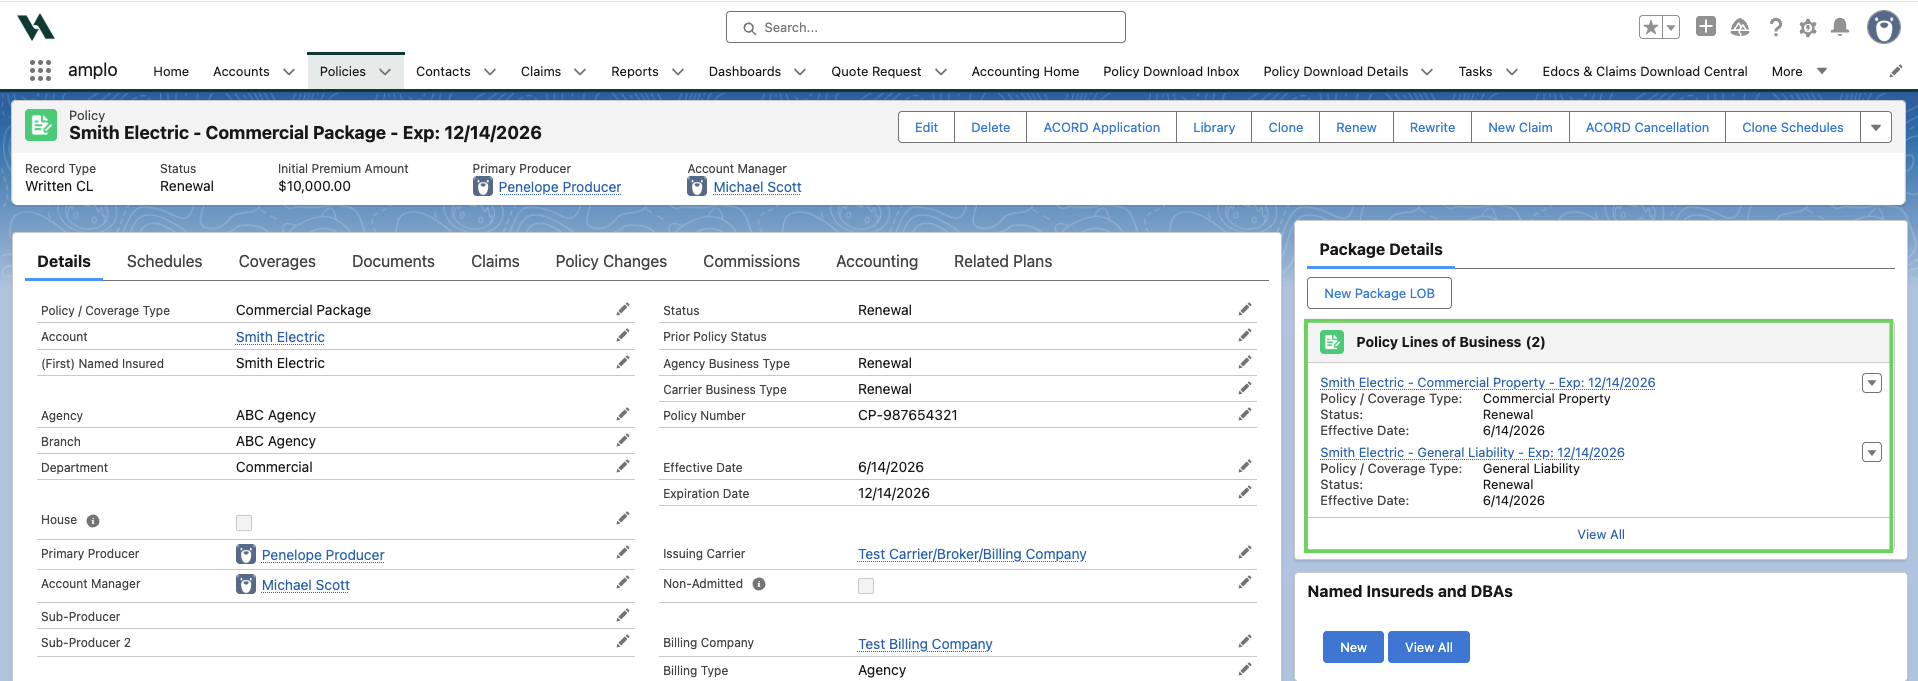
In the Policy Lines of Business section of Package Details, review to ensure the package contains the Line of Business you need to convert to a monoline policy.
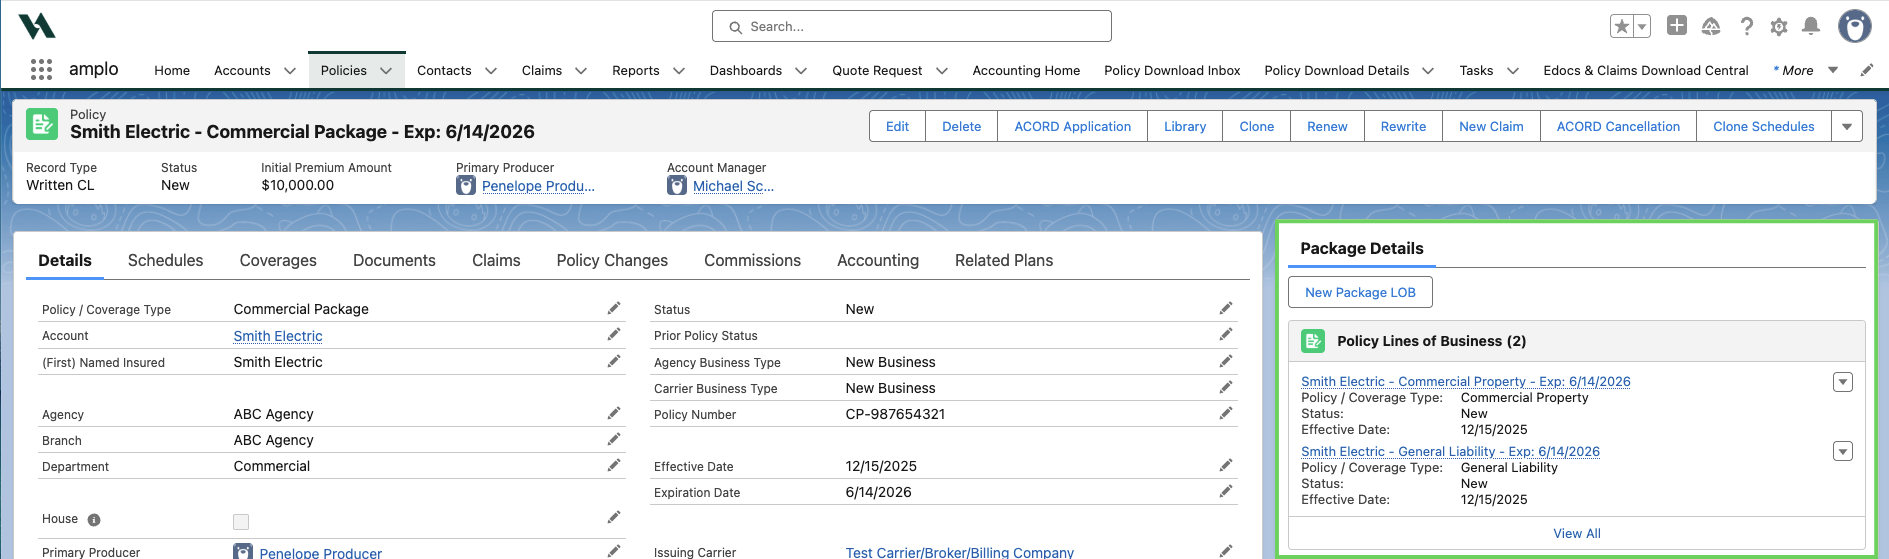
Note: Retain the original package policy as a record of the full historical structure.
Create a new monoline policy
This section provides instructions on how to create the new monoline policy where you can then clone schedules, update coverages, or add new information as needed.
From the Account page, select New CL Policy.

In the New CL Policy modal, complete the following:
Policy/Coverage Type: Select the line of business (LOB) you want to create as a monoline policy.
ACORD Form State: This field is required before marking the policy as Written(Sold).
Status: Since you're marketing a new policy, you can update to status to Information Gathering (or another status based on your agency's workflow.)

Select Save.
After saving, a confirmation message will appear at the top of the page. Select the hyperlink in the confirmation header to navigate to your new monoline policy record.

Once the monoline policy page opens, verify the account name in the Account field.

Note: Document the reason for the split in the Policy Notes or Activities section. For information on this, see 📄 Manage activities and client interactions.
Clone the schedules
Cloning schedules from the previous policy ensures the new monoline policy reflects the same exposure details as the original package policy.
On the new policy record page, select Clone Schedules.

Find and select the policy that contains the schedules you want to copy.

Select Copy Schedules. Once the schedules have been cloned, you'll be redirected to the monoline policy record.

Review and remove unrelated schedules
Select the Schedules tab.
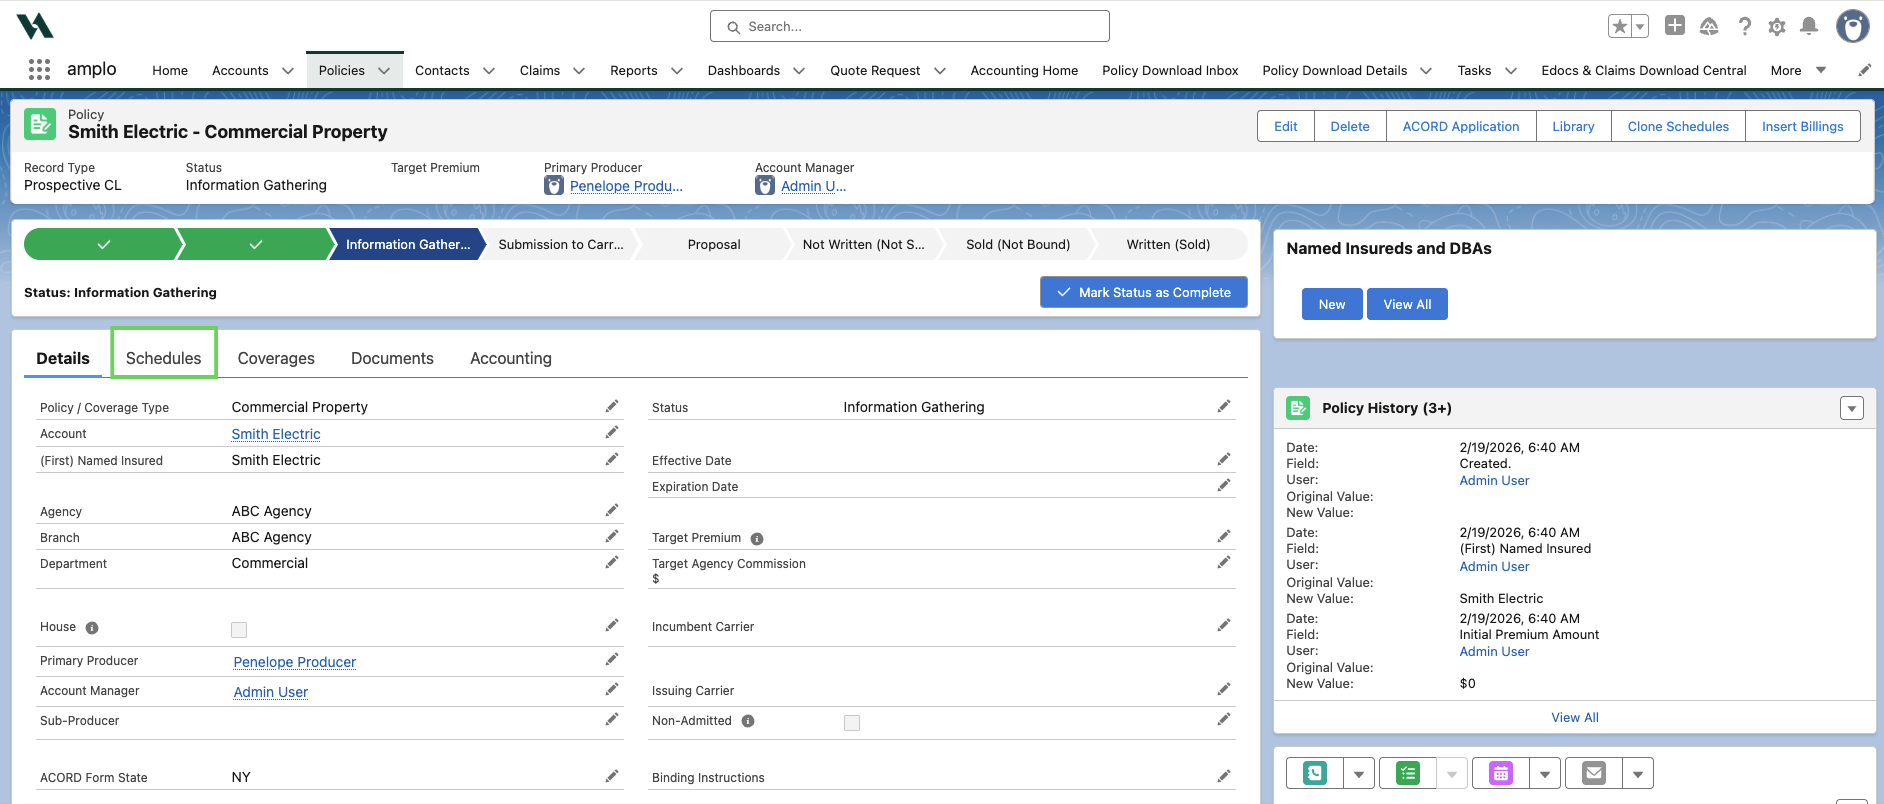
Review each Schedule type (premise, vehicle, etc).

For any item not associated with the new monoline policy:
Select the checkbox next to the schedule item.
Click the trash can icon.
Confirm the deletion by selecting Okay.
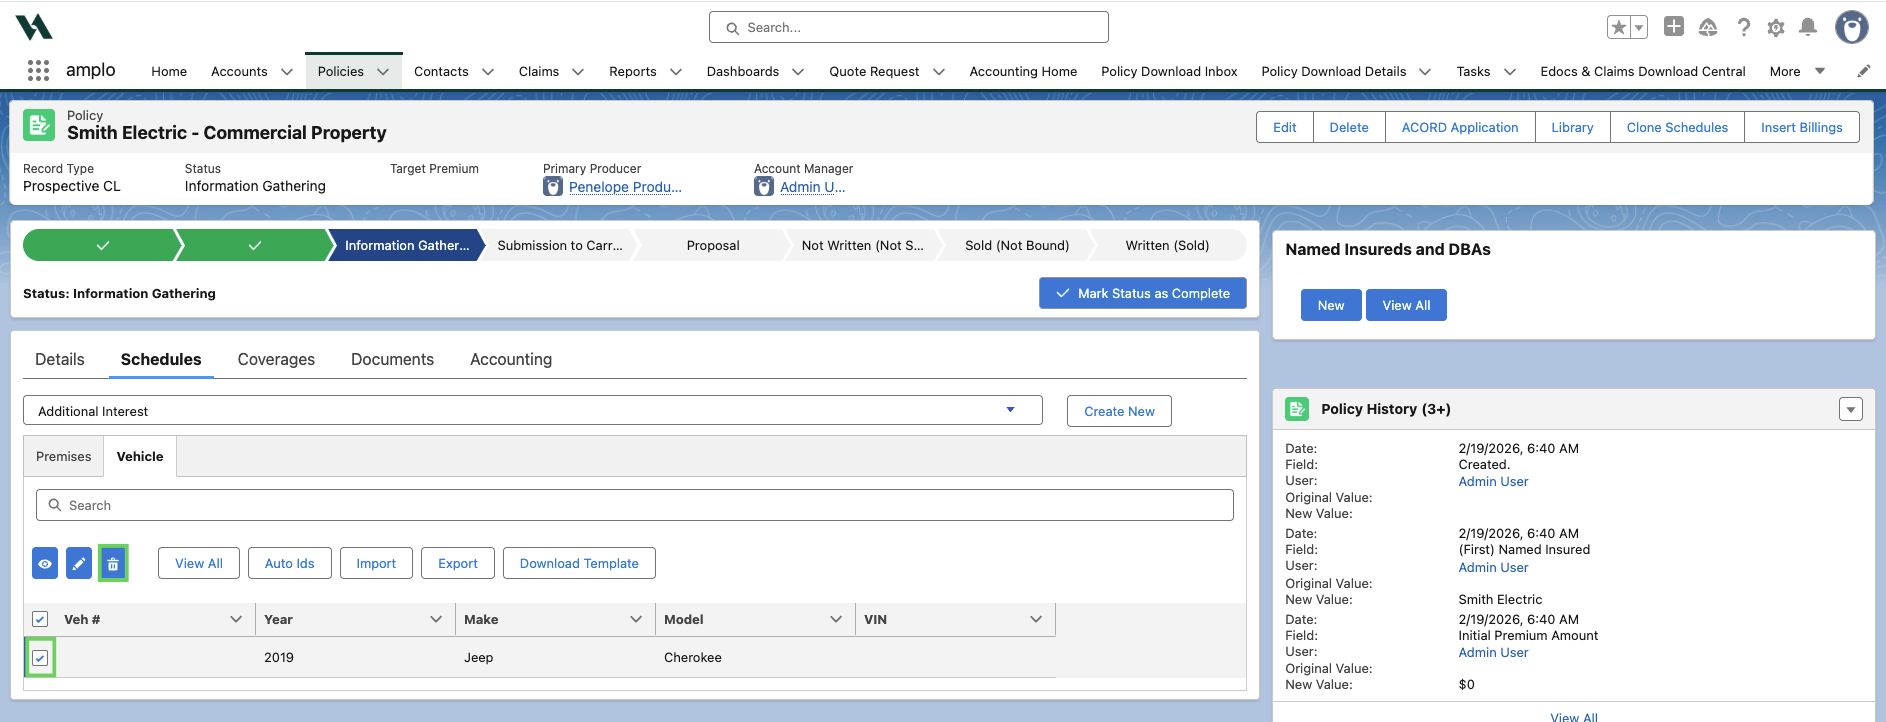
Note: Deleting a schedule here only removes it from the monoline policy, not the original package policy.
Review coverages
Confirm limits, deductibles, and coverage details align with the new carrier or policy structure.
Select the Coverages tab.

Select the down arrows next to each coverage type to expand the section and review the listed coverages. Continue selecting the dropdown arrows until you see the edit pencil icons appear.

Select the pencil icon next to the desired field to to edit limits, amounts or other details.
Generate and finalize ACORD application
If the carrier requires a new ACORD application, complete the steps below.
On the monoline policy, select ACORD Application button.

Use the search box on the Select Form tab to find and select the appropriate ACORD applications and the corresponding line of business application.

Once the Veruna ACORD Form Viewer opens, verify the mapped fields are correct, and input values for any unmapped fields.

Select Save.
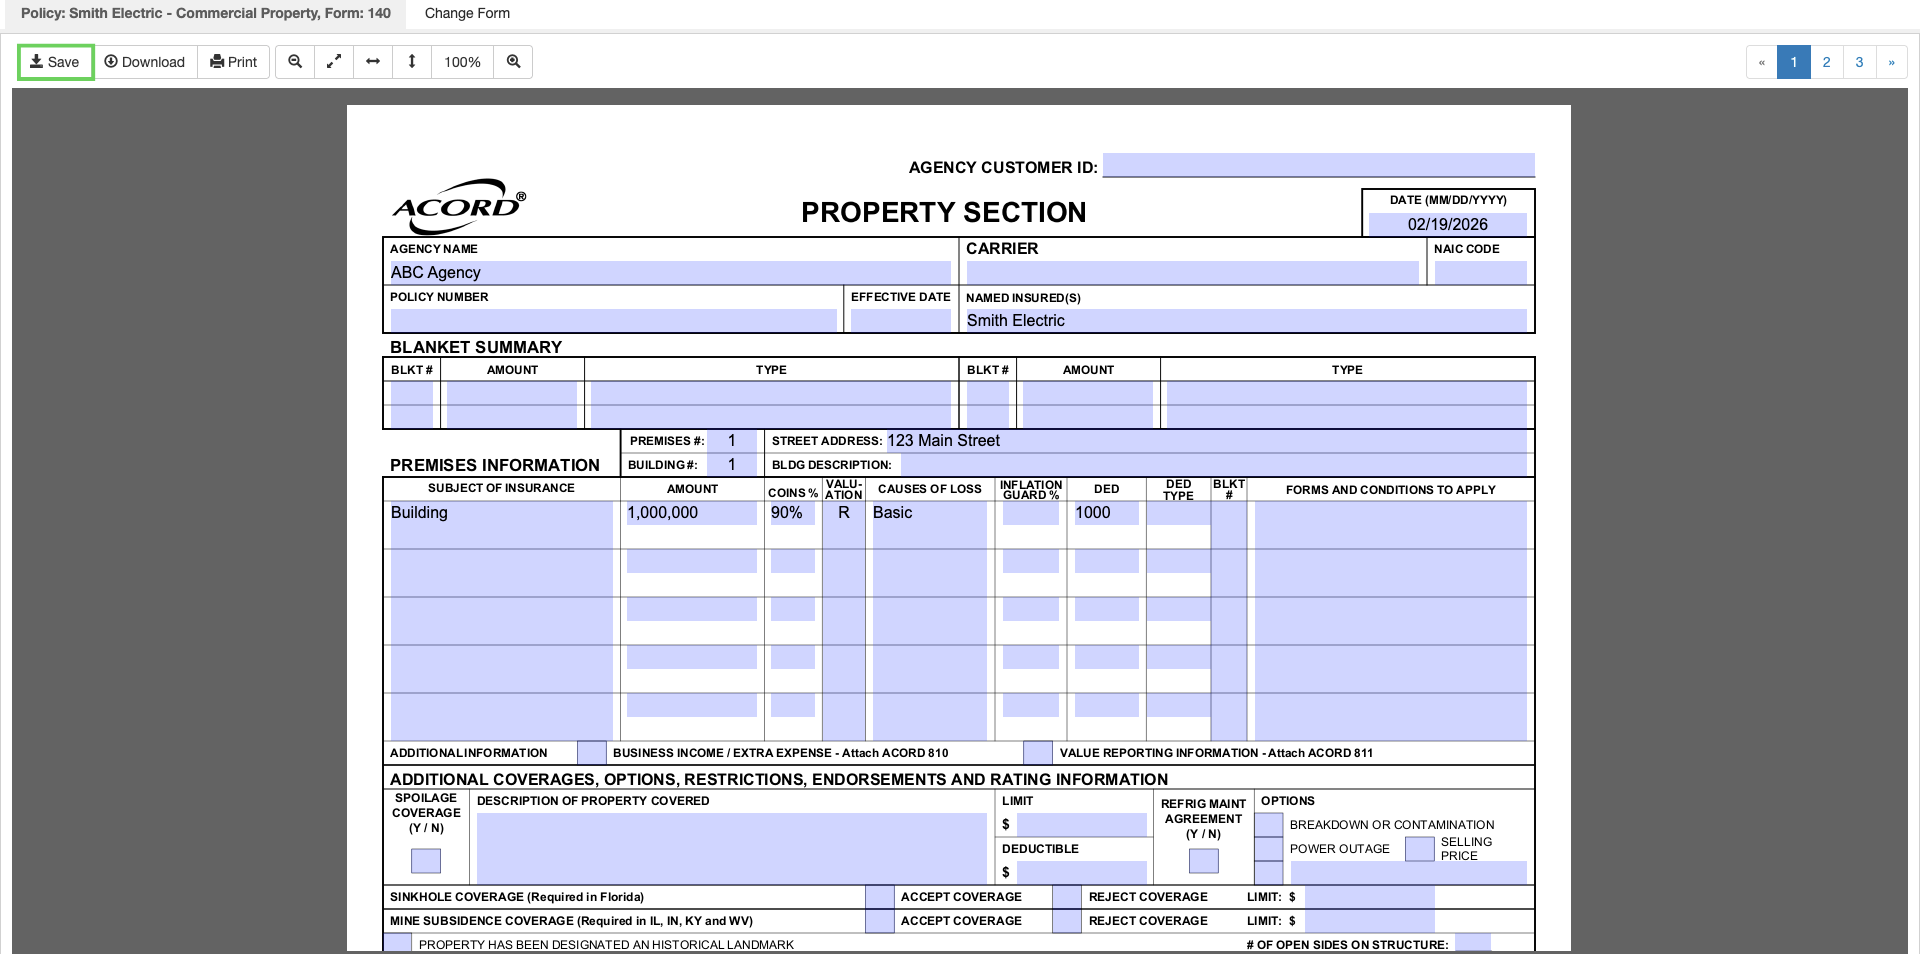
Select Save again or select Do not save to return to the Veruna ACORD Form Viewer.

Select Change Form to back to the previous screen.

Click on the Finalize Forms tab and select the checkbox next to your form under the Select Forms tab.

Click on the Arrange Forms tab.

Click Finalize Forms.

A finalized, uneditable version of your forms will appear in a new tab as PDF. This PDF will automatically save to the Documents tab of the policy tab. You can also download a copy to your computer by selecting the Download button.
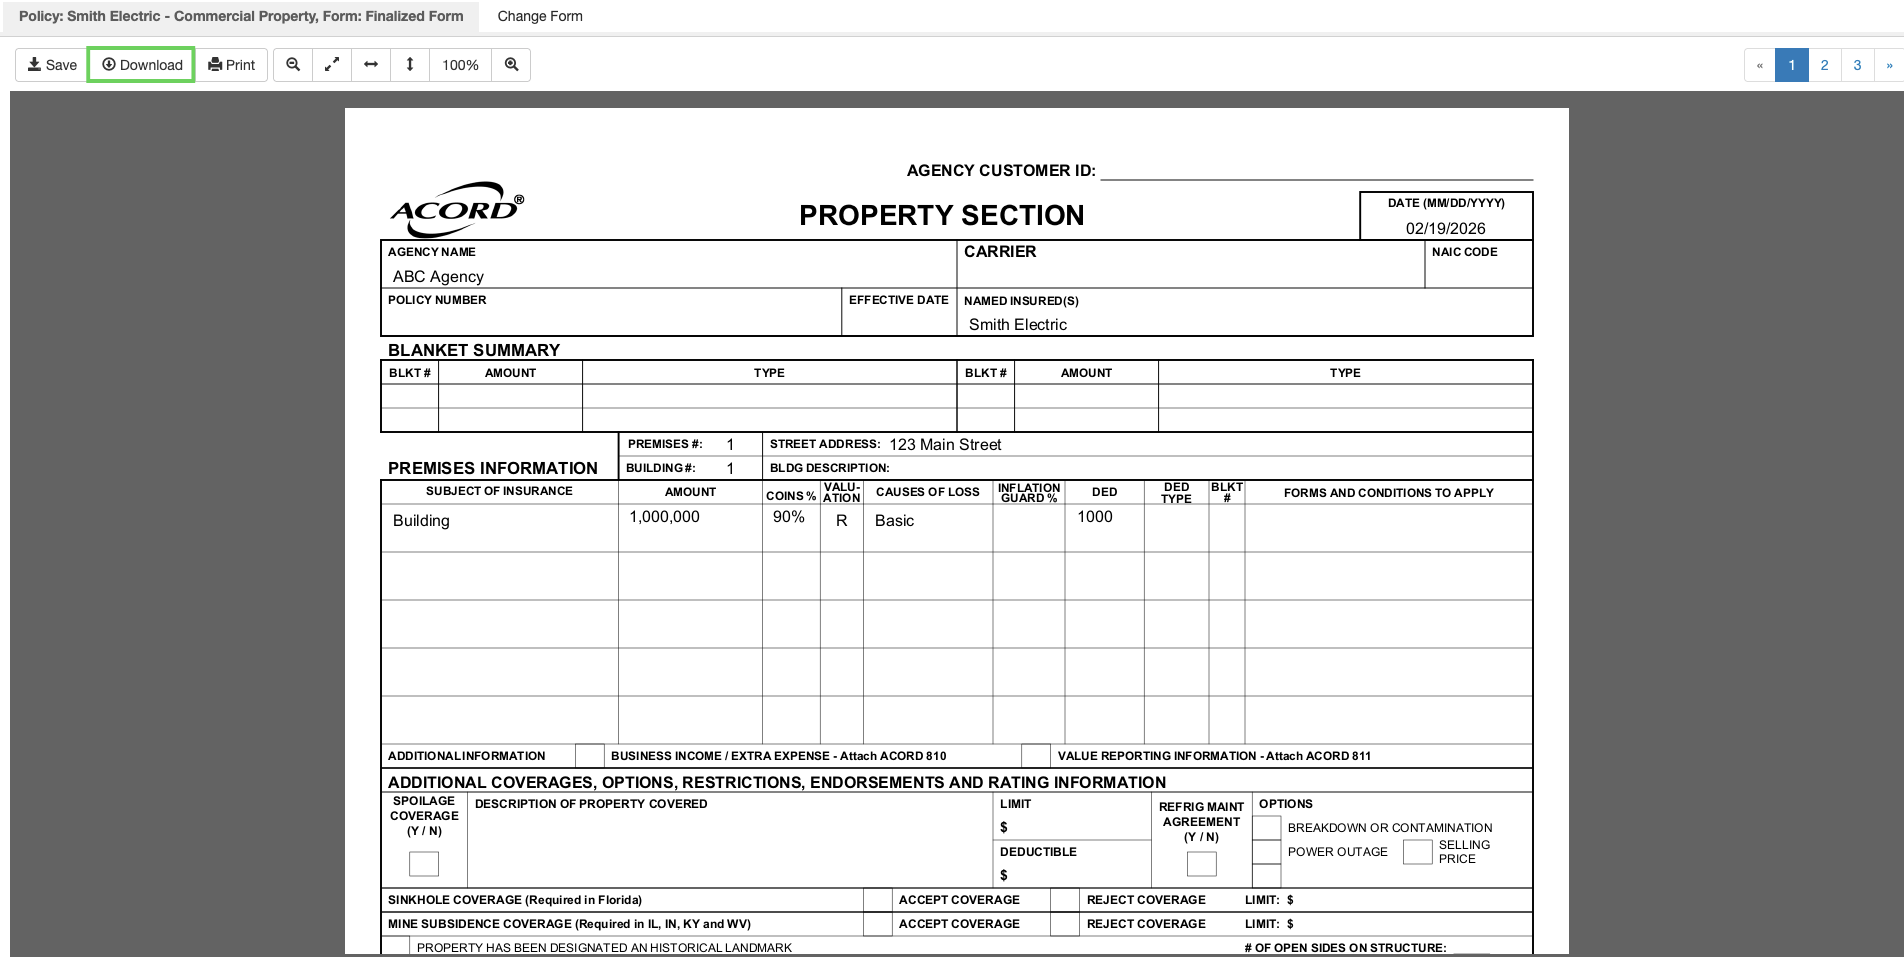
Once the new monoline policy has been sent to and bound by the carrier, follow the steps in 📄 Finalizing a policyto mark the policy as Written (Sold).
Remove the LOB from package policy
There are two scenarios where you may need to remove a line of business from a package policy: midterm (during the active policy term) or at renewal. Follow the steps below for guidance on how to handle each scenario.
Find the package policy
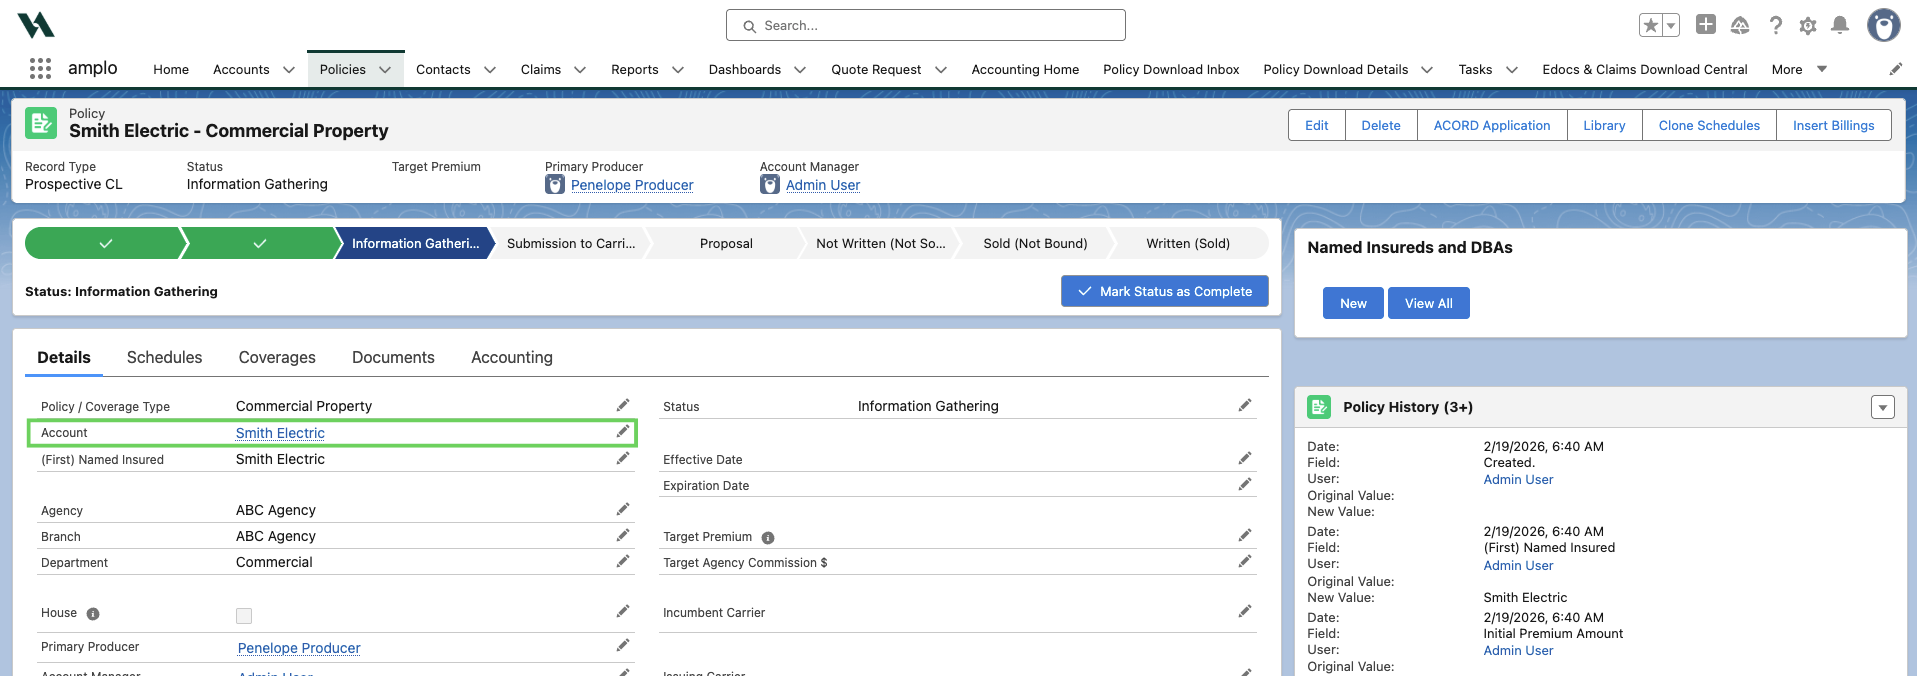
From the policy details page of the monoline policy, select the Account Record.
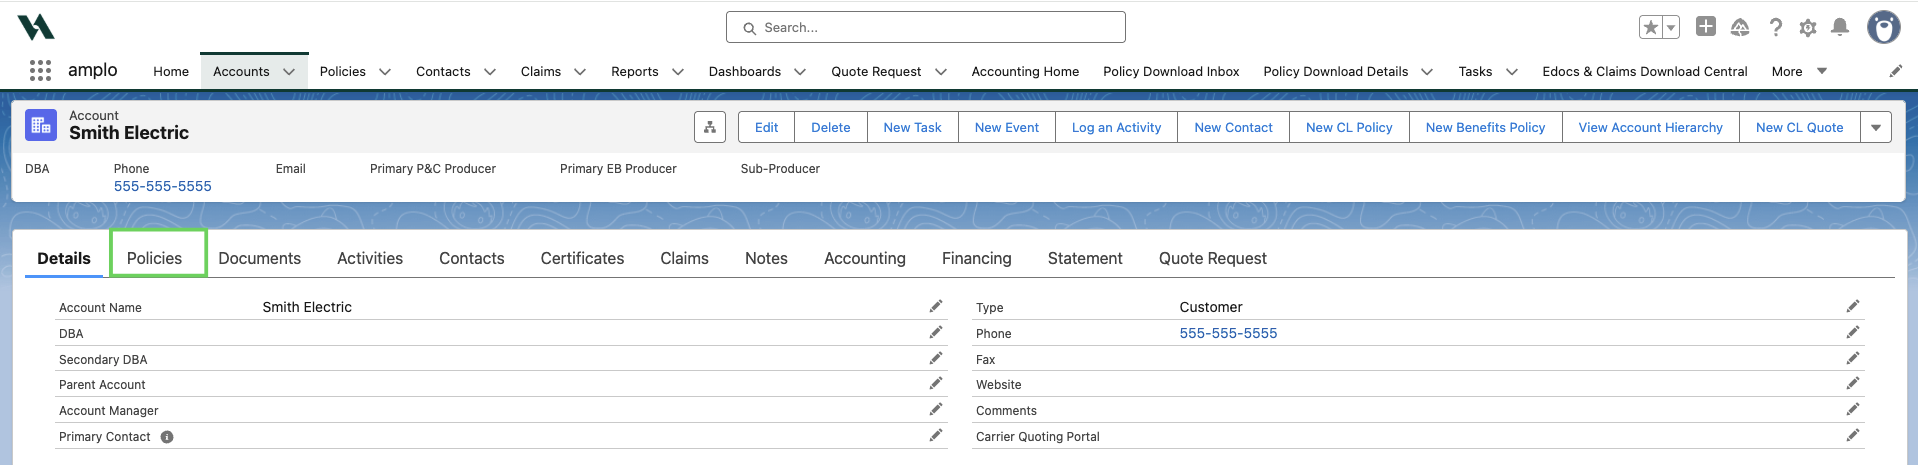
Select the Policies tab on the Account page.
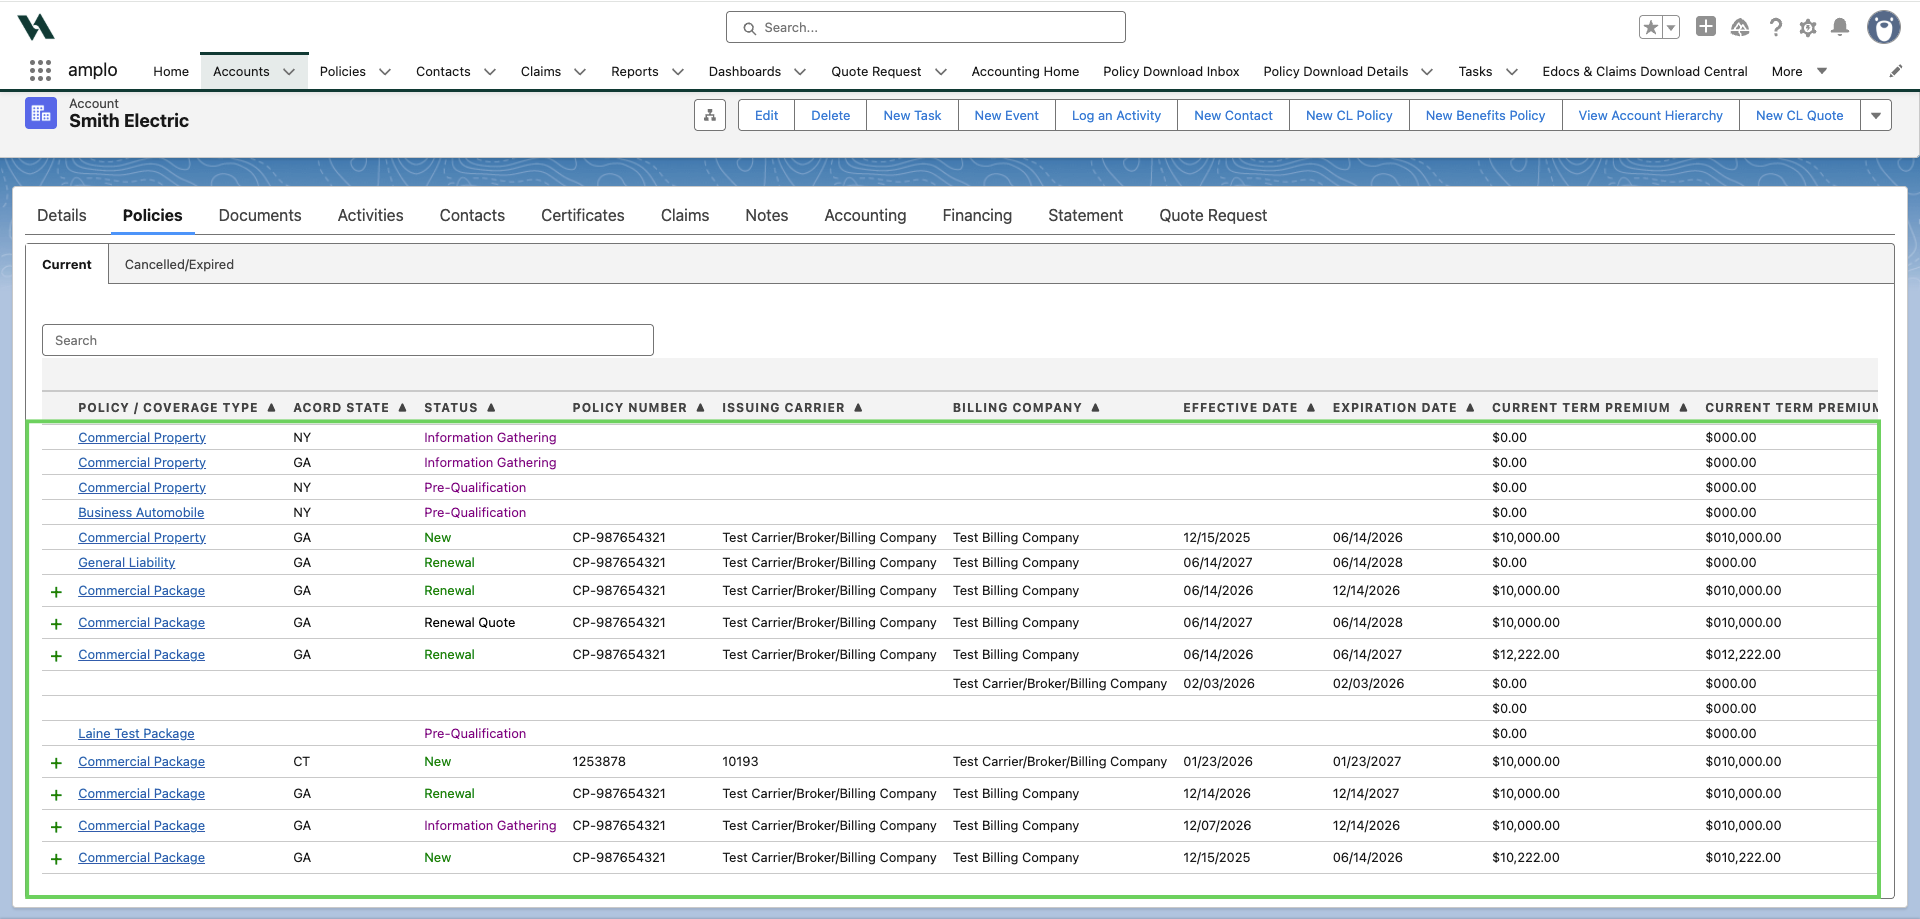
Then, select the package policy with the LOB you want to delete.
Remove the LOB midterm
If you are removing the LOB midterm (during the active policy term), you will need to submit a cancellation for the package LOB to the carrier.
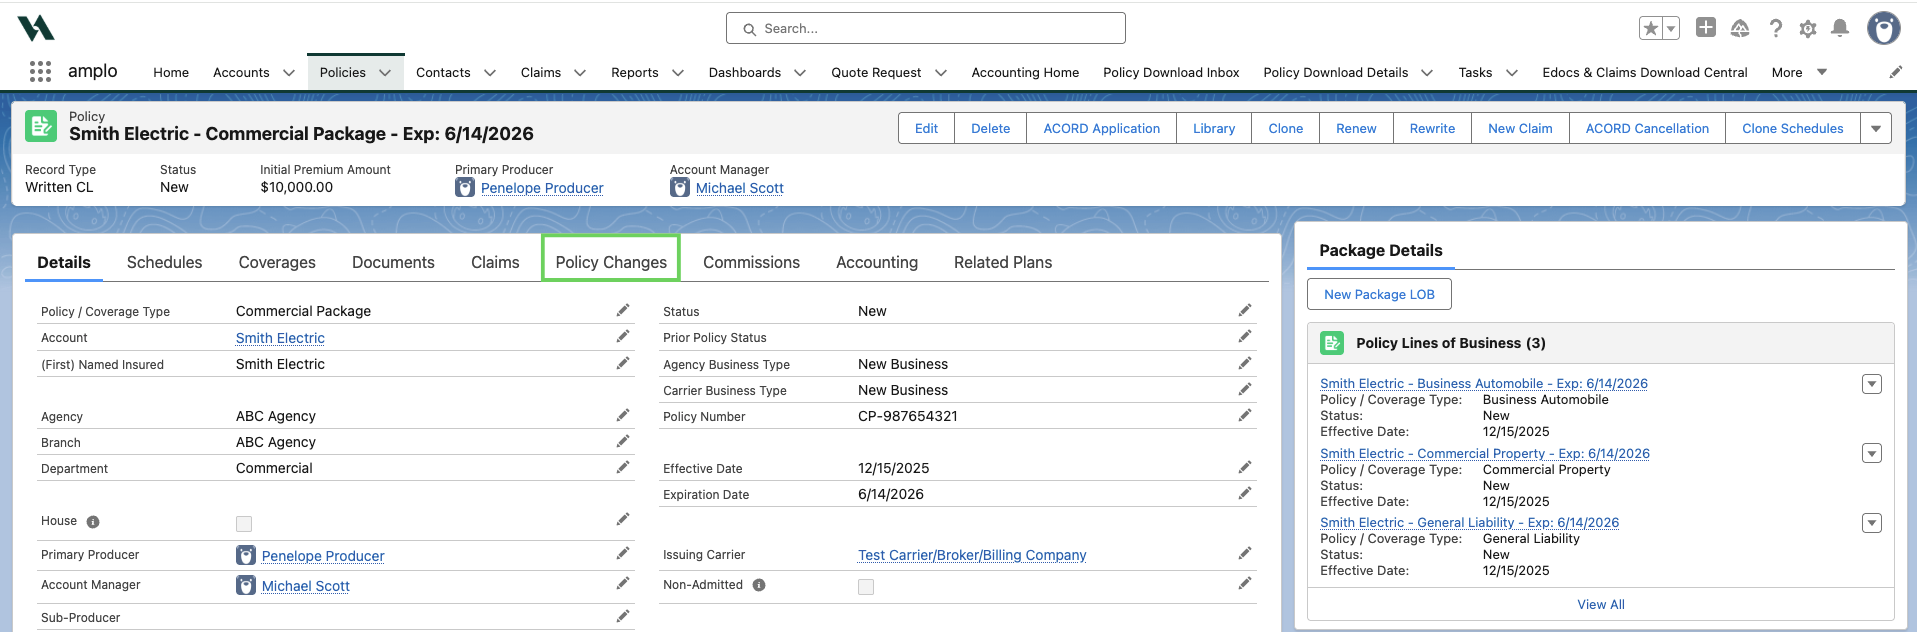
From the package policy record, select the Policy Changes tab.
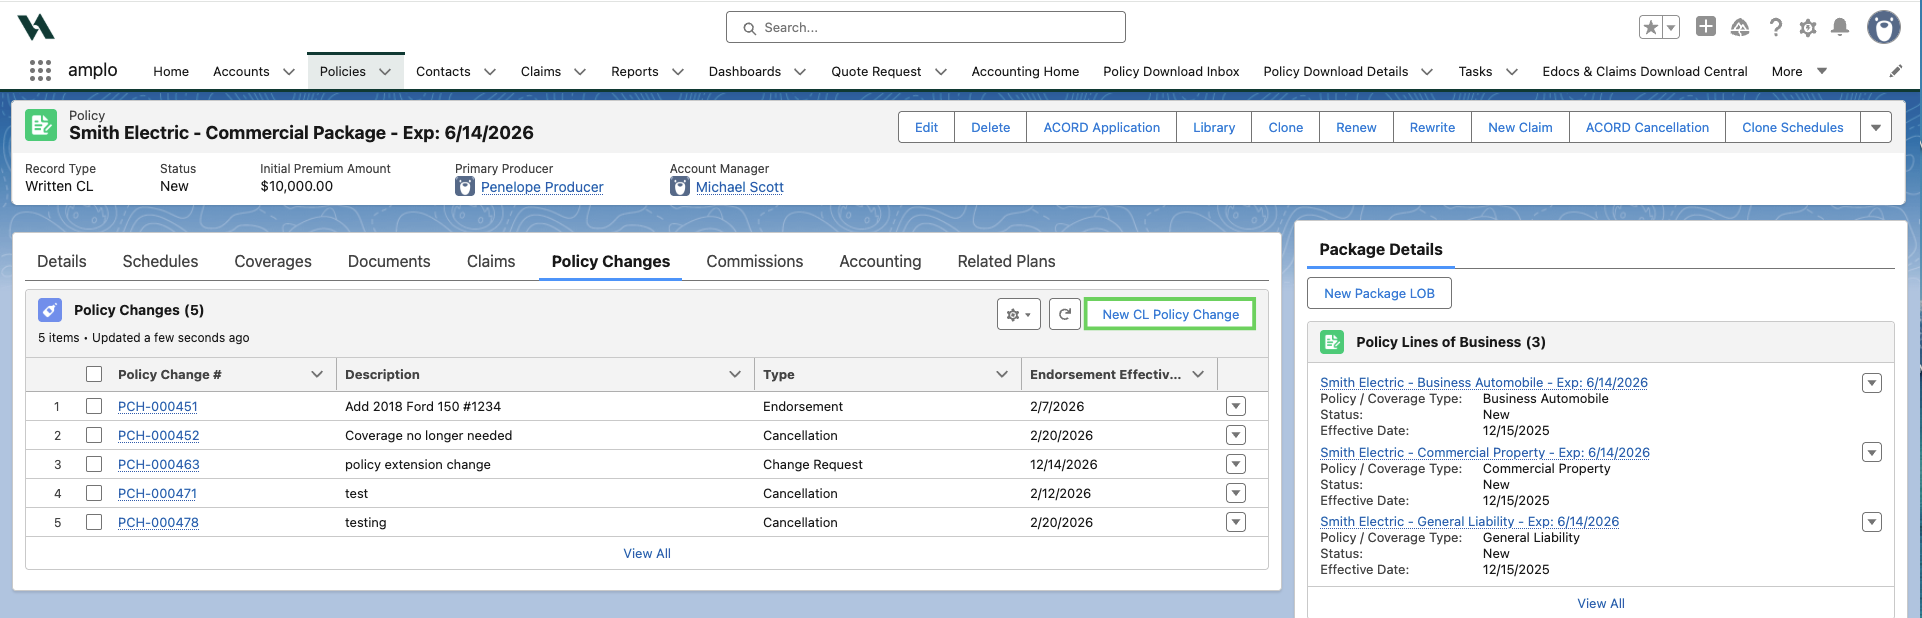
Click New CL Policy Change.
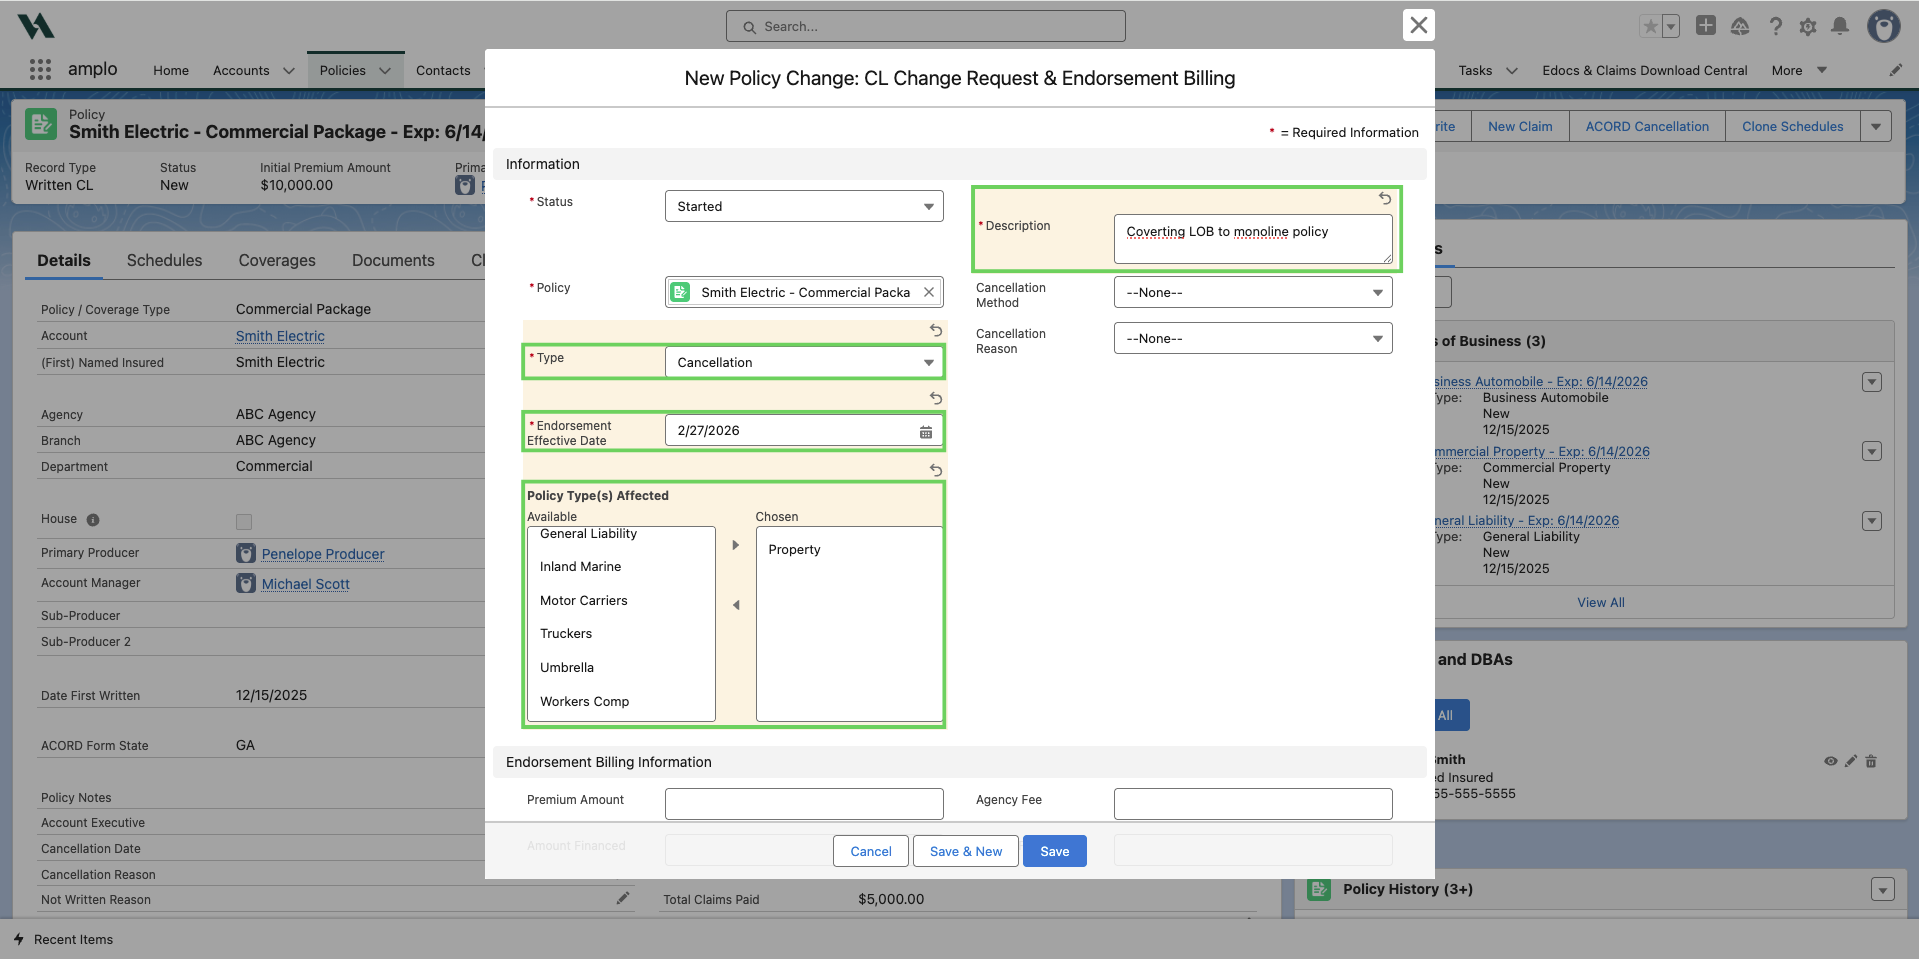
On the New CL Policy Change modal, complete the following fields:
Type: Select Cancellation.
Endorsement Effective Date: Enter the effective cancellation date for that LOB.
Policy Type(s) Affected: Select the LOB we created as a monoline policy.
Description: Enter "Converting LOB to monoline policy."
Select Save.
Then, follow the policy cancellation workflow in 📄 Cancellation and reinstatementarticle.
Remove the LOB at renewal
If you are removing an LOB after a renewal policy has been generated in the system, you need to ensure that the LOB is removed from the renewal policy.
From the account record, select Policies.
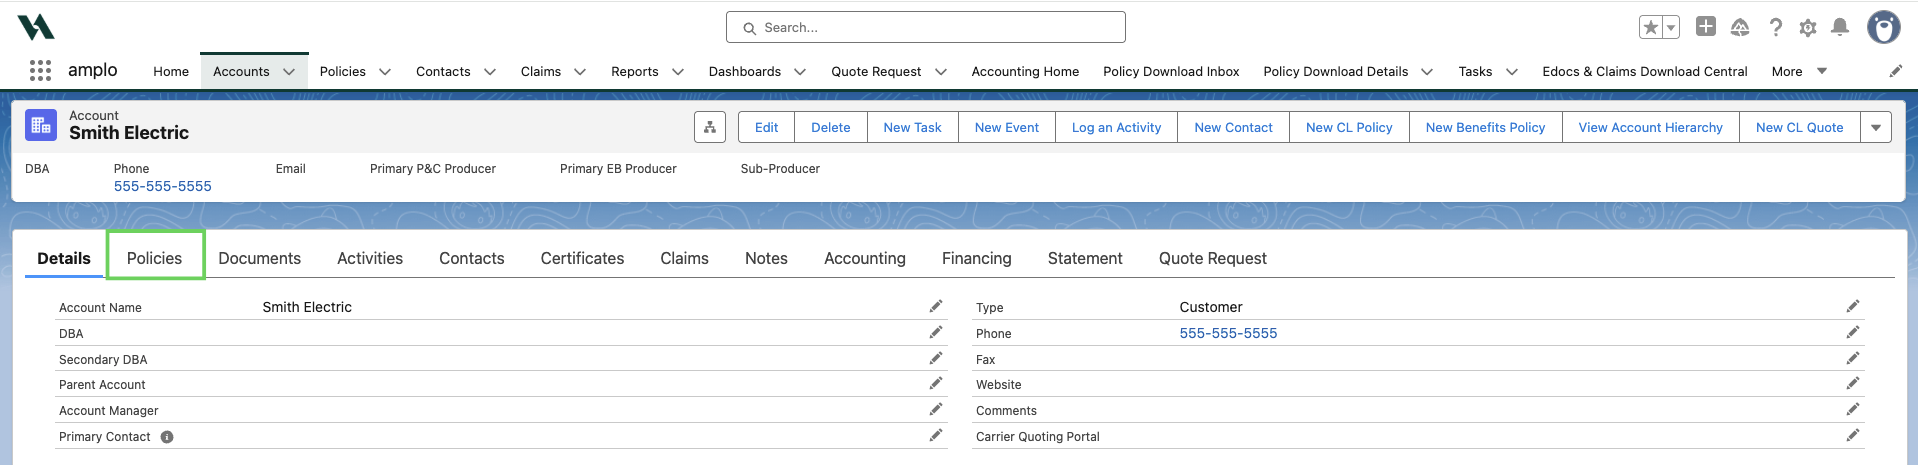
Locate and open the renewal policy.
The policy status cannot be Written (Sold) or Not Written.

On the policy record, find the Policy Lines of Business.
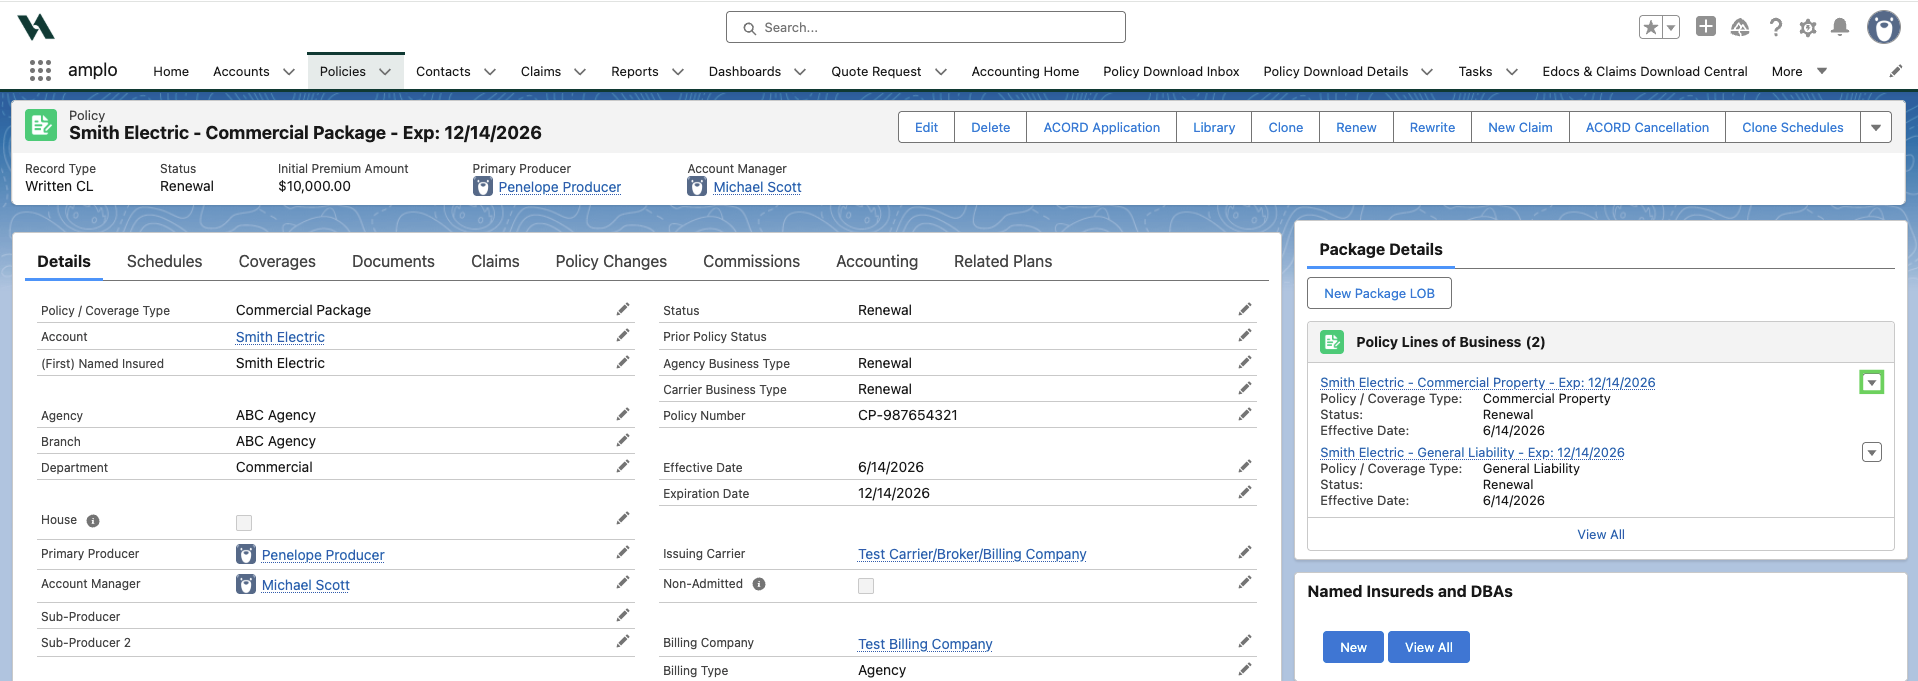
Select the down arrow next to the LOB you want to remove.
Click Delete to remove the LOB.
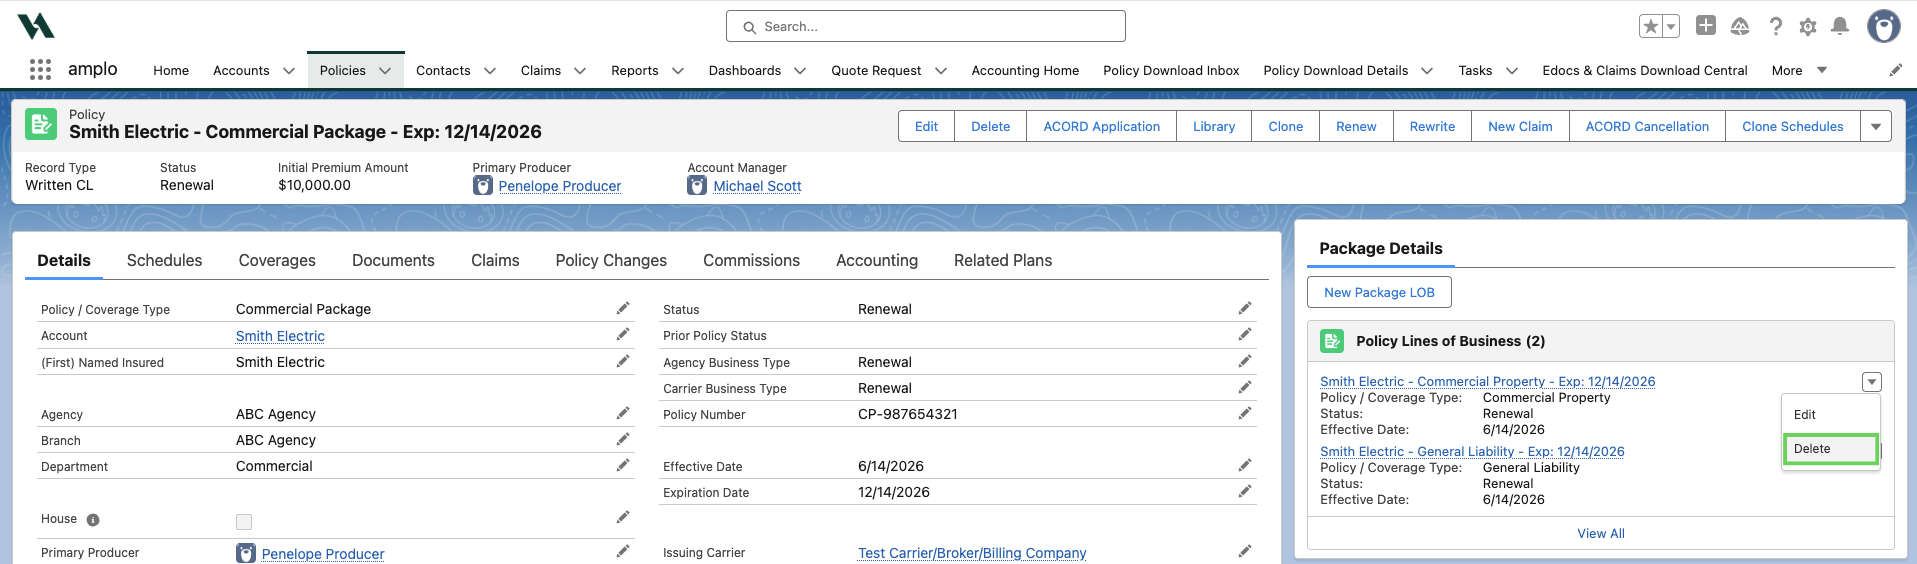
Note: If you change the status of the LOB instead of deleting it, the LOB will inherit the package policy status is renewed or marked as Written (Sold).
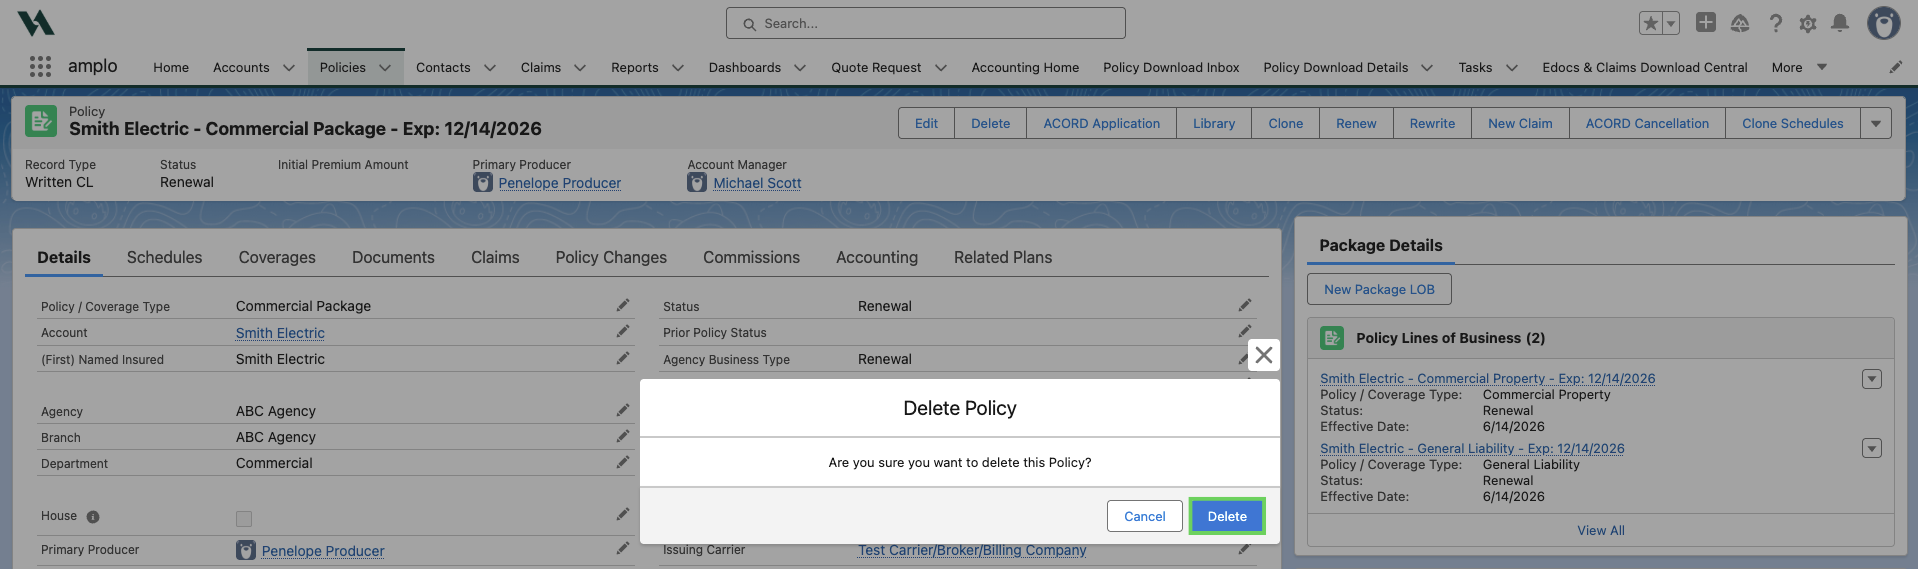
Select Delete to confirm the deletion.
Create a new certificate template
A new certificate template must be created for the monoline policy.
Navigate to the Account for which you need to create the template.
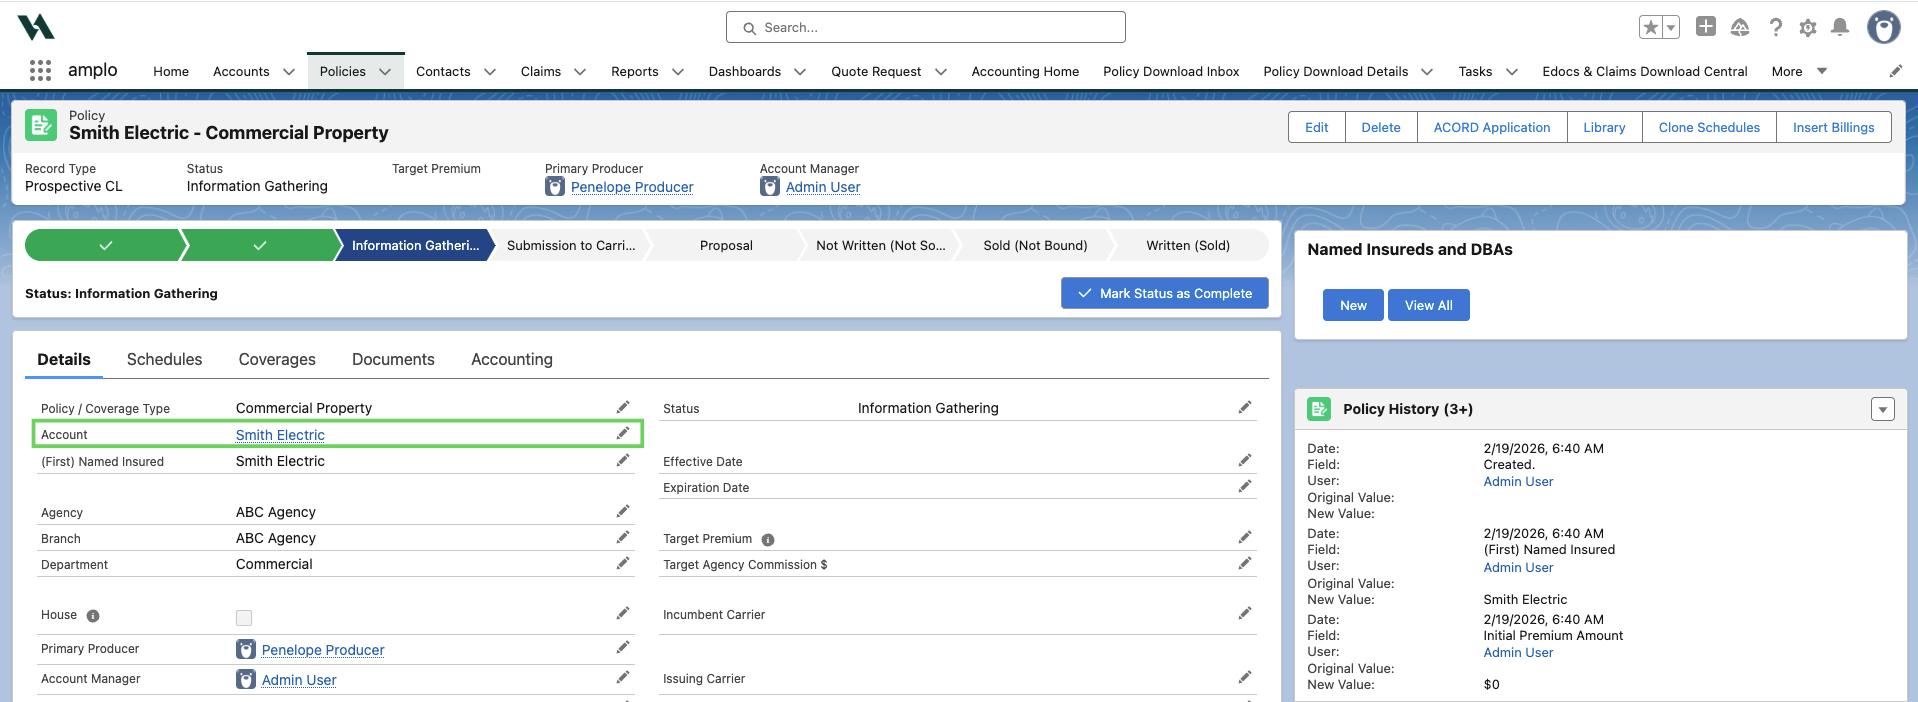
From the account record, select the Certificates tab.
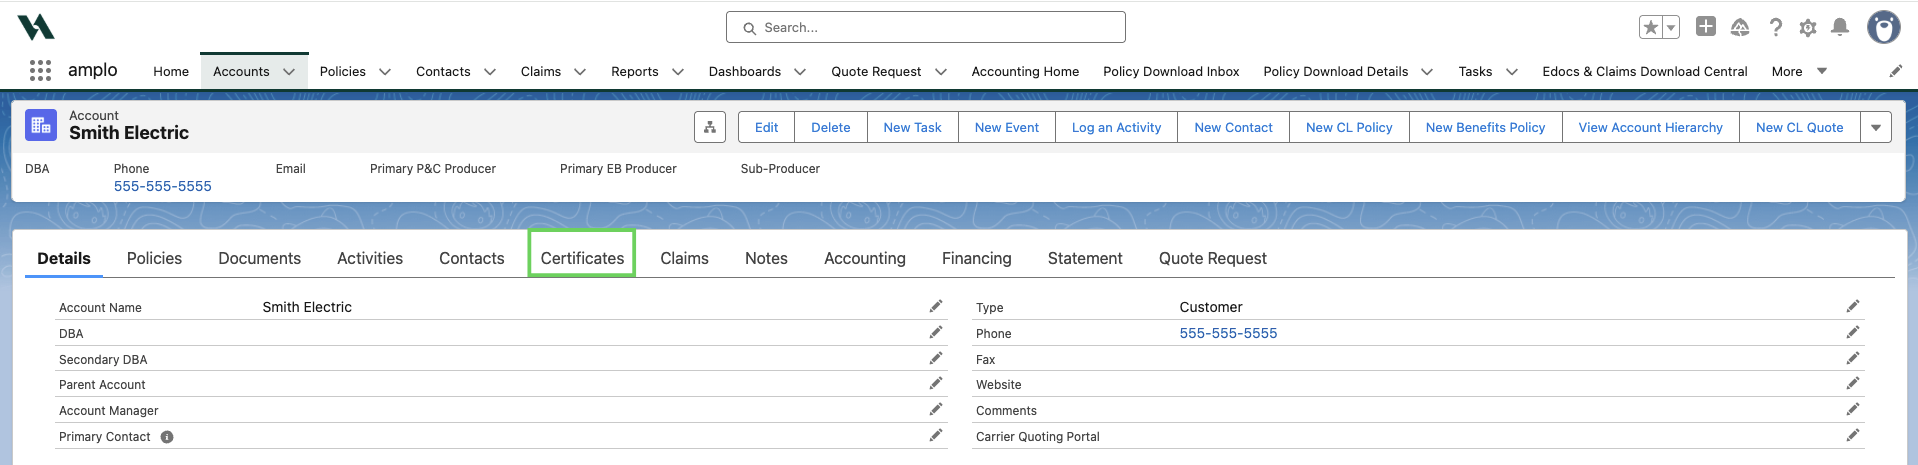
Select Create New.

Choose your required certificate, then select Next.
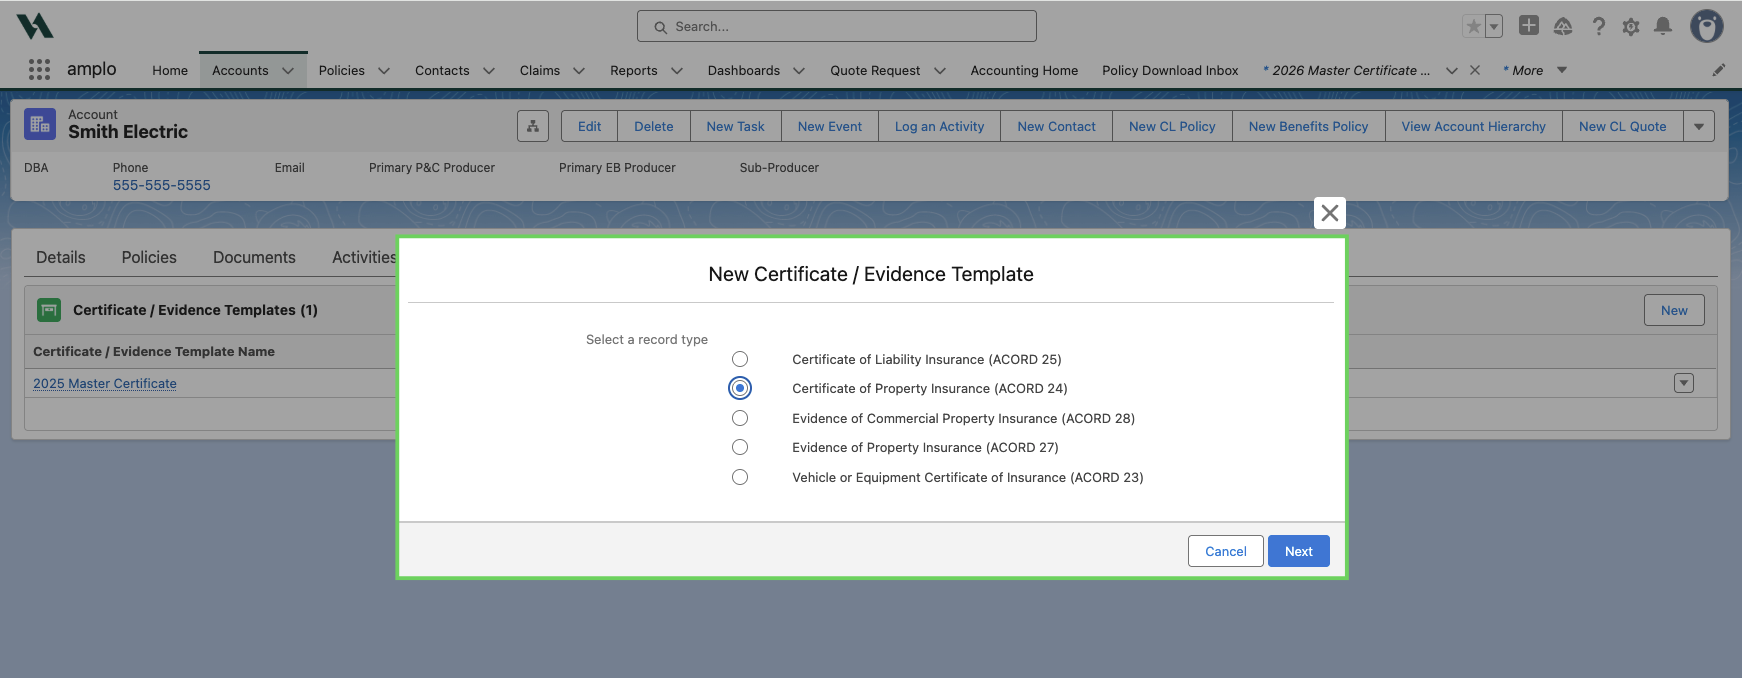
Once the New Certificate / Evidence Template modal opens, enter the following:
A descriptive name into the Certificate/Evidence Template Name field
The values for the Account and Certificate or Evidence Form will auto-populate.
Save.

Locate the new certificate template and select the hyperlink to open it.

Select the Related Policies tab on the certificate template page.

Click the down arrow next to Add Related Policies

Locate and select the checkbox next to the new monoline policy and select Choose Location.

Then, select the appropriate schedule and select Apply and Save.

From the template page, select the Holders tab.

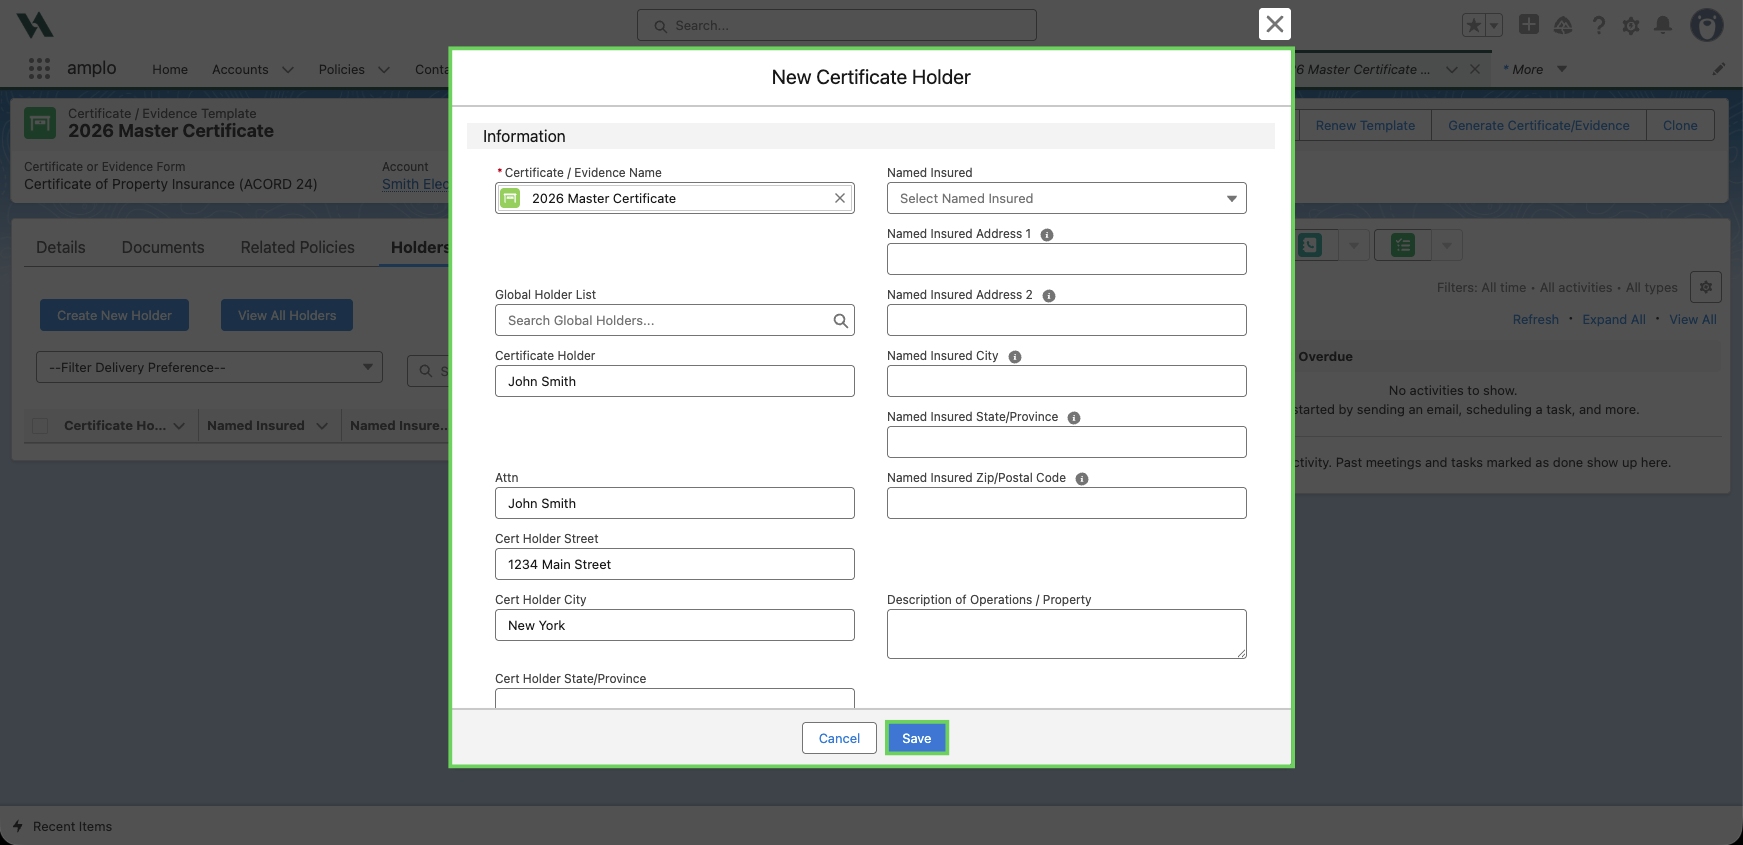
Select Create New Holder
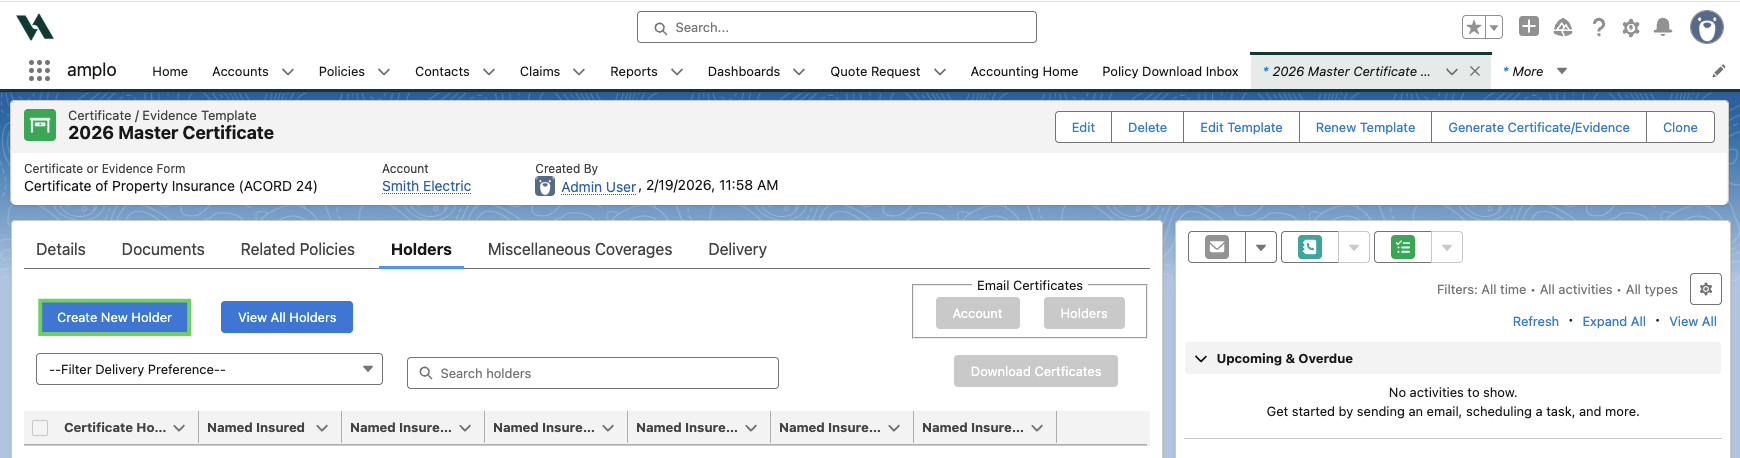
On the New Certificate Holder modal, enter the holder's information and save.
Verify that the holder information is correct.
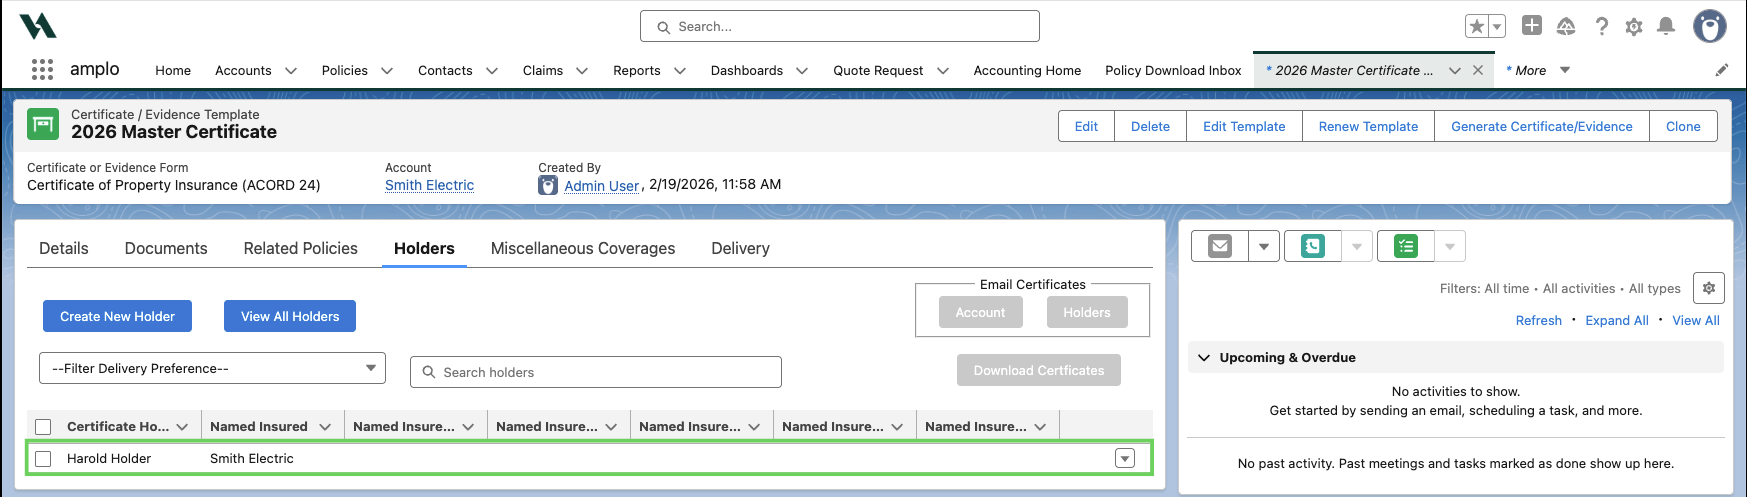
Select Generate Certificate/Evidence.

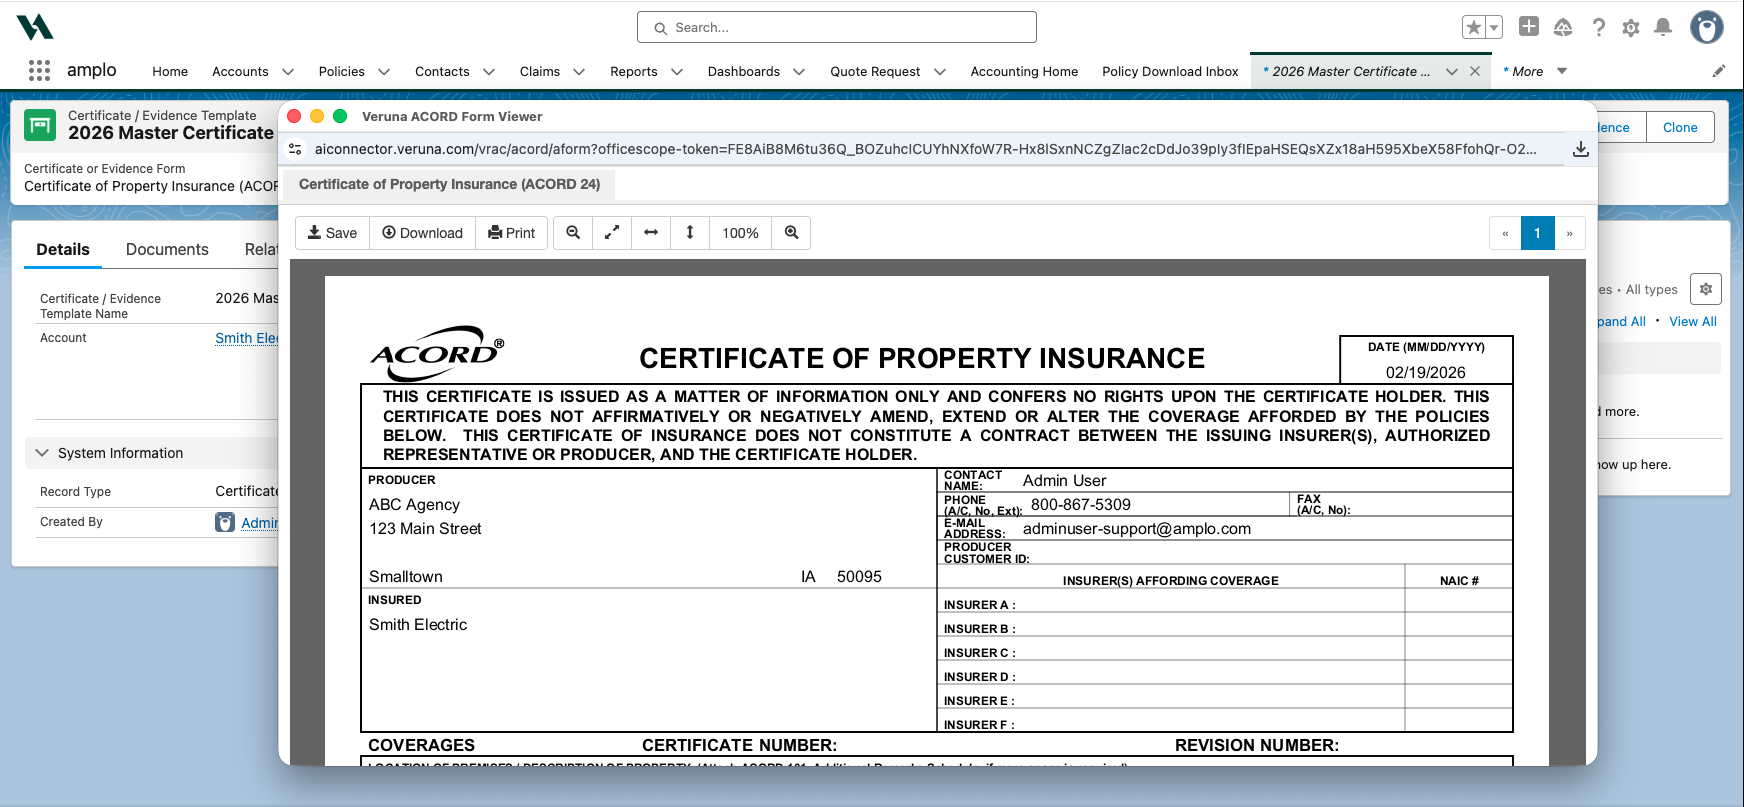
Once the Veruna ACORD Form Viewer opens, confirm the certificate information is correct. Then, download the certificate to your computer.
Note: Coordinate with the carrier or underwriter if a new submission or quote is required.
Troubleshooting
An orphan LOB policy occurs when a Line of Business (LOB) policy remains linked to a parent monoline policy, causing the parent policy to be restricted by the LOB’s values. This can lead to errors during actions such as renewals if the LOB’s effective and expiration dates do not align with the parent policy. For more information on correcting this issue, see 📄 Identifying and correcting 'orphan' LOB policies.