User management
Last updated: July 27, 2026
Overview
Effective user management in Salesforce ensures secure system access, proper data visibility, regulatory compliance, and operational efficiency. In amplo, user setup spans multiple configuration layers:
Configuration | Purpose |
User Record | Controls login access and identity |
User License | Determines what platform features are available |
Profile | Defines baseline permissions |
Permission Sets | Grant additional access beyond the profile |
Managed Package licenses | Control access to installed applications |
Public Groups | Controls record visibility |
App-level configuration | Enables VerunaDocs functionality. |
This guide walks through each layer in the proper administrative order.
Navigating to User setup page
On the top navigation bar, click on the gear icon.

Select Setup.
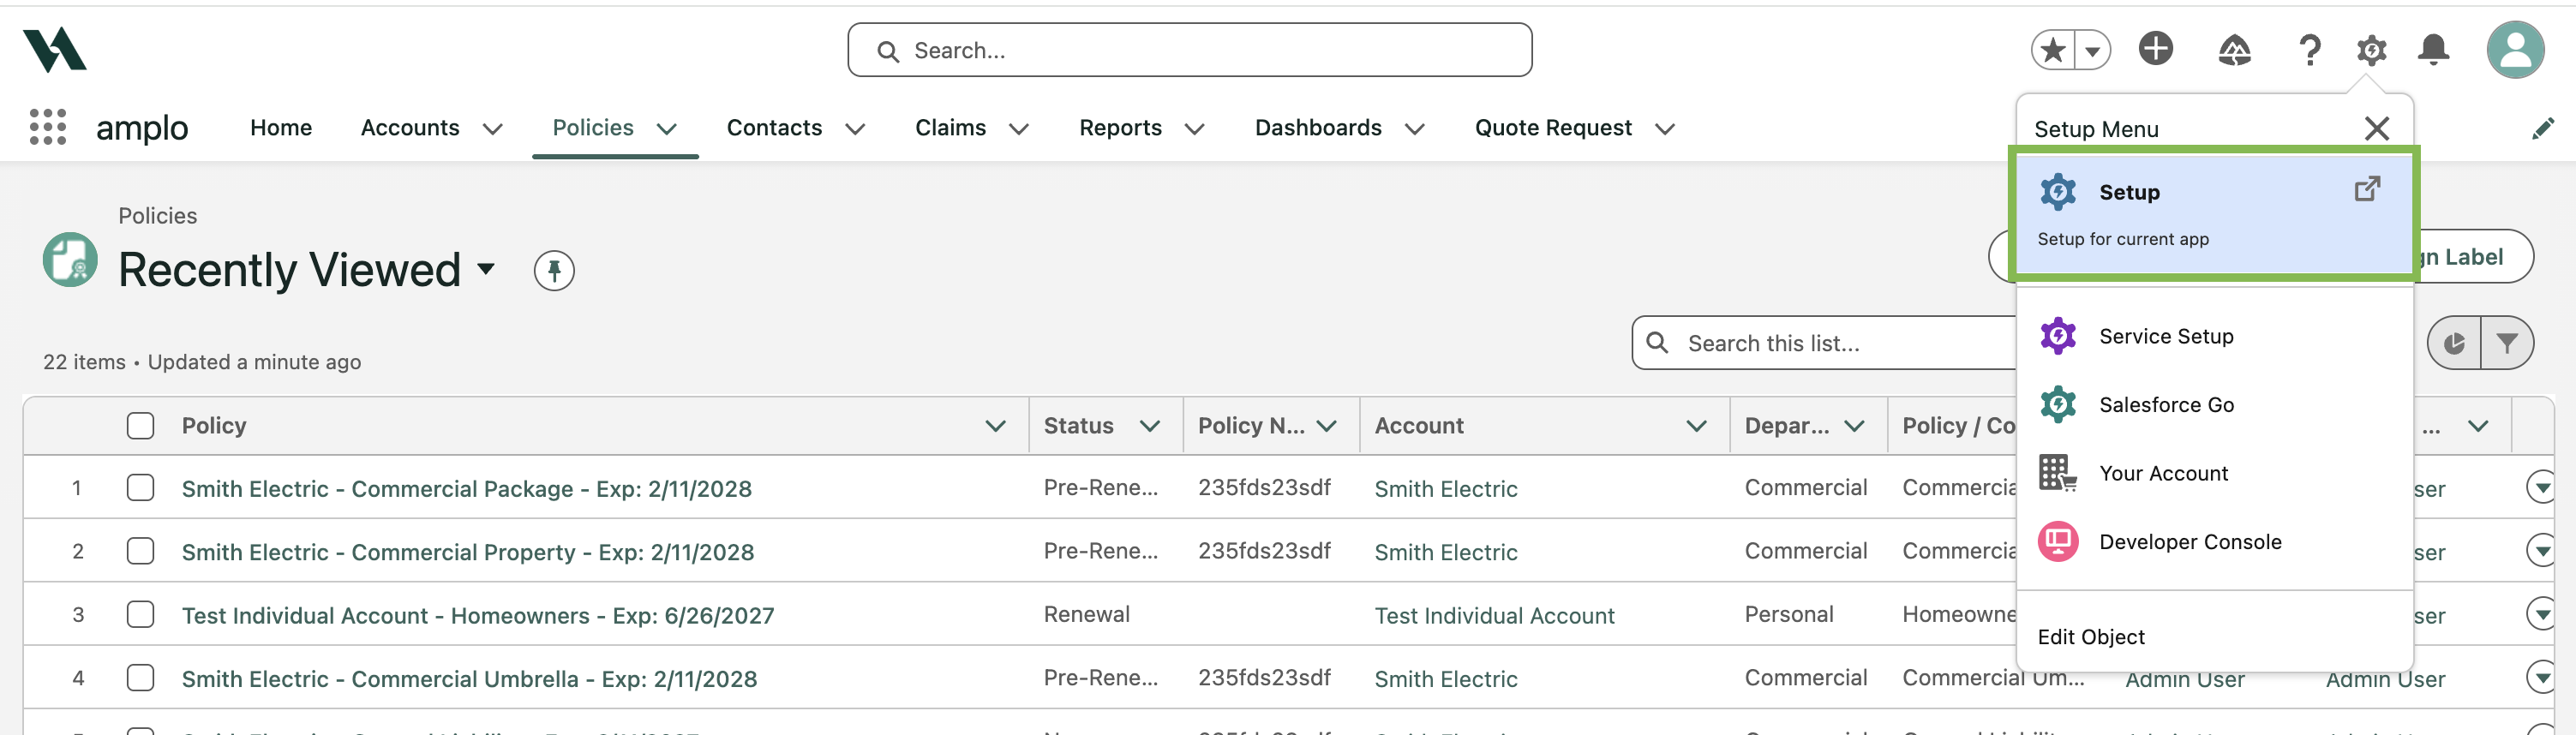
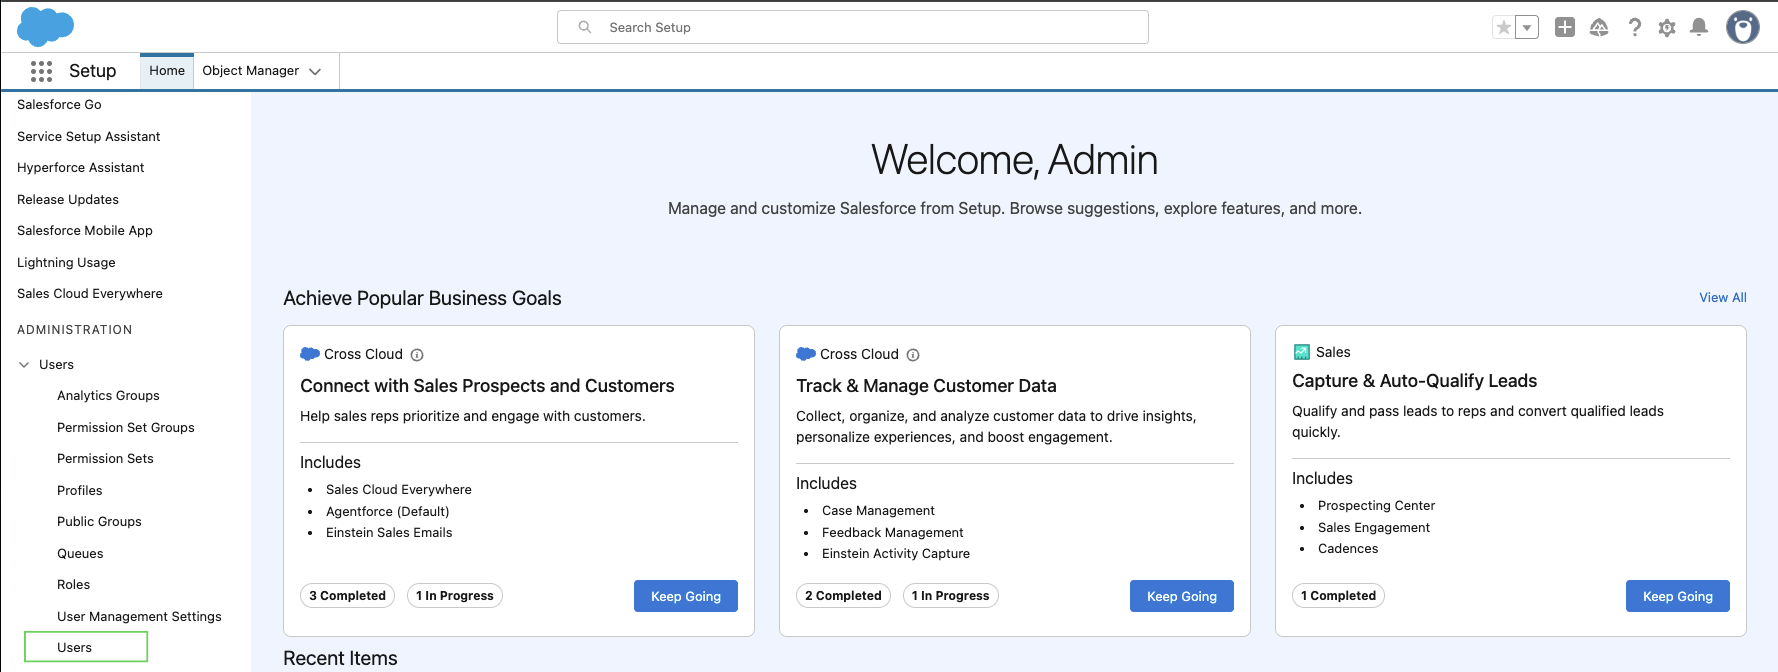
The Admin setup page will open in a new tab. In the Quick Find box, search for Users.
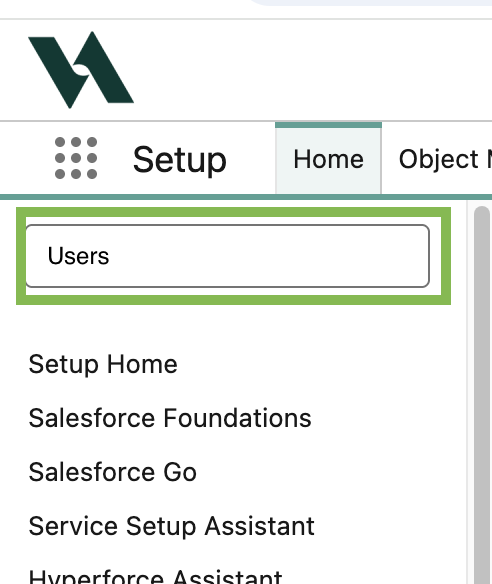
Select Users from the list.
From here, there are several ways to manage your users.
Create a new user
If all licenses are in use, you'll need to either revoke a license from an inactive user or purchase additional licenses. Review 📄 Requesting additional licensesfor more information.
Click New User.

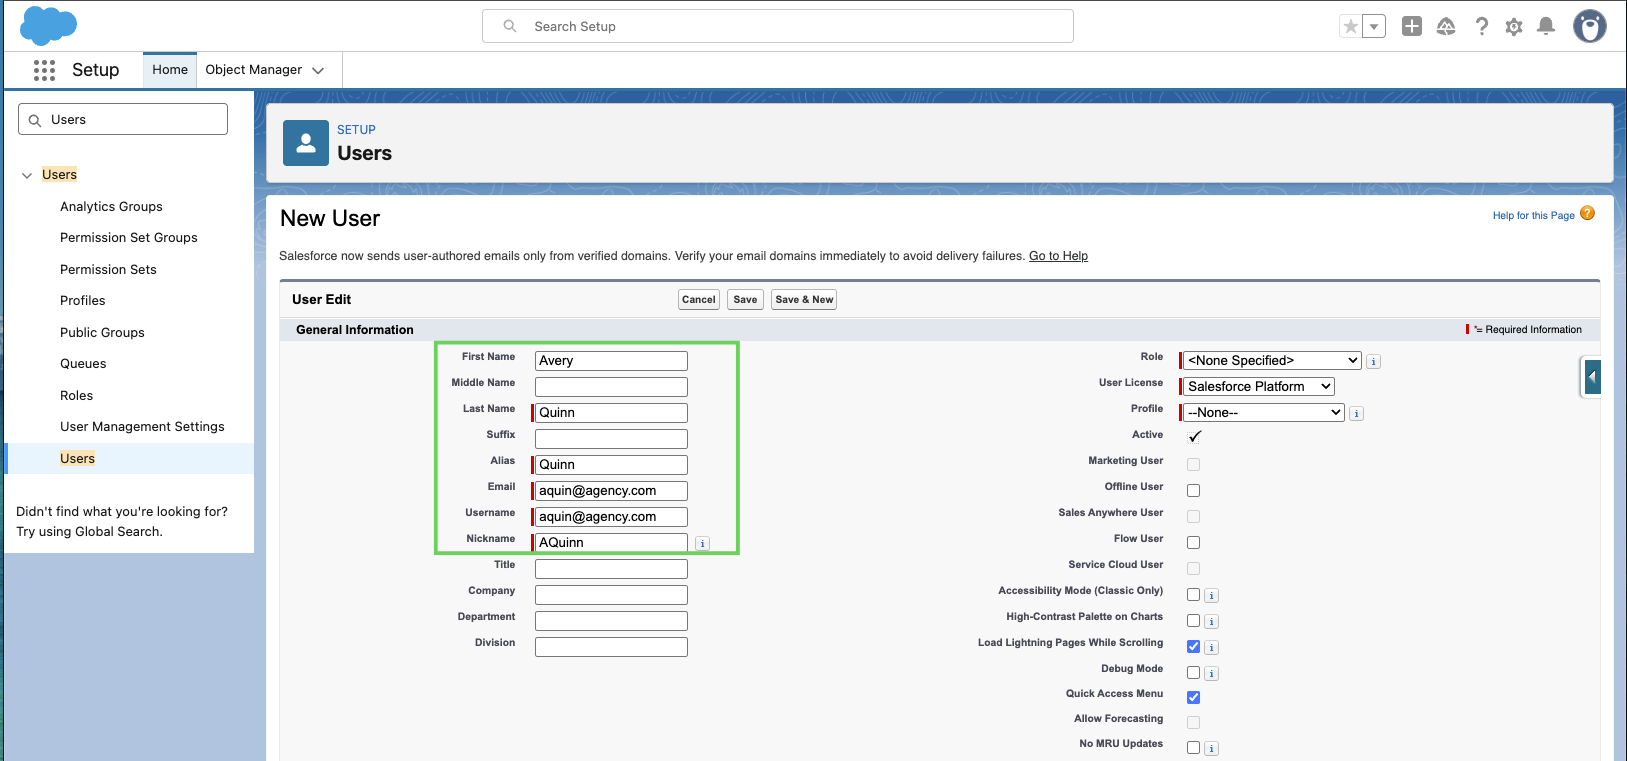
Complete all relevant fields in the General Information section:
First Name
Last Name (required)
Alias (required and autofills based on first and last name)
Email (required)
Username (required and must be unique across all Salesforce orgs)
Use the dropdowns to assign core access controls:
Role: Defines the user's role within your agency.
User License: Determines platform access, depends on what type of Salesforce org was purchased. The most common type is Salesforce Platform.
Profile: Determines baseline permissions and object access.
Choose Veruna Standard User for non-admin users.
Choose Veruna Power User for admin users.
Note: To learn more about standard profiles, see 📄 Default user profile overview.
d. Ensure the Active check box is checked.
In Additional Information, select Producer or Account Manager, if applicable.

Select Save or Save & New if adding multiple users.
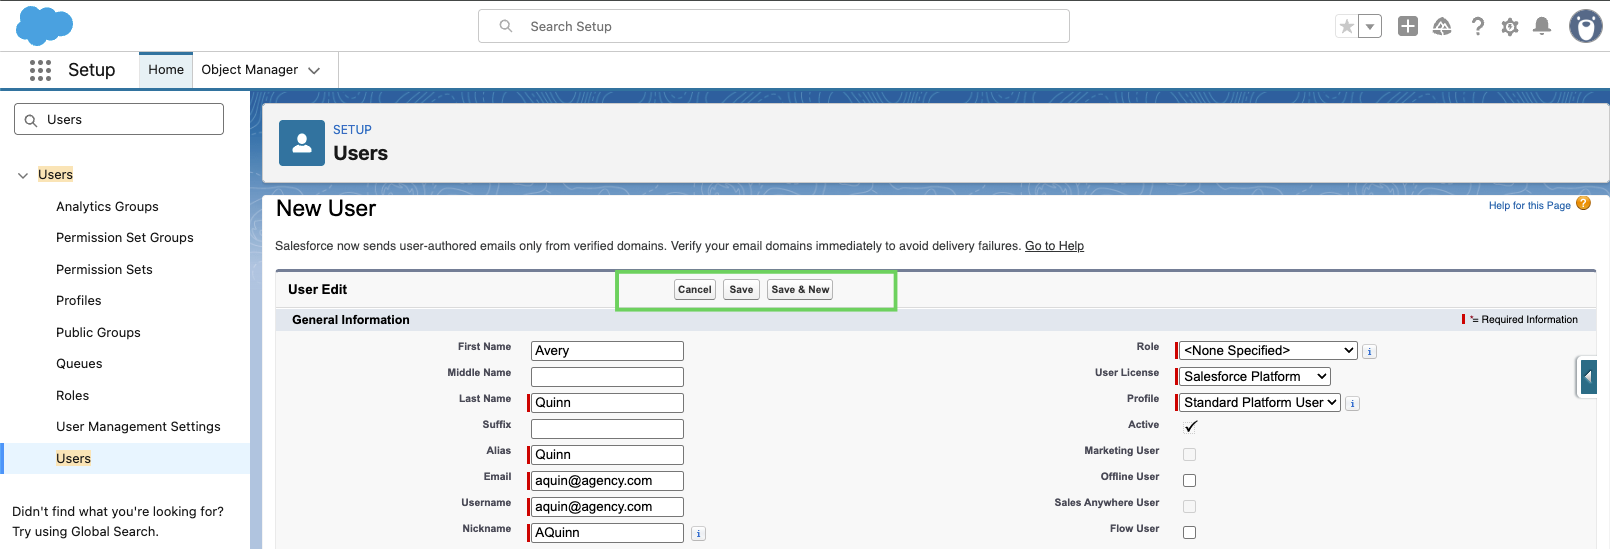
Once you select Save, you'll be redirected to the user's profile to assign a license.
Assign licenses
Managed package licenses are separate from Salesforce user licenses. Without them, users cannot access installed applications.
Scroll to Managed Packages on the user's profile. Then, click Assign Licenses.

Under Assigned Licenses, select the appropriate package(s) and click Add.

Note: No checkboxes available? You may have reached license capacity. Contact support@amplo.com for more information.
Exit the user profile page to continue editing the user.

Creating a signature
A digital signature can be uploaded to a user account and applied to documents, forms, emails, or records. For more information, see📄 Managing signatures.
On the user profile, scroll down to find the Default Signature or Additional Signatures section.

Click Create New Signature in either section. You can also apply another user's signature by selecting Choose Signature.
In the New Signature window, enter the following information:
Signature Name
Description

Click Save.
On the Signature page, select Upload Files under Files.
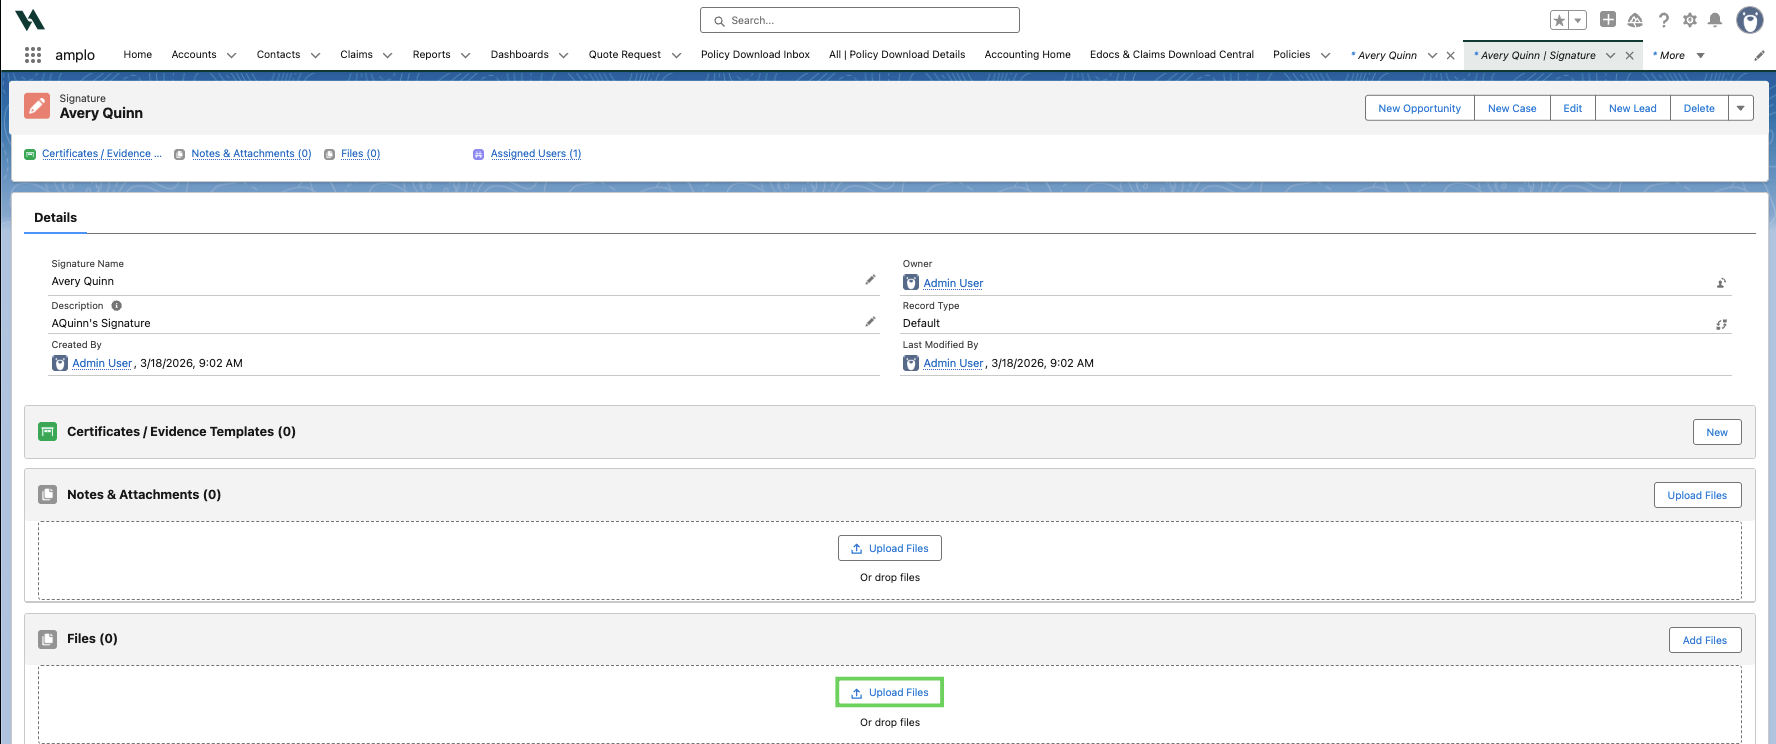
Select your signature file and allow the upload to complete. Select Done once the upload is finished.

Assign permission sets
Profiles provide baseline permissions, and permission sets extend access. Each required permission set must be assigned individually. Admins can create and update permission sets. To learn more, see Managing permission sets. Complete these steps for each required permission set.
In the Permission Set Assignments section, click Edit Assignments.
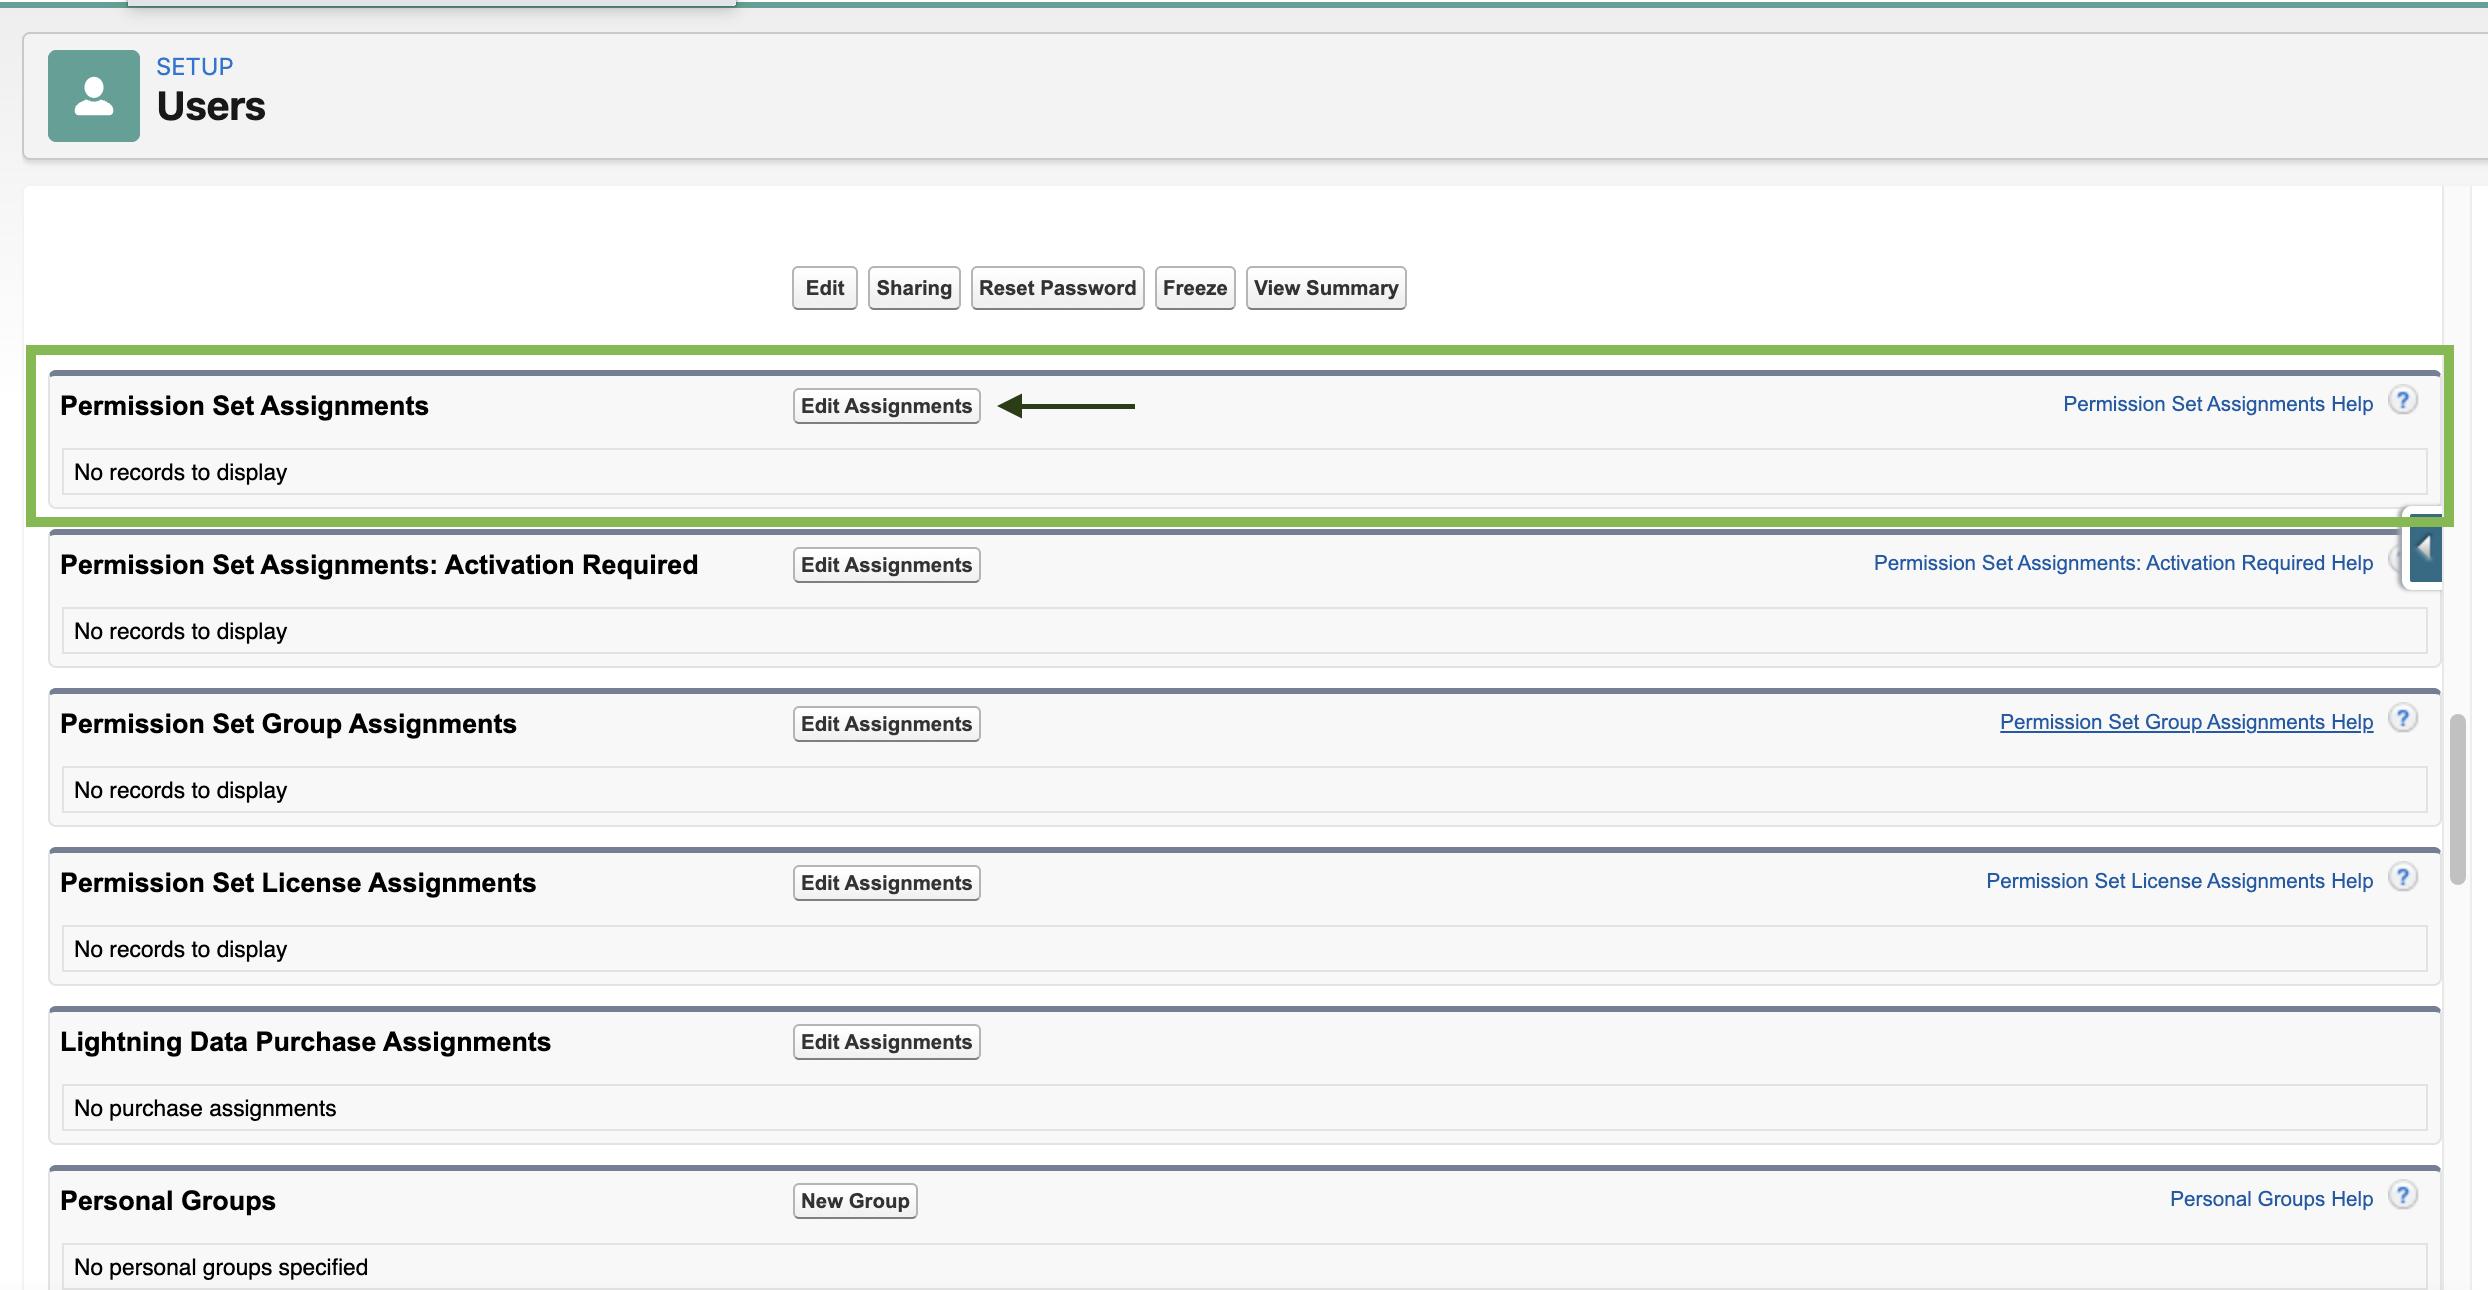
Use the arrows to add/remove the desired permission set:
SDocs User
Veruna Custom Settings
VerunaCore

Note: For a full list of AccountingSeed permissions sets, see Standard Permission Sets.
Select Save.
Assign Permission Sets in bulk
You can also assign Permission Sets to users in bulk using the steps below:
Use Quick Find to search and select Permission Sets.

Select the name of the desired Permission Set.
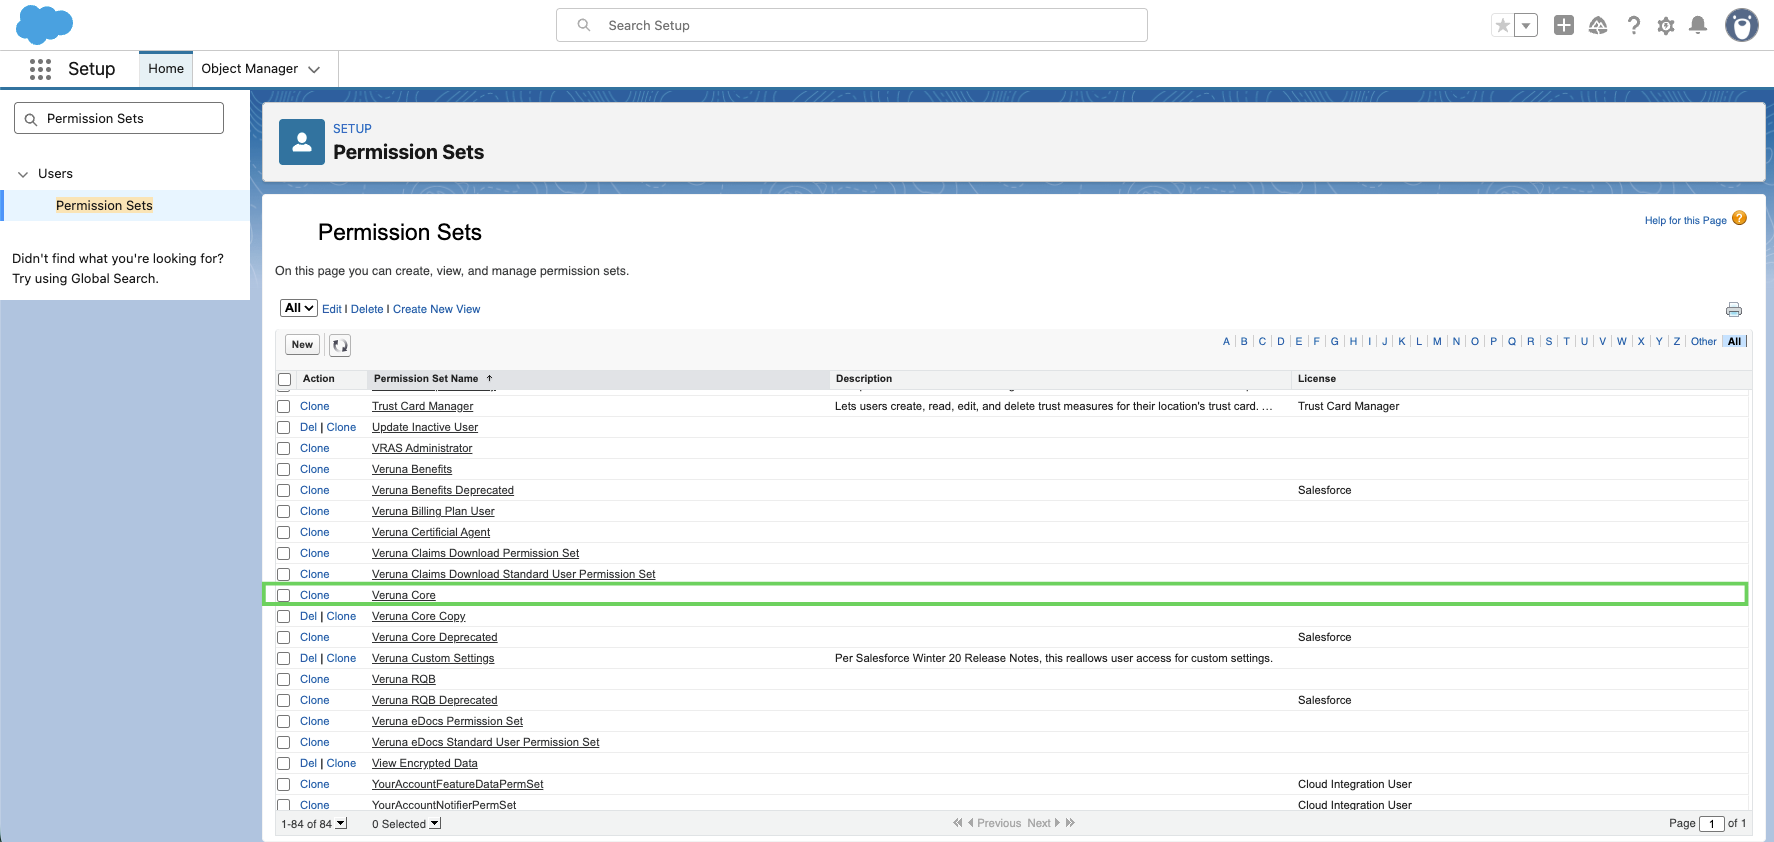
Click Manage Assignments.

Select Add Assignments.

Select the new user(s) and click Next.

Click Assign.
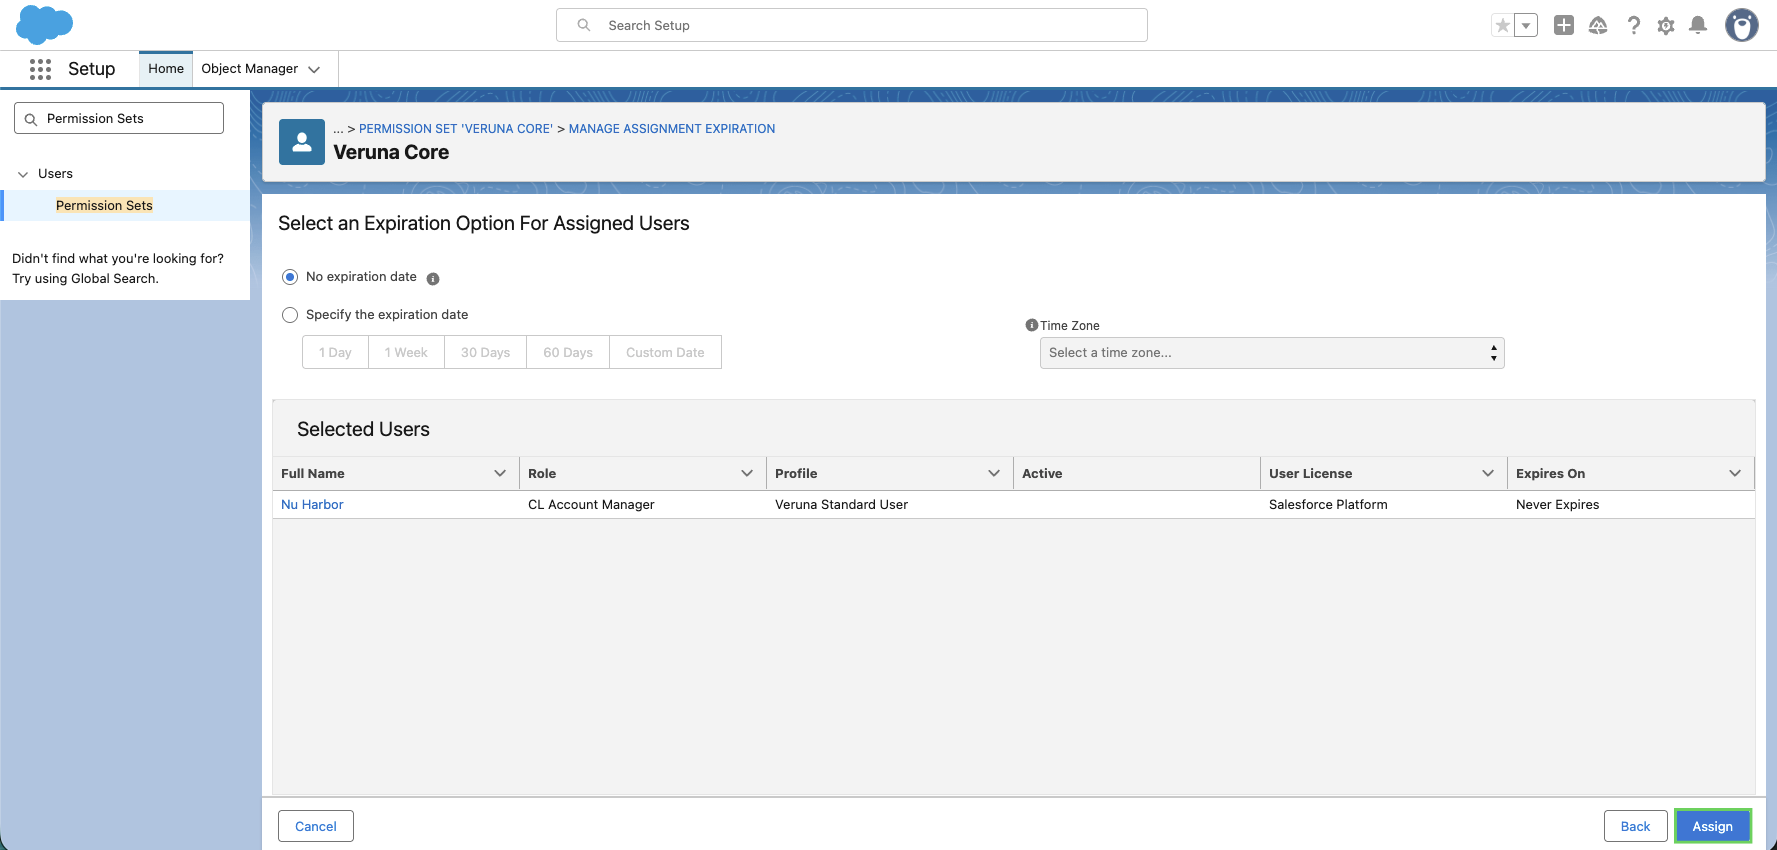
You'll now see your user successfully assigned to the permission set.
Configure record visibility
If a user has the correct permissions but can't see records, the issue is usually related to sharing settings, not licenses or permission sets. Public groups control visibility based on your organization's sharing model. Follow the steps below to adjust record visibility.
On the user's profile, select Public Group Membership.

Select New Group.

In the New Group page, add the following:
Label: Enter a name/descriptor.
Group Name: This field will auto-populate.
Select the desired group in Available Members. Then click the right arrow to move to Selected Members.

Click Save.
Note: Users not added to required public groups may be unable to view Accounts, Contacts, Opportunities, or other records, even if properly licensed.
Application-level configuration
Note: Do not configure the application until the correct user license is assigned.
VerunaDocs access
VerunaDocs provides integrated document management, including ACORD autosave and certificate functionality. It requires both admin configuration and user-level token setup.
Admin setup
In the App Launcher, search for and select VerunaDocs Setup.

Click Sync VerunaDocs Users.

This step provisions access for new users within VerunaDocs.
End user setup
Each user must complete token setup manually.
Navigate to any Account record.
Click on the Documents tab.
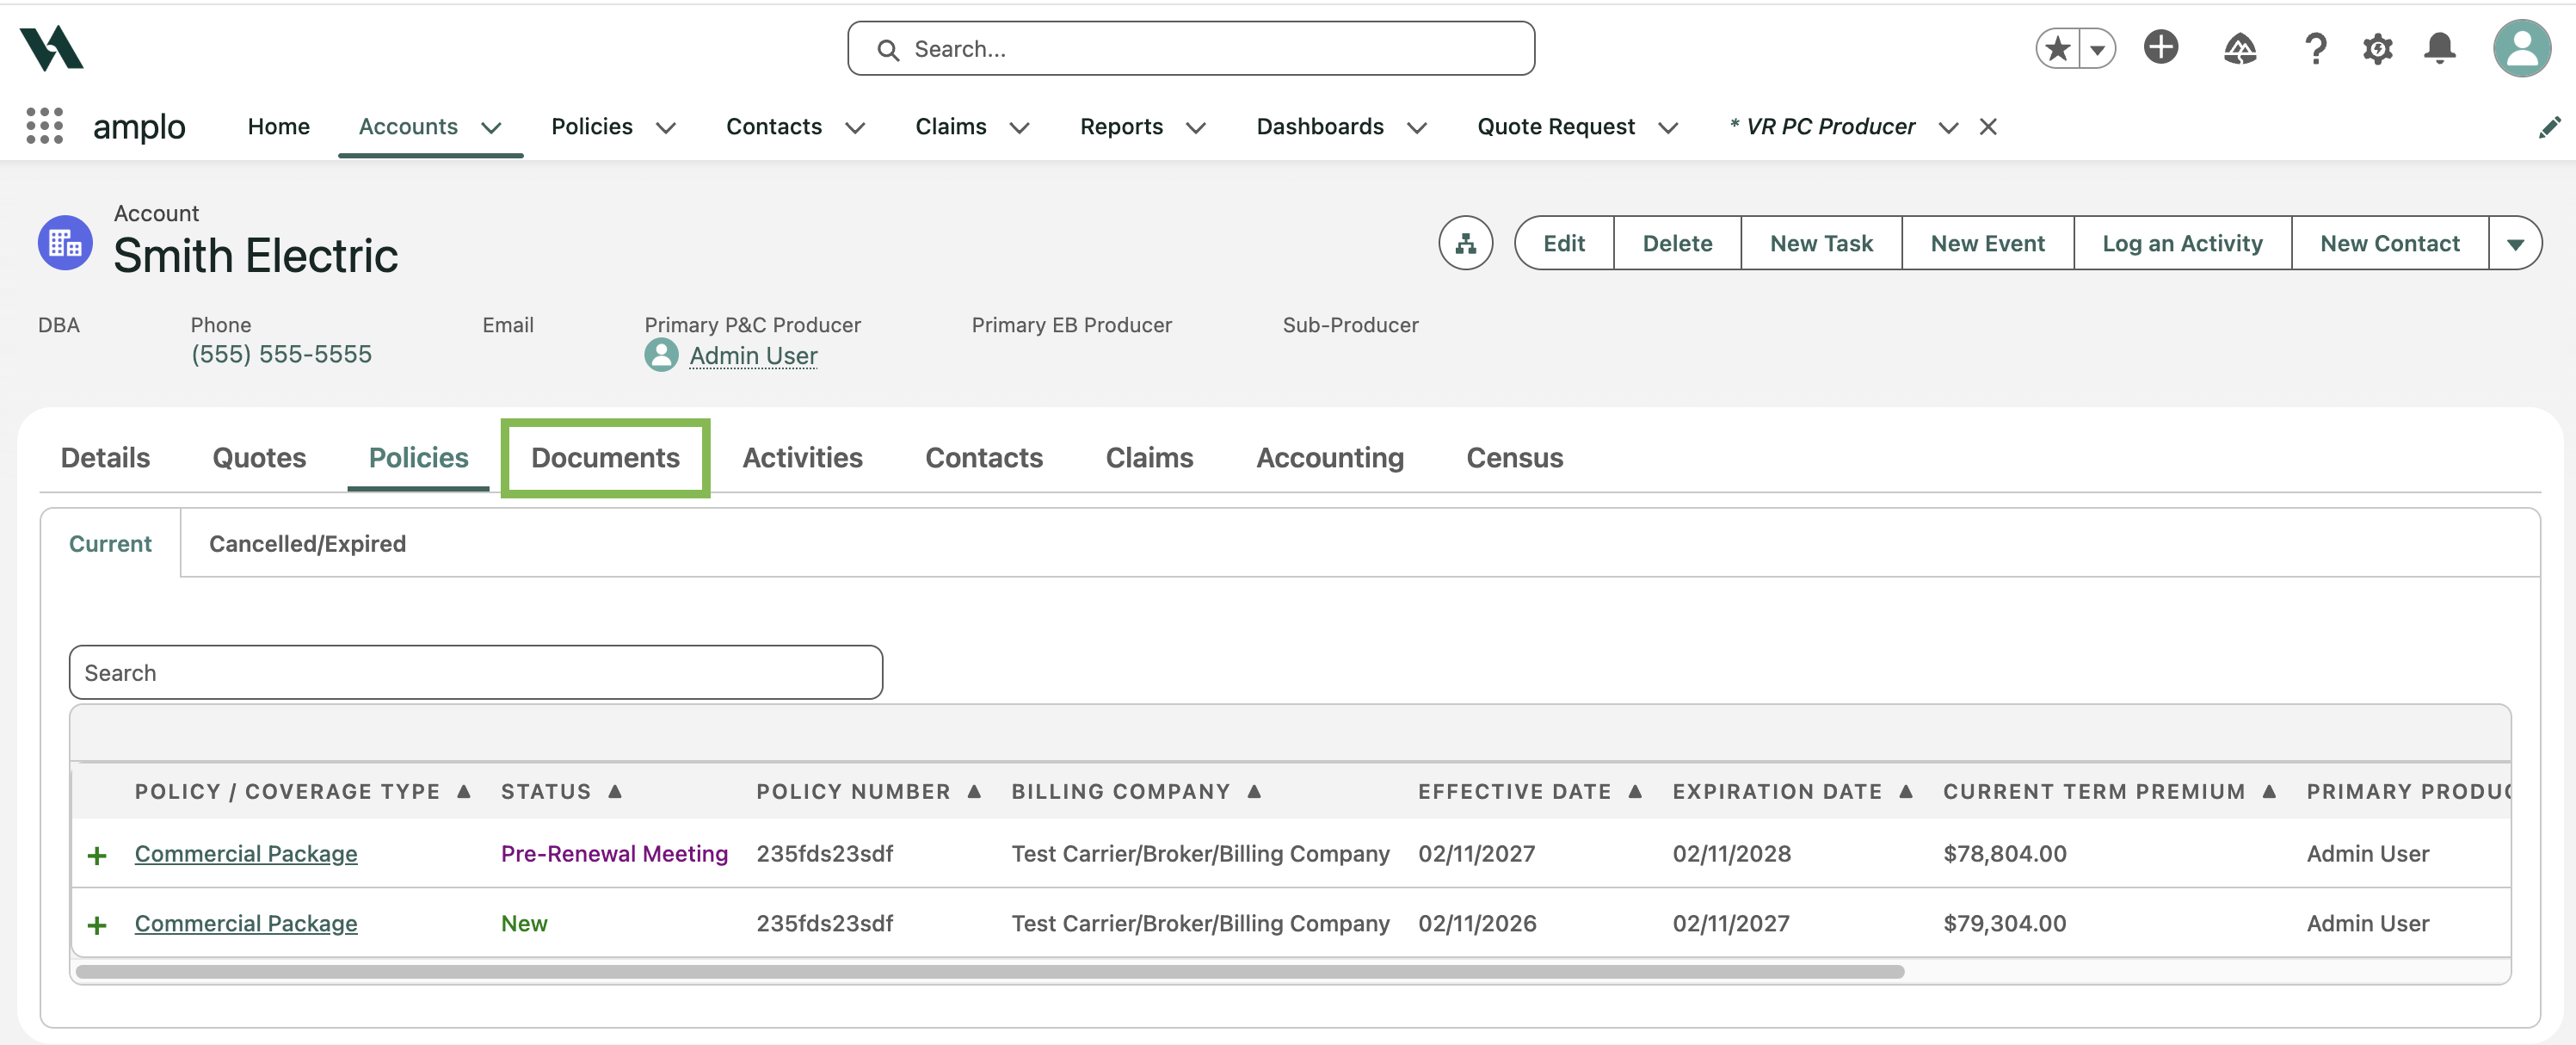
Click the hyperlink to display the documents list.

When prompted in the new window, click Allow. add access note
Note: If the user already has access to VerunaDocs, the popup does not appear.
This establishes the user’s VerunaDocs token.
Allow Accounting Period editing
Accounting periods are typically locked to protect financial accuracy and reporting integrity. In limited situations, certain users may need permission to edit locked accounting periods. Grant this access sparingly. Editing locked periods can affect financial data and reporting consistency.
On the Users page, click Edit next to the user.
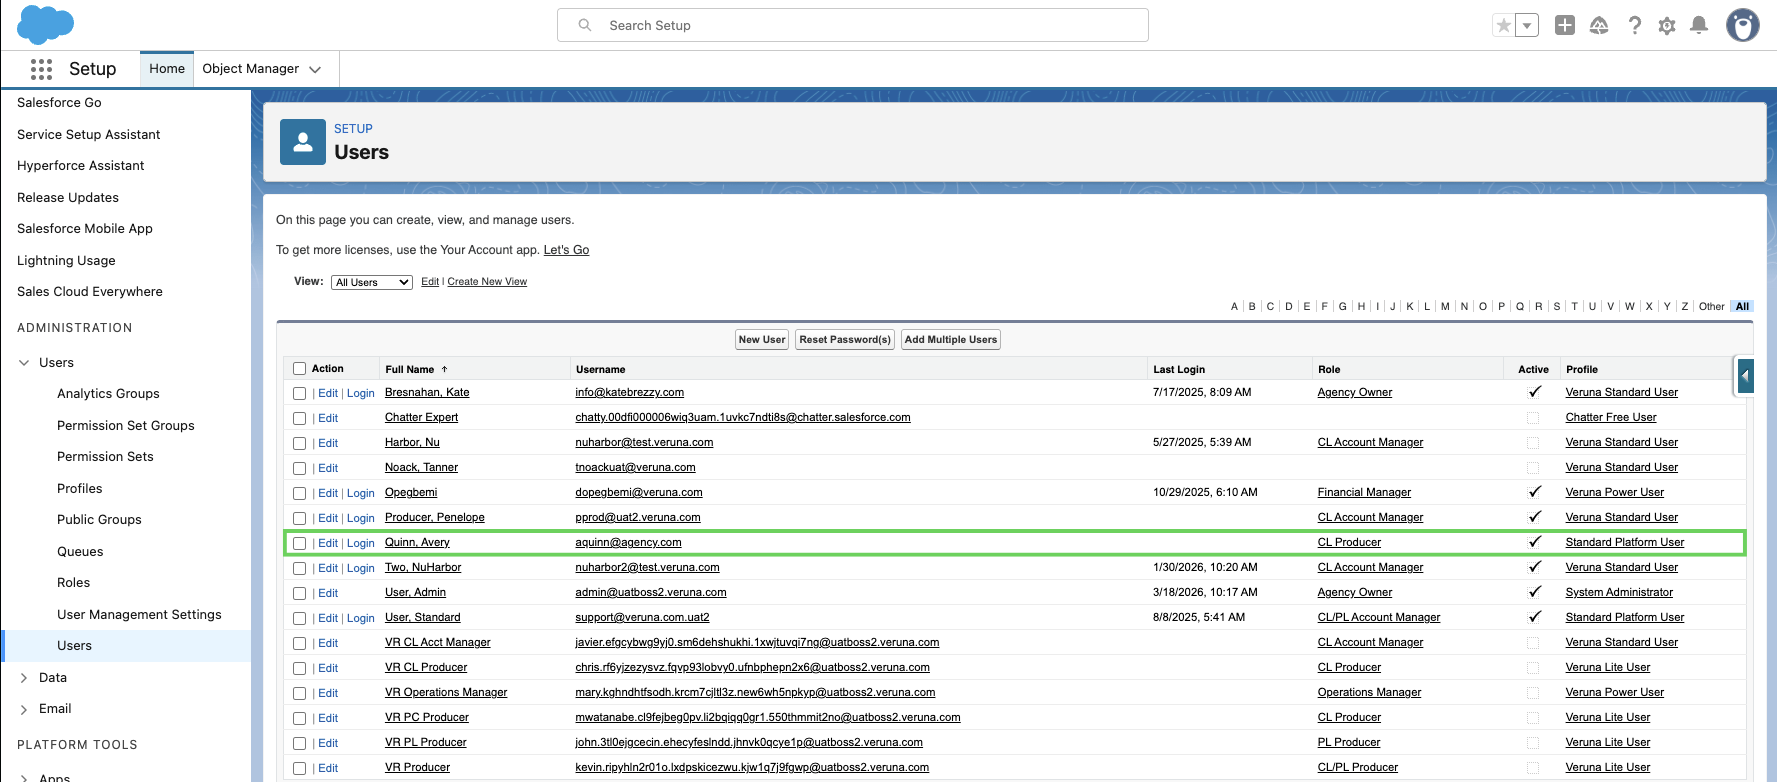
In Additional Information, select Enable Editing Locked Accounting Period.

Click Save on the user record.
The user can now edit locked accounting periods.
eDocs access
There are two permission sets to support the configuration and processing of eDocs:
Admin
System Administrators should assign themselves the eDocs Permission Set to access all eDocs configuration and processing features.
Admins can:
View, edit, and process records on the eDocs Inbox
Preview documents and process them using Update or Ignore
Enable Display eDocs Download Detail to view and edit detailed fields
View, run, and save filters on the eDocs Inbox page
Access the Configure menu, including:
Record Processing
Mapping
Workflow
Admins can also view, edit and save changes across all configuration pages. To assign Admin permissions for eDocs:
In Setup, search for Permission Sets.

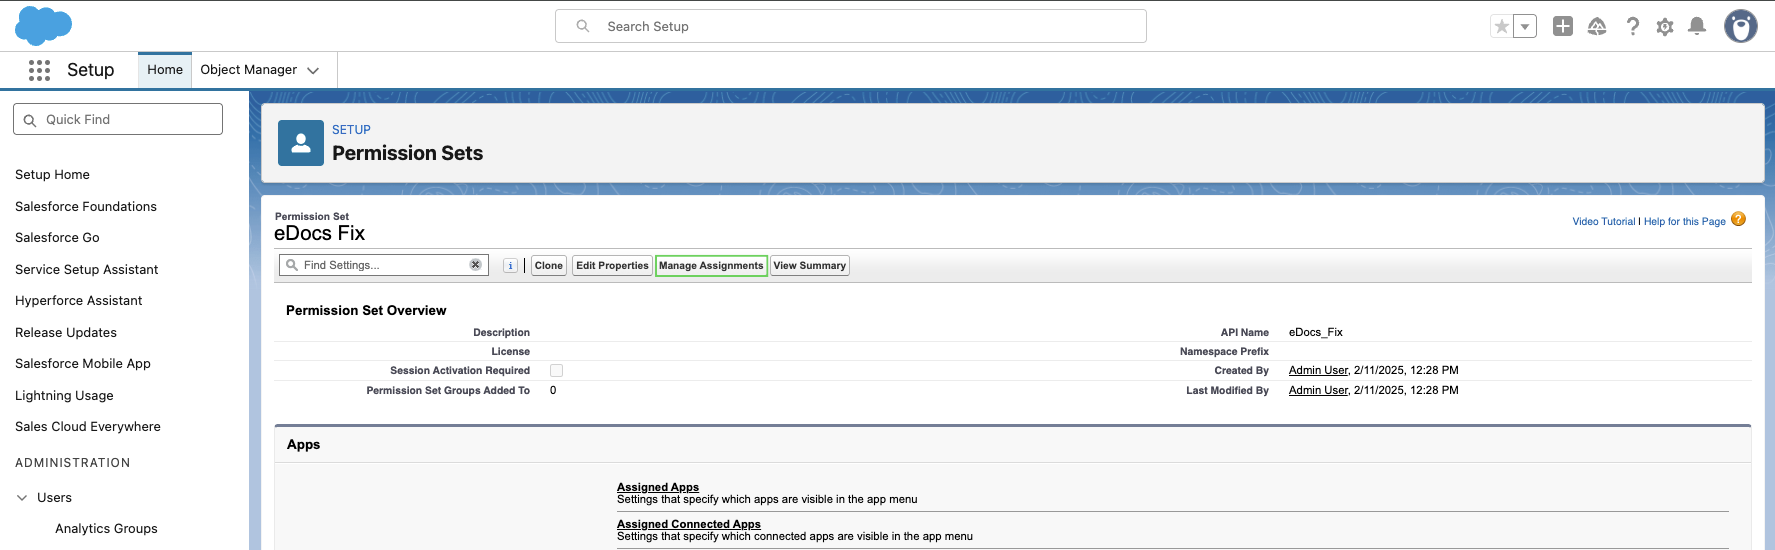
Locate eDocs Fix Permission Set.
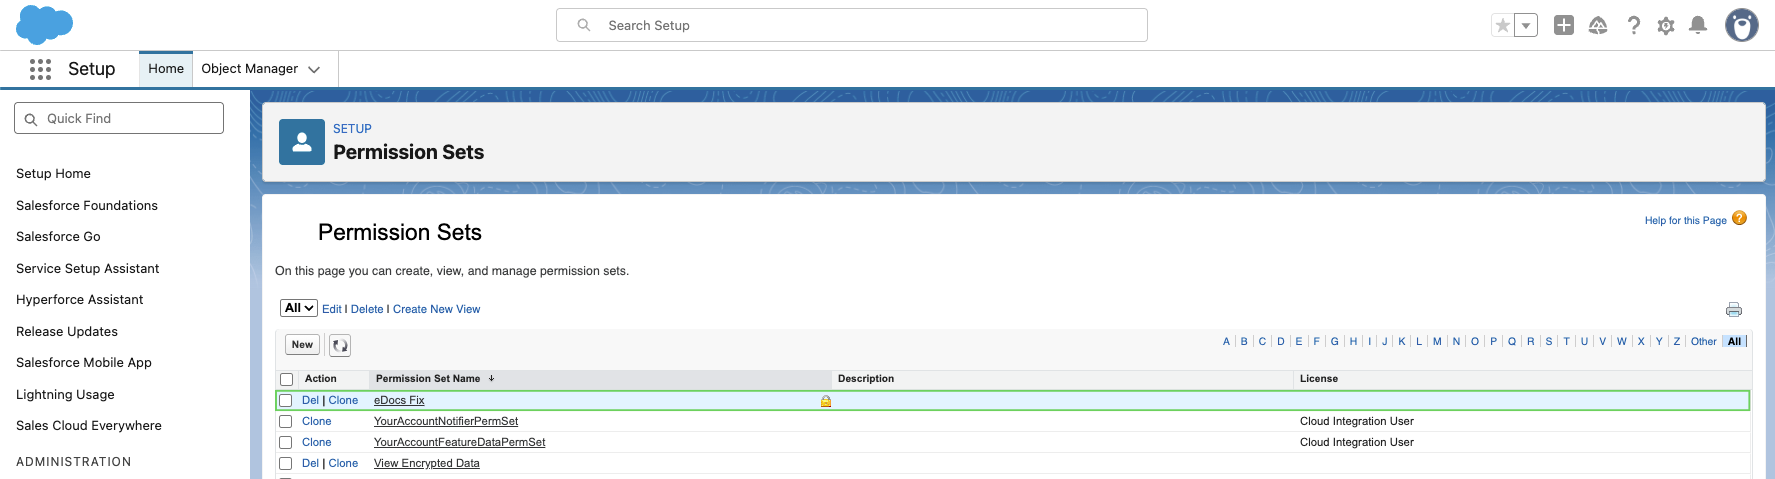
Select Manage Assignments and assign it to all administrators.
Standard User
Assign the eDocs Standard User Permission Set to users who process eDocs. Standard users can:
View, edit, and process records in the eDocs Inbox
Preview documents and process them using Update or Ignore
Enable Display eDocs Download Detail to view and edit record details.
View, run, and save filters on the eDocs Inbox page
Standard users cannot access to the Configure menu or administrative settings. To assign Standard User permissions:
In Setup, search for Permission Sets.
Locate eDocs Fix Permission Set.
Assign it to all other users who will process eDocs.
Deactivate a user
Salesforce users aren't deleted — they are deactivated which frees licenses for reassignment.
Click on the gear icon and click Setup.

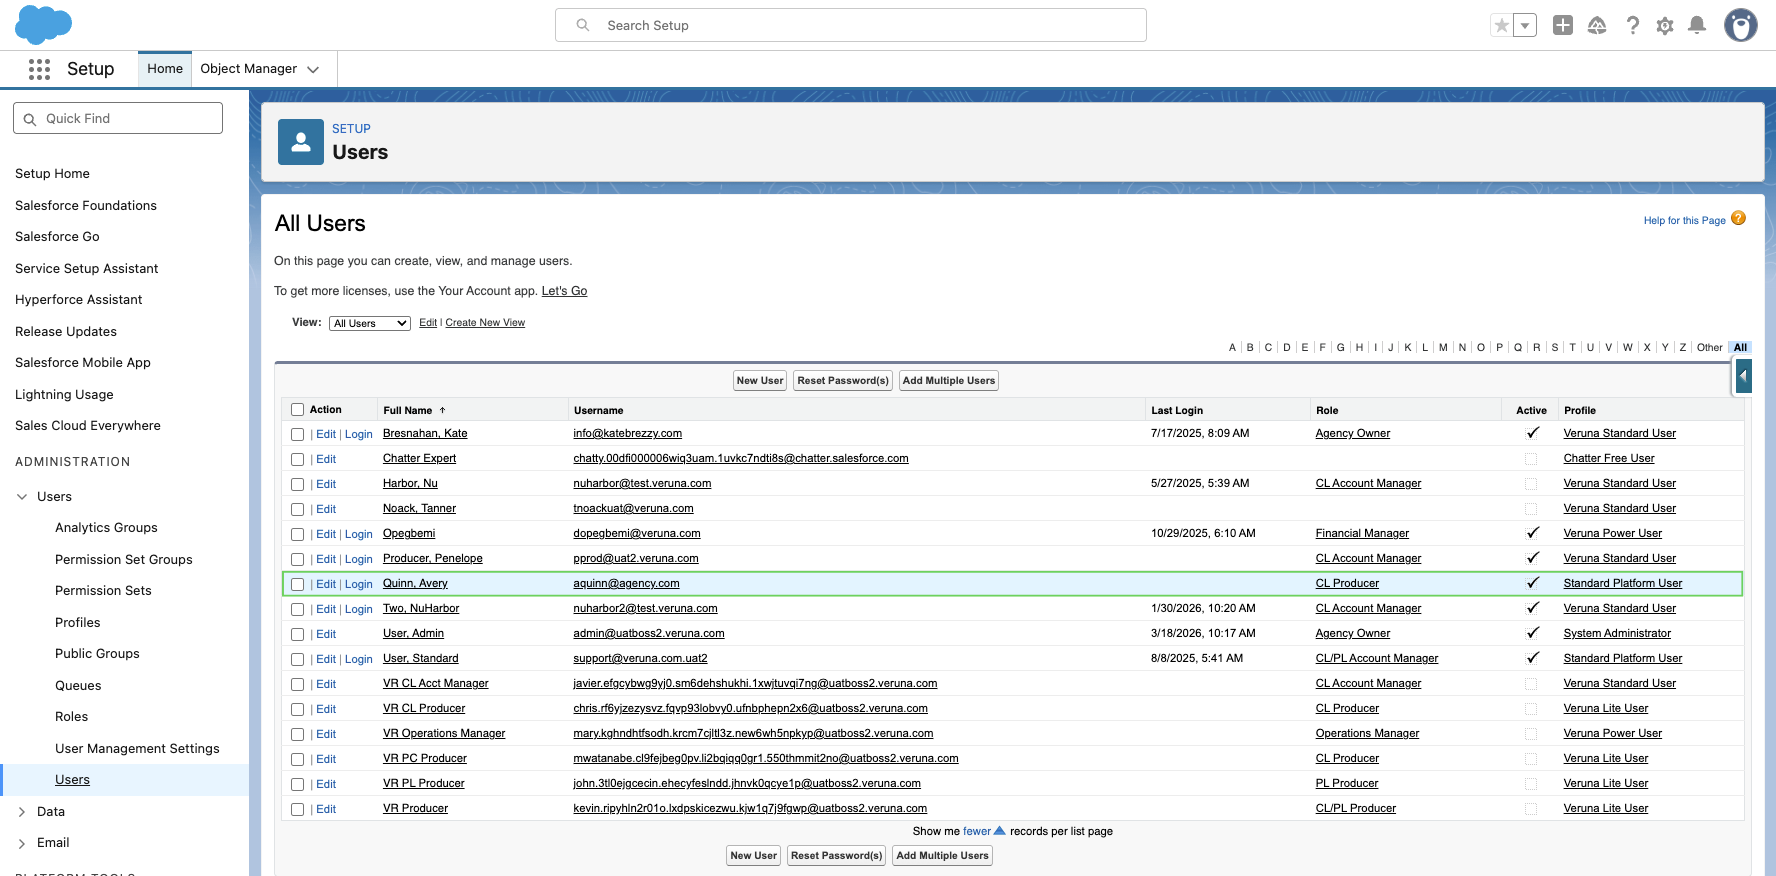
The Admin setup page will open in a new tab. In the Quick Find box, search and select Users.
Select the name of the user you want to deactivate.
Then, select Edit.
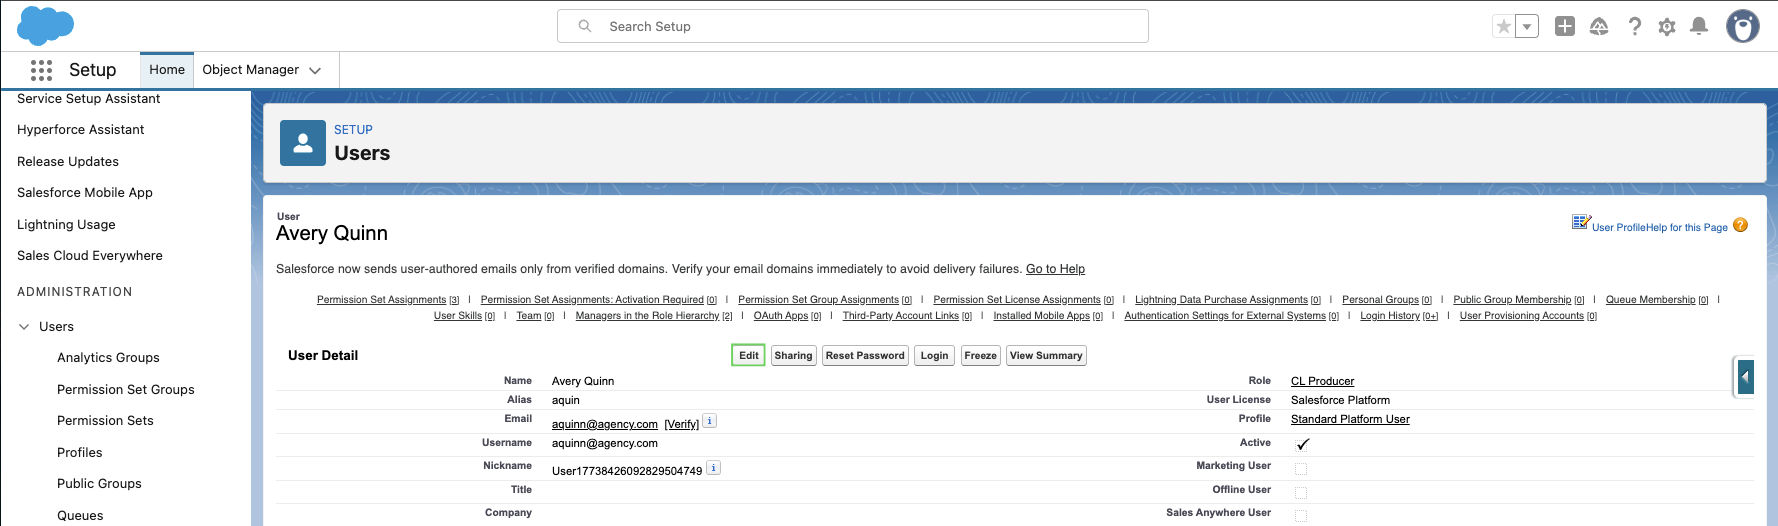
Uncheck the Active checkbox and select Save.

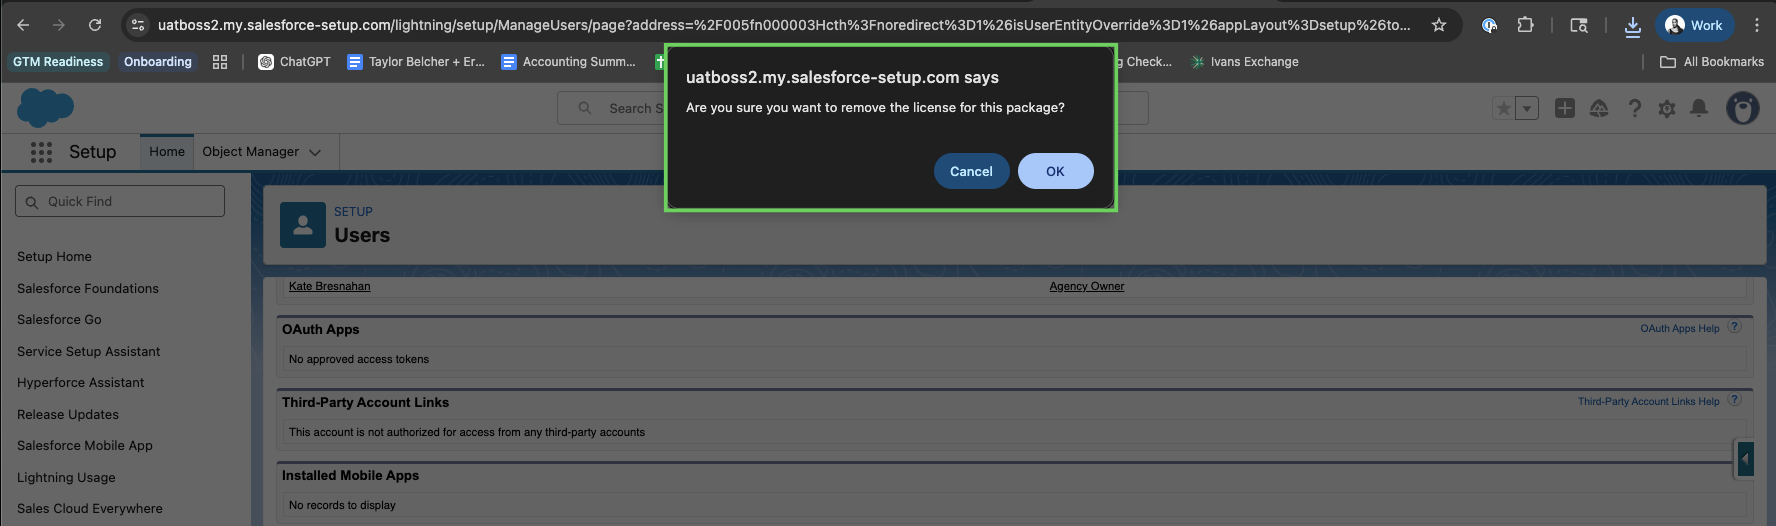
Under Managed Packages, select Remove next to the license you want to remove.
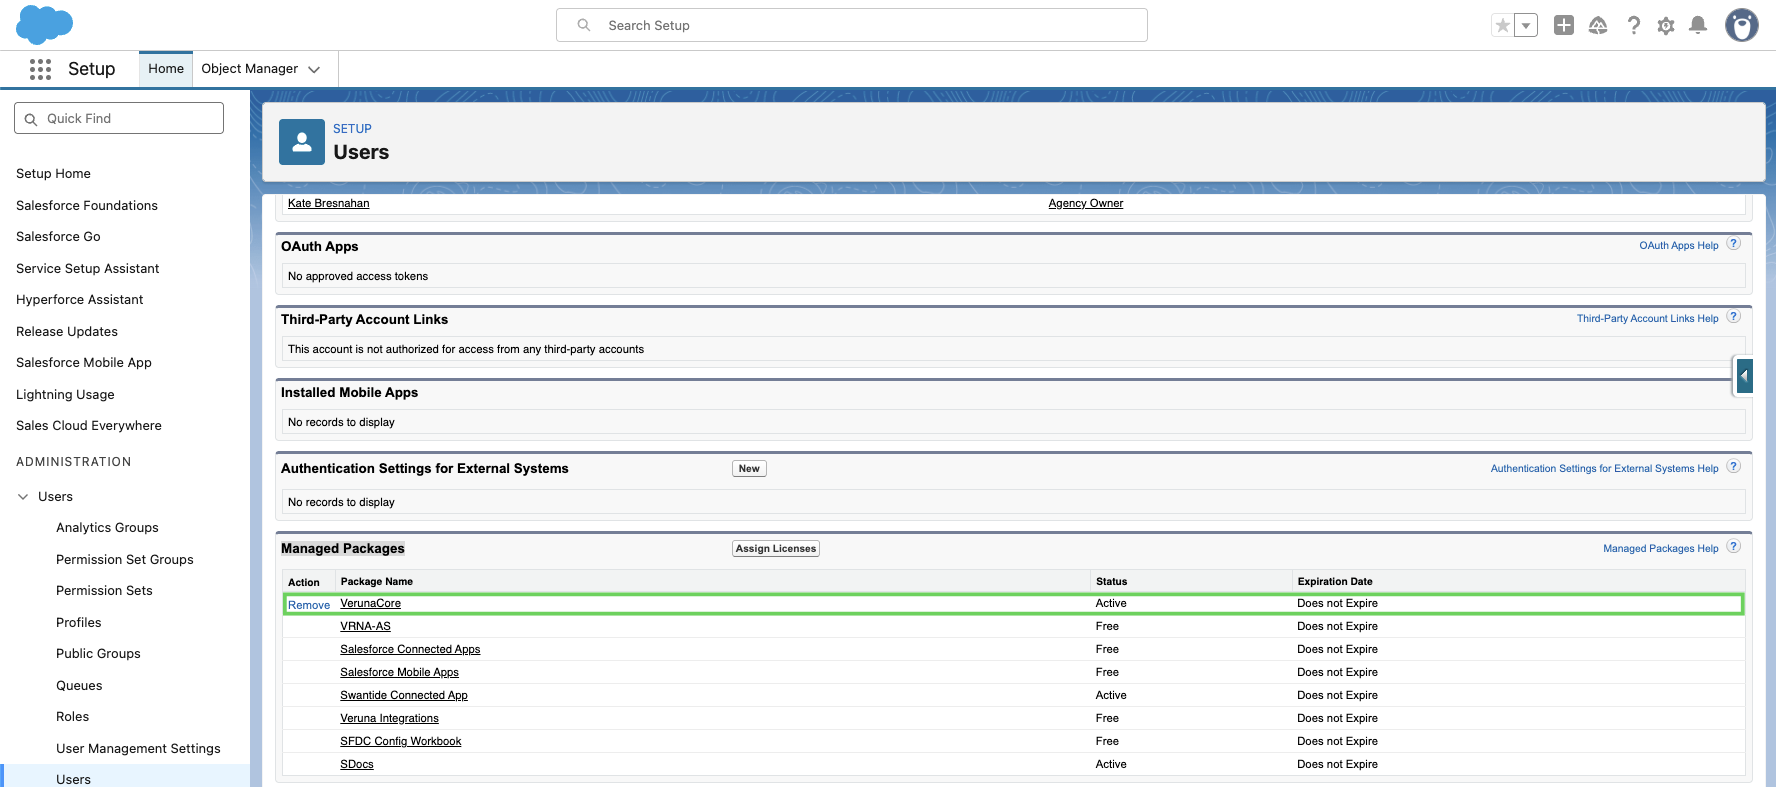
Select OK in the confirmation pop-up.
Note: Reassign owned records before deactivation, if necessary.