Bulk updating users on policies
Last updated: March 25, 2026
Overview
Salesforce Inspector Reloaded is a tool you can use to reassign policies in bulk when a user leaves your organization. This allows you to quickly update fields such as Main Contact, Account Manager or Sub-Producer without editing each policy individually.
Note: This article primarily addresses updating user fields to account for organization departures, but the process can be used for any bulk updates to system records.
Before you begin
Install the Salesforce Inspector Reloaded (see 📄 Salesforce Inspector Reloadedfor instructions).
Identify the replacement user.
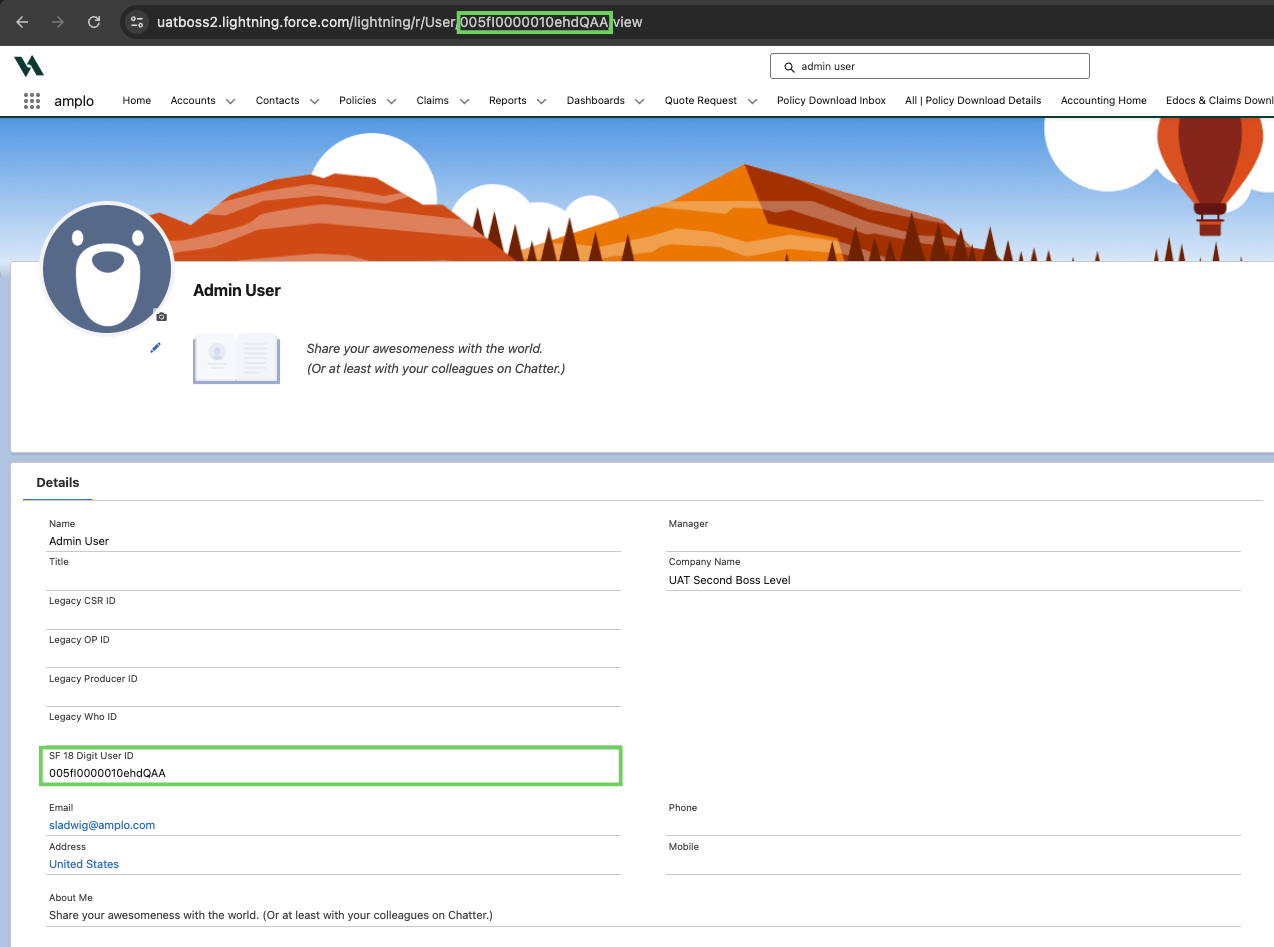
Locate the replacement user’s 18-digit User ID (found in the URL of their user record or in the SF 18 Digit User ID field). You’ll use the User ID, not the user’s name, during the update process.
Create a policies report
First, generate a report to identify the policies you need to update.
Navigate to the Reports tab.

Click New Report.

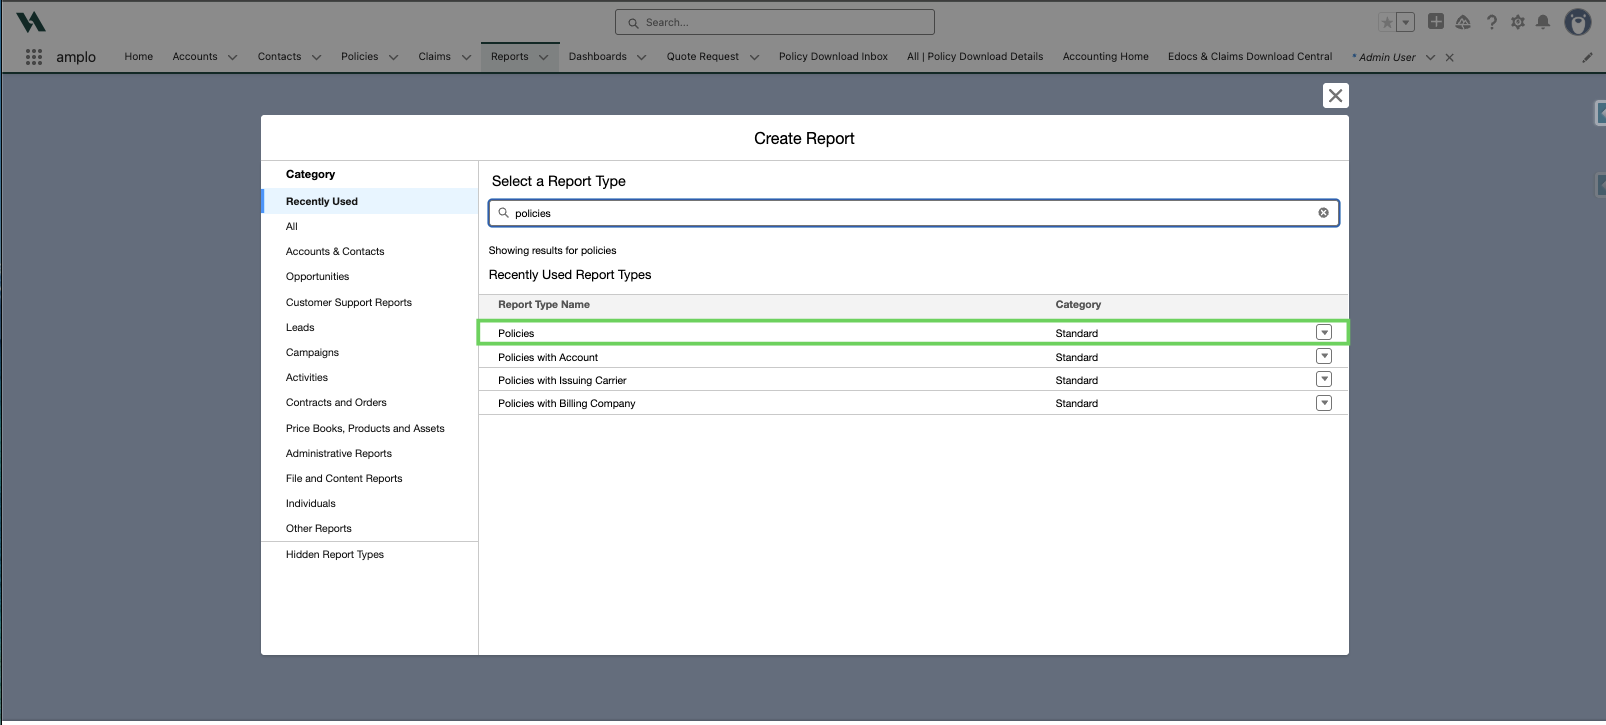
In the Create Report modal, select Policies as the report type.
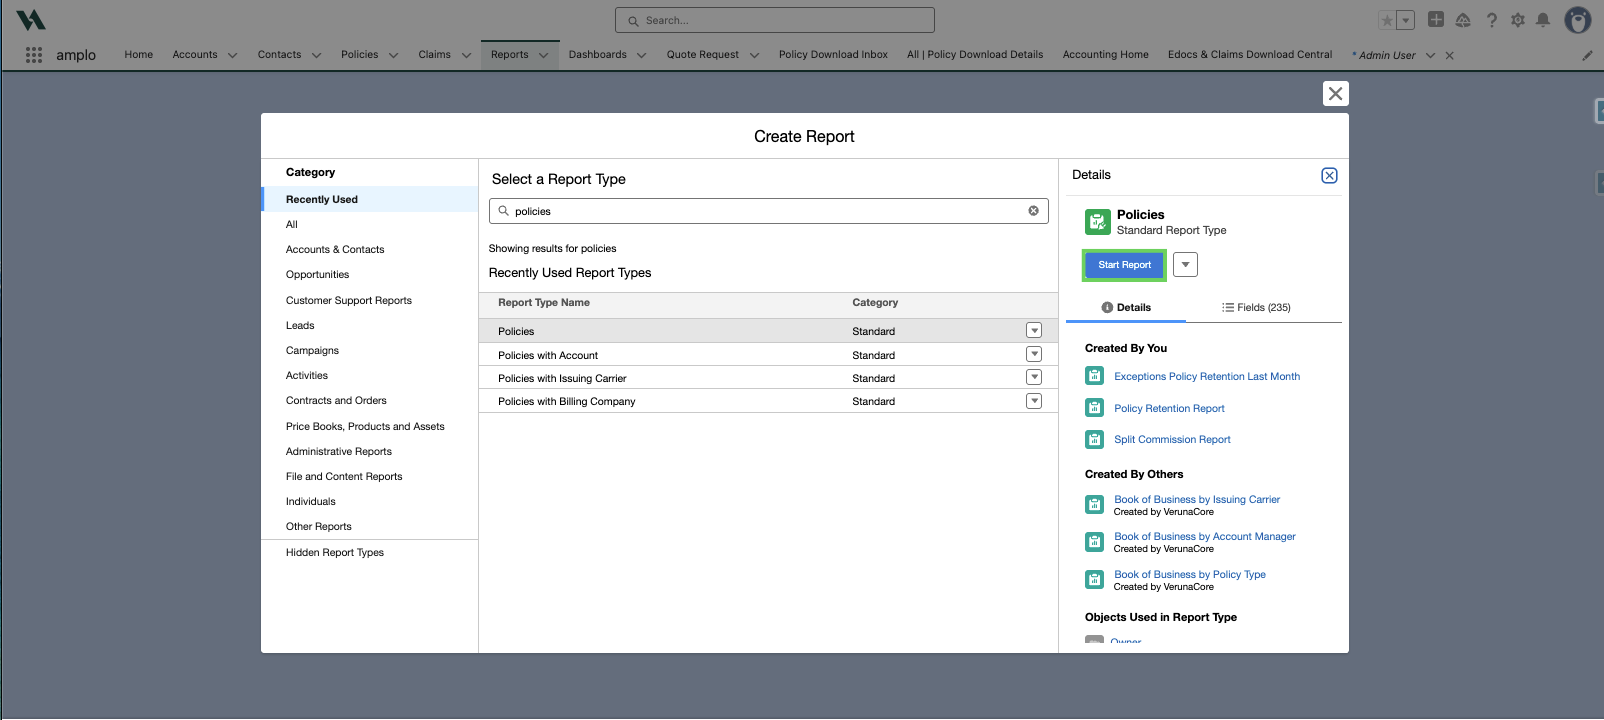
Click Start Report.
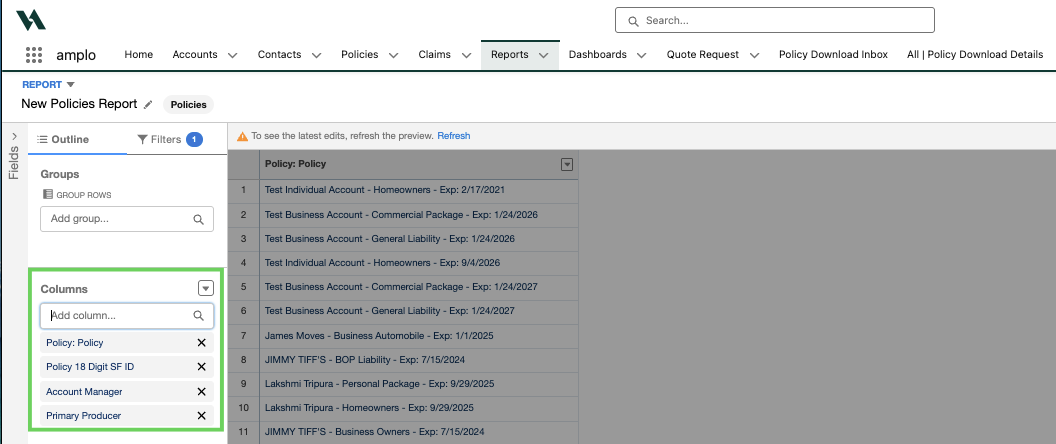
In the Columns section, search for and add the fields needing updates, such as:
Policy 18 Digit SF ID
Account Manager
Primary Producer
Click the Filters tab.
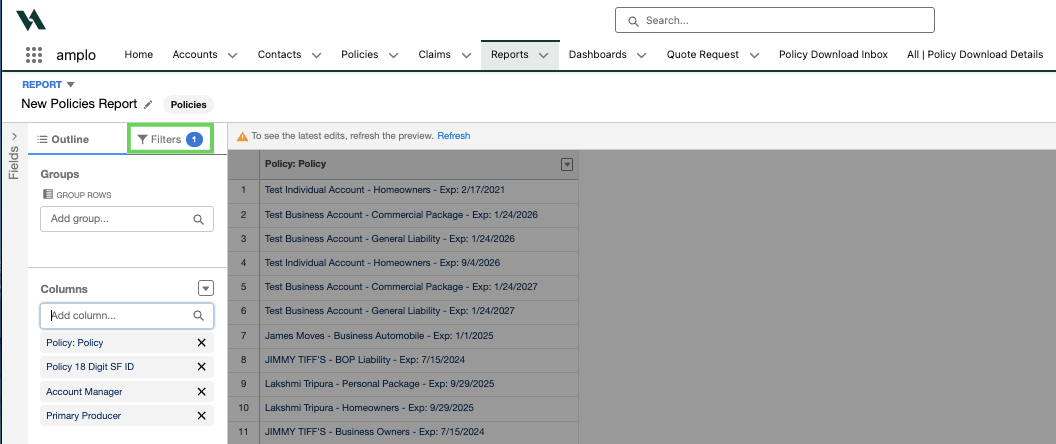
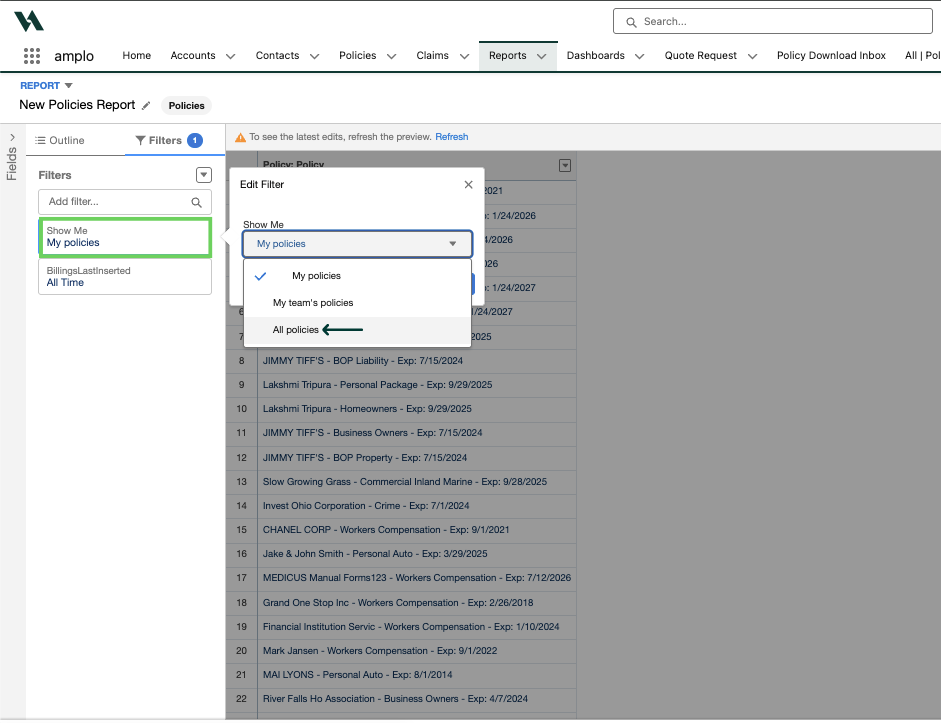
In Show Me filter, change to All Policies and click Apply.
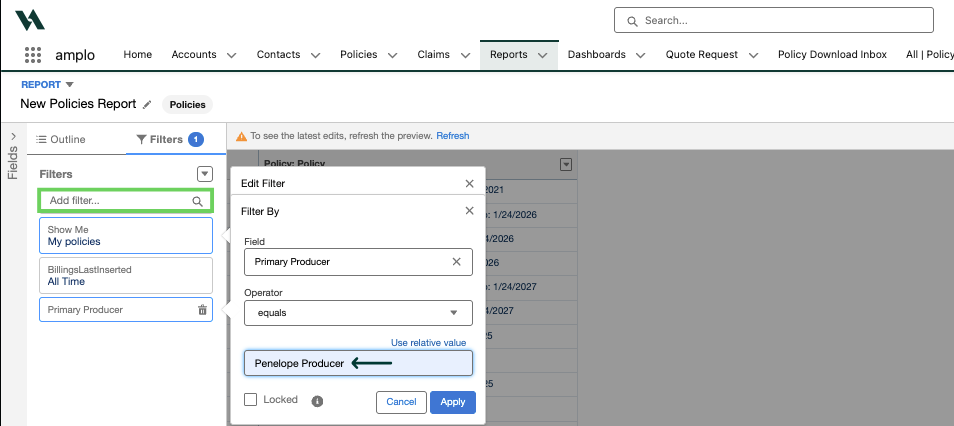
In Add filter, search and select Primary Producer, enter the departing user's name and click Apply.
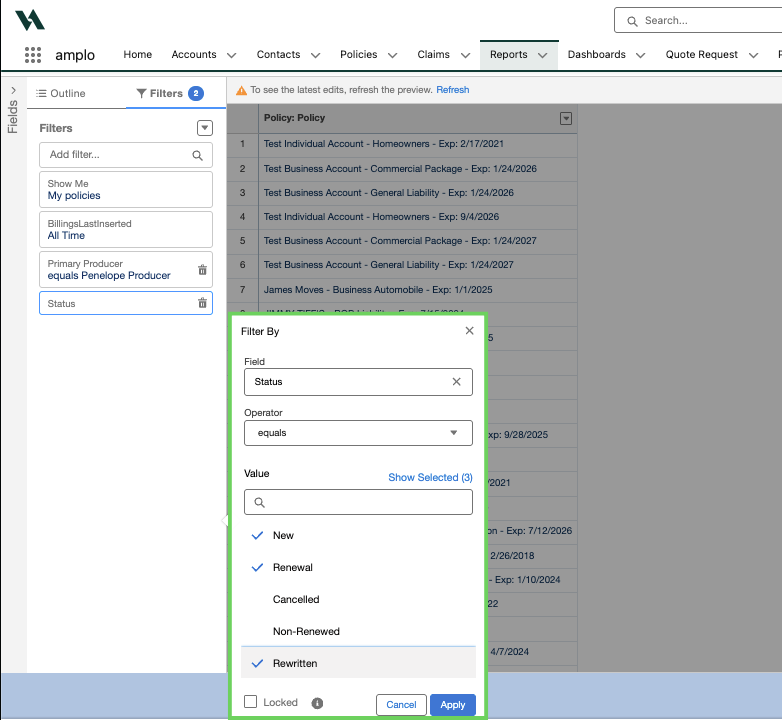
Lastly, add the Status filter. Then, select the values you prefer and click Apply.
If you want to update policies in force, select New, Renewal and Rewritten.
Click Run.

Click the down arrow next to the Edit button, then click Export.

In the Export modal, choose the file format (.xls or .csv are preferred), then click Export.
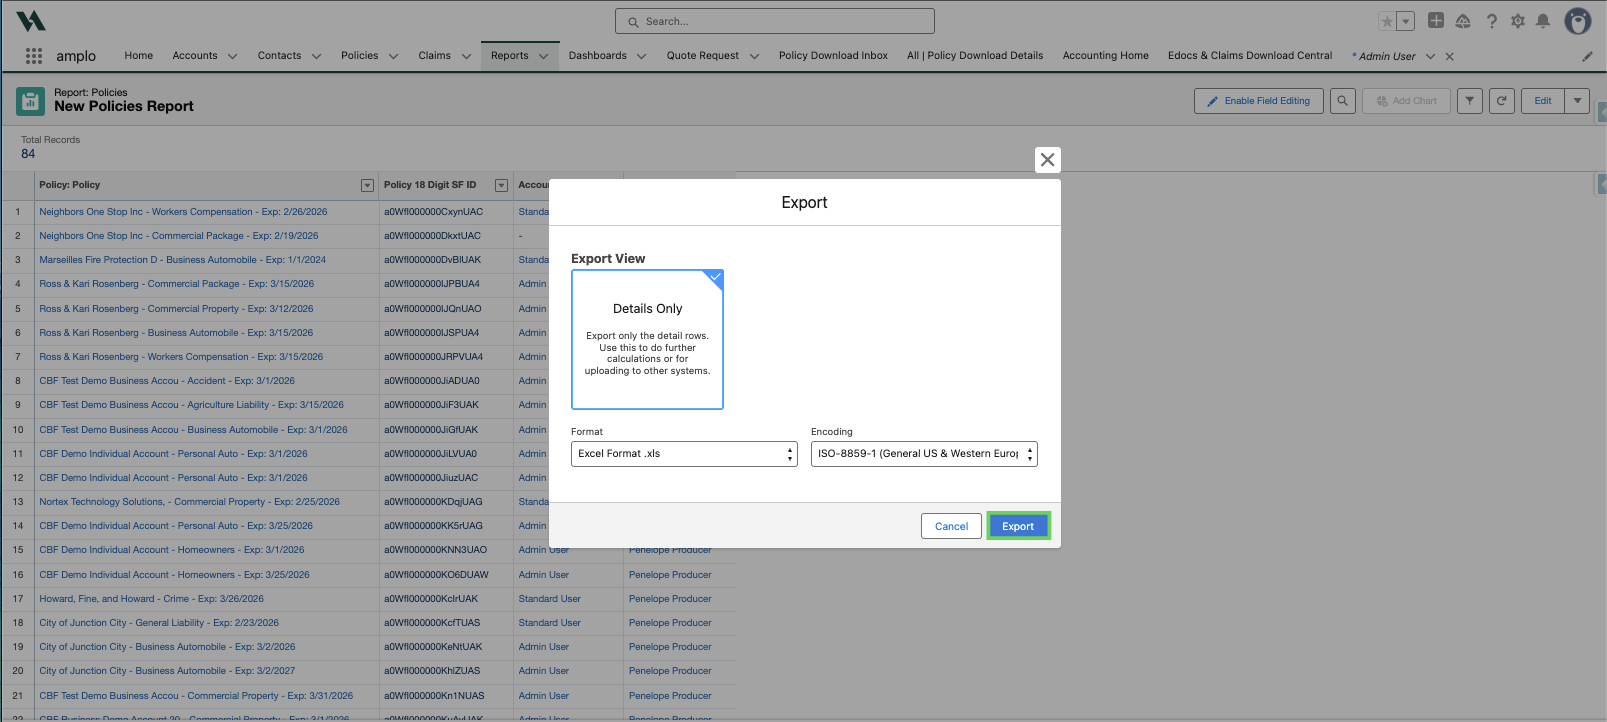
The file will download to your computer and will serve as the foundation for your bulk update.
Prepare the update file
Next, update the exported file with the new user information.
Open the exported file.
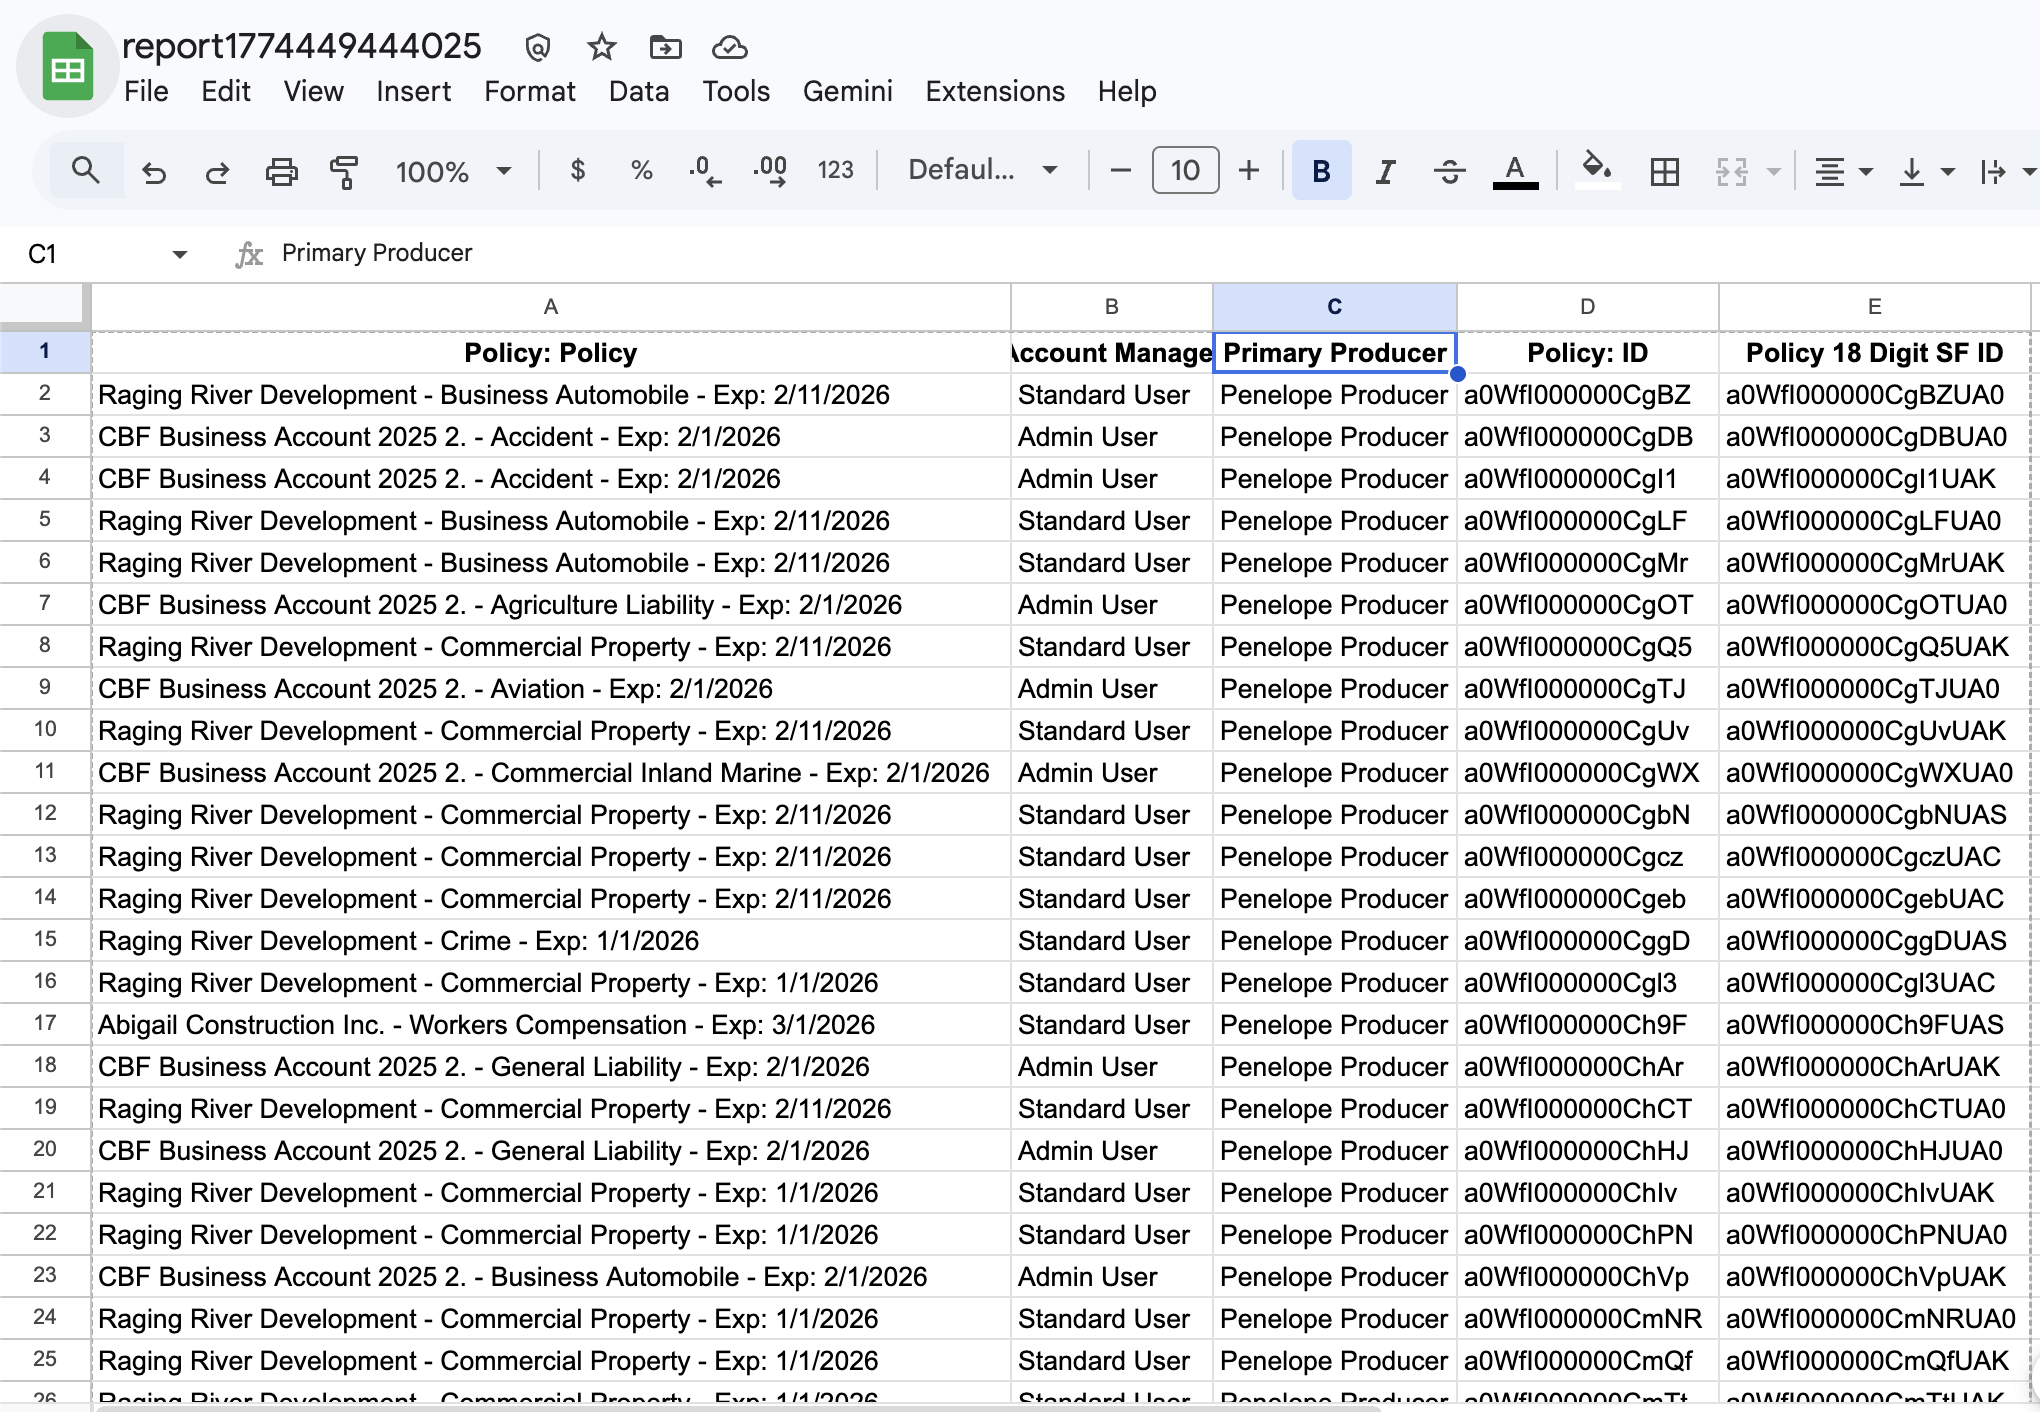
In the Primary Producer column, replace the current name with the new user’s 18-digit User ID.

Important: These fields are lookup fields. Always use the User ID, not the user’s name.
Confirm the Policy ID column is included. Data Loader uses this as the unique identifier to locate records.
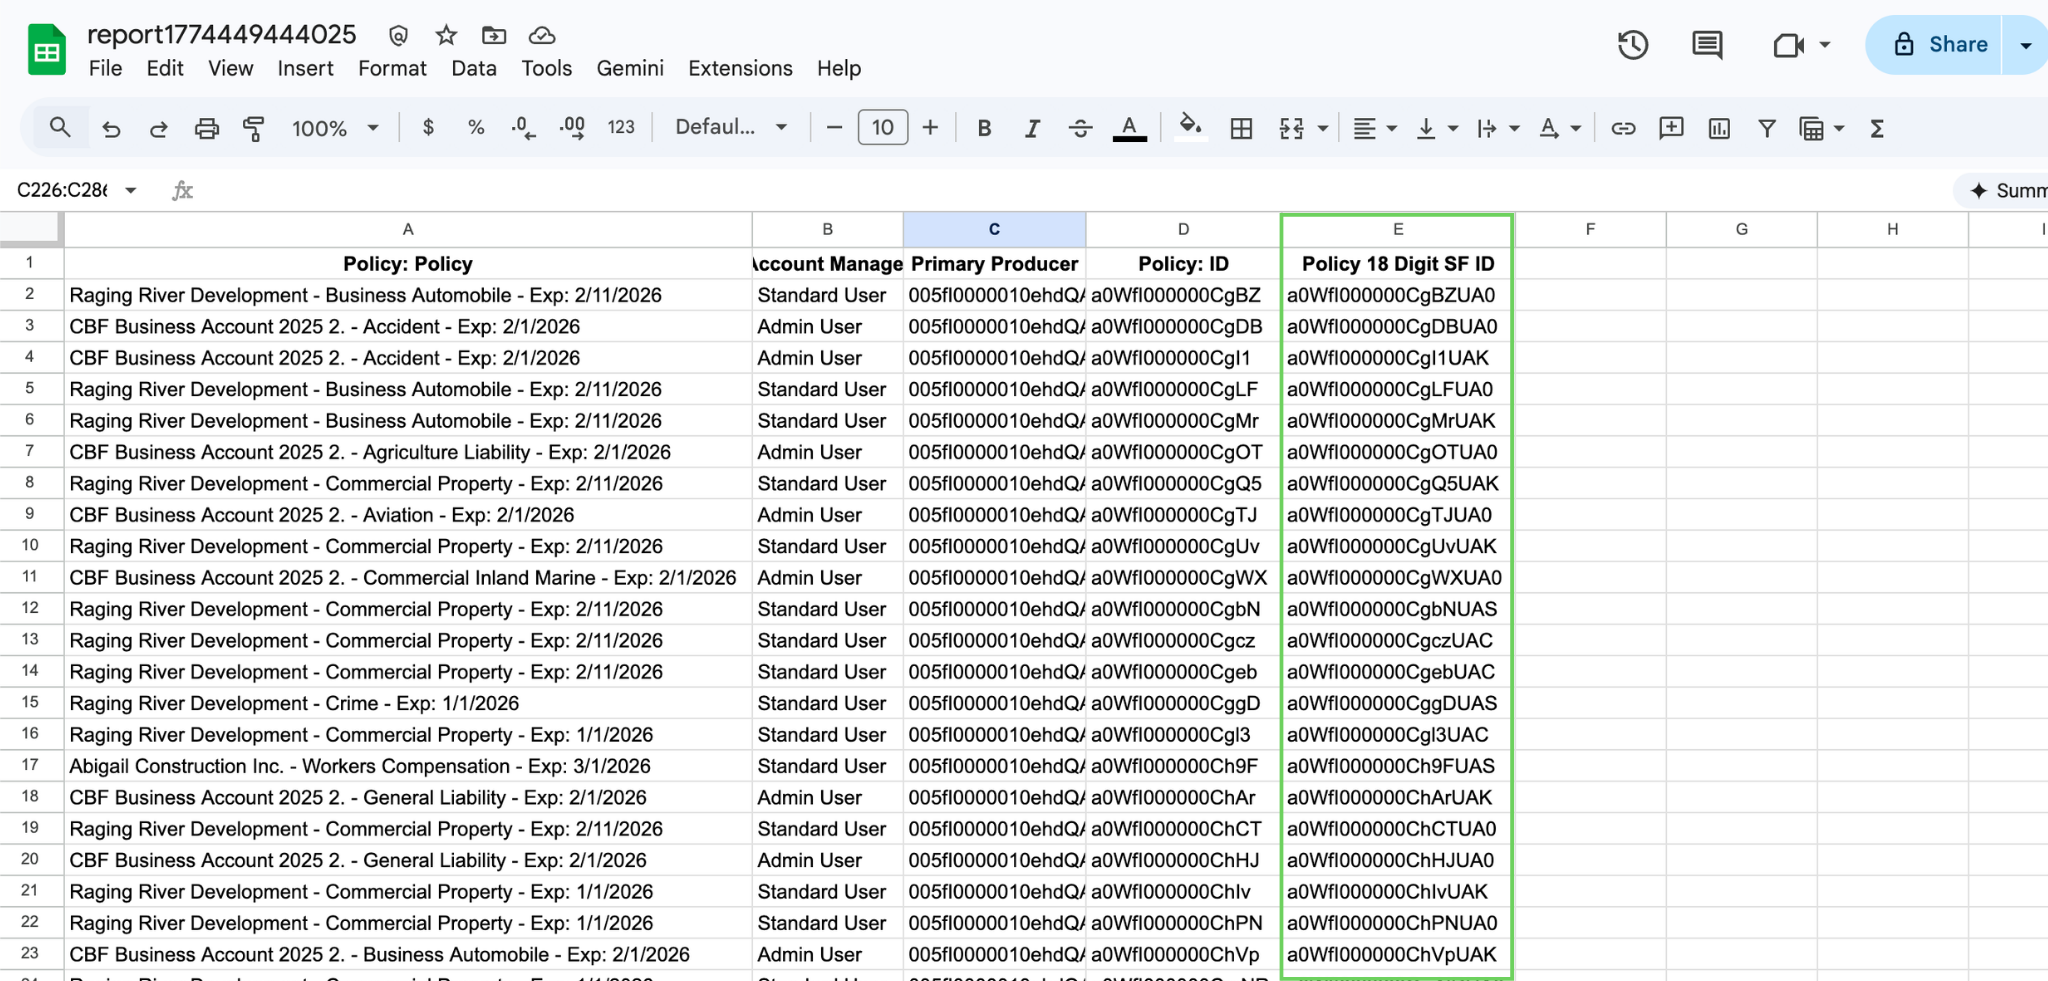
Leave the file open and return to amplo.
Update records using Salesforce Inspector Reloaded
Once your file is finalized, use Salesforce Data Loader to update the records.
In amplo, open the Salesforce Inspector Reloaded extension.
Select the Data Import under the Objects tab.
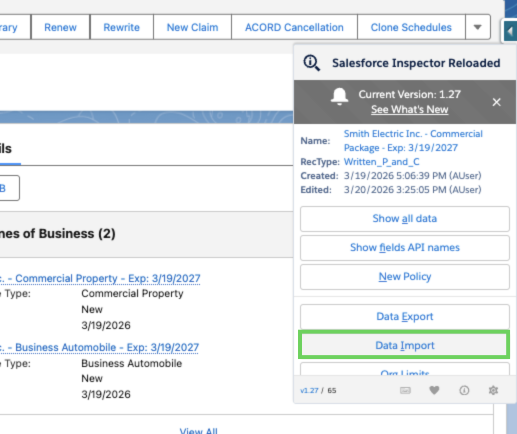
In Configure Import, enter the following details:
Action: Click the dropdown and select Update.
Batch size: Change from 200 to 25.
Threads: Change from 6 to 1.
Data: Copy and paste your data from the report. The data will appear in a table below
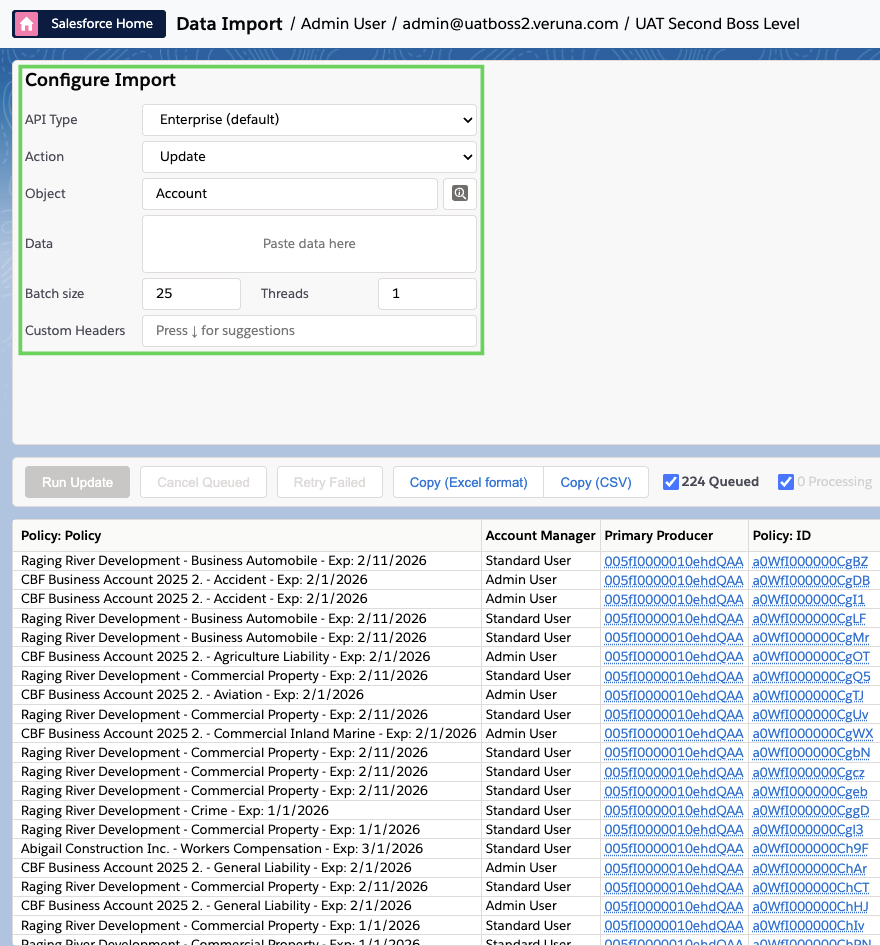
Note: Only copy and paste cells that contain data to avoid Field Mapping errors.
In Field Mapping, follow the steps below:
Select Skip next to (as we are not updating these fields):
Policy: Policy
Account Manager
Primary Producer: Select VRNA__Primary_EB_Producer__c from the dropdown.
Policy 18 Digit SF ID: Select Id.

Select Run Update.
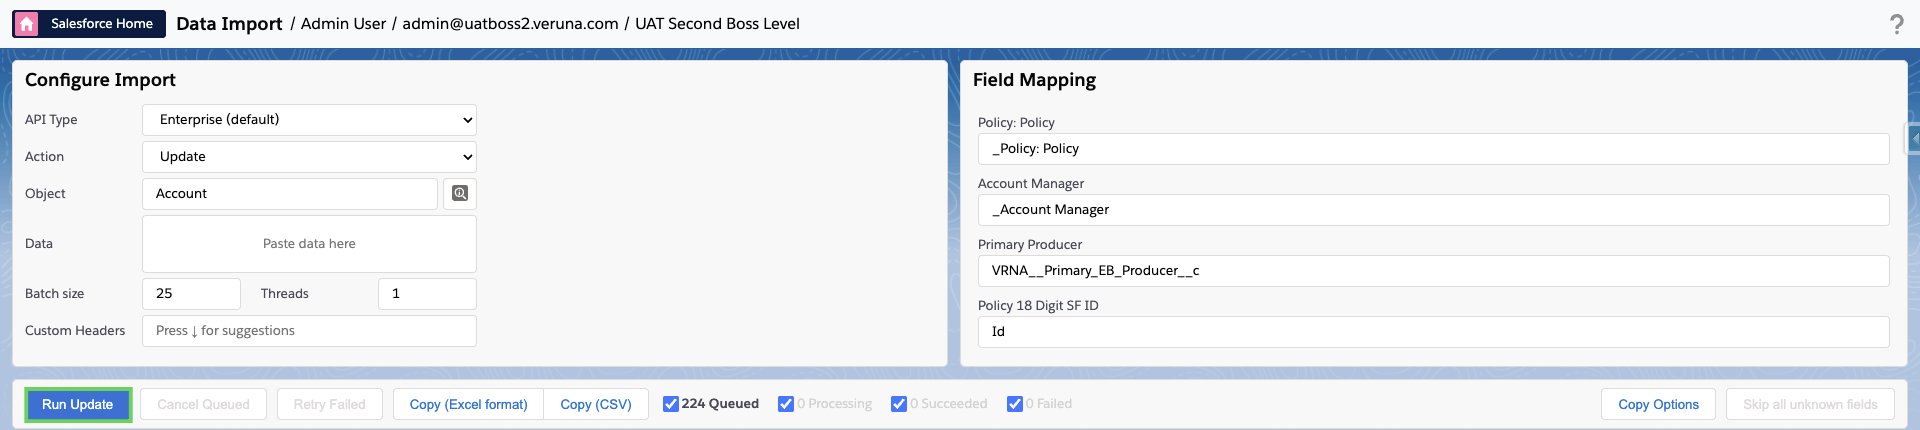
In the confirmation modal, select Update to proceed or Cancel to return to the previous page.

After the process completes, review the success and error files generated by Inspector Reloader to confirm all records updated correctly.
Deactivate the departing user
After confirming that all policies have been reassigned, deactivate the departing user from your system. This ensures clean data and prevents future assignment issues. For detailed instructions, see 📄 User management.