Managing vendor payables
Last updated: March 2, 2026
Overview
Recording vendor payables accurately is essential for tracking agency expenses, managing vendor relationships, and ensuring timely payments. This guide walks you through how to create and post a vendor payable in your accounting system.
Create a vendor payable
In the App Launcher, search and select Payables.
Select the New.

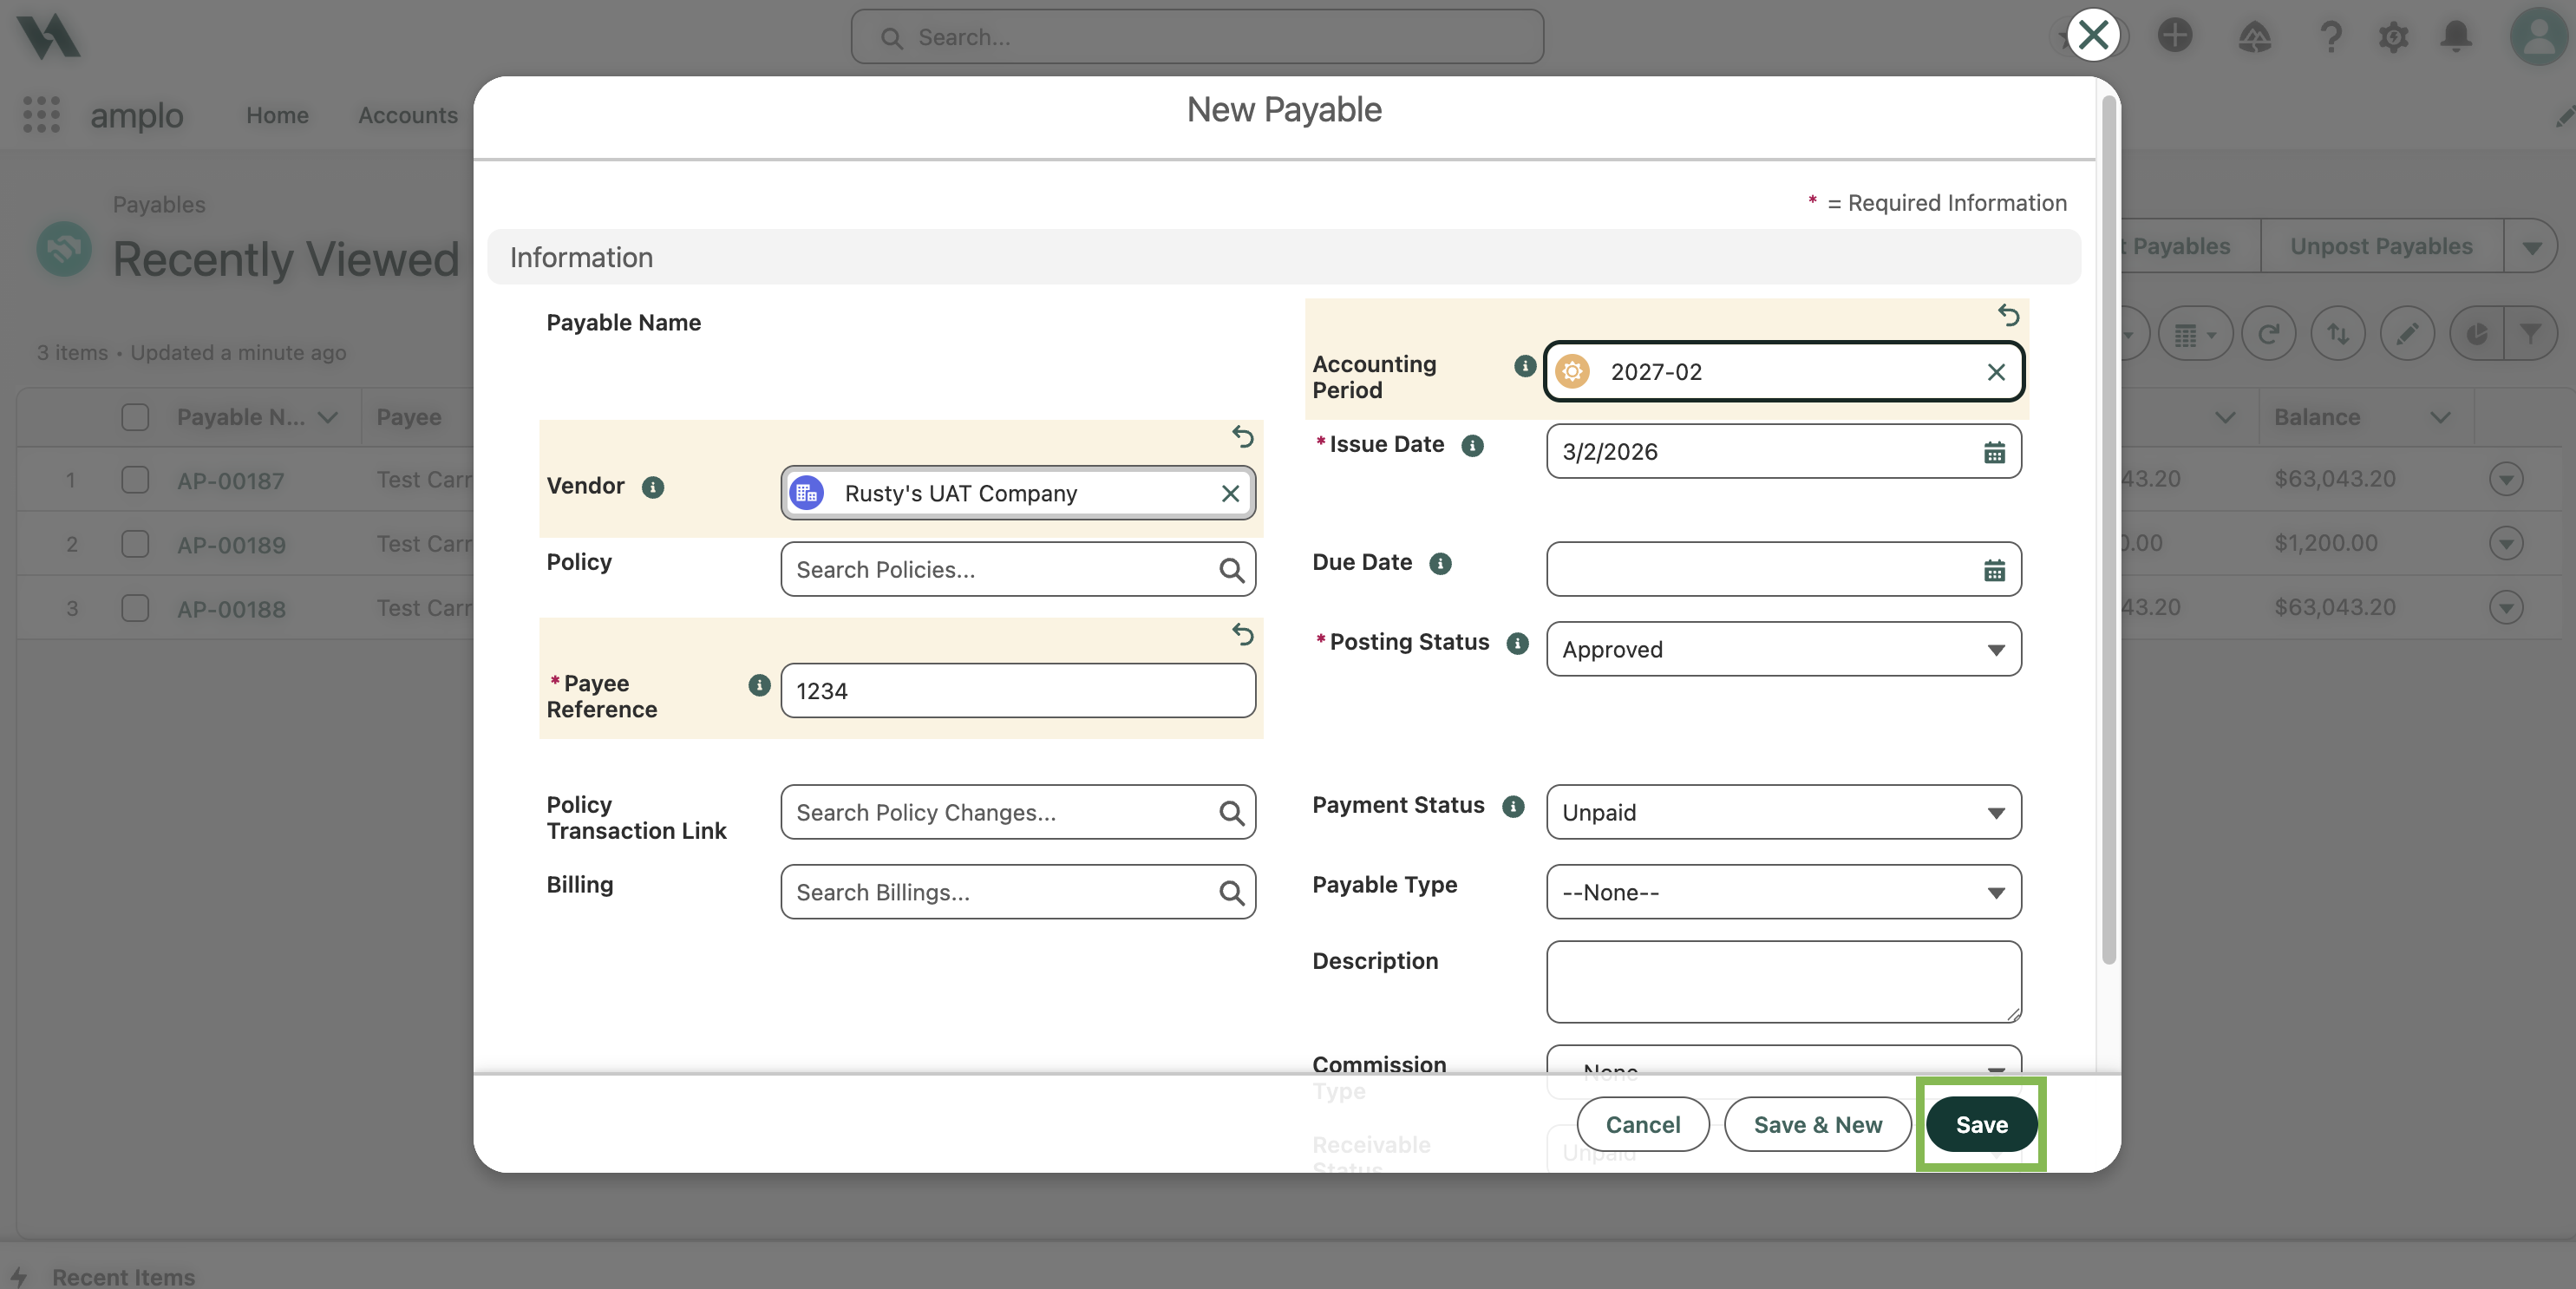
In the New Payable modal, complete the following fields:
Vendor: Use the lookup field to search for and select the vendor.
Payee Reference: Enter a reference number or note for tracking.
Policy Transaction Link
Billing
Accounting Period: Select from the list.
Issue Date: defaults to current date. Edit if needed.
Due Date: Enter a future date if the payment is not due immediately.
Posting Status: Defaults to Approved. Edit if needed.
Payment Status
Payable Type: Select Vendor.
Commission Type: Producer or Sub-Producer.
Click Save, or Save & New if you have additional payables to enter.
Enter payable line details
On the Payable record, enter information for the new Payable Line.
Amount: Enter the dollar amount of the payment.
Quantity
Unit Cost
Tax Amount
Total
Expense GL Account: Choose the appropriate general ledger account.
Agency: Select the agency making the payment.
Branch: Specify the branch, if applicable.
Profit Center: Enter this if your organization uses profit centers.

When finished, click Save.

Finalize the payable
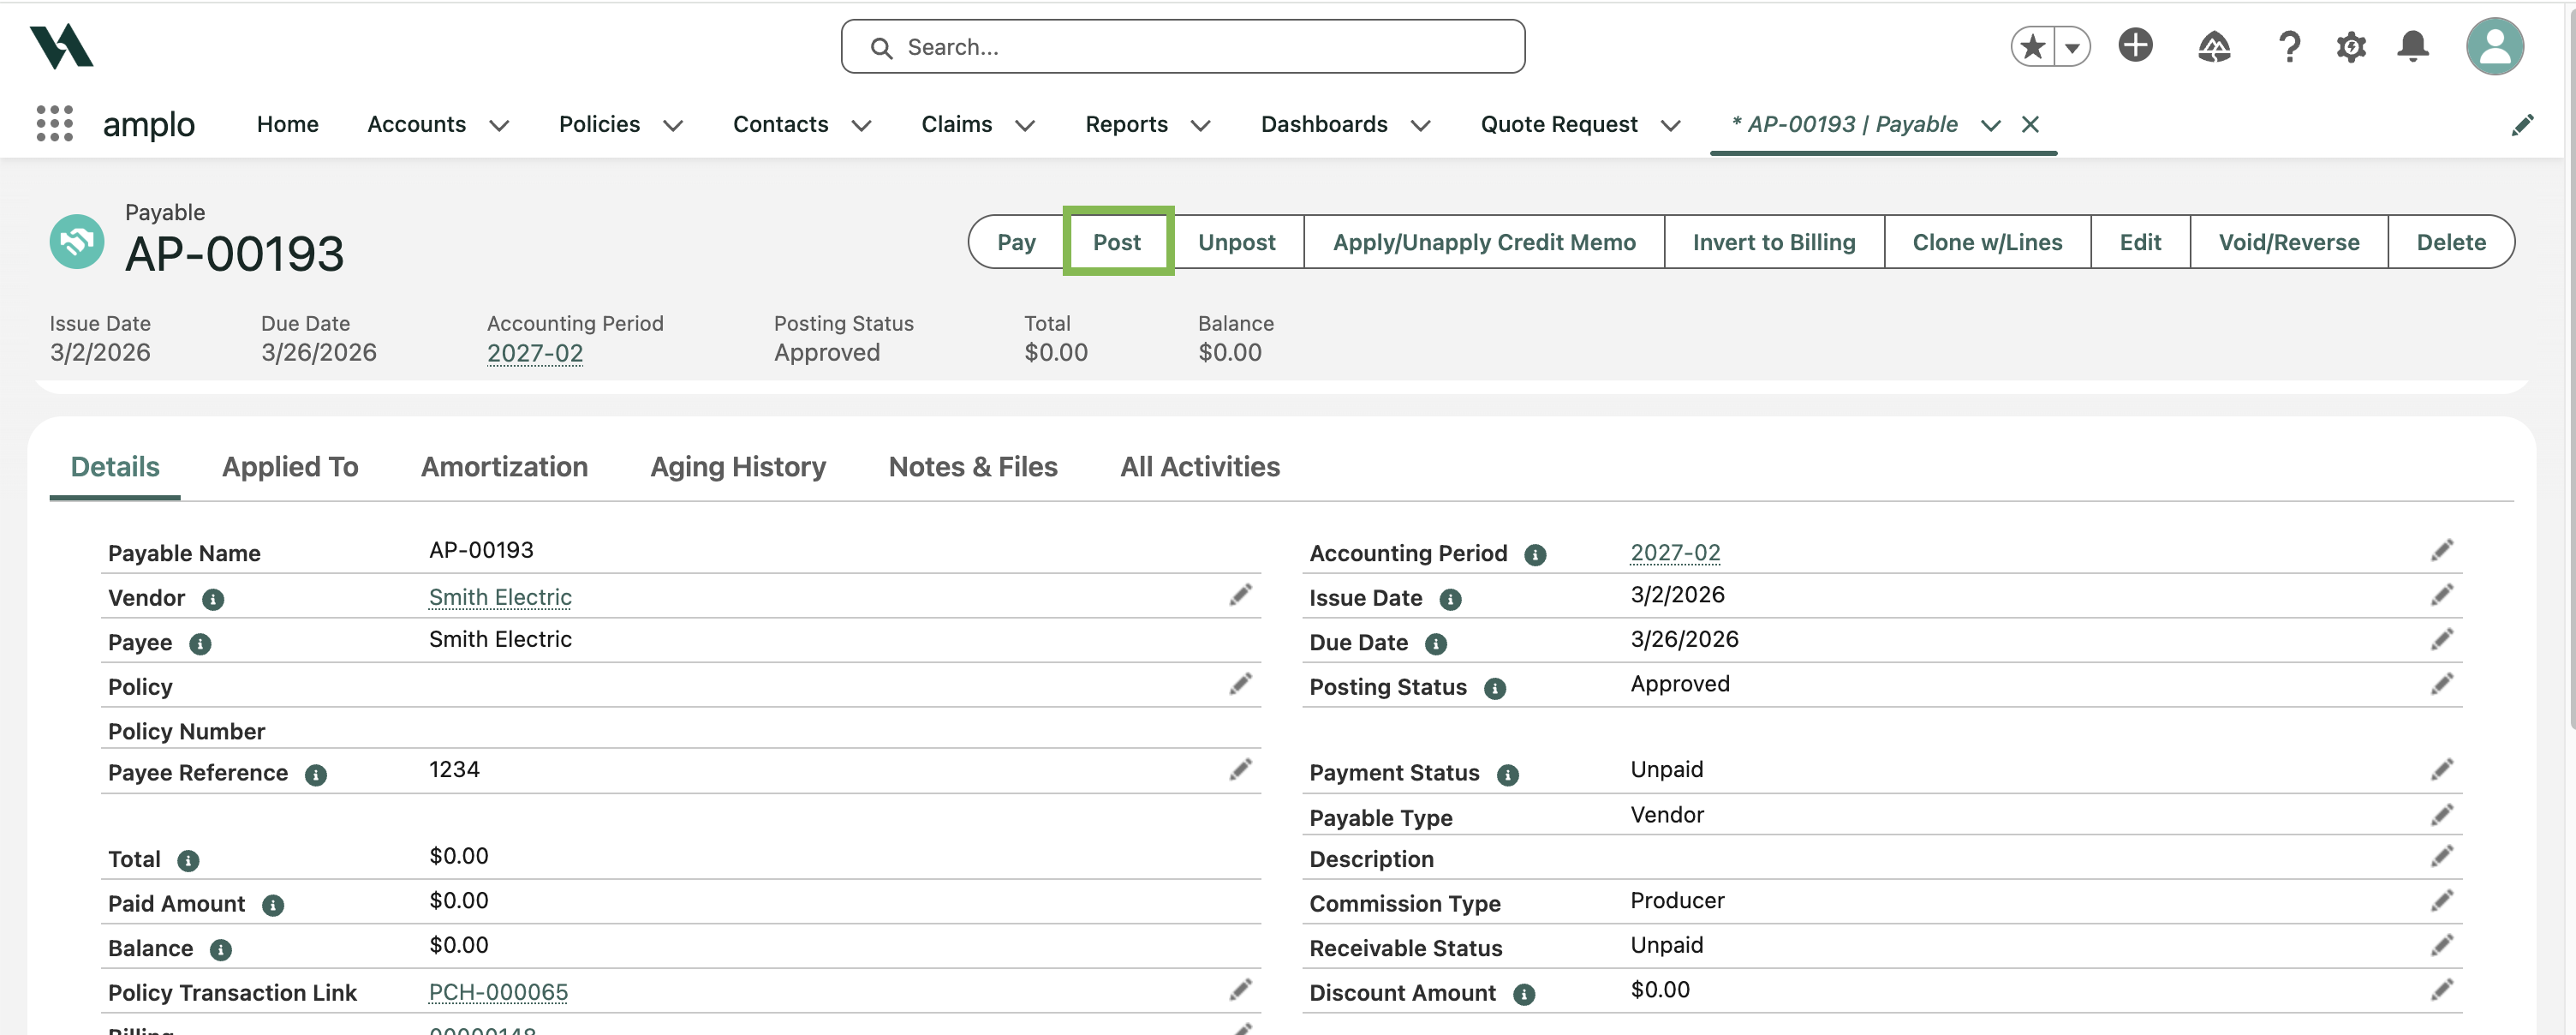
Click Post.