Managing cash receipts
Last updated: March 19, 2026
Overview
Cash receipts record incoming payments. Without accurate tracking:
You can’t see what’s been paid
You can’t identify overdue balances
You risk cash flow shortages
Healthy cash flow keeps operations stable and predictable. This article explains how to manage add and modify cash receipts.
Add a cash receipt
Adding cash receipts is a foundational accounting task that supports financial accuracy, operational efficiency, and compliance.
Create a new cash receipt
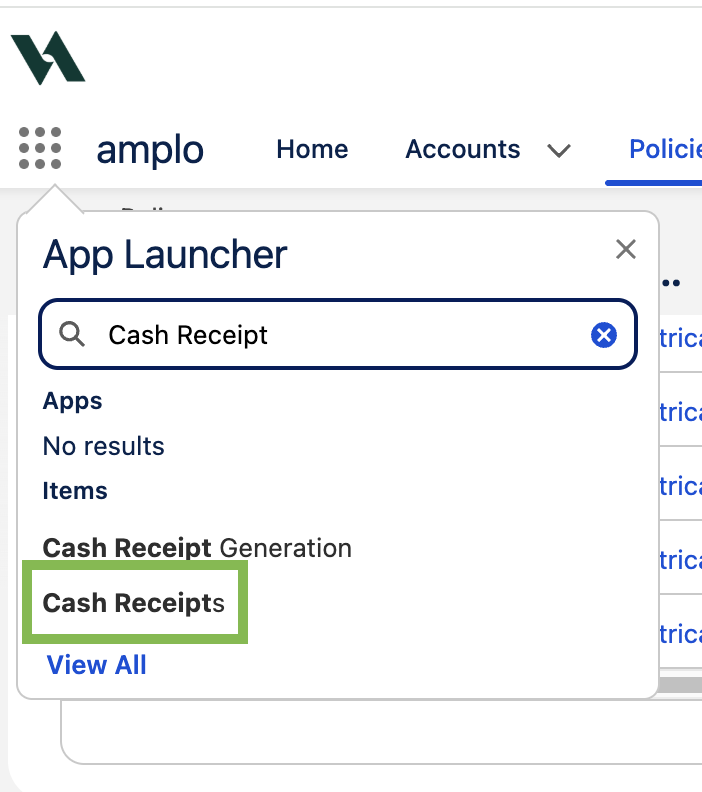
In the App Launcher, search and select Cash Receipts.
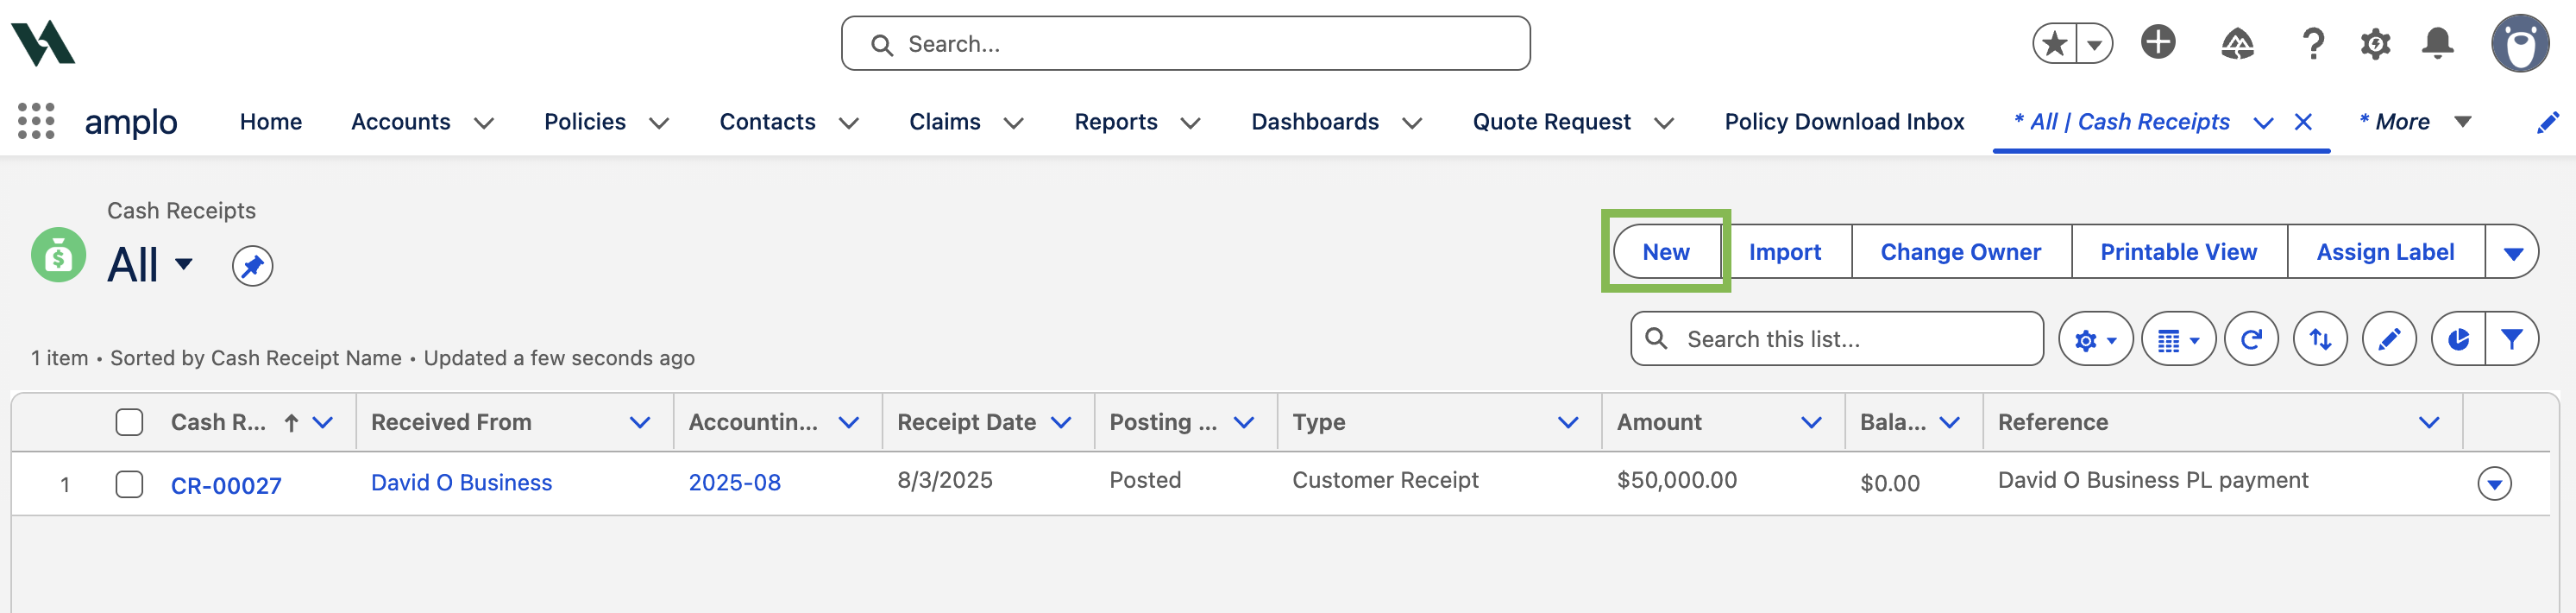
Click New.
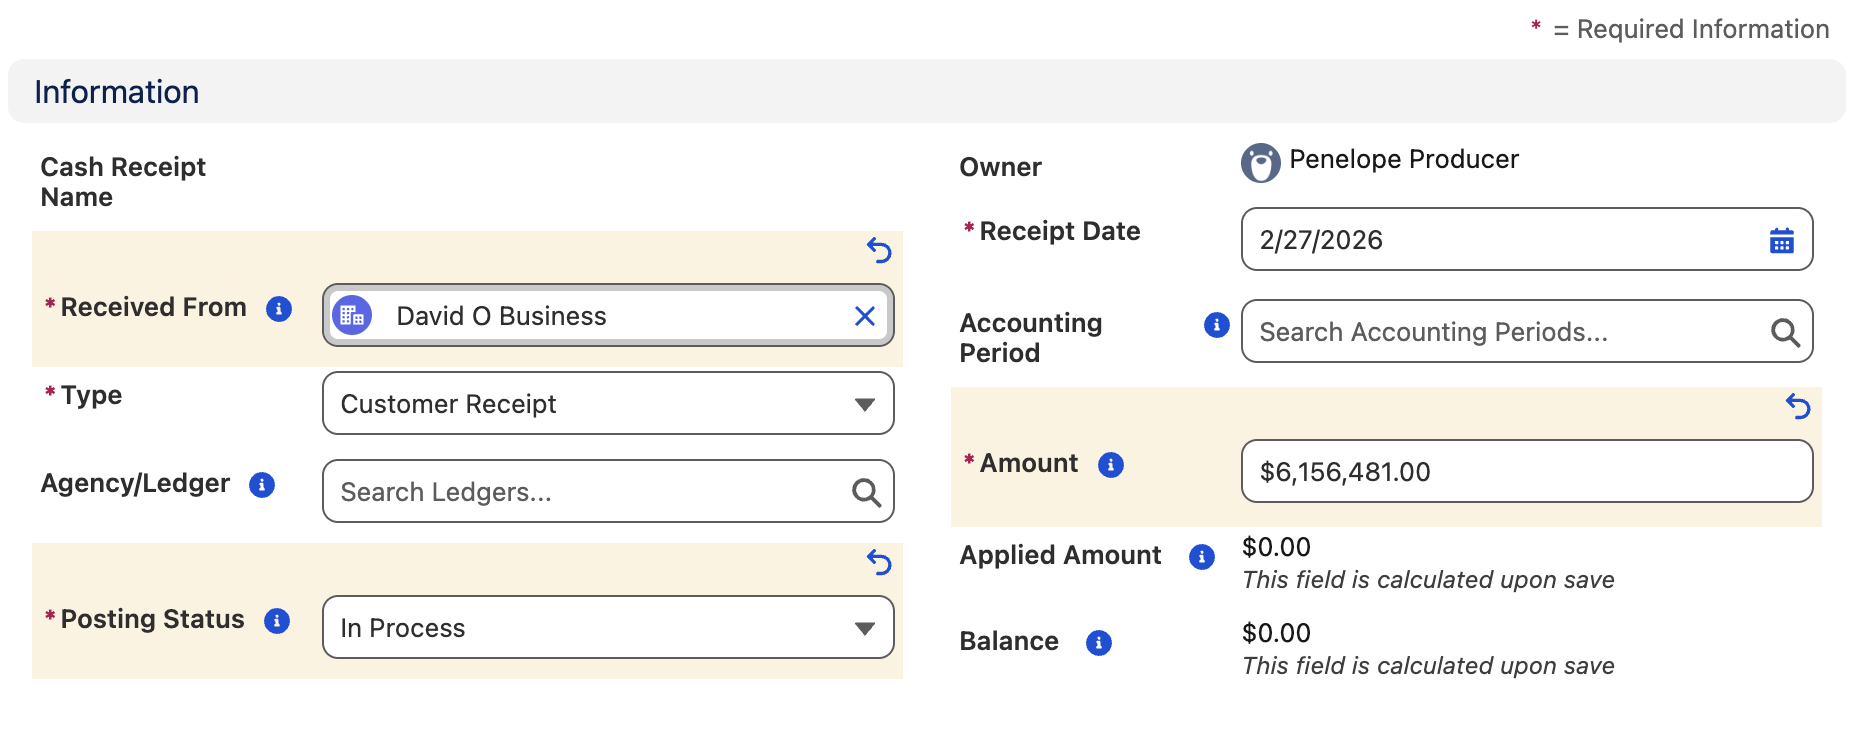
In the Information section, fill in the required fields:
Received From: Select a Vendor or Account, or enter the payor.
Type: Select one:
Customer Receipt (default)
Customer Prepayment
Vendor Refund
Other Receipt
Posting Status: Select In Process.
Receipt Date: Defaults to today’s date. Update if needed.
Amount: Enter the amount received.
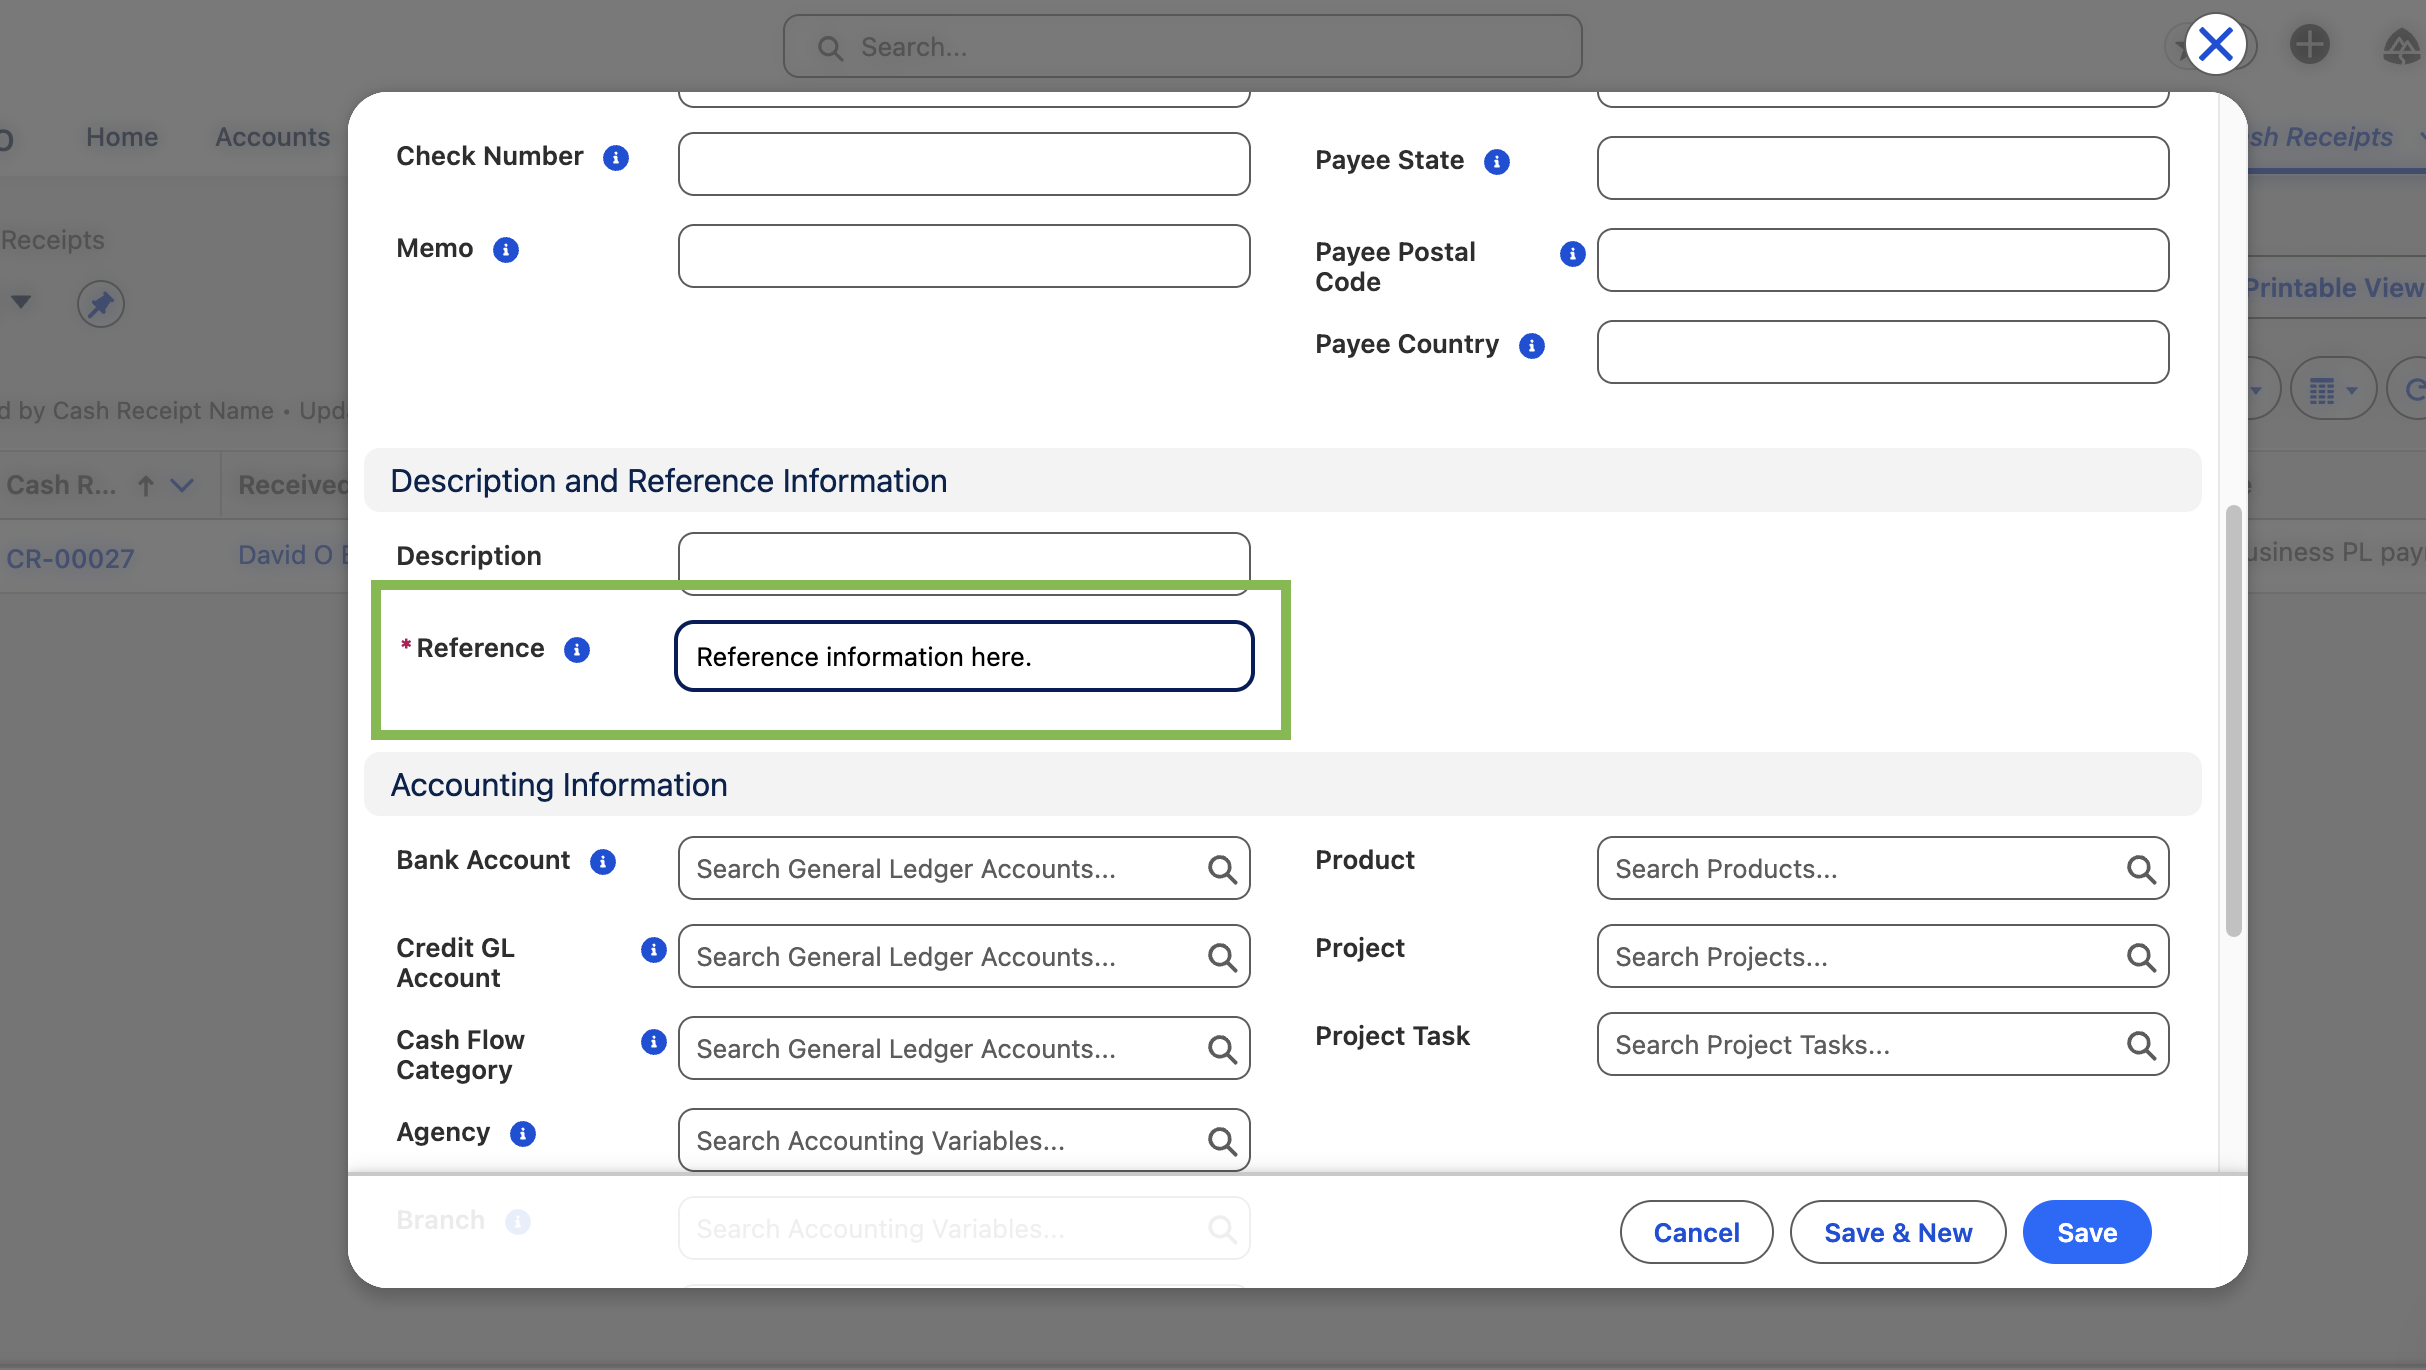
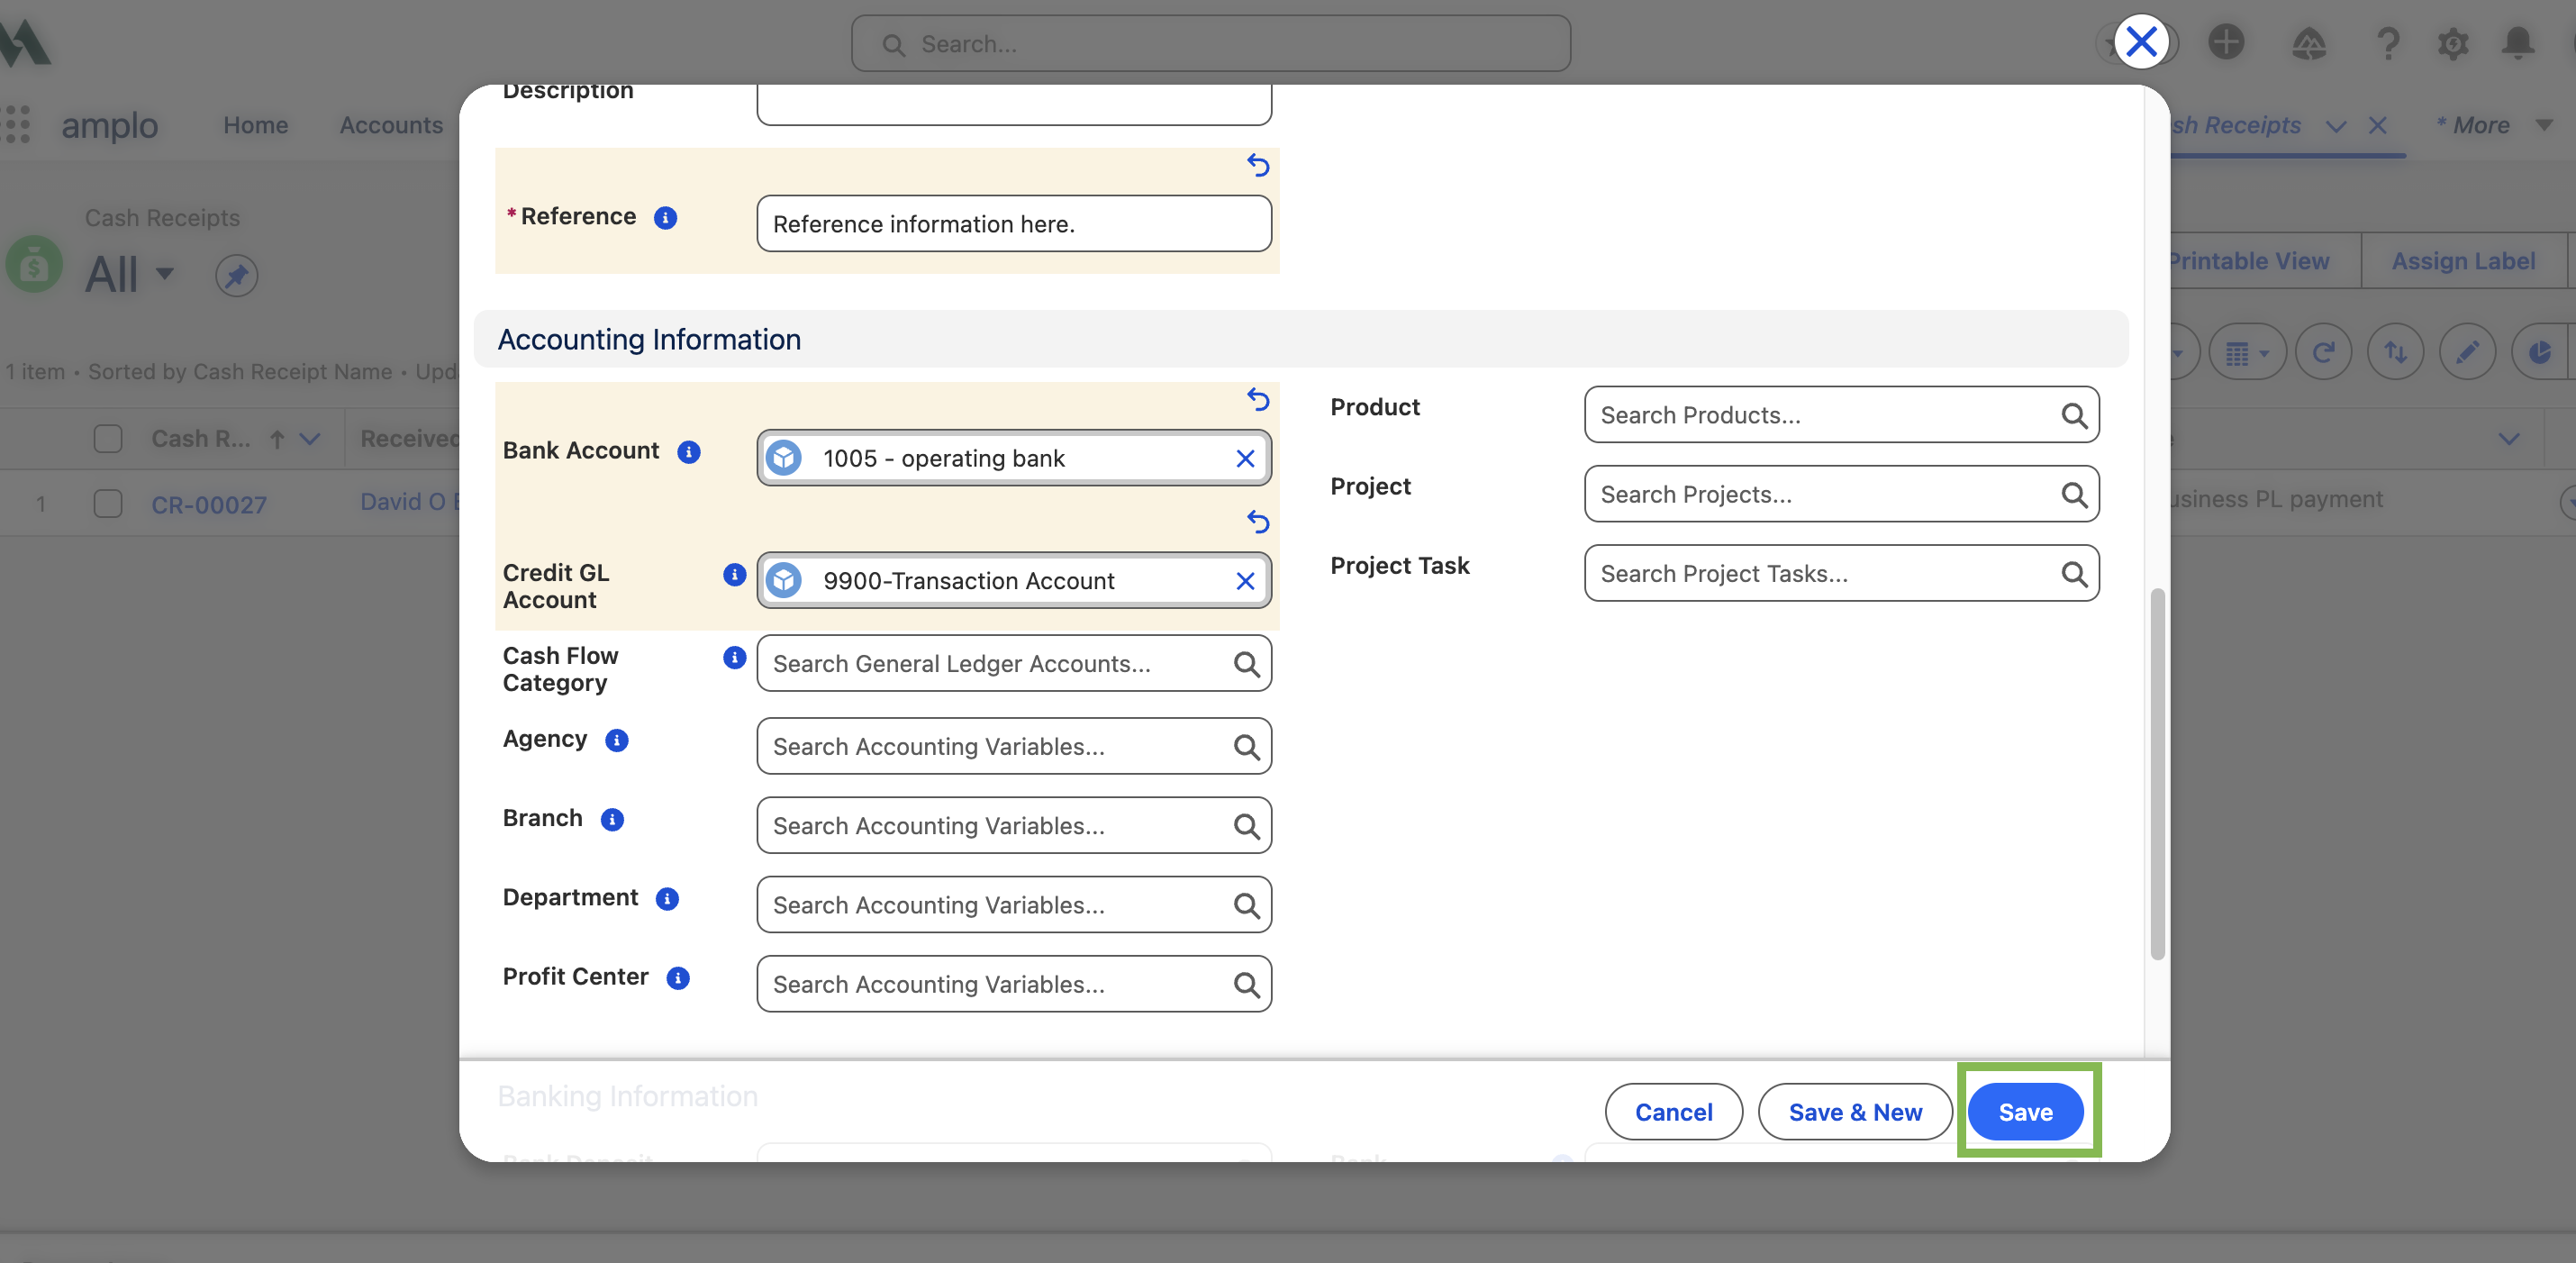
In the Description and Reference Information section:
Reference: Enter any relevant reference information.
In the Accounting Information section, enter:
Bank Account: Defaults based on user setup. Select a different account if needed.
Credit GL Account: Leave blank for Customer Receipts applied to billings. Enter the appropriate GL Account for other receipt types.
Click Save.
Import cash receipts
Use Data Loader to import batches of cash receipts from external systems such as QuickBooks or Excel.
Insert using Data Loader
Open Data Loader.
Select Insert.
Choose the Cash Receipt object.
Upload your prepared CSV file.
Map the required fields, including:
Payment Date
Amount
Customer Account
Bank Account
Run the insert process.
Review the success and error files to confirm results.
Apply a cash receipt
Apply a receipt to reduce an open billing balance.
Navigate to Cash Receipts
Select the receipt to apply.
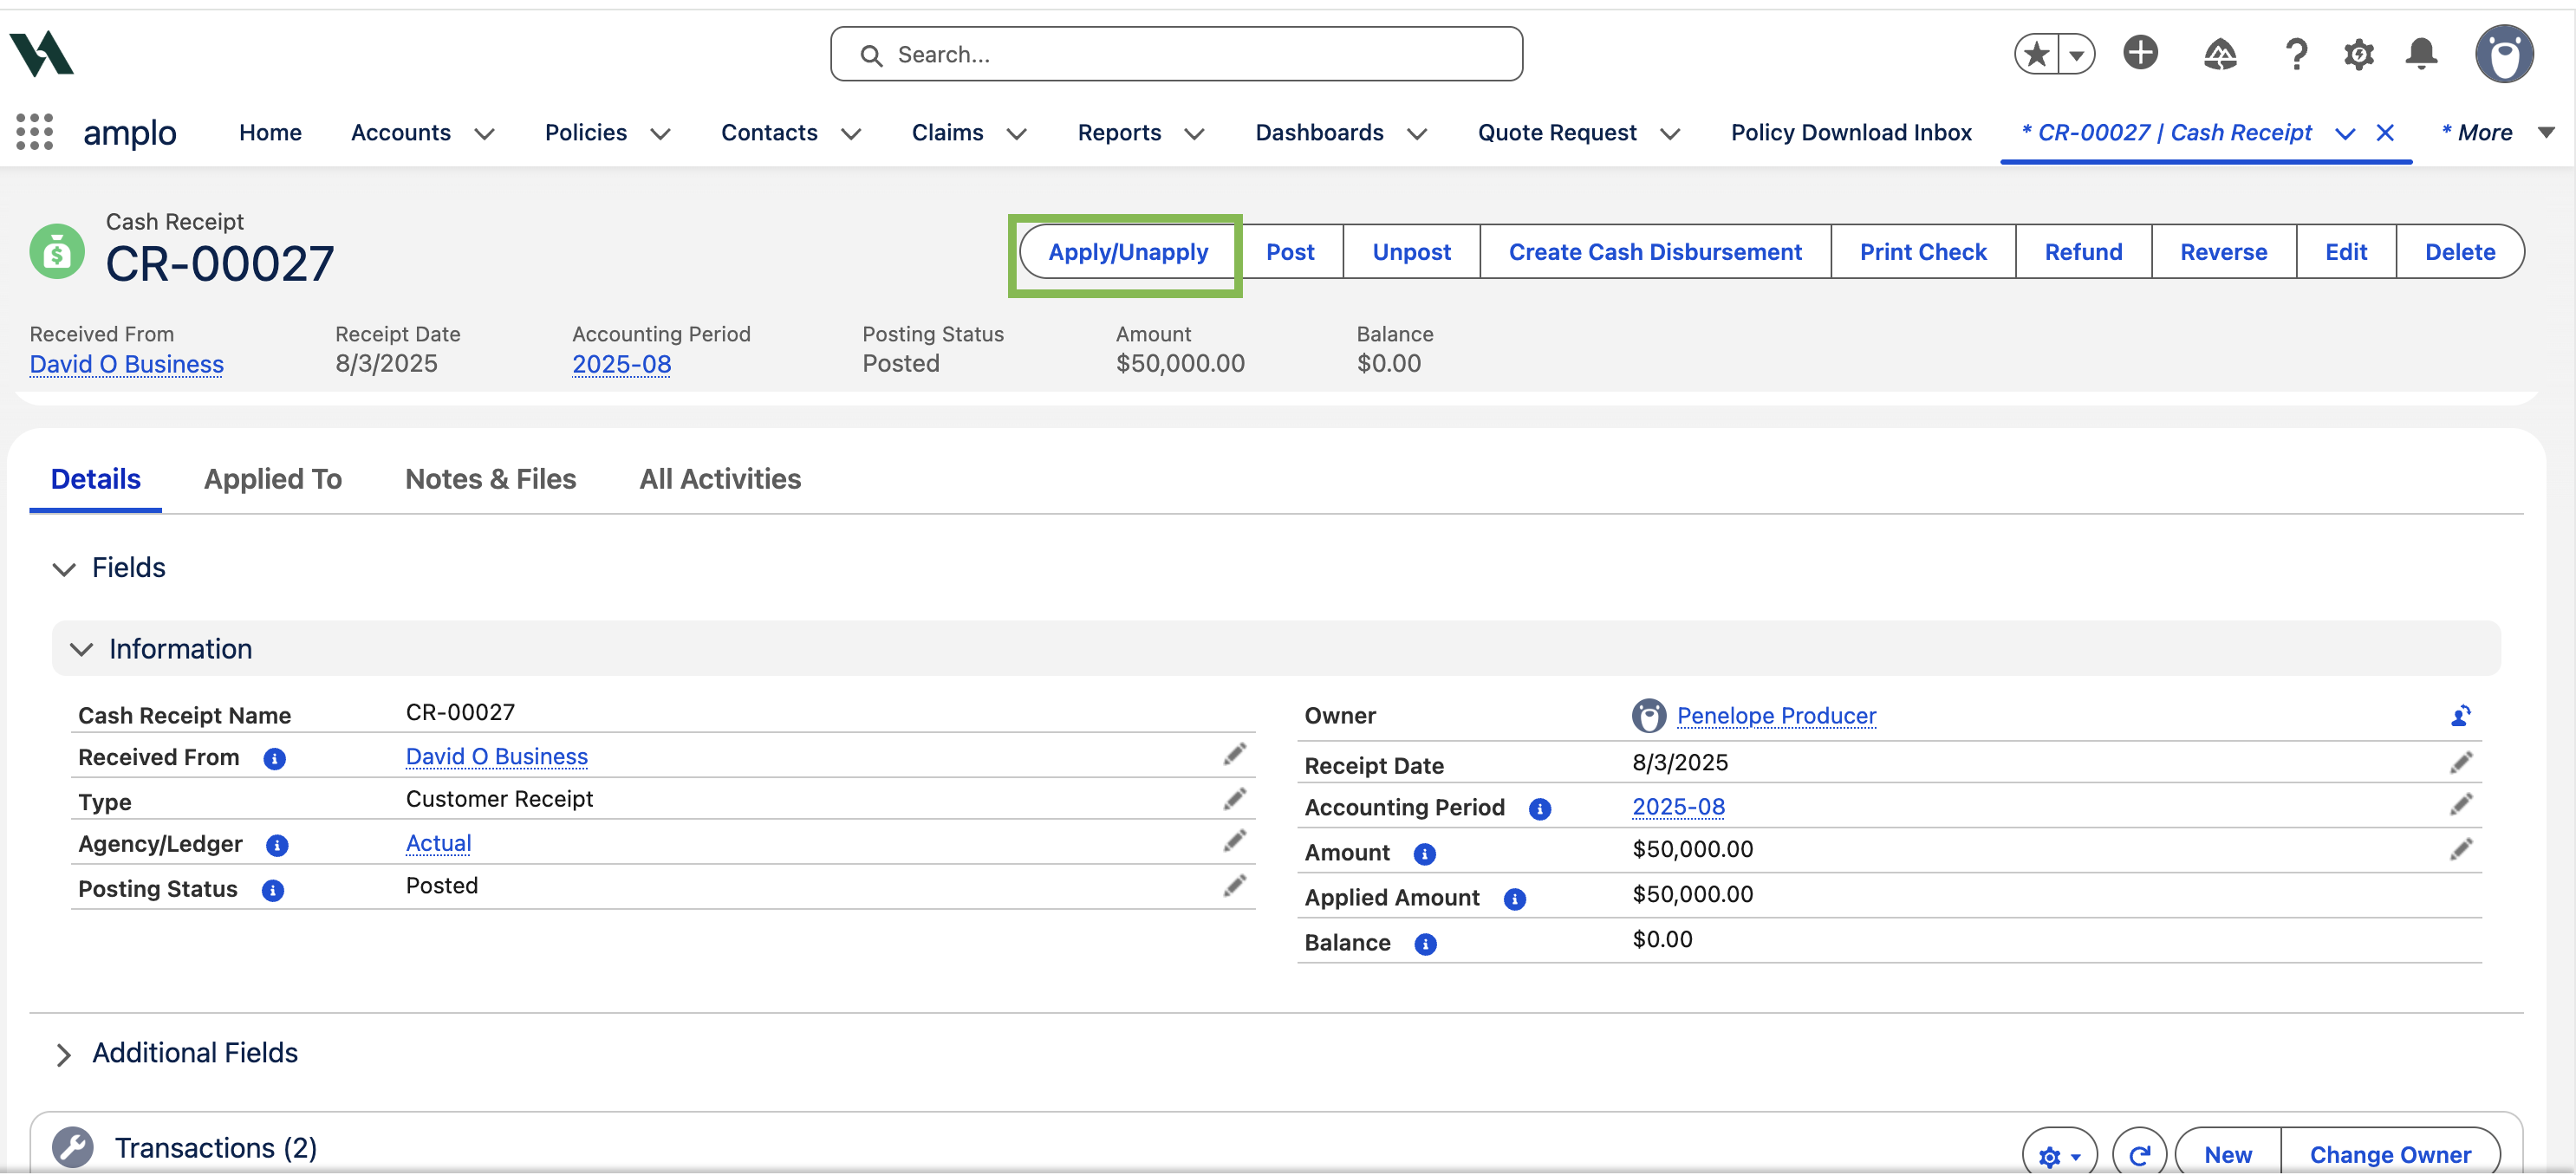
Click Apply/Unapply.
Review the list of open billings.
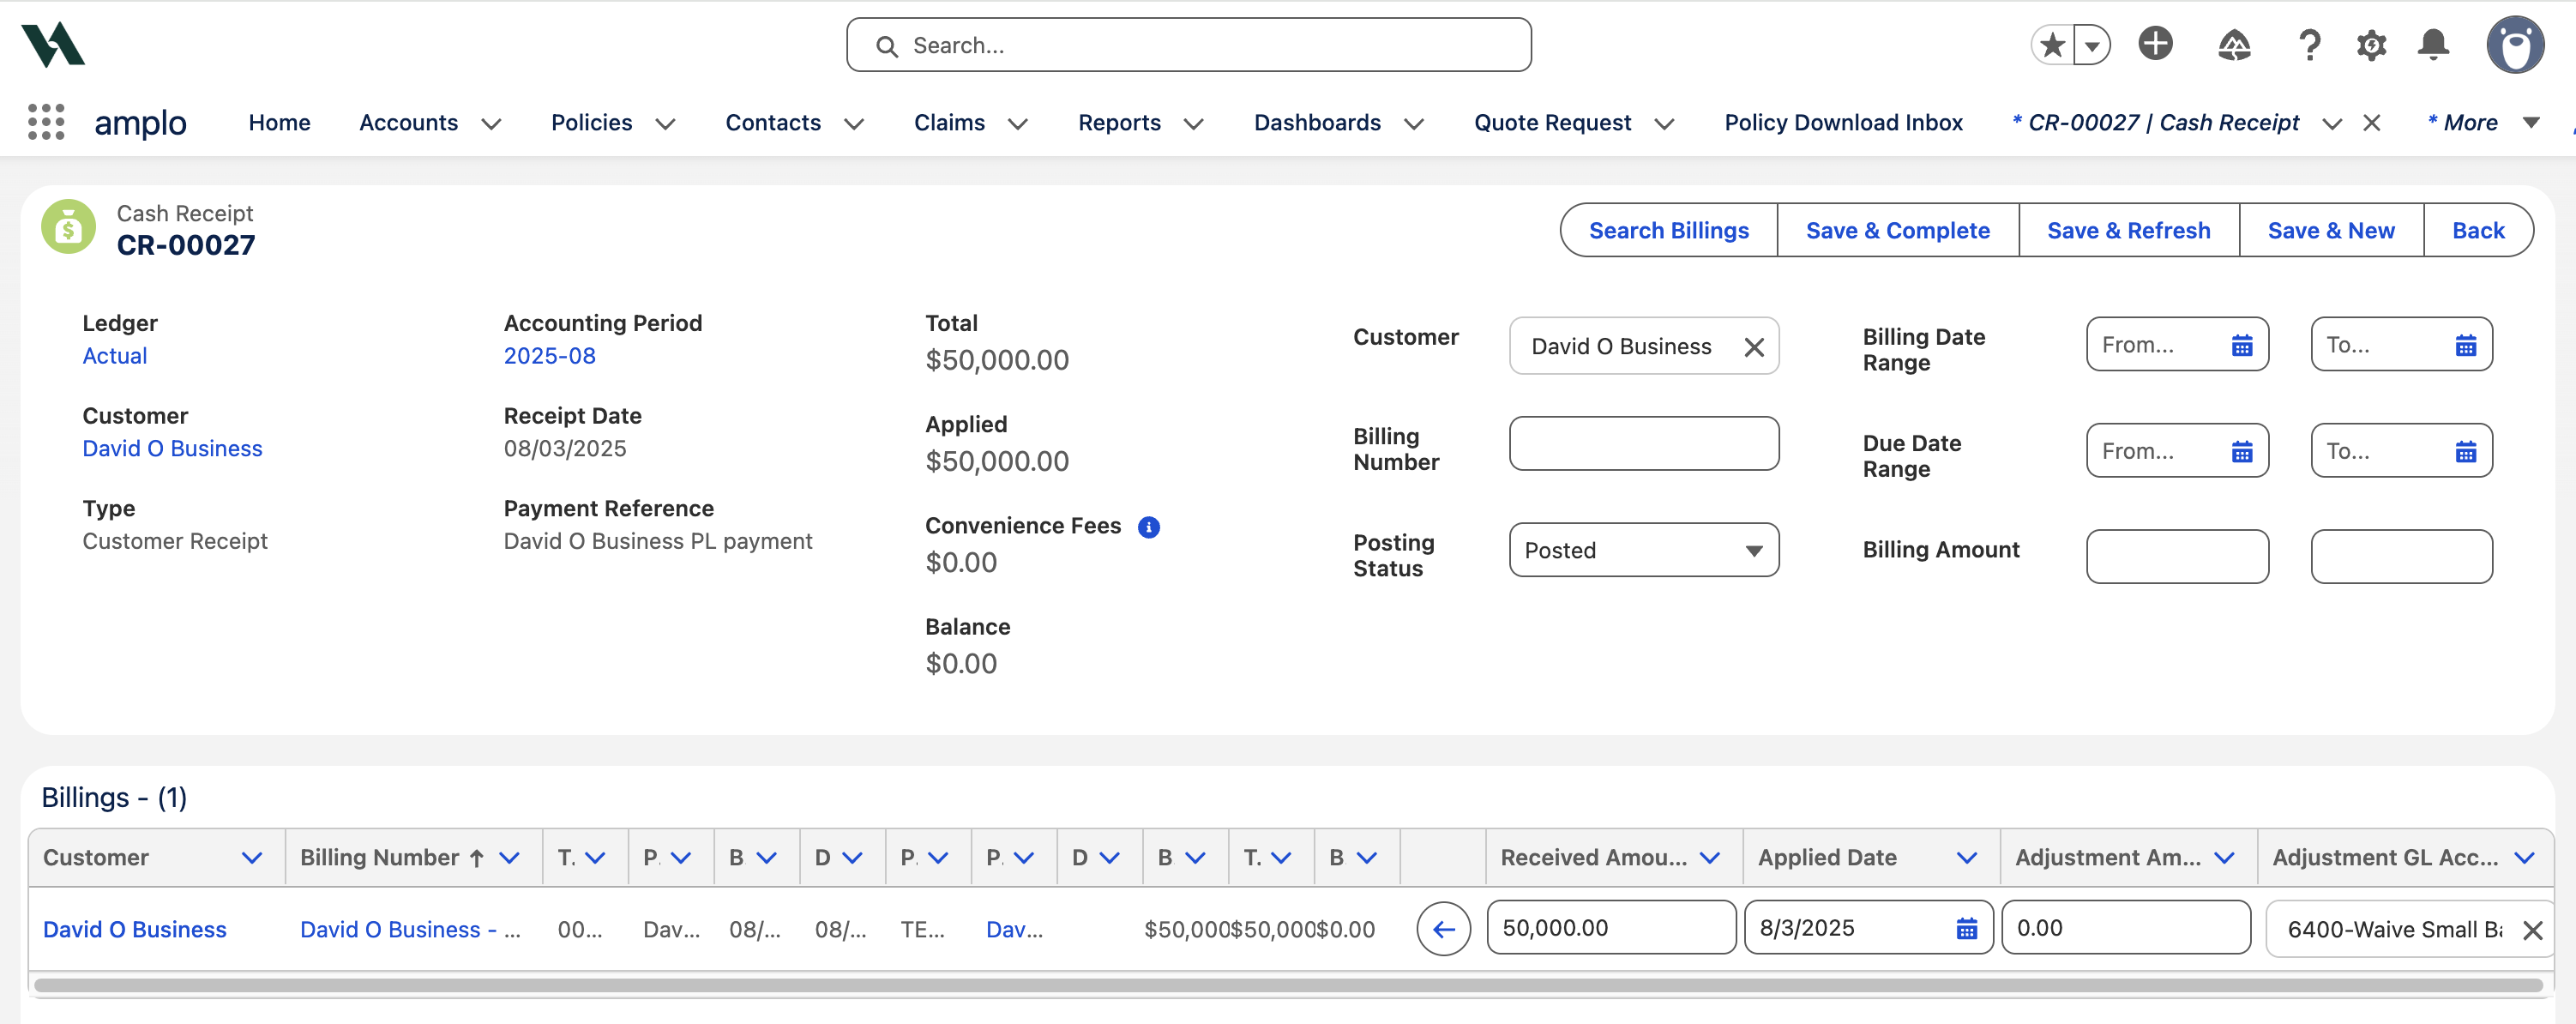
Enter the amount to apply to each billing, then click Save & Complete.
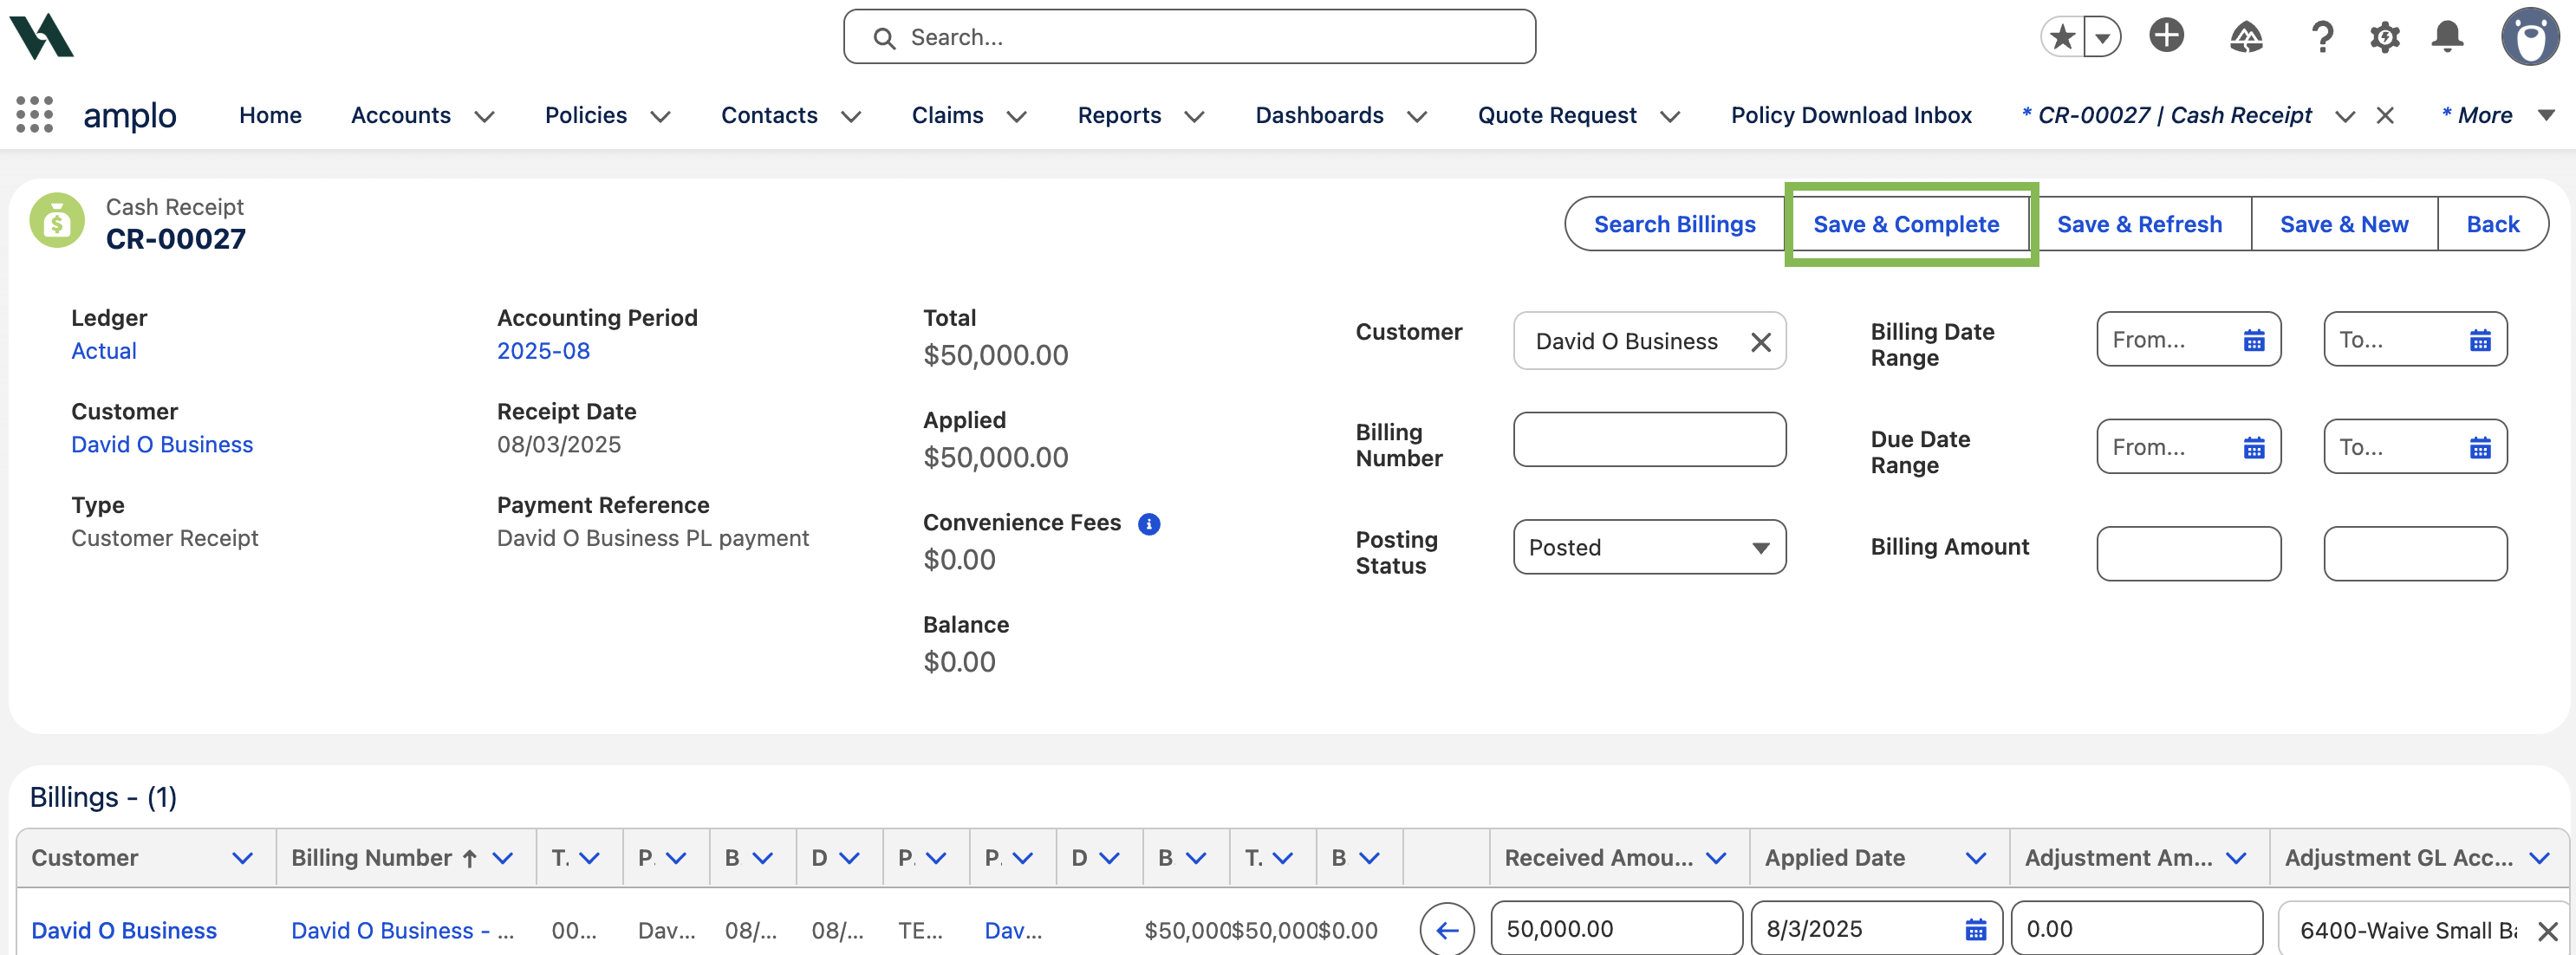
The receipt now reflects the applied amount.
Error resolution
When applying Cash Receipts to old Billings, you get an error that starts with: Accounting period status must be Open...
This error occurs because a Payable associated with the Billing has a posting status of Rejected. This value is a custom Accounting Seed value that is not recognized by the system and prevents the cash receipt from being applied. To resolve the issue, the link between the billing and the payable with the Rejected status must be broken.
Navigate to the Billing record, then hover over the Payable link.
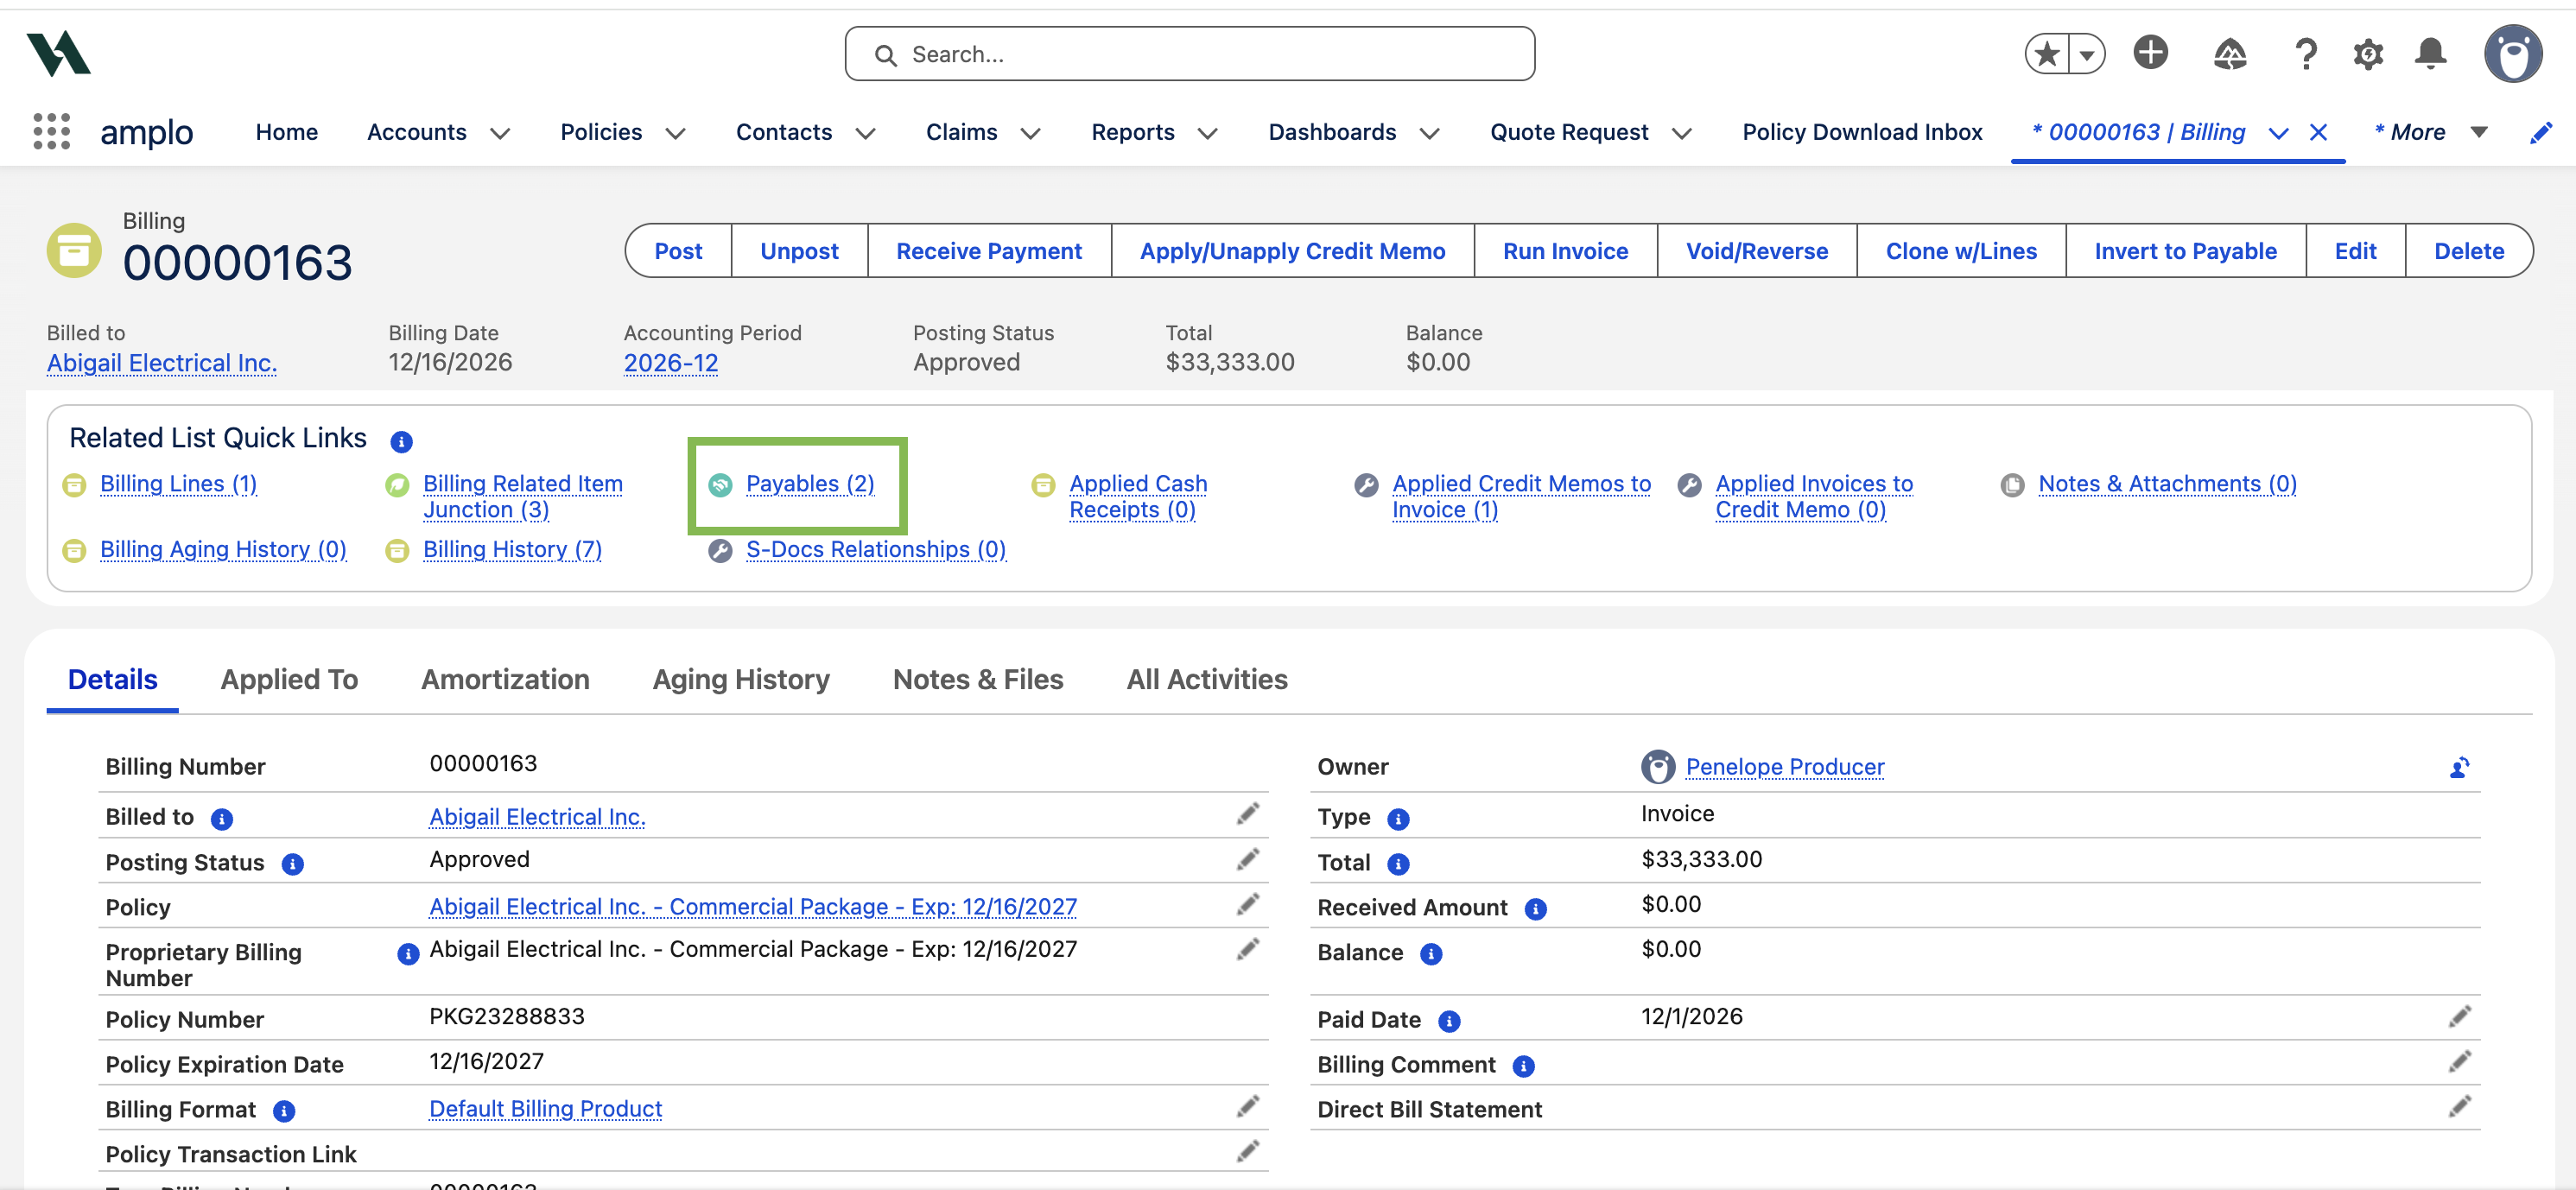
Select the Payable.
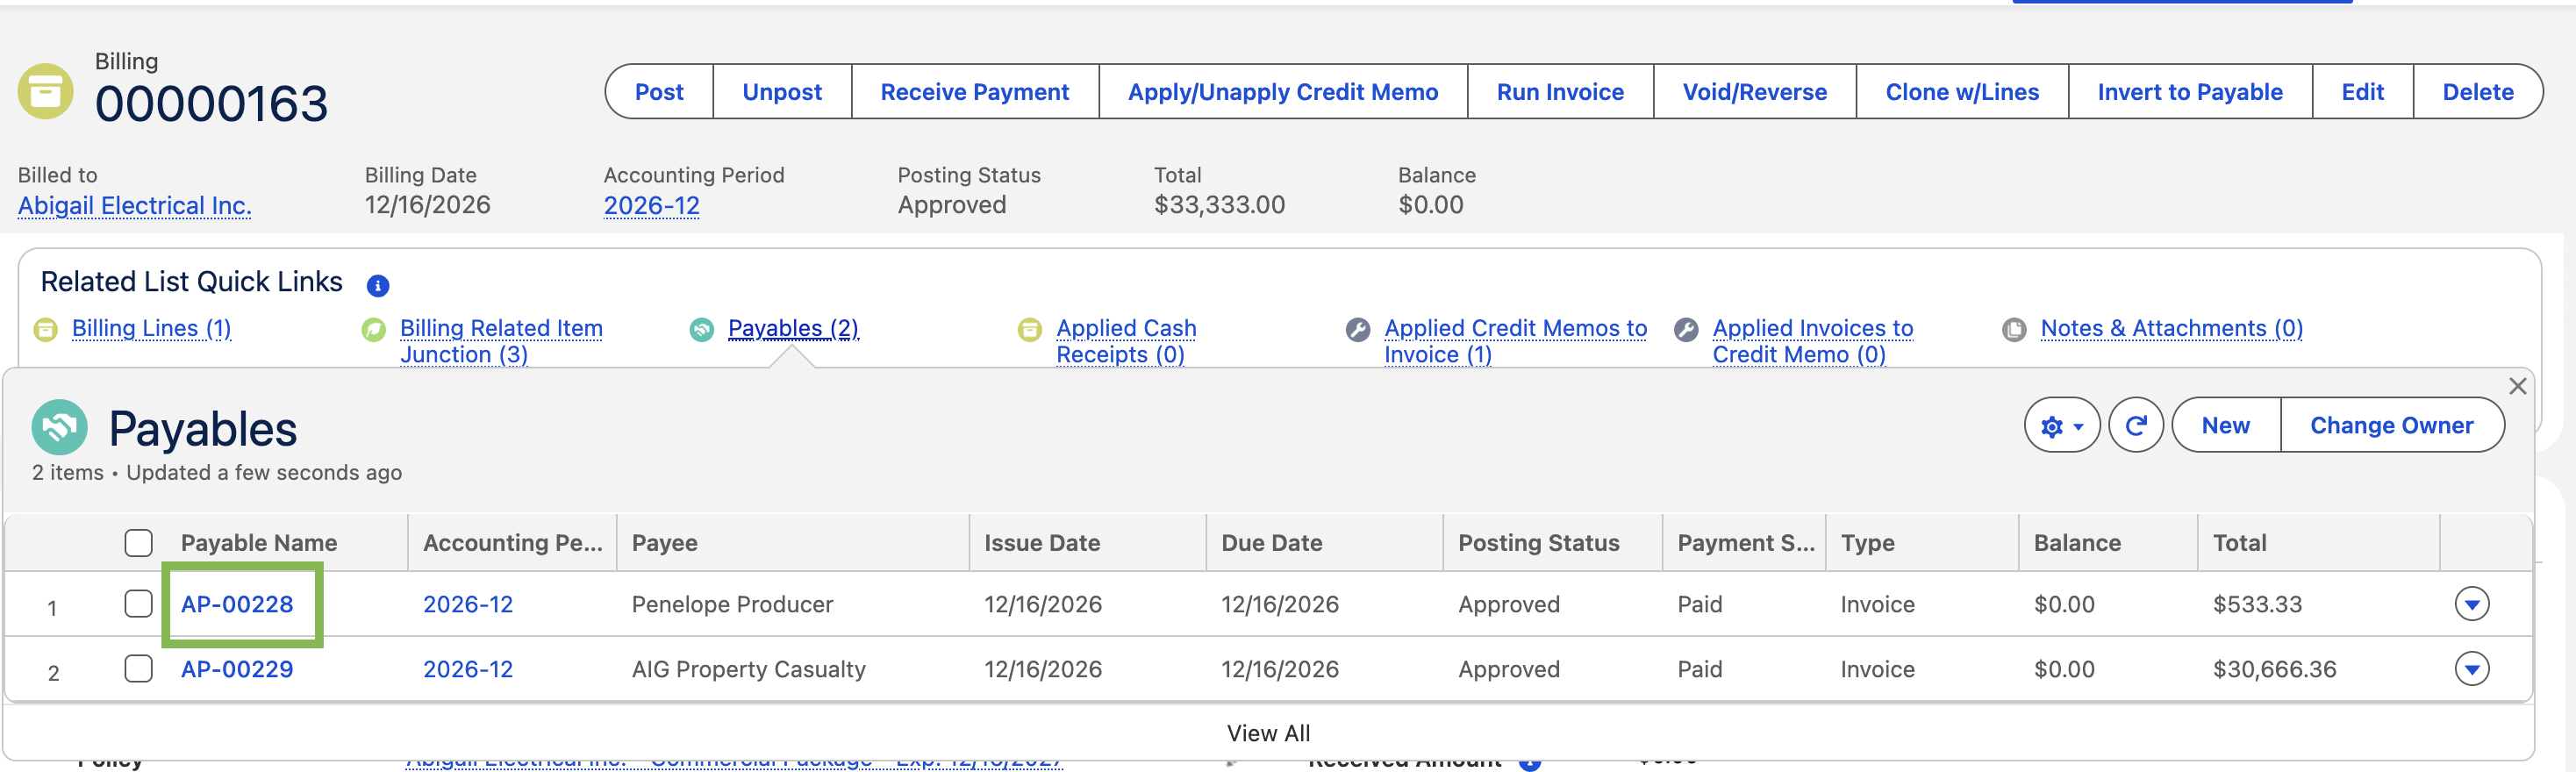
On the Payable record, click the pencil icon next to the Billing field.
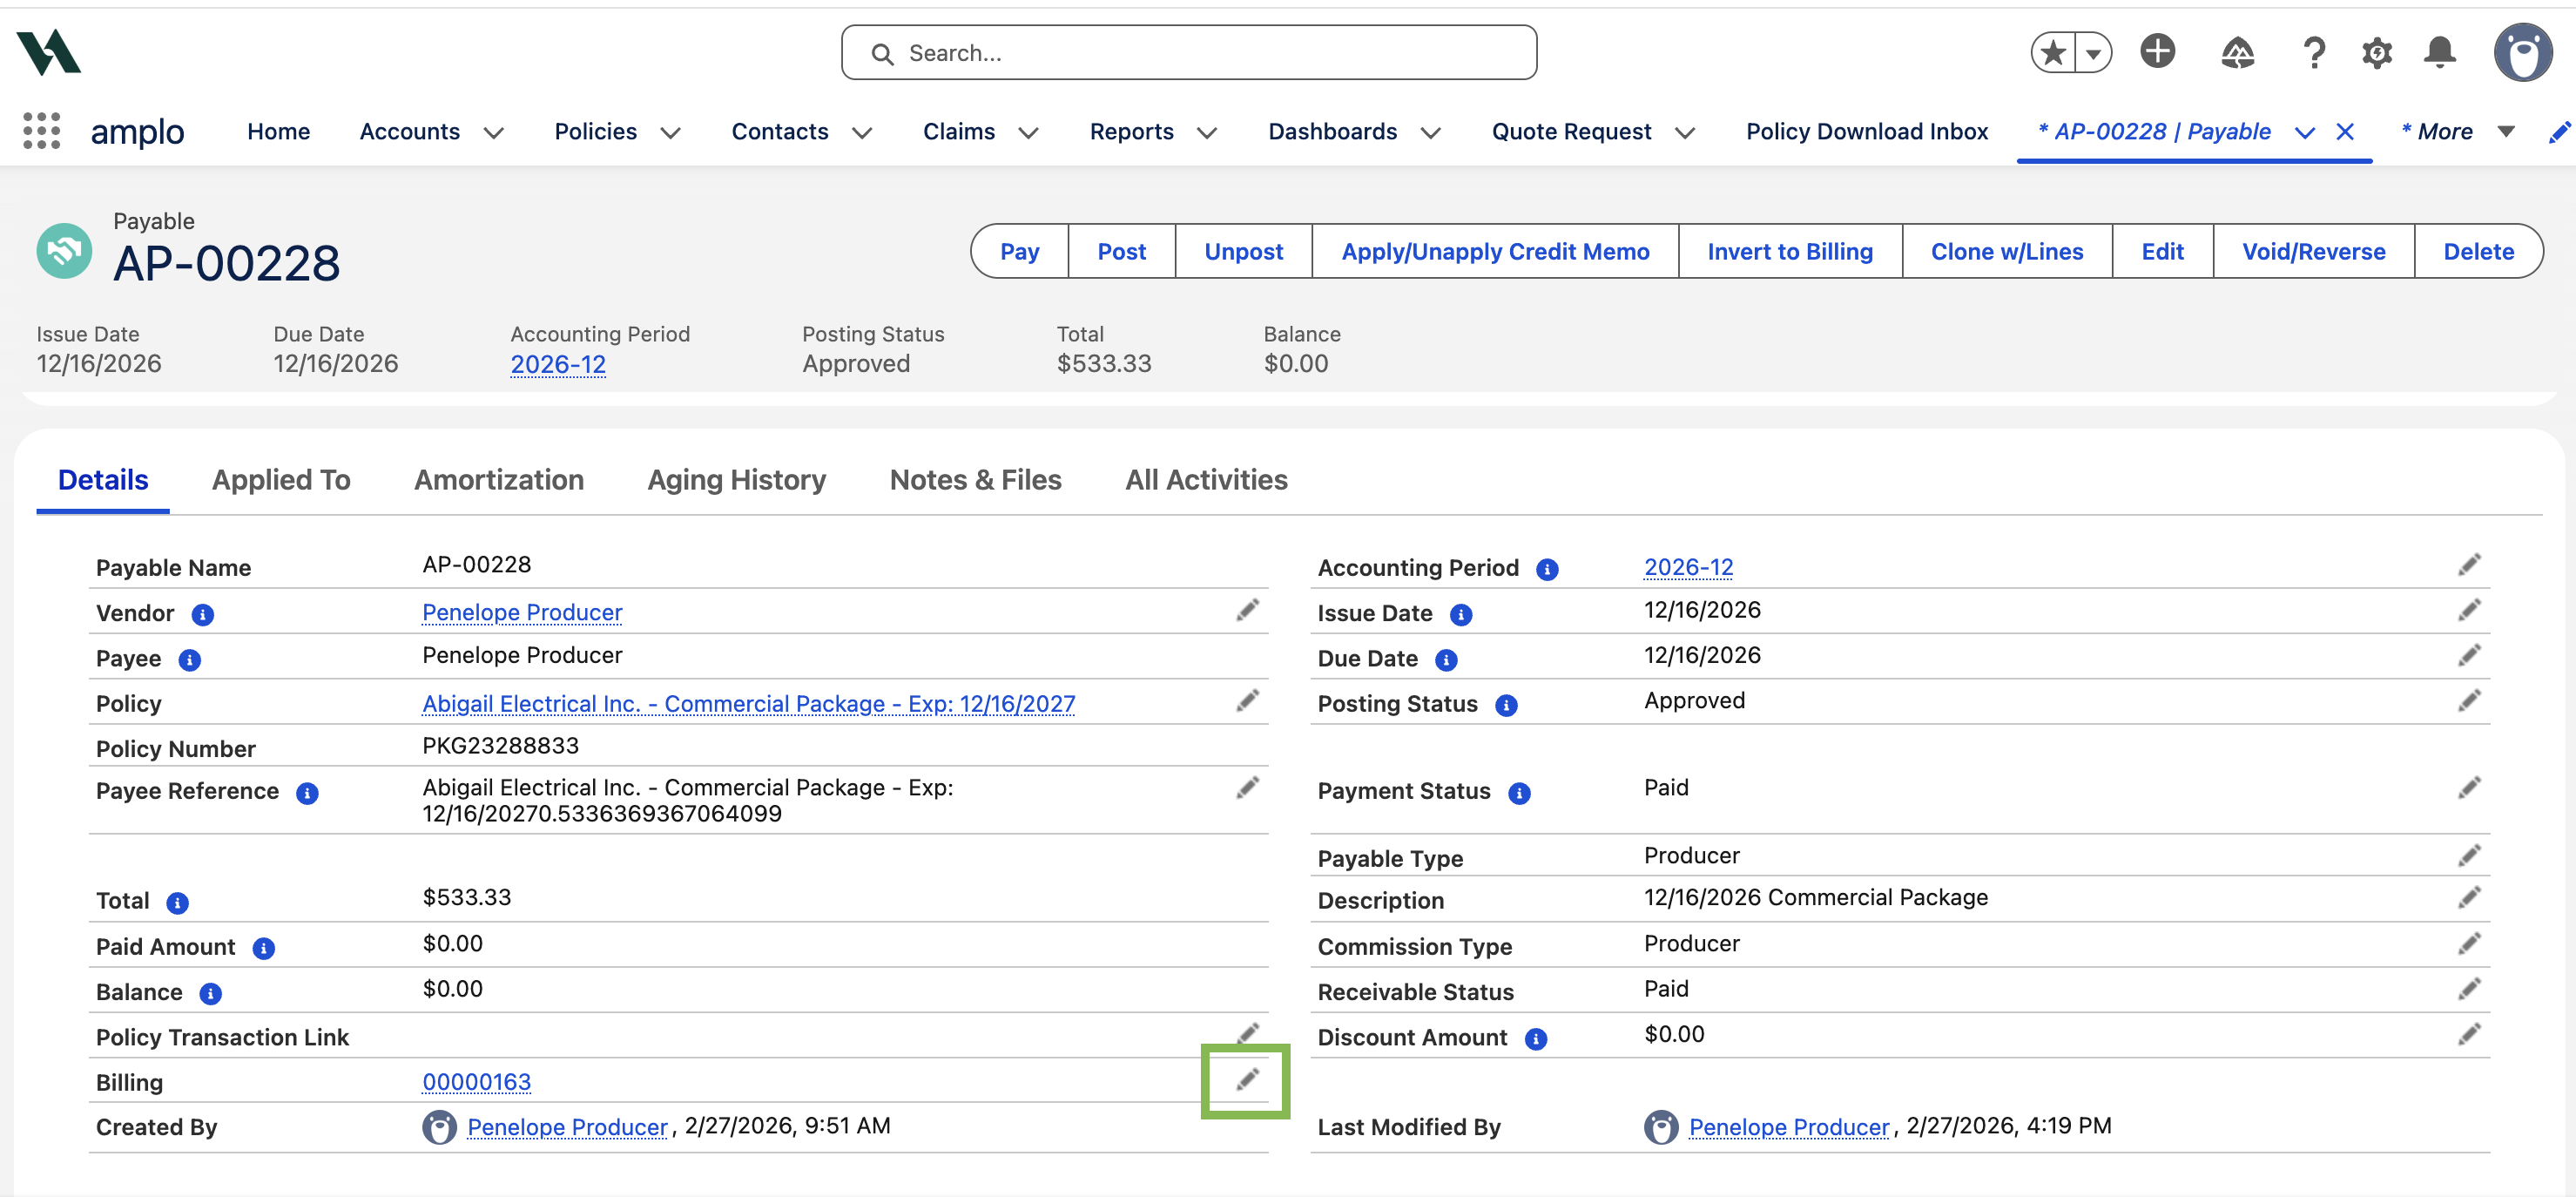
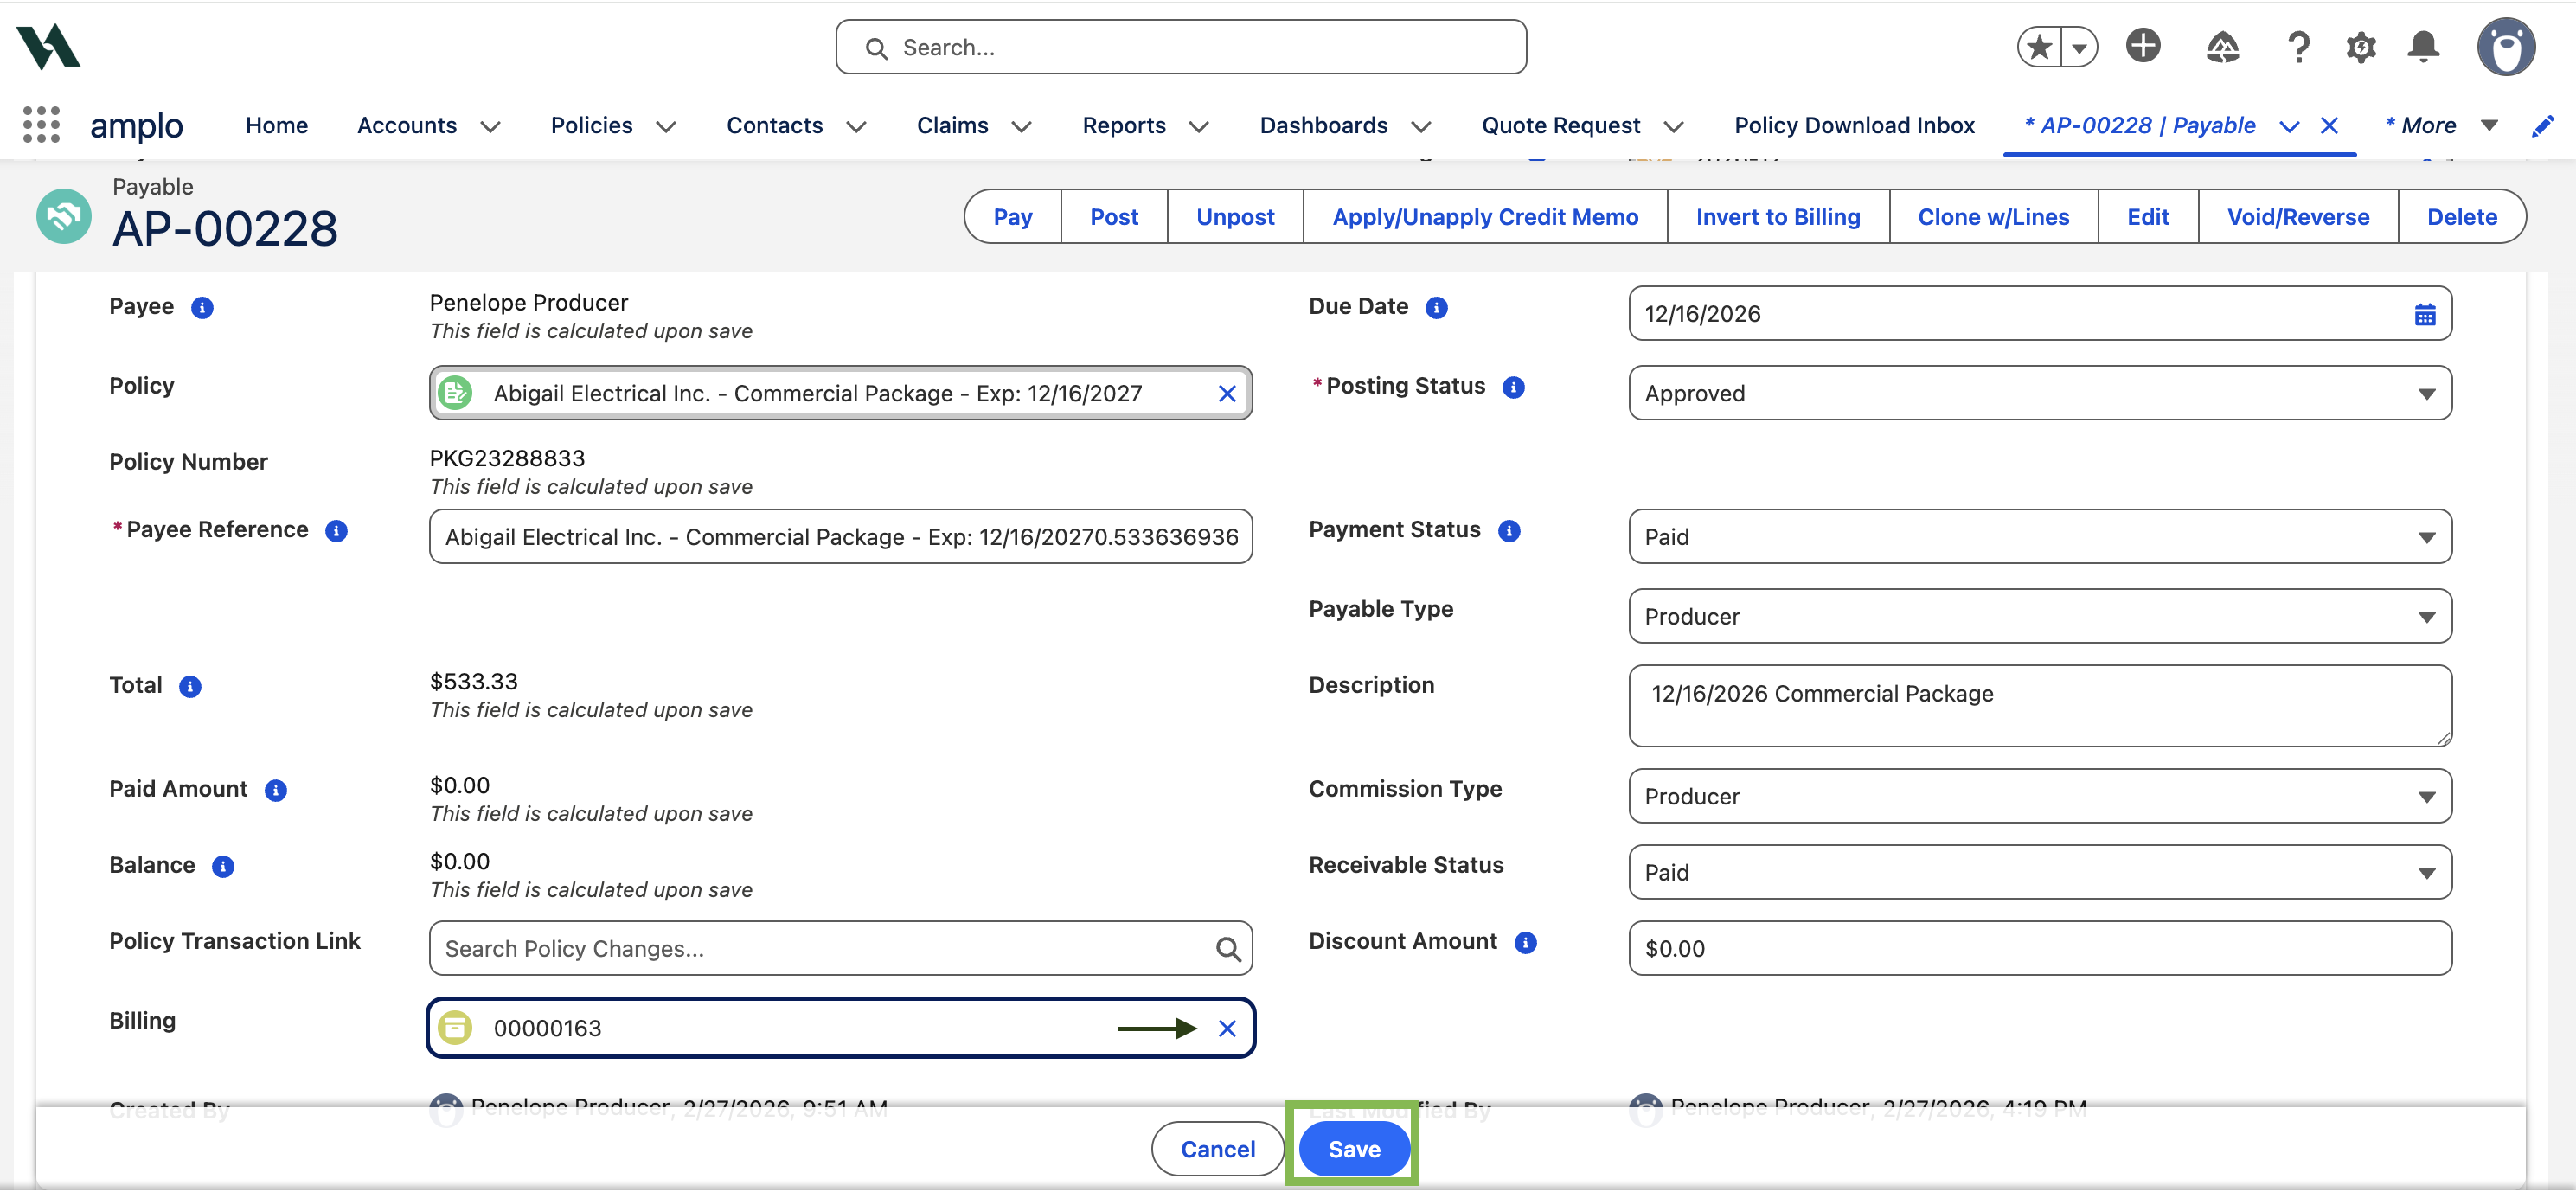
4. Click the X to remove the Billing link from the Payable, and click Save.
Navigate back to the Billing record, hover over the Billing Related Item Junction section, and select
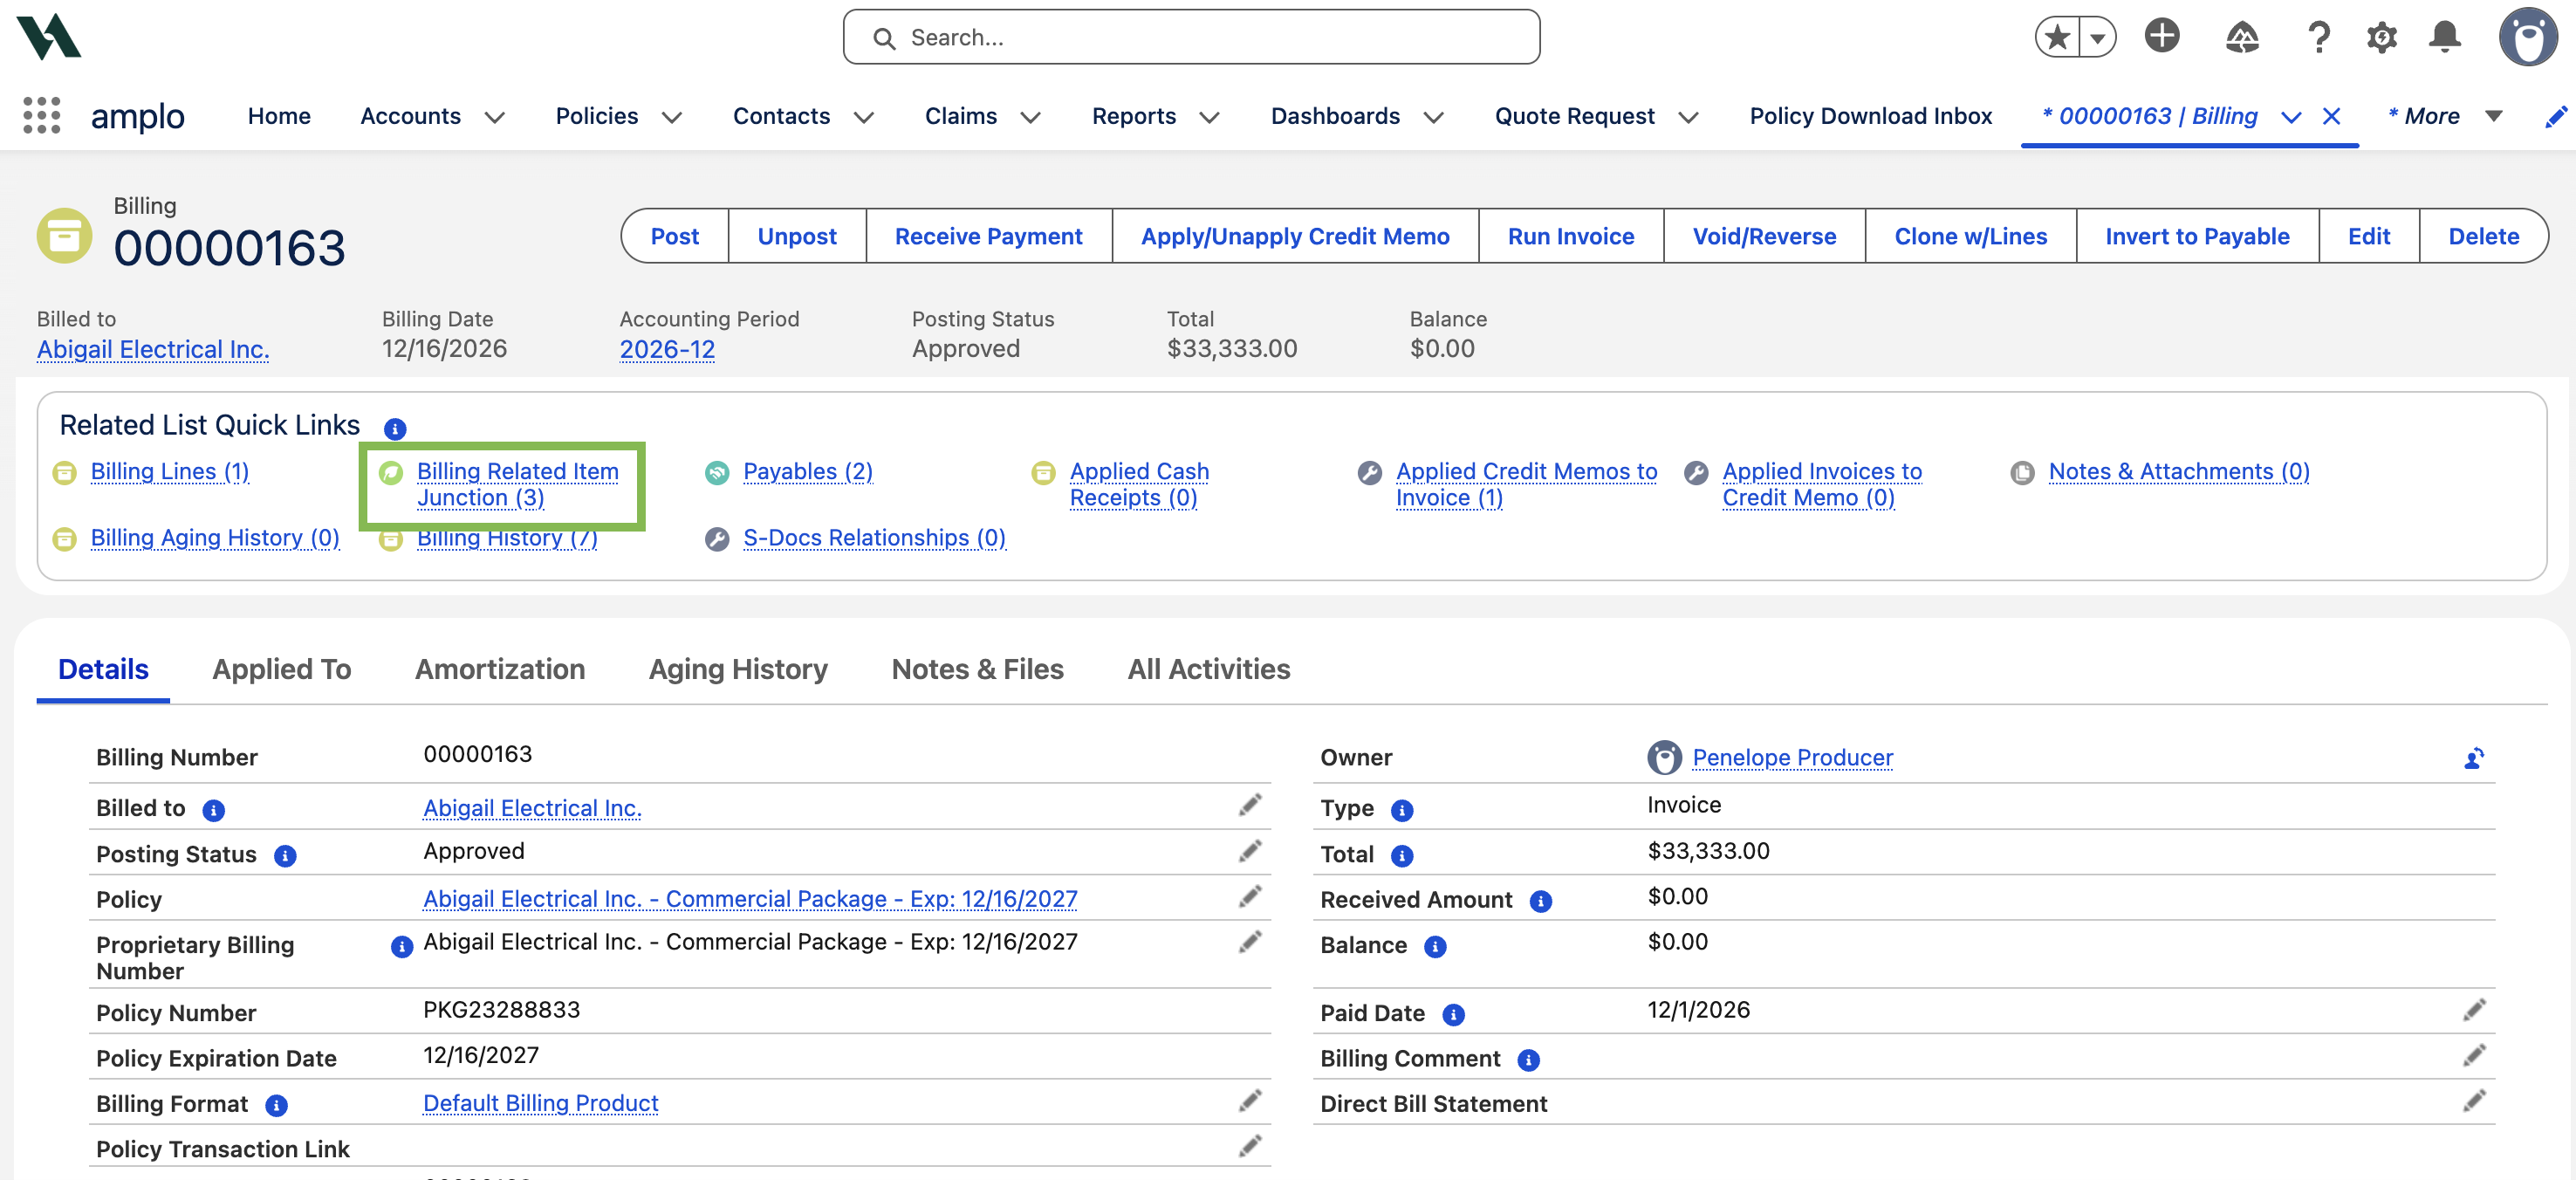
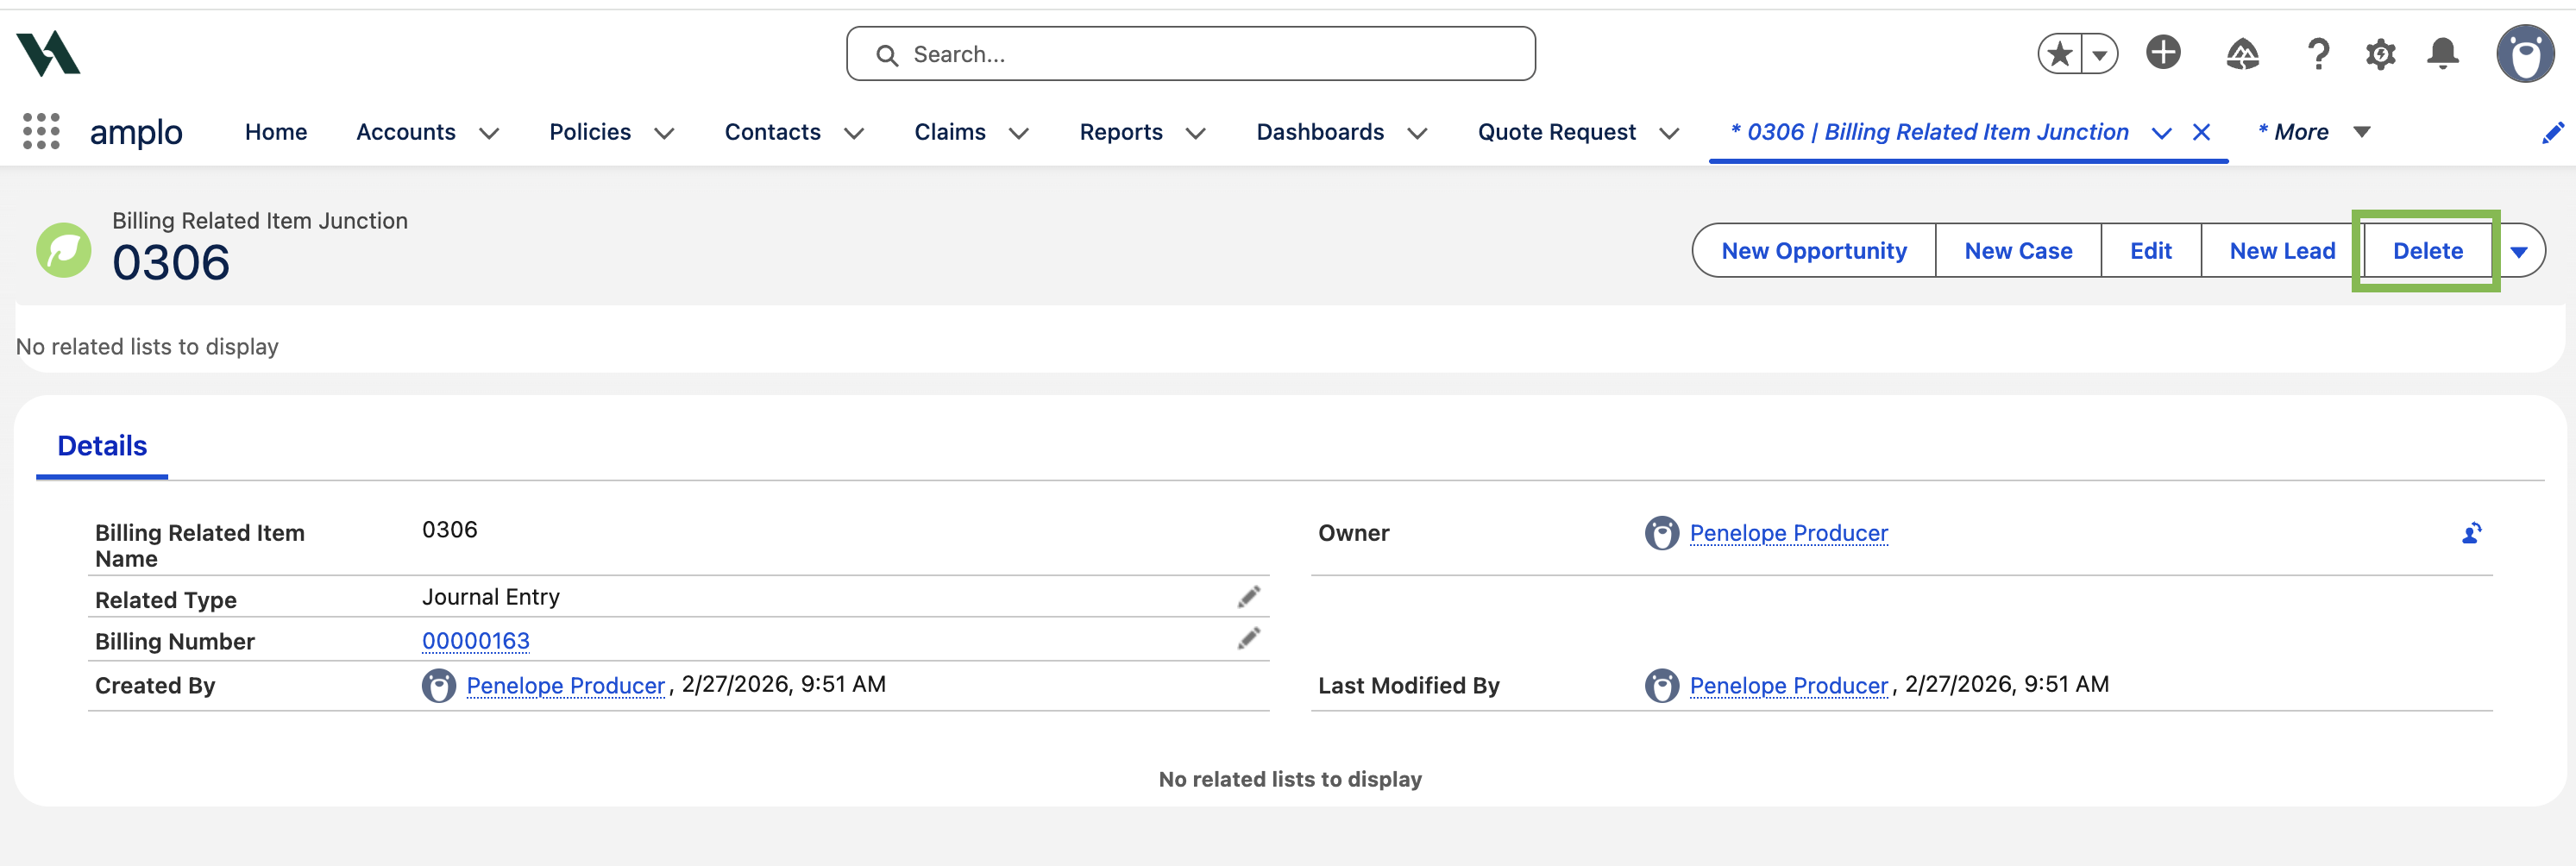
Click Delete on Billing Item Related Junction record.
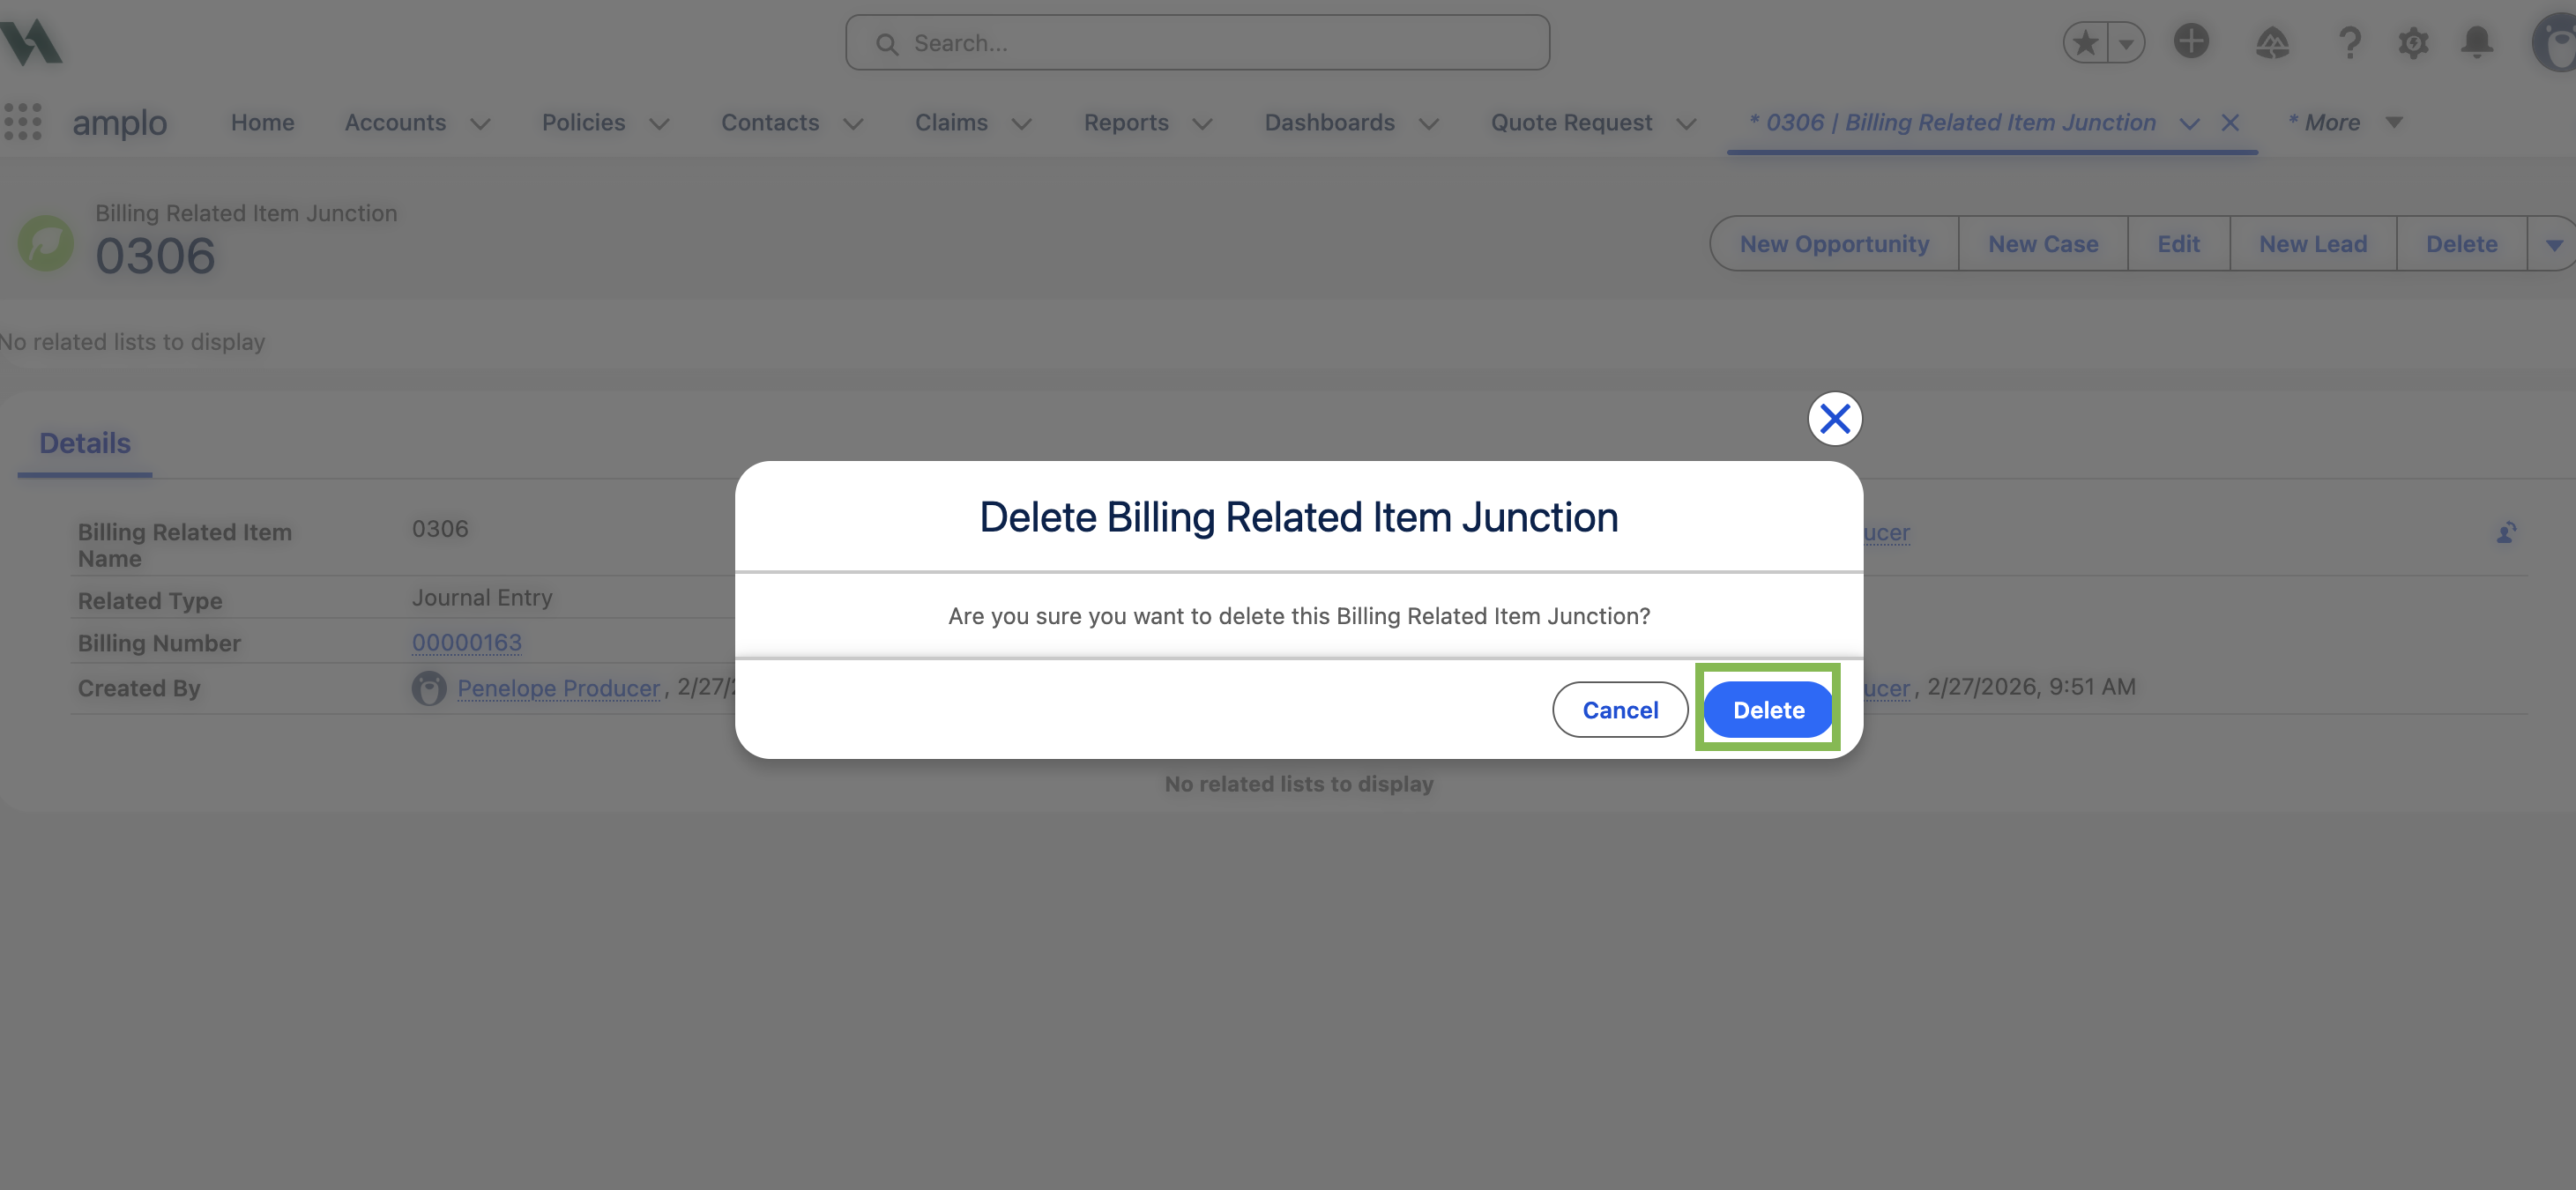
On the confirmation modal, click Delete.
Unapply cash receipts
Unapplied cash refers to payments that have not yet been matched to a billing. This allows you to record funds immediately and allocate them later.
Navigate to Cash Receipts.
Select the receipt.
Click Apply/Unapply.
Adjust the applied amounts as needed.
Reallocate funds to the appropriate billing(s).
Click Save & Complete.
Click Save & Complete.
When fully applied, the Cash Receipt balance updates to zero. Accurate management of unapplied cash prevents reconciliation issues and supports reliable reporting.
Refund cash receipts
Cash receipt refunds help agencies accurately manage overpayments, policy cancellations, and accounting corrections—while maintaining compliance and client trust.
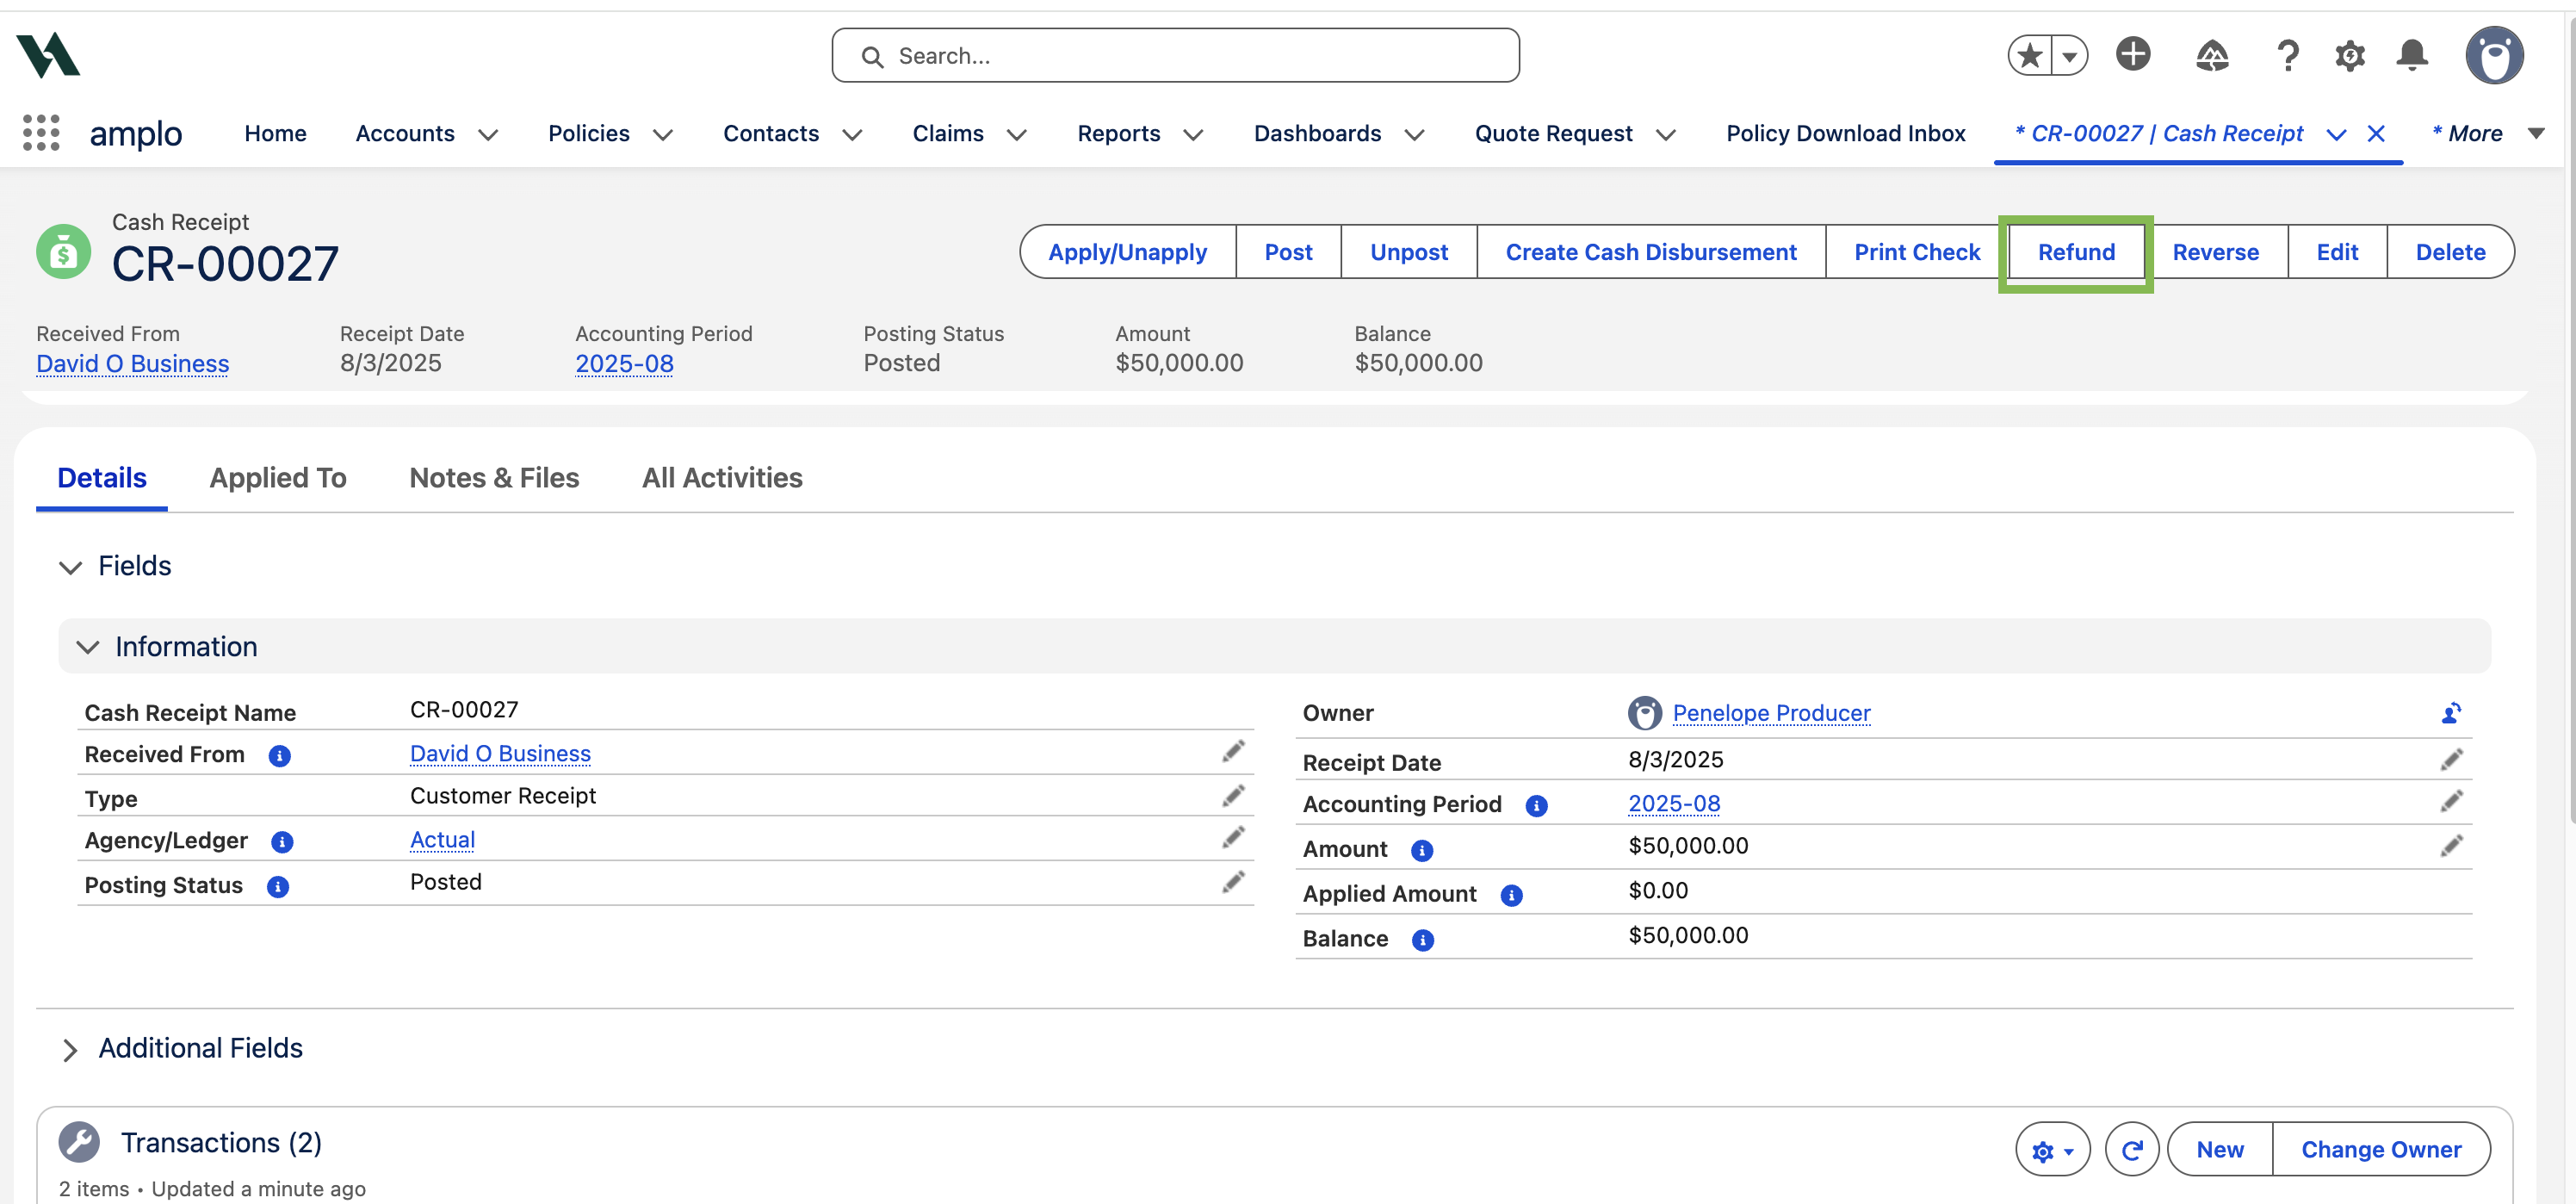
Navigate to the Cash Receipt to refund.
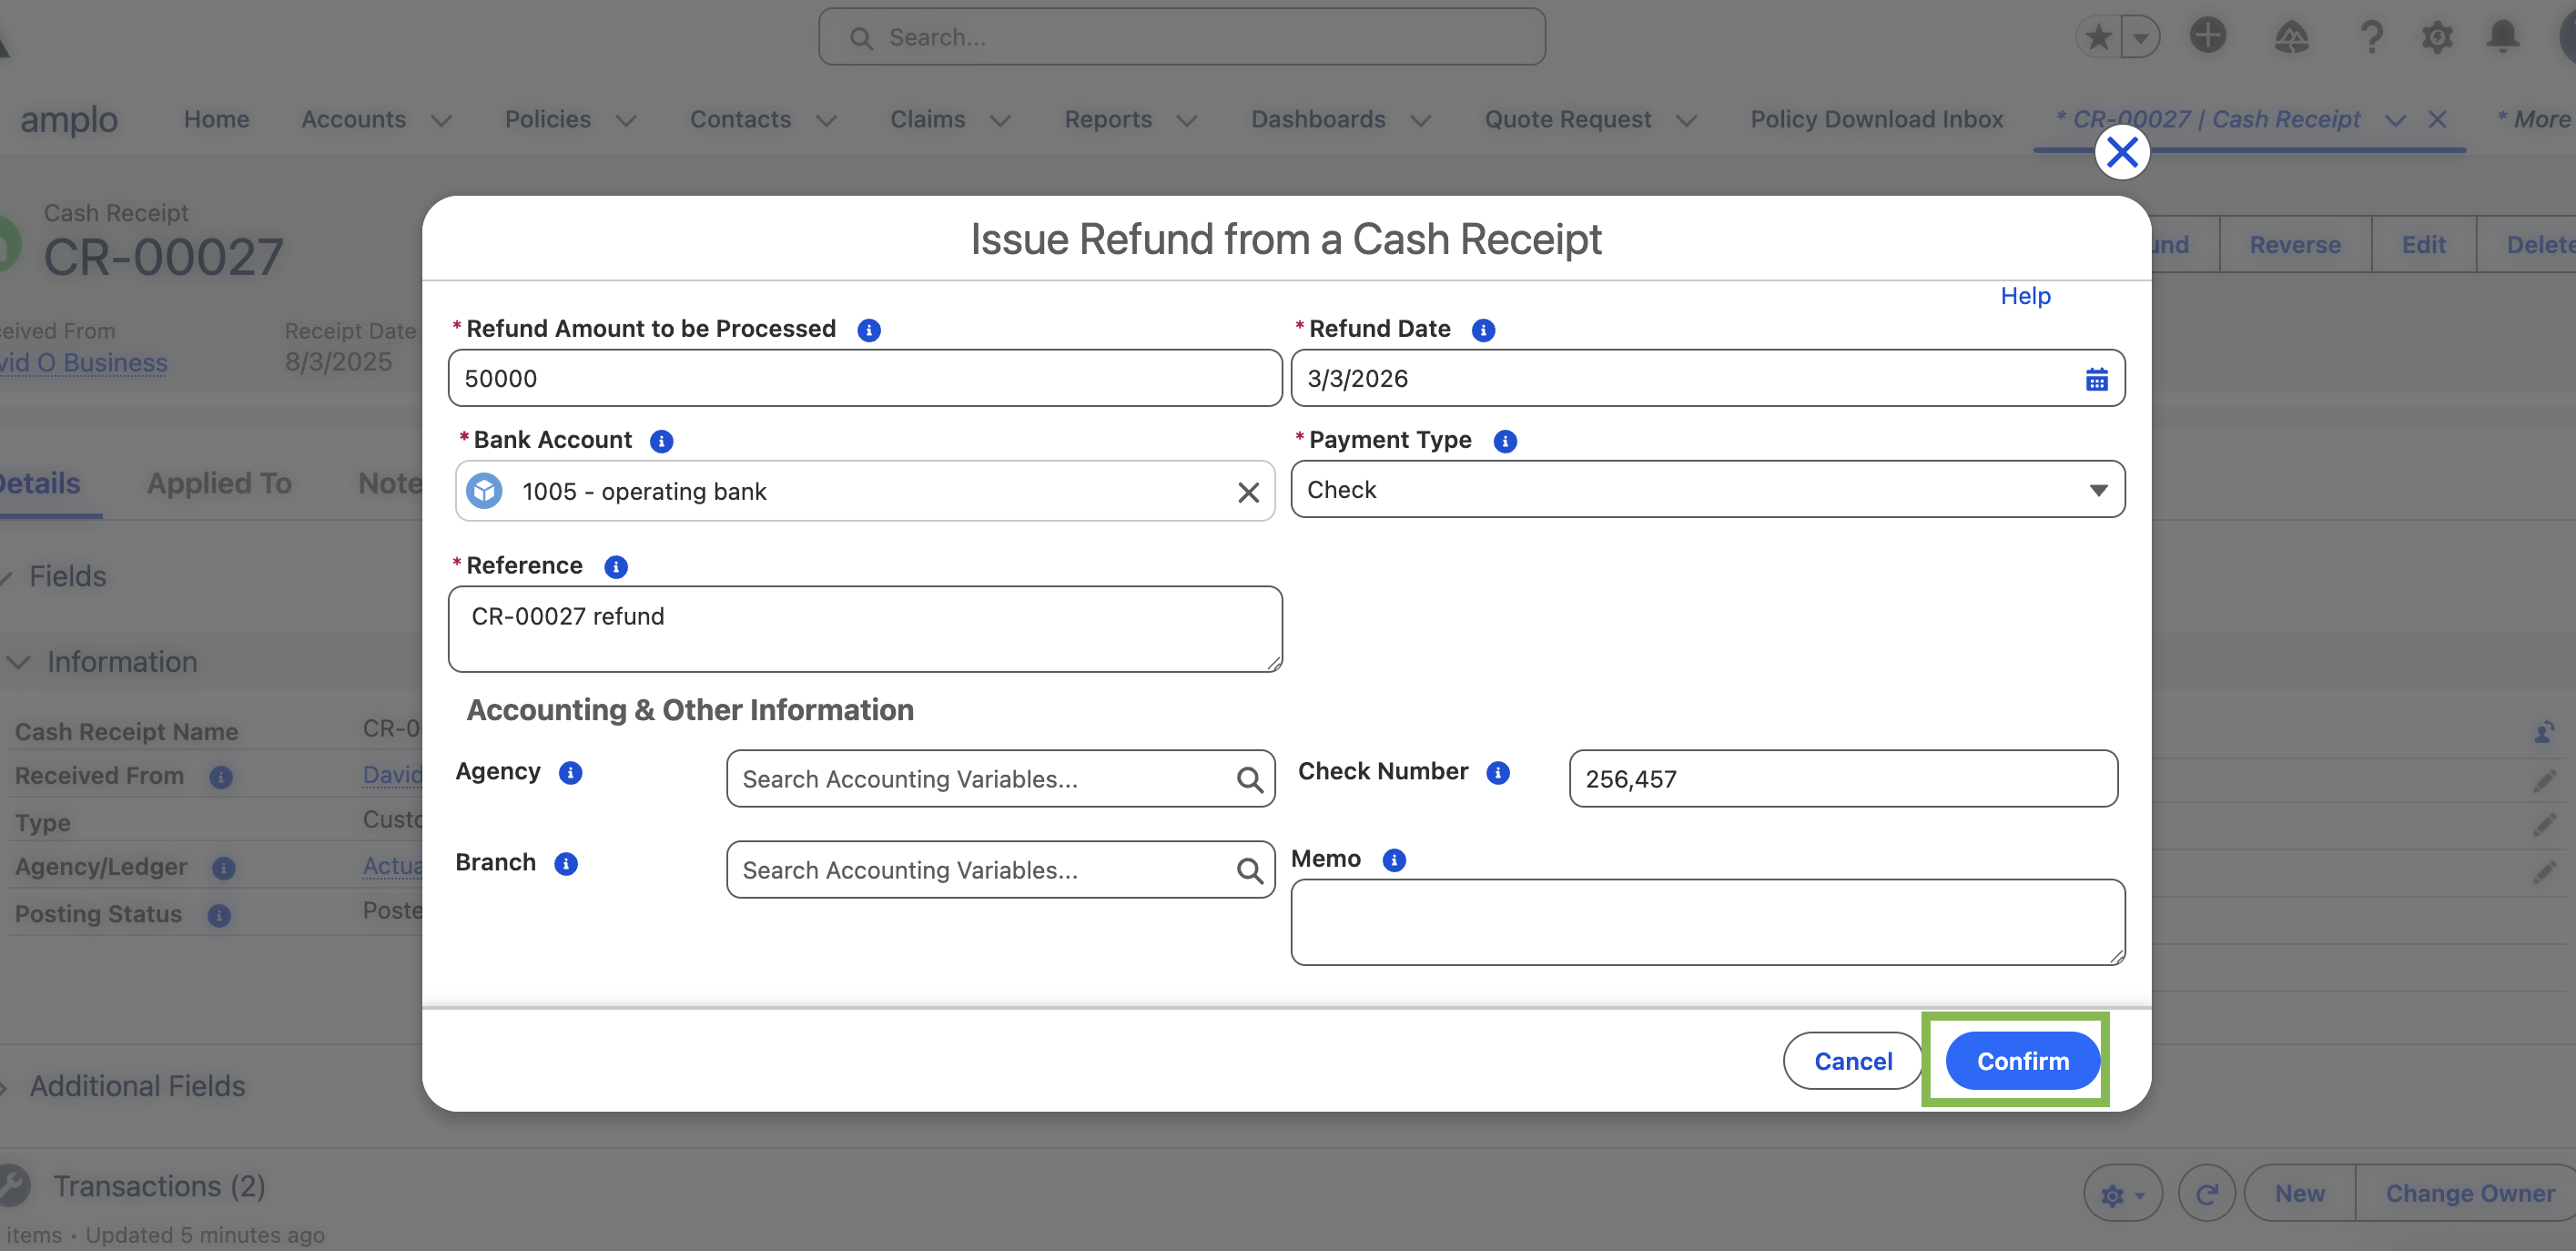
Click Refund.
In the Issue Refund from a Cash Receipt modal, complete and confirm the following:
Refund Amount to be Processed: Confirm the amount of the overpayment. Edit as needed.
Bank Account: Defaults to the account on the Cash Receipt.
Reference: Automatically pre-fills. Edit as needed.
Refund Date: Defaults to the current date. Edit as needed.
Payment Type: Select Check or Electronic.
Memo: Add any relevant notes.
Click Confirm.
Reverse cash receipts
A cash receipt may need to be reversed if it was applied incorrectly, duplicated, entered for the wrong amount, or if the payment was returned. Reversals are also used when policies are canceled or refunded after payment. This process ensures accurate records, proper reconciliation, and a clear audit trail.
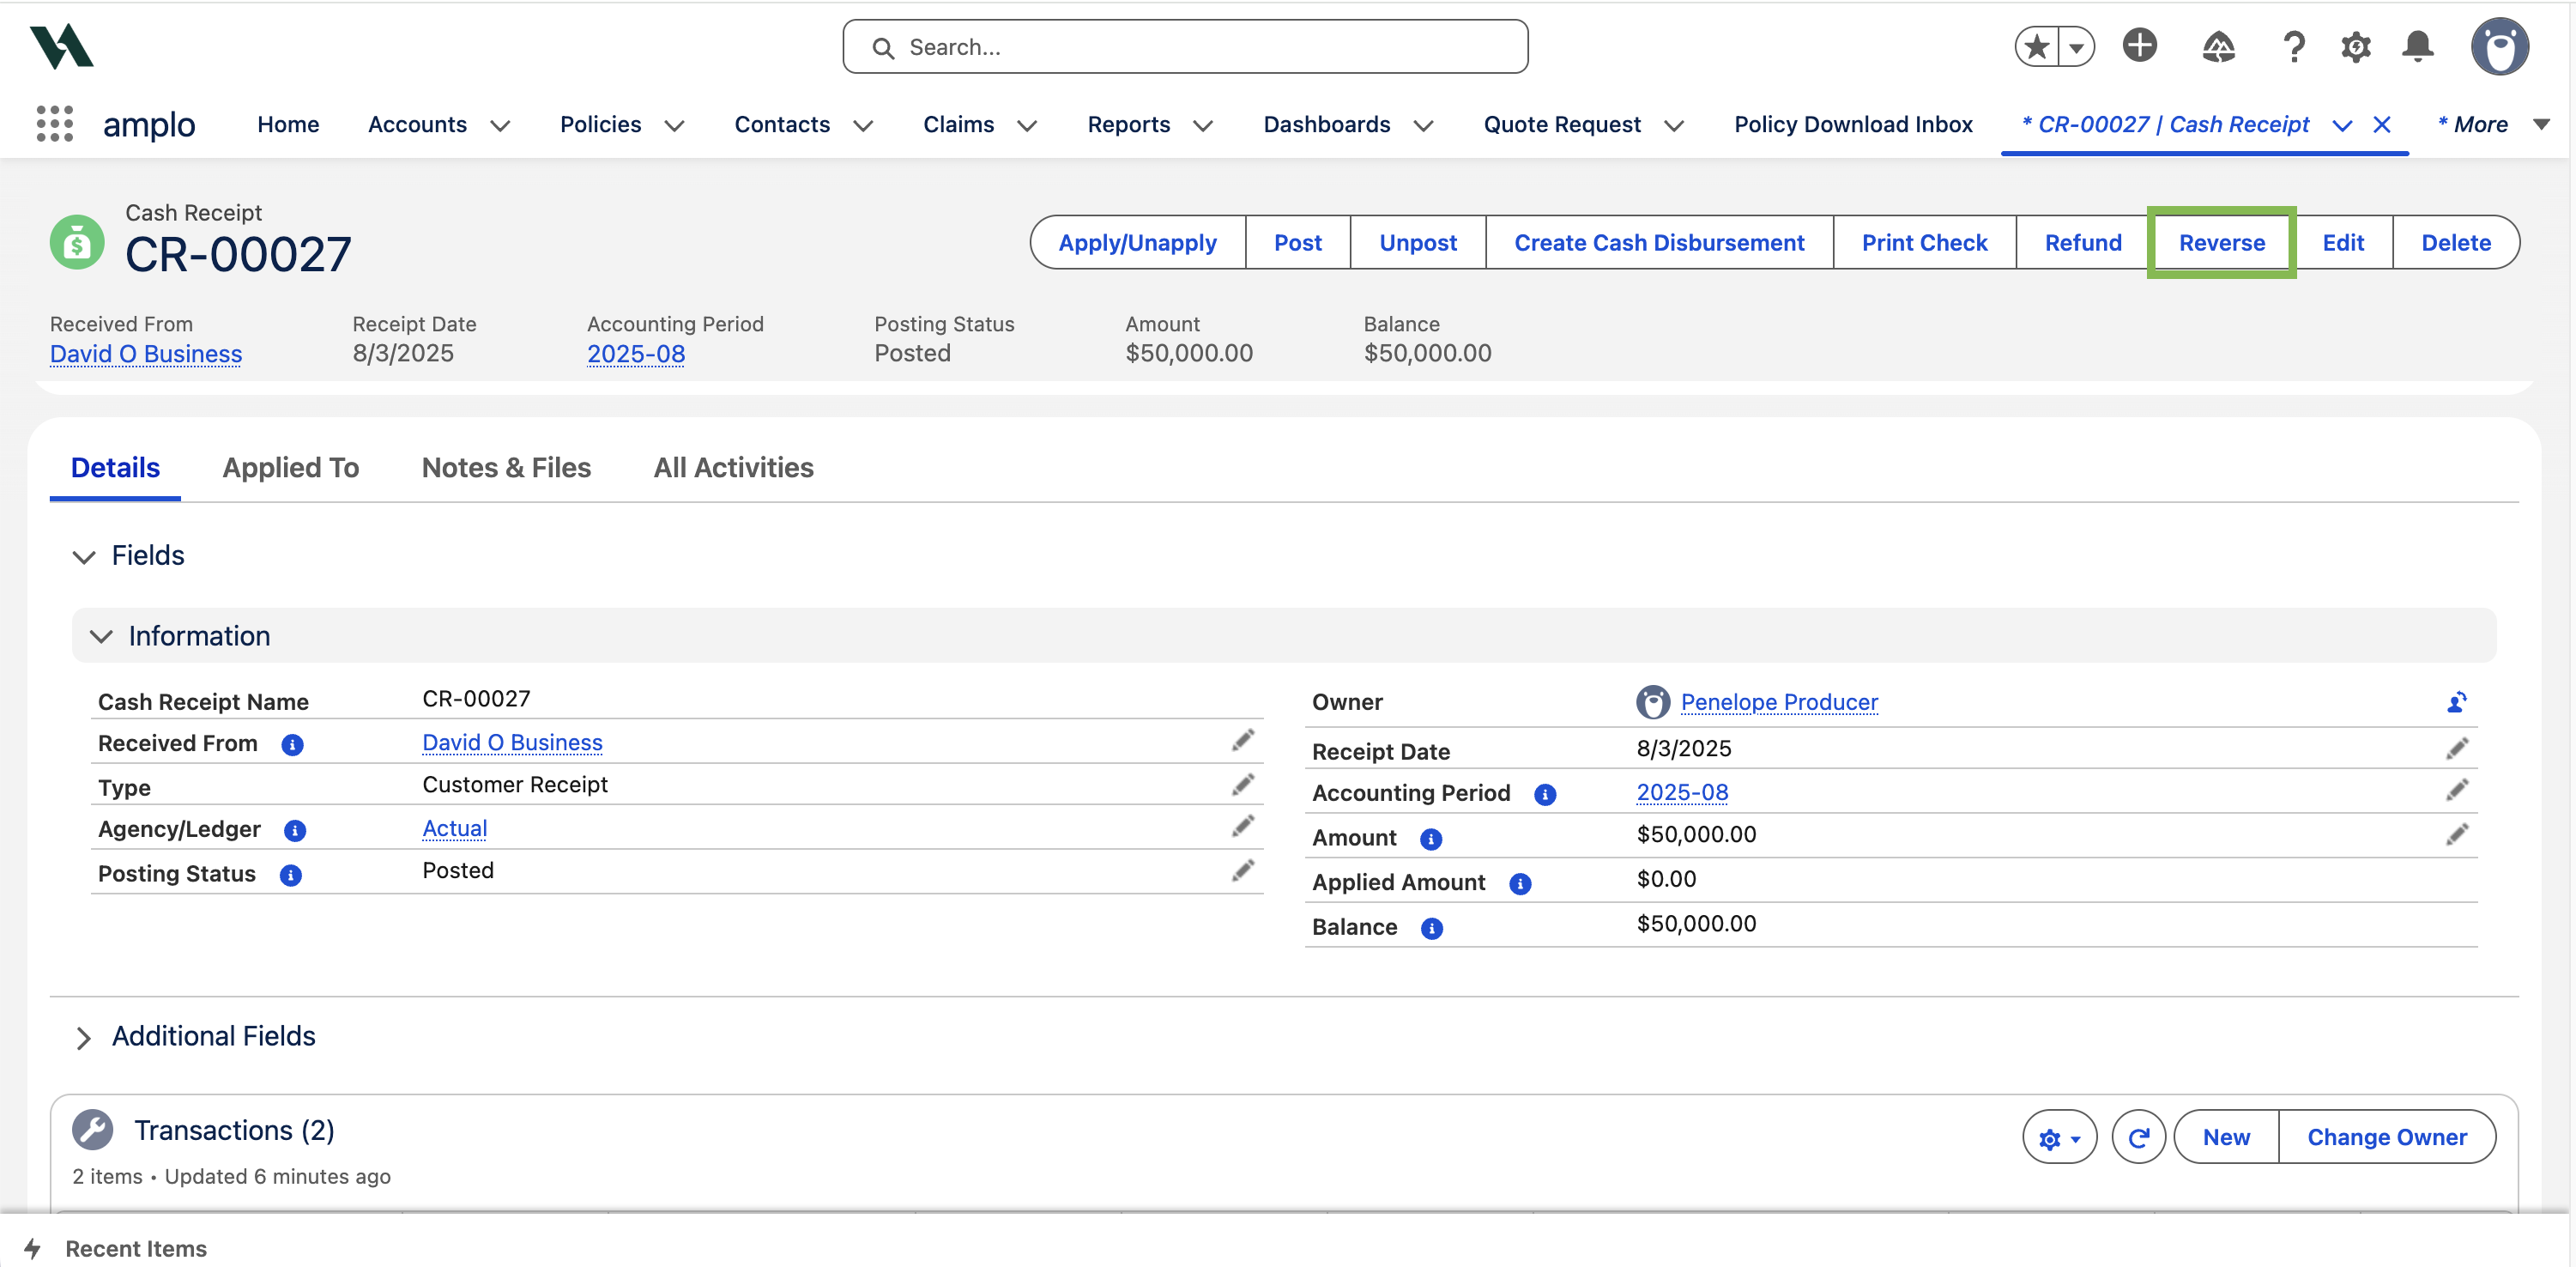
Navigate to the Cash Receipt record to reverse.
Click Reverse.
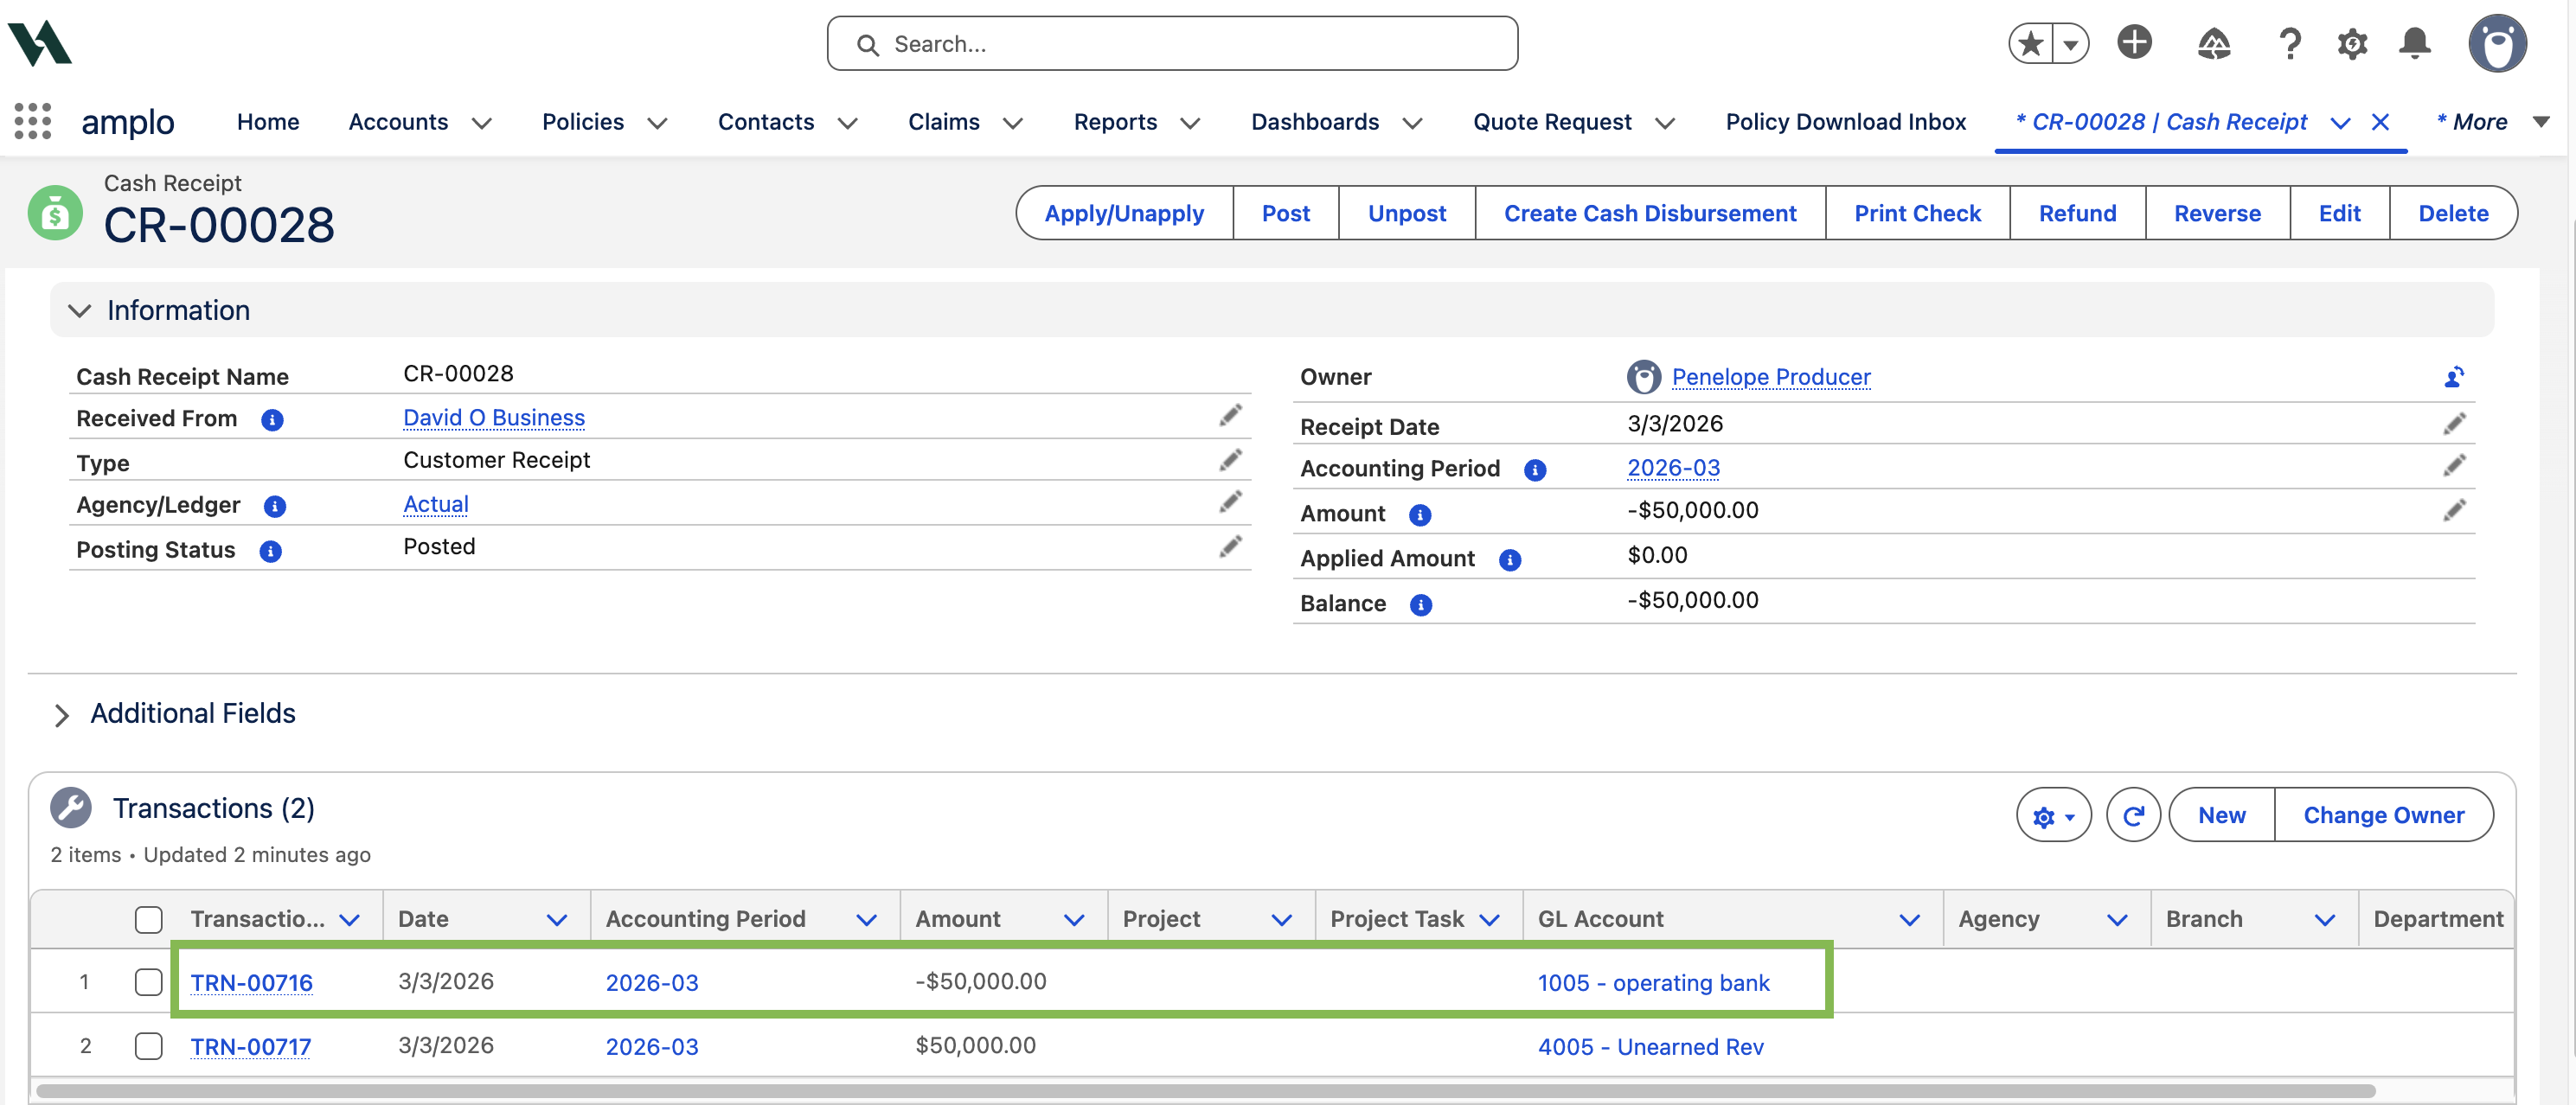
A new Cash Receipt with a negative balance is created.
Click Create Cash Disbursement.
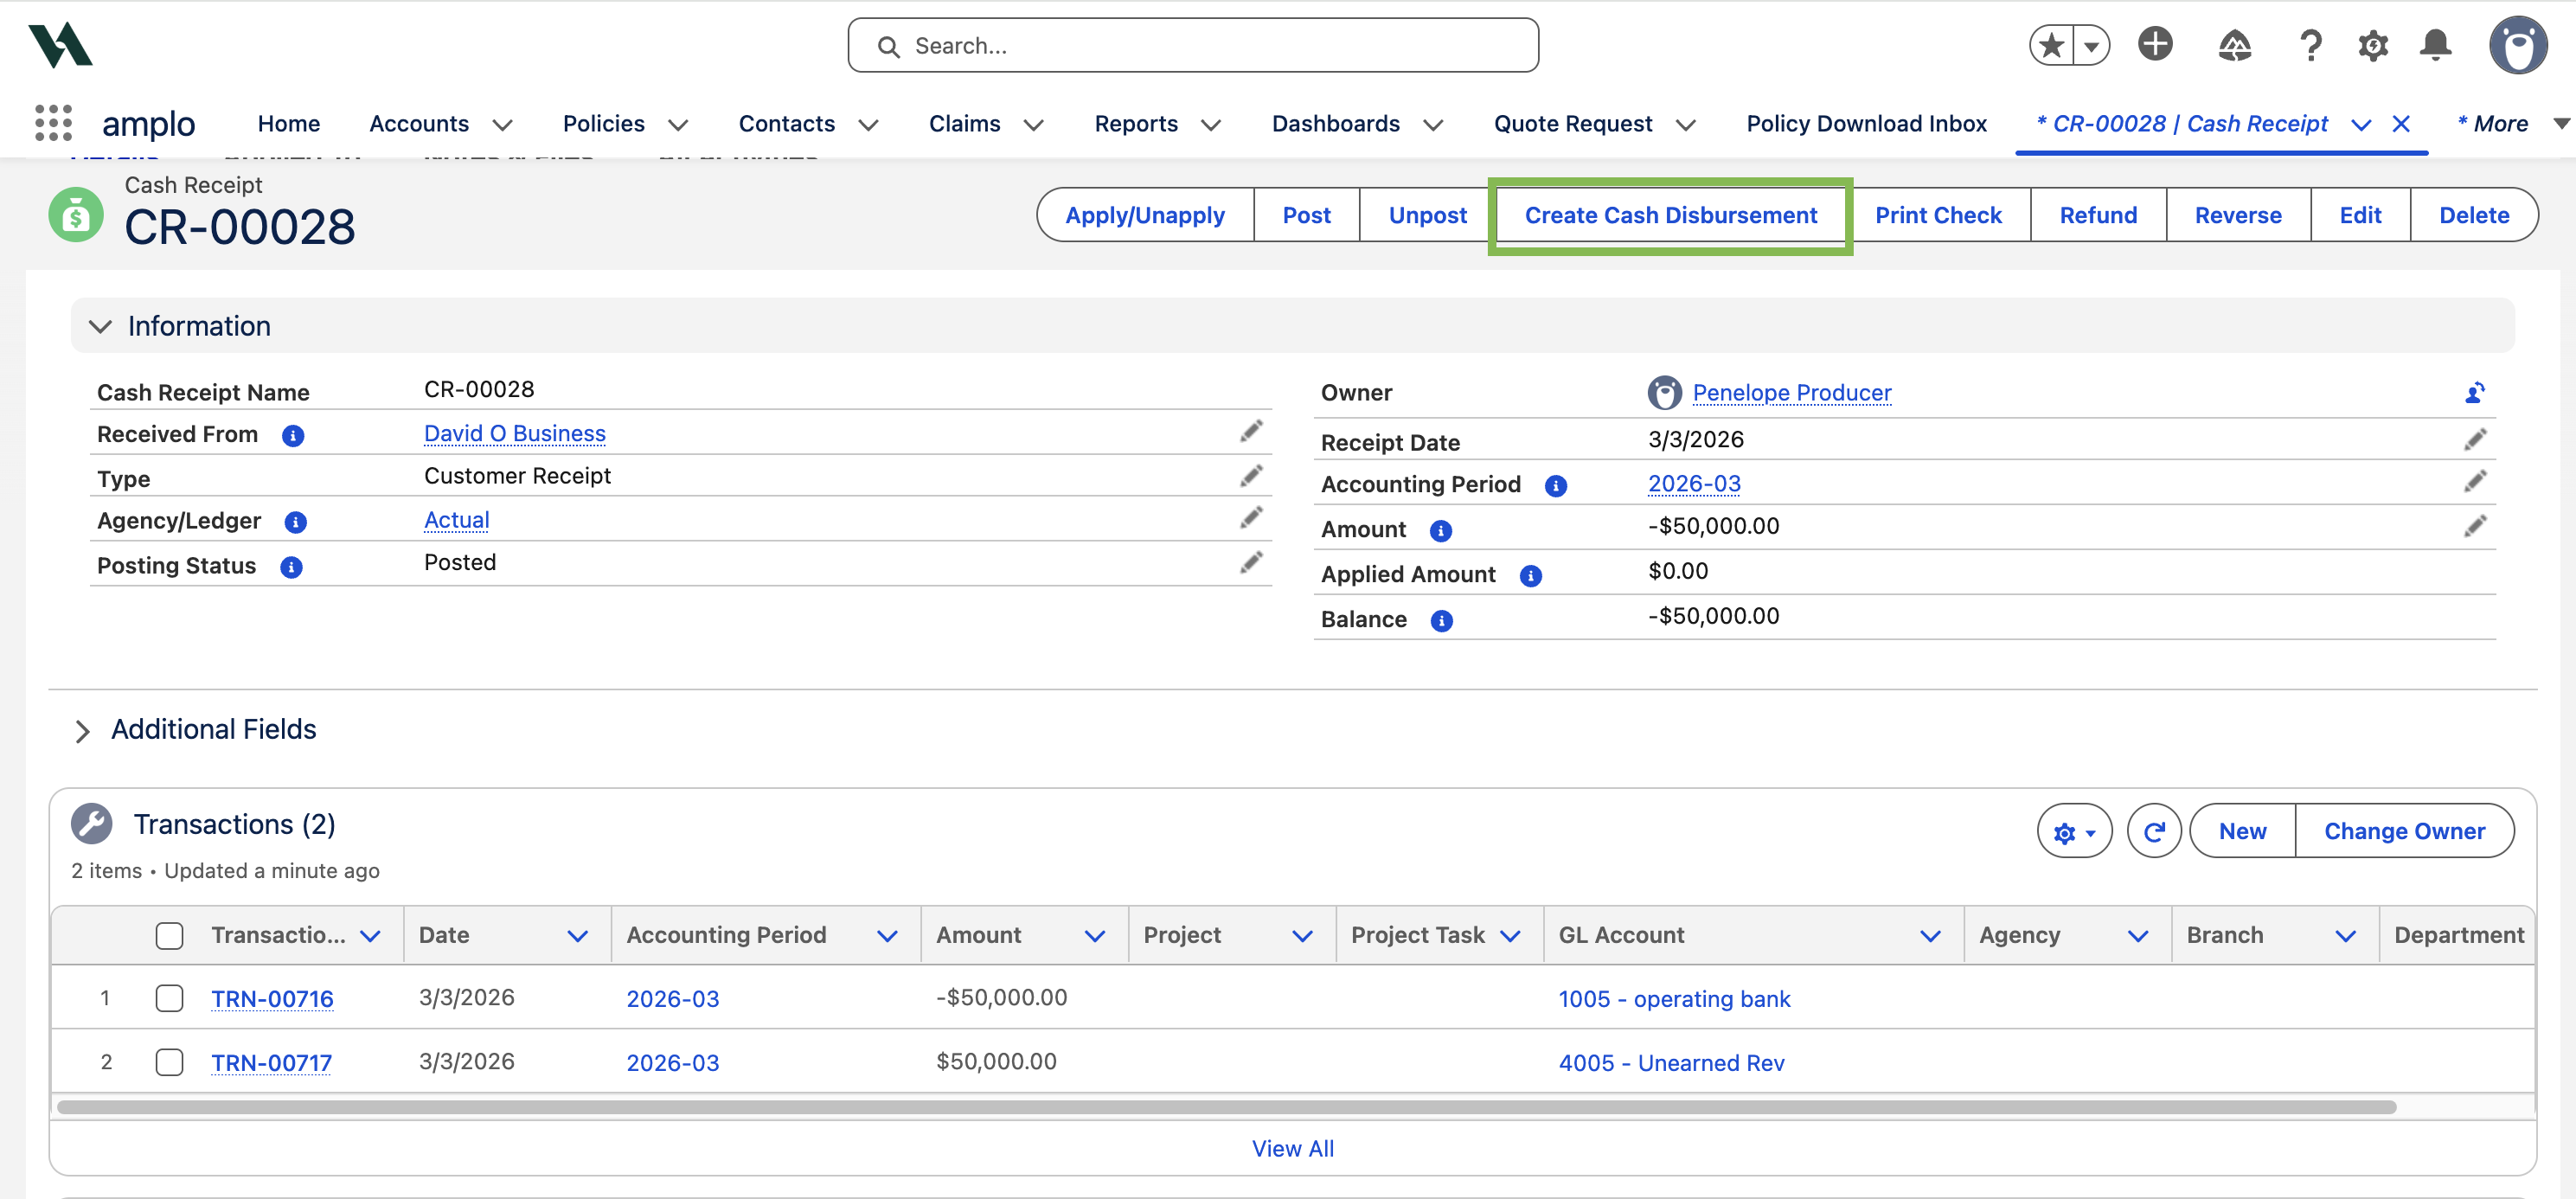
Verify that the cash receipt references the cash disbursement, and vice versa.
Applying cash receipts between parent and child accounts
An agency may receive payments from a parent account that should be allocated to one or more child accounts. Conversely, payments may also be received from a child account that need to be shared with the parent account or other related child accounts.
Navigate to the Account that received the payment.
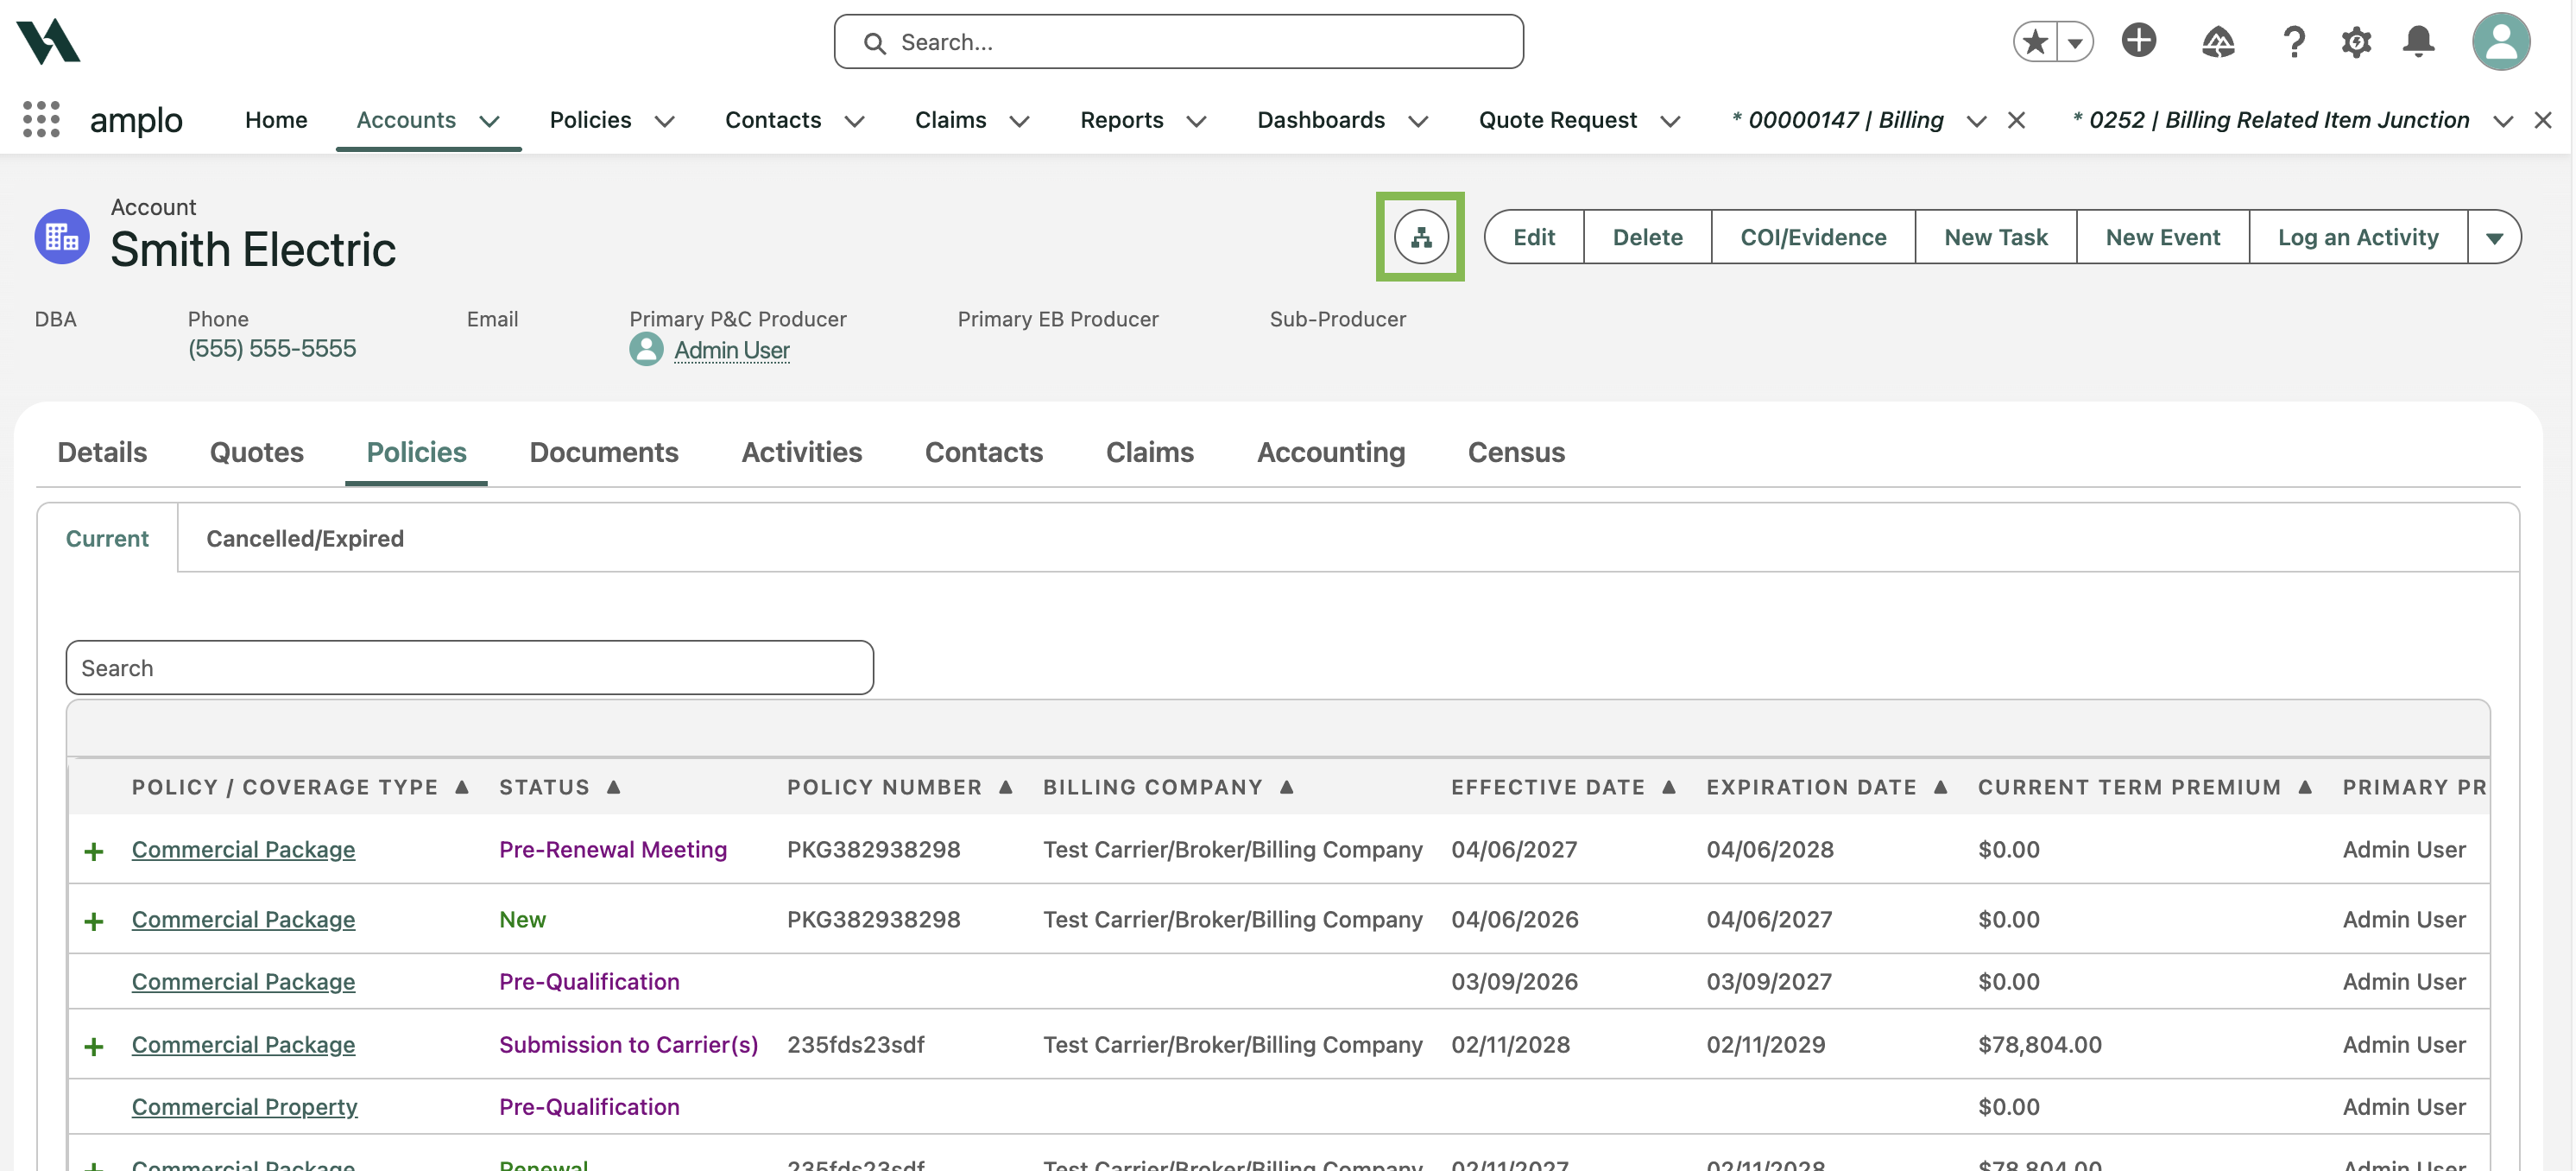
Click the View Account Hierarchy button
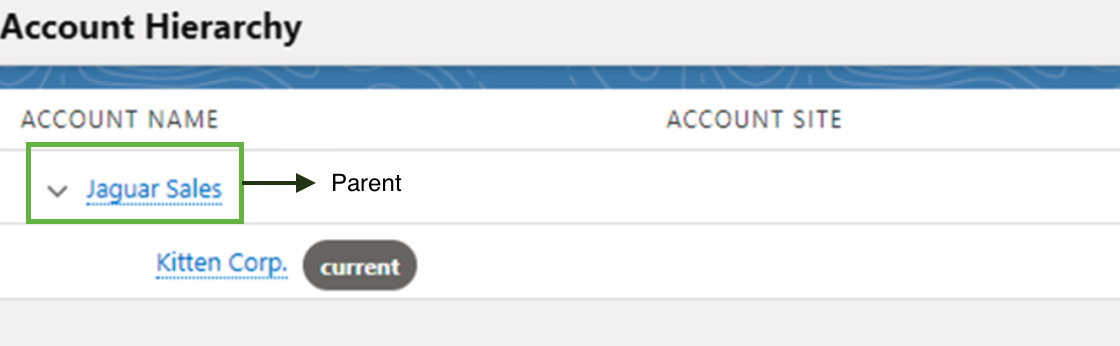
Determine if the account is the parent or child.
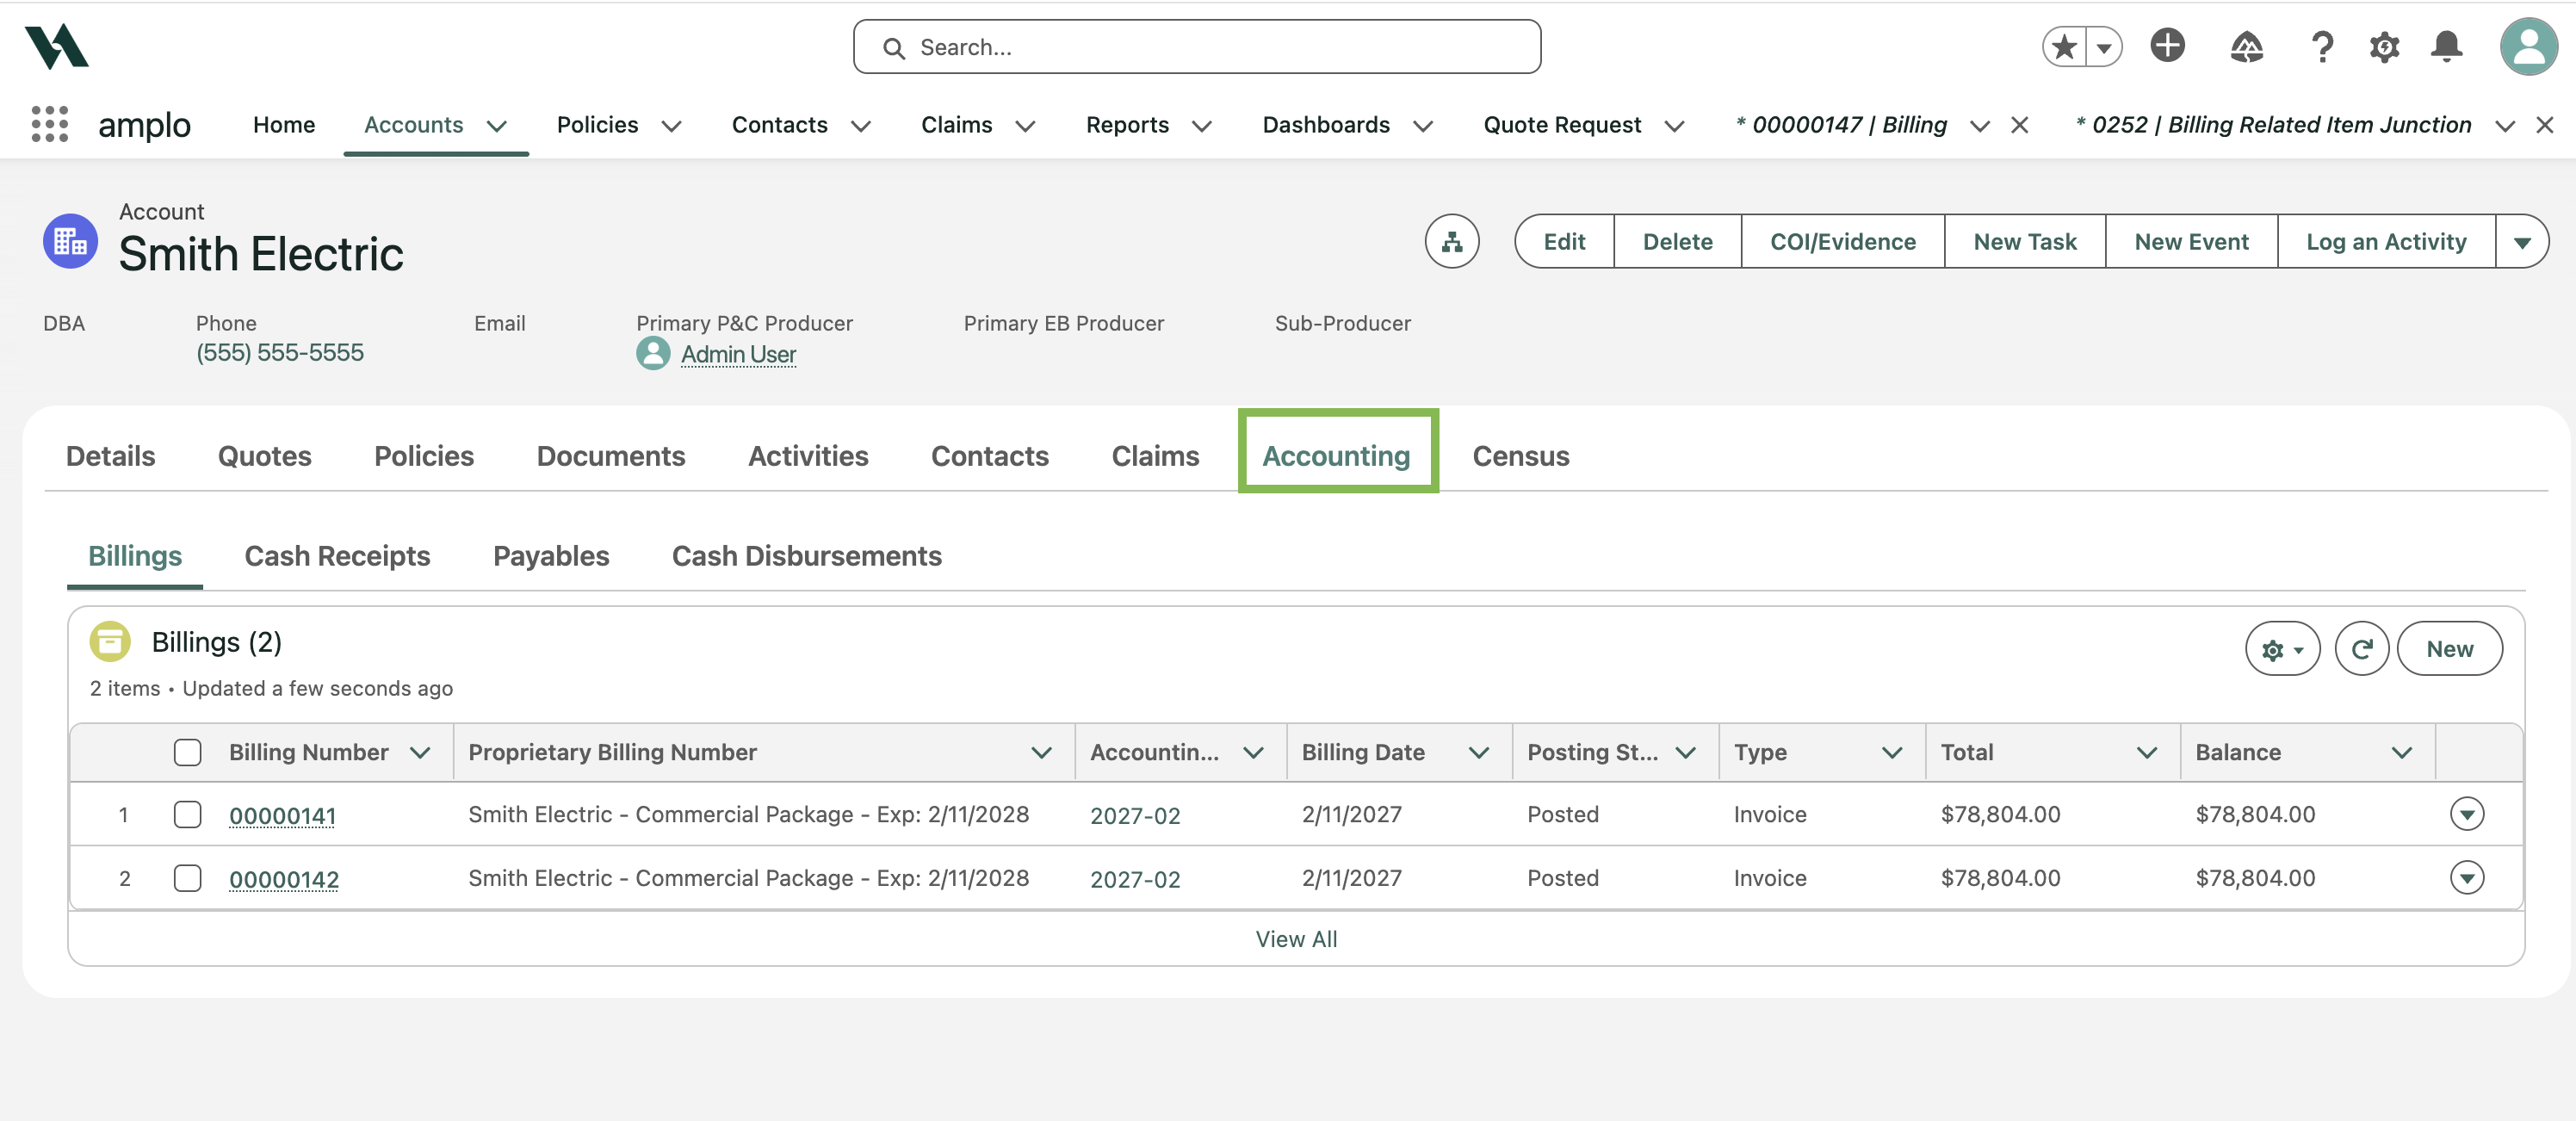
Click the Accounting tab.
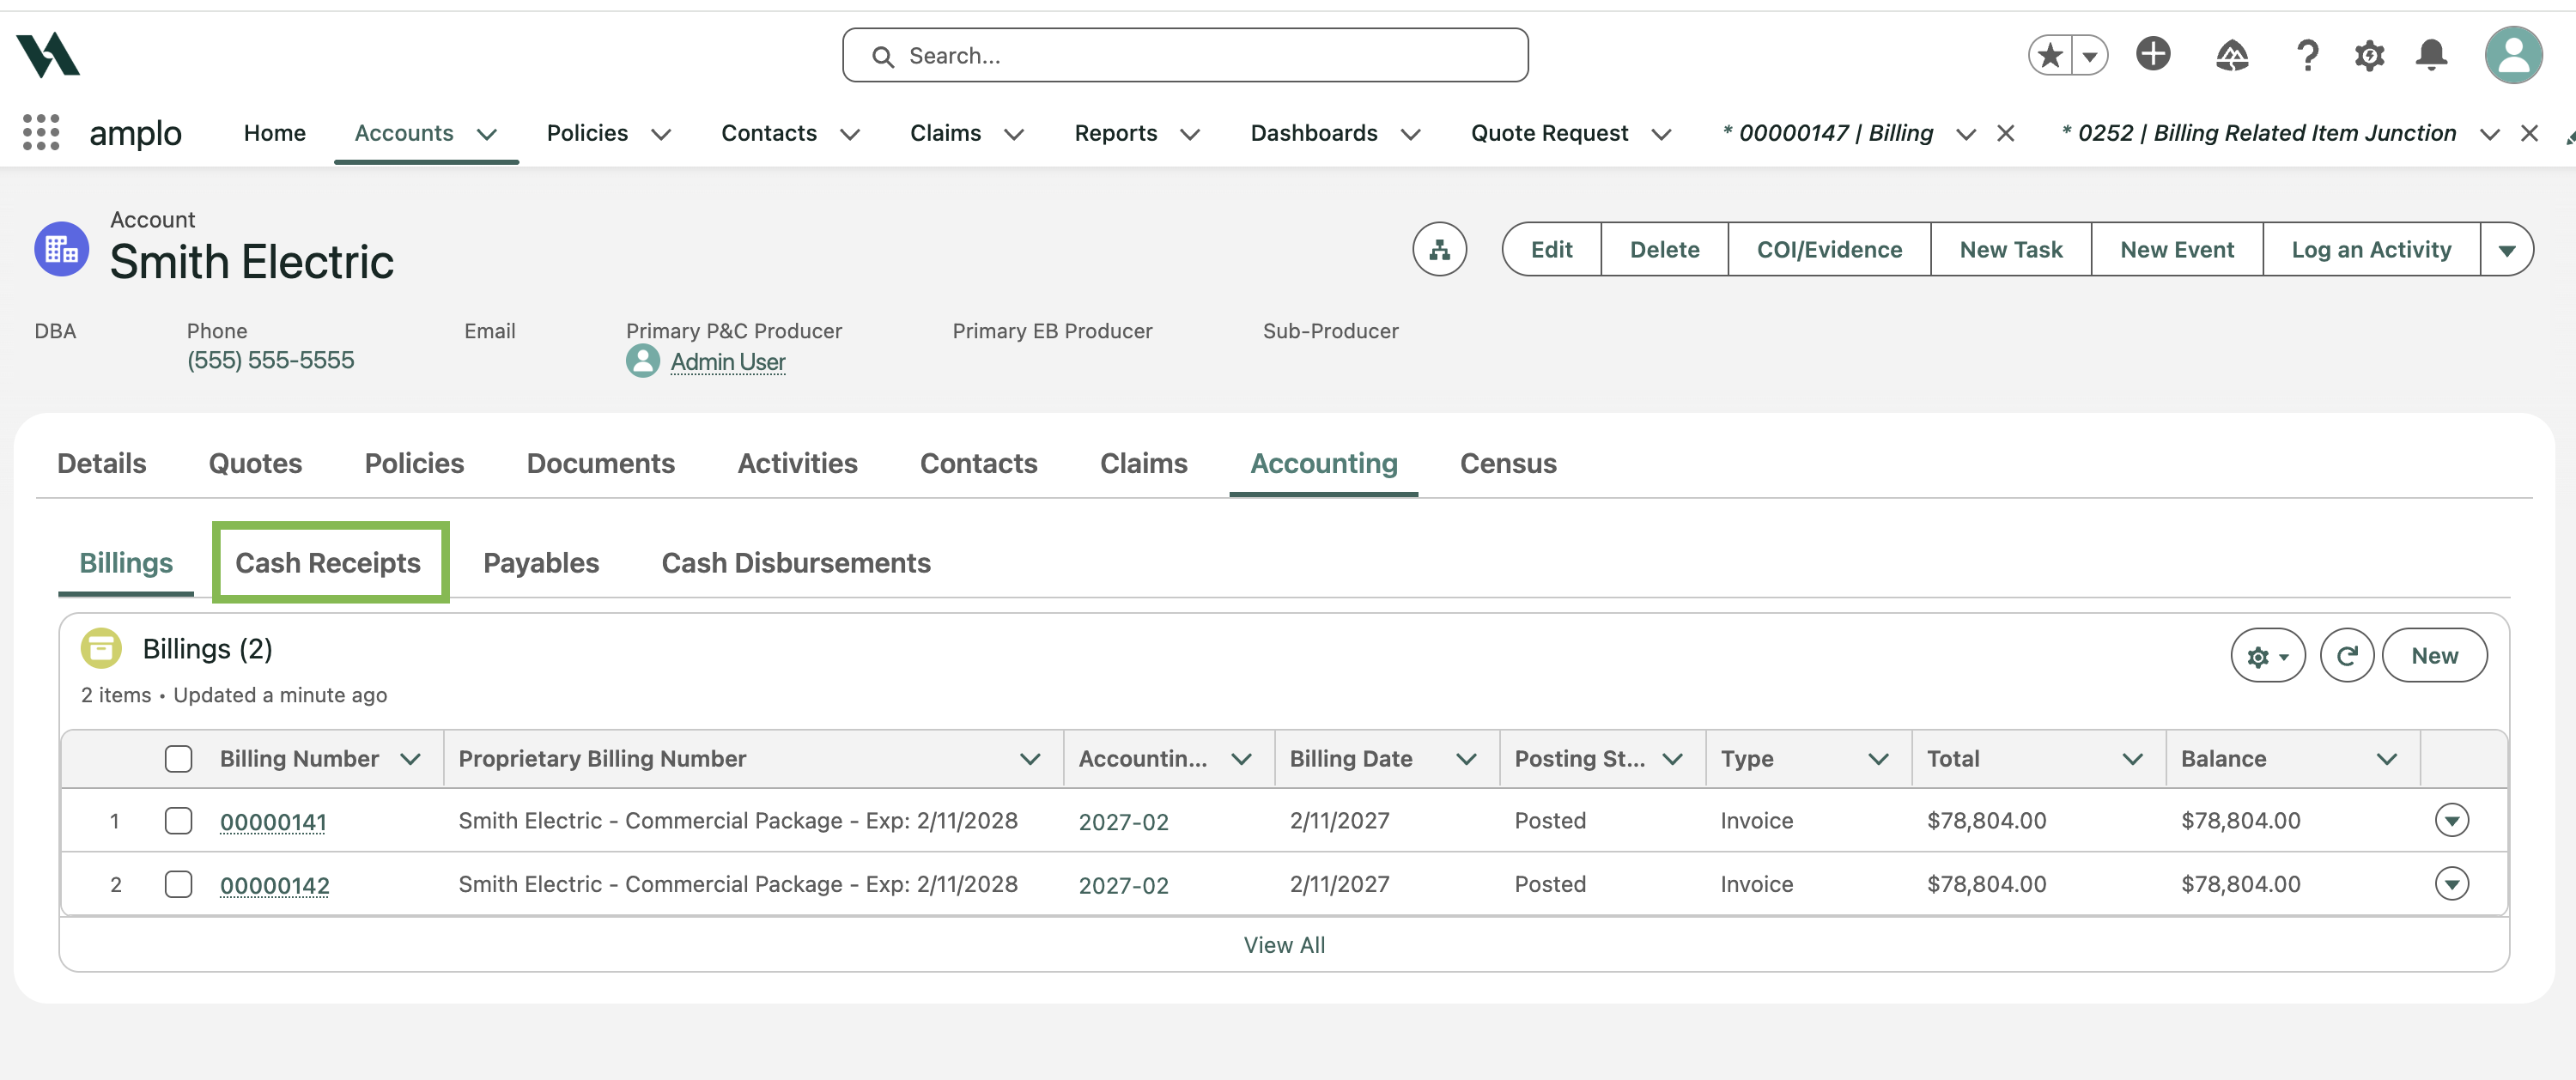
Click Cash Receipts.
Click New.
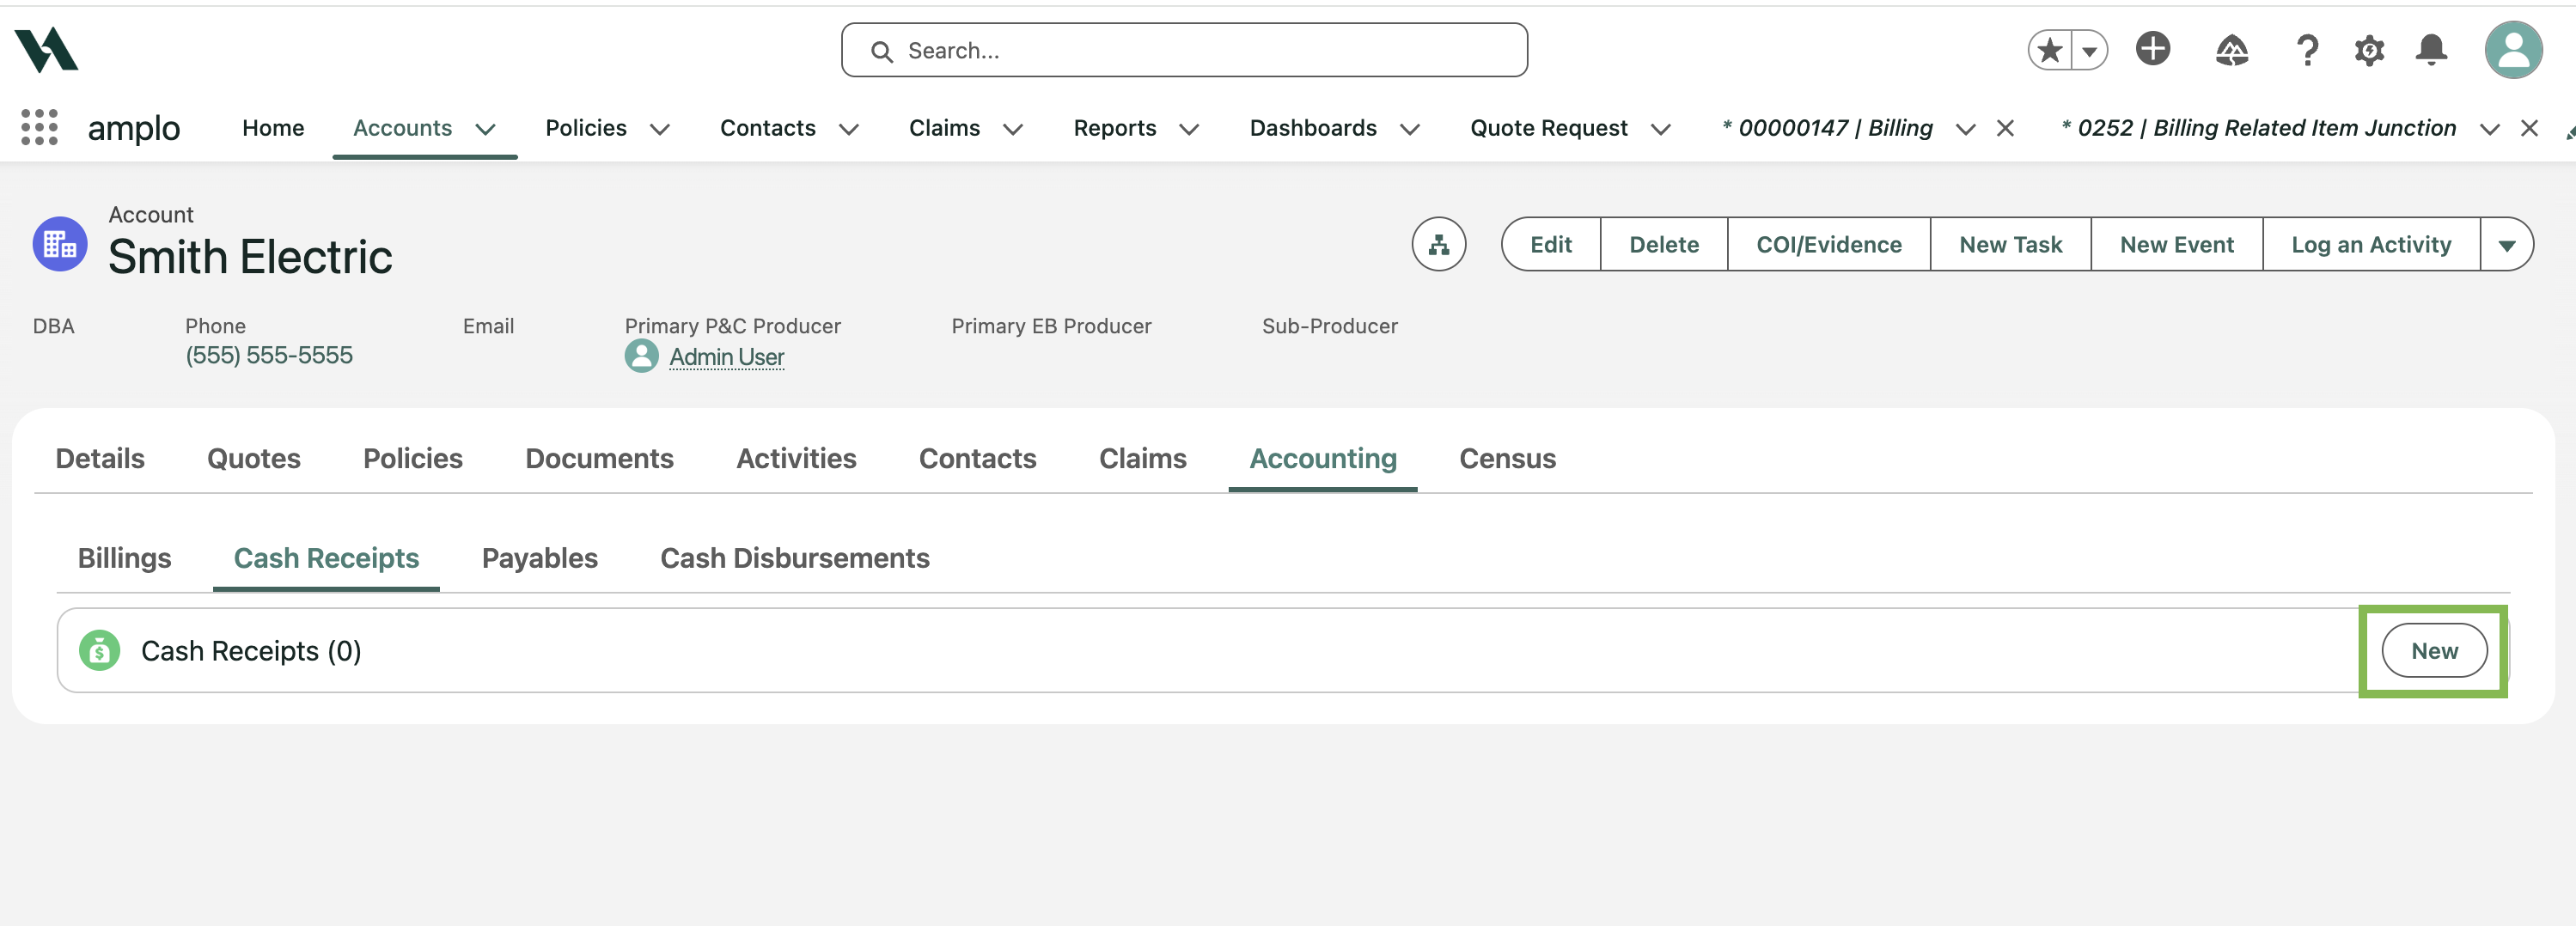
In the New Cash Receipt modal, enter the following information:
Received From: defaults to the current Account.
Type: defaults to Customer Receipt.
Posting Status: Defaults to Approved.
Receipt Date: Defaults to current date. Update as needed.
Amount: Enter the amount of the receipt.
Bank Account
Reference
Click Save.
Click the Cash Receipt Name to open the cash receipt.
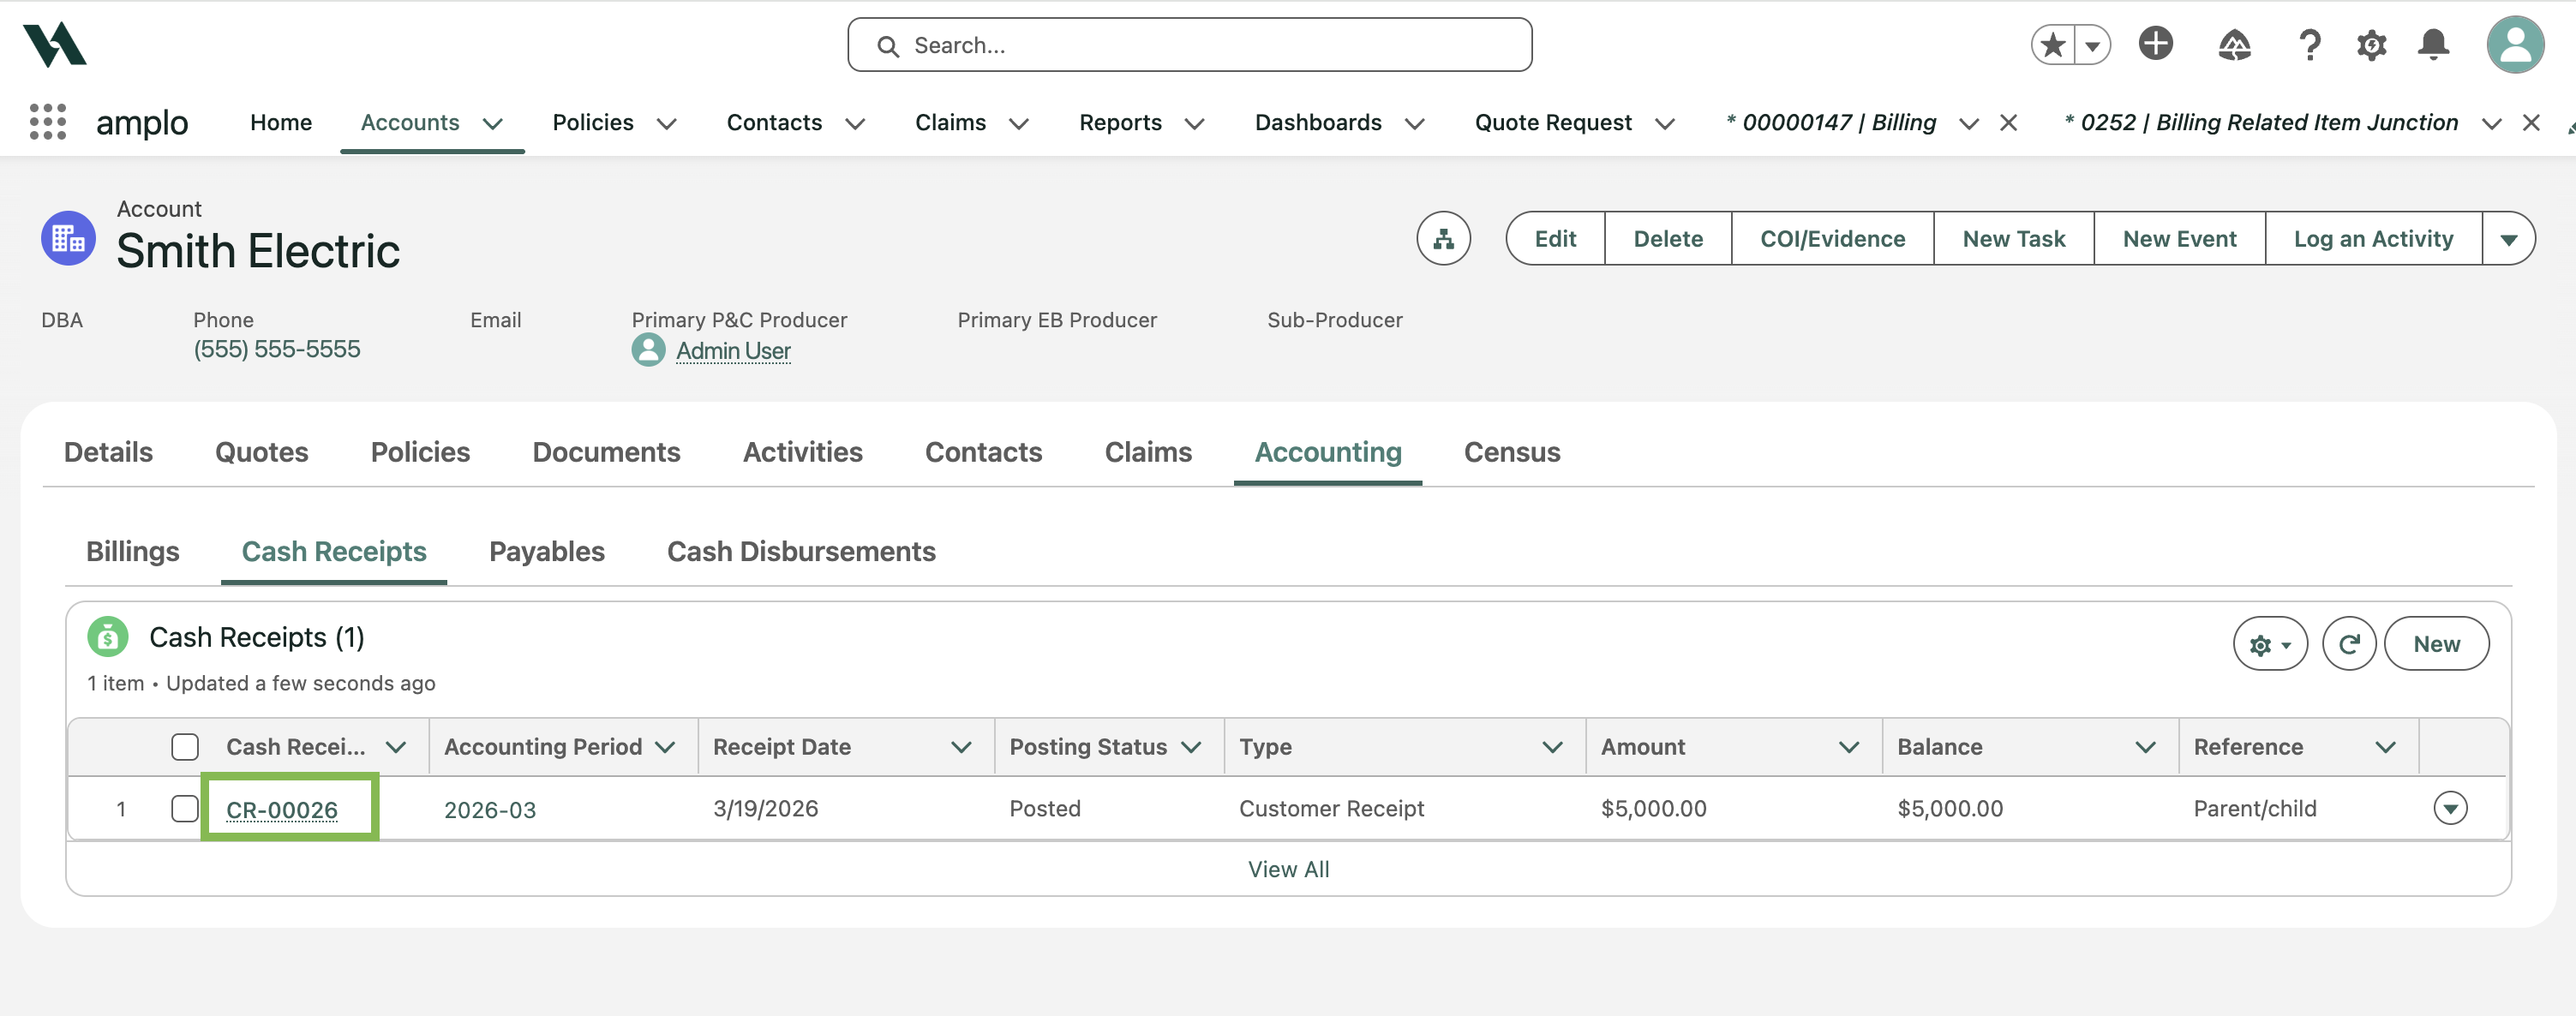
Click Apply/Unapply.
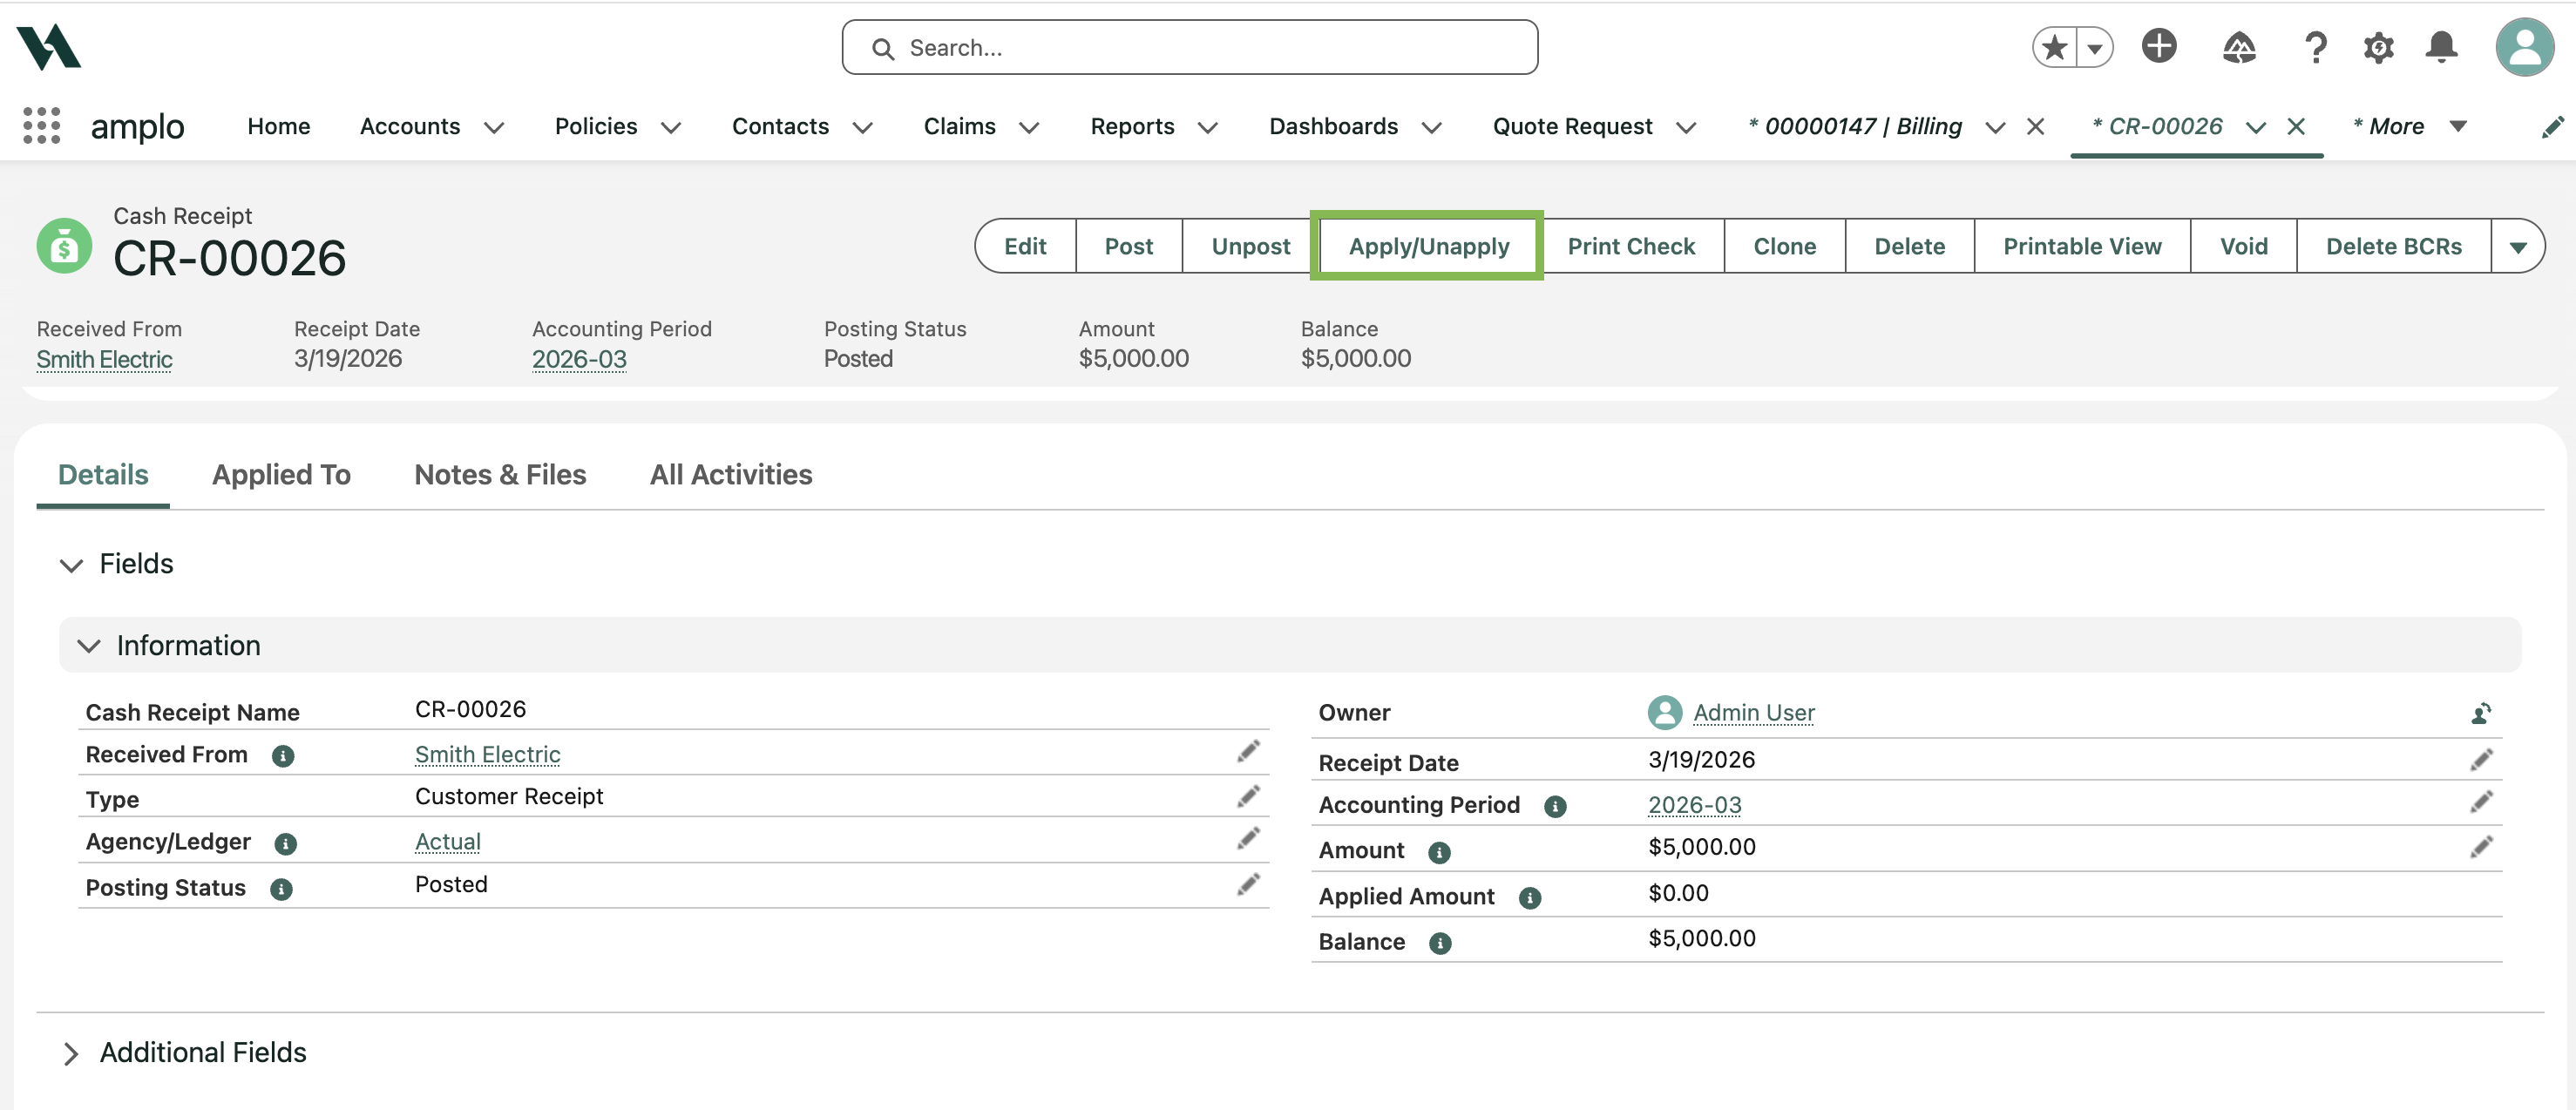
Choose the funds to apply
Choose the amount of funds to apply to the Account.
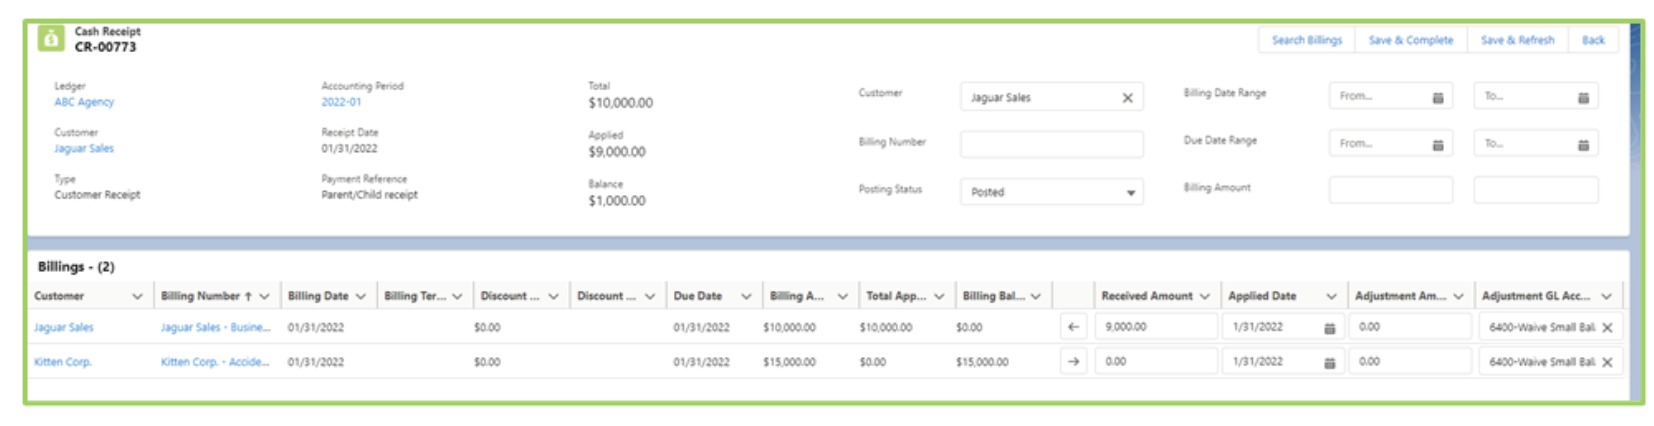
Click Save & Refresh.
Select the Account to apply the rest of the funds.
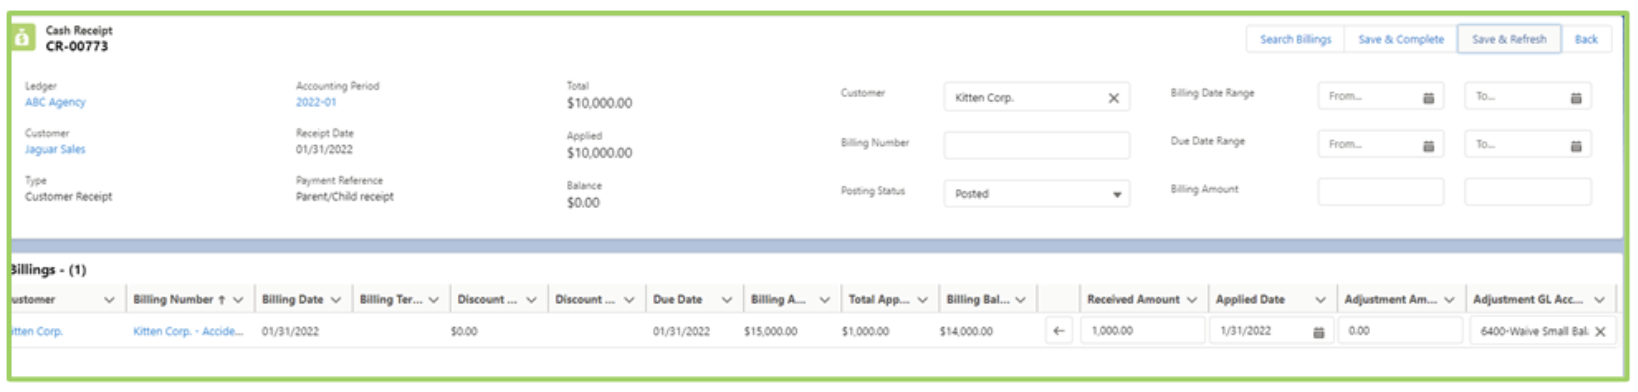
Click Save & Refresh.
Click Save & Complete.
The Cash Receipt application will now be split between the parent and child accounts.