Reporting on former customer accounts and lost policies
Last updated: July 27, 2026
Overview
Use this article to identify and report on accounts that have become former customer where all in-force policies have dropped to zero. You'll learn how to build an Account History report to track when an account's type changed to "Former Customer", how to count unique accounts to avoid duplicates, and how to filter by policy type (CL, PL, or Benefits) using separate reports.
Create an Account History report for lost accounts
An Account History report identifies the exact date an account's Type field changed from Customer to Former Customer, which is more reliable than the Date Last Modified field that can be updated by unrelated system processes. Use the steps below to generate the report.
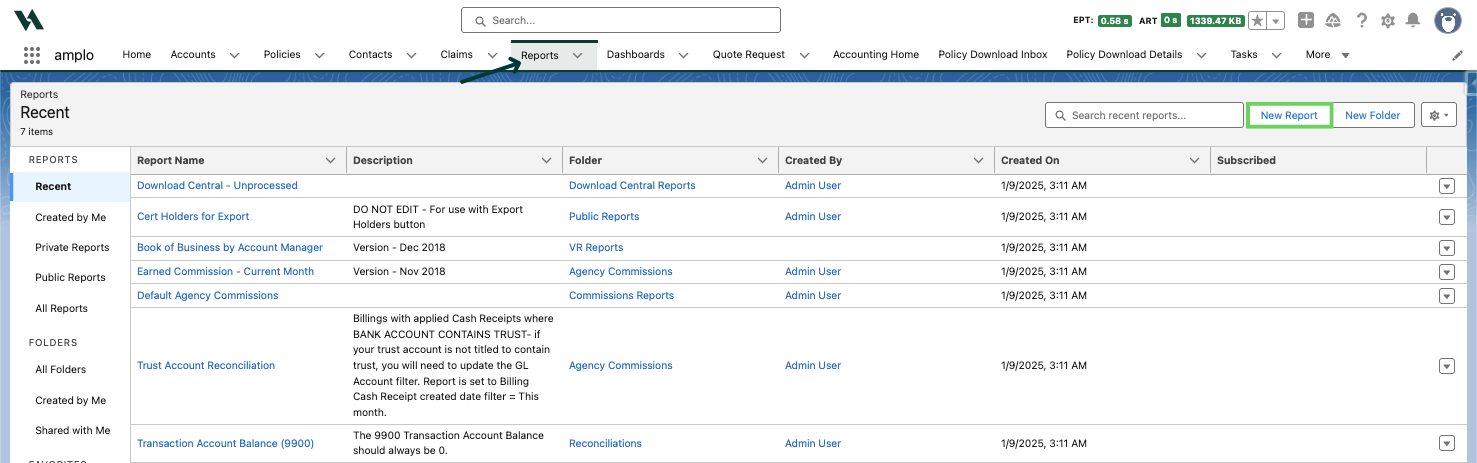
Click the Reports tab and select New Report.
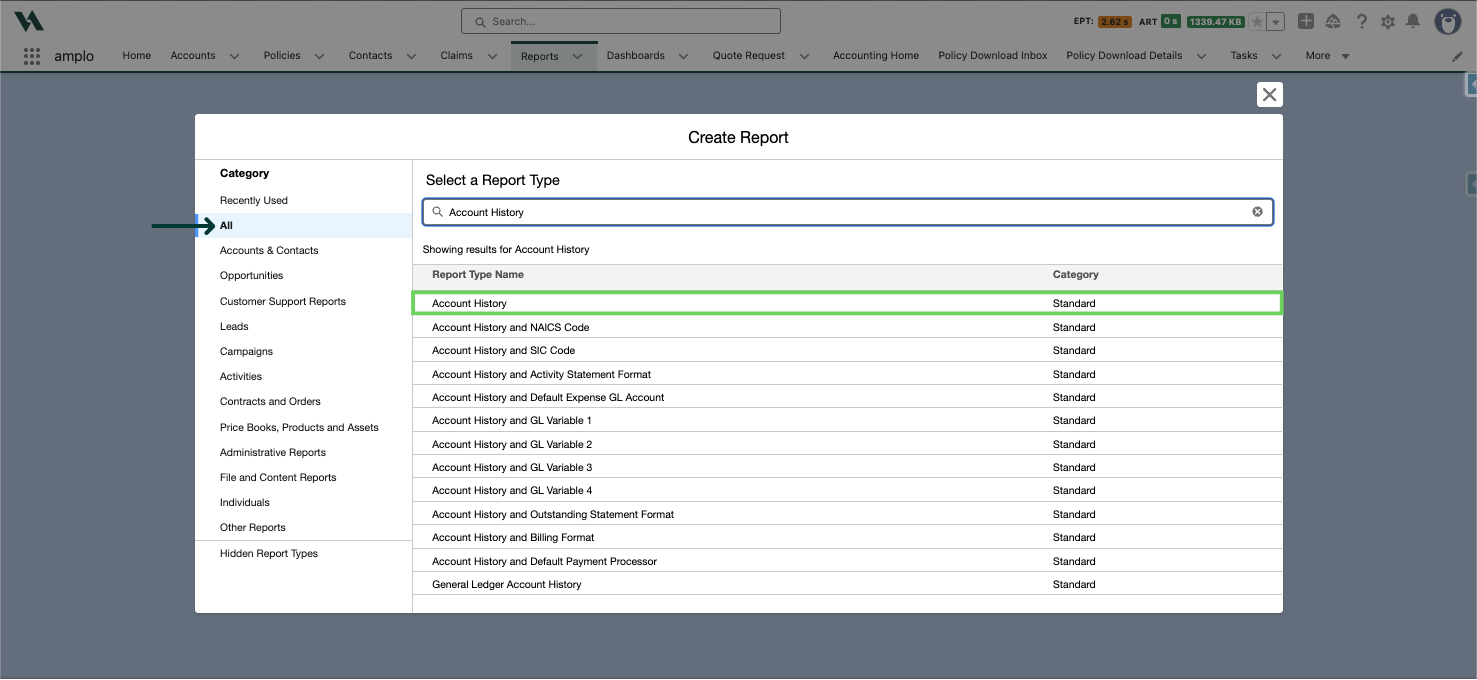
In the Create Report modal, select All under Category, then select Account History as the Report Type.
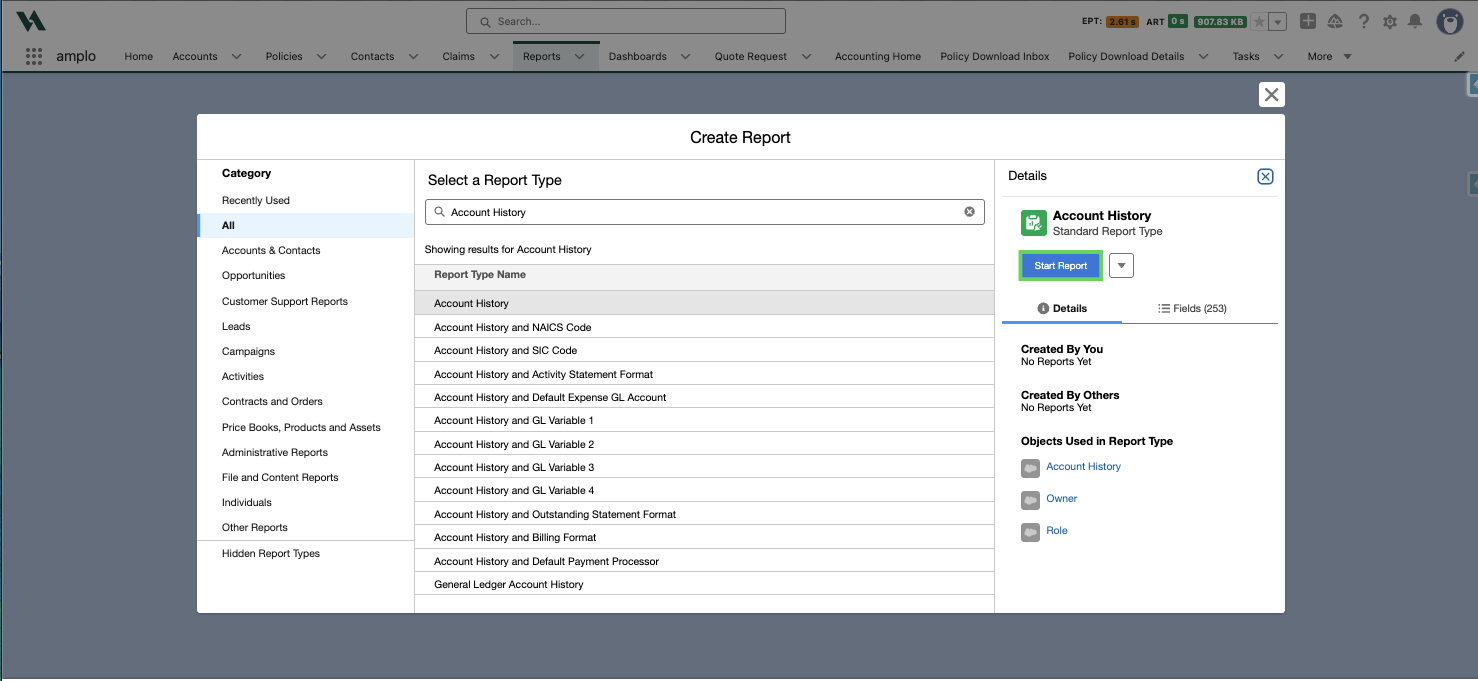
Click Start Report.
Once the report opens, add the following columns:
Type
Total In-Force CL Policies
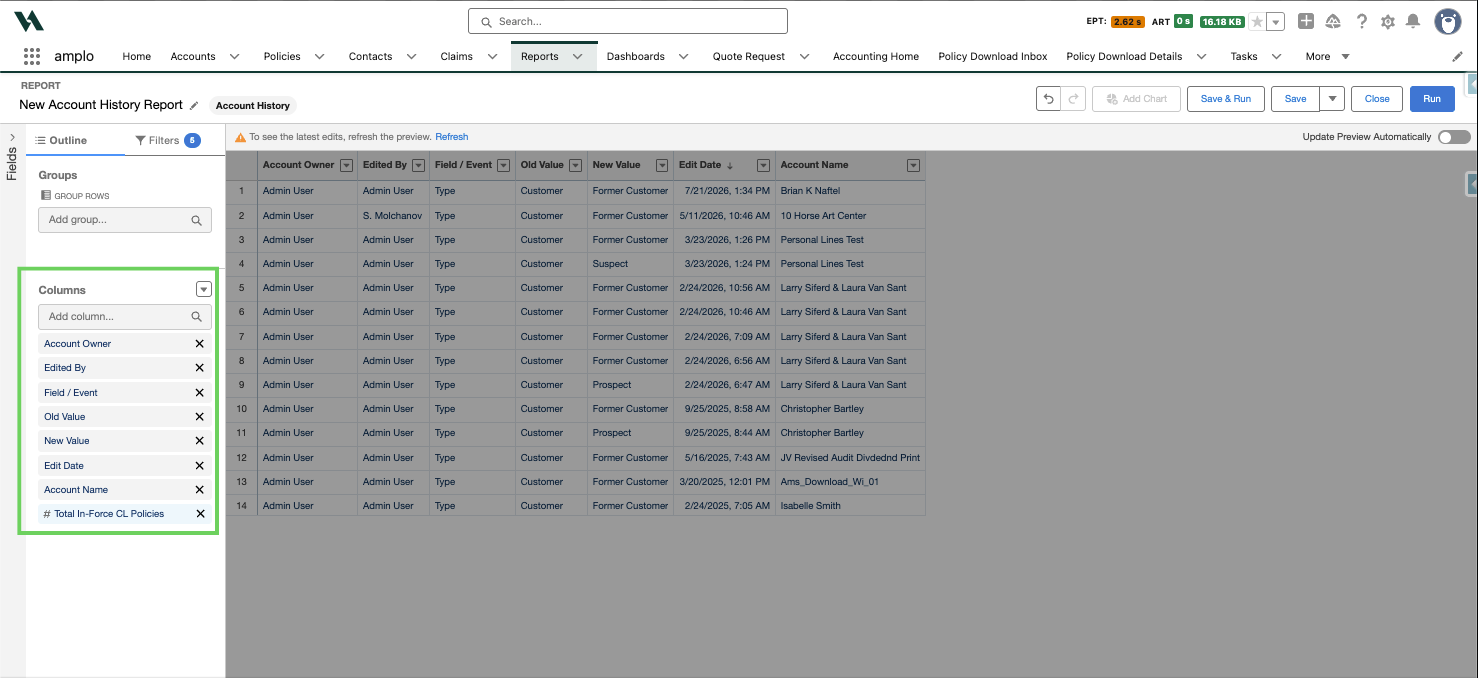
Note: For personal lines, select Total In-Force PL Policies. For benefits, select Total In-Force Benefits Policies.
Click Filters, then add the following filters:
Field/Event equals Type
Old Value equals Customer
Type equals Former Customer
Total In Force CL Policies equals 0.
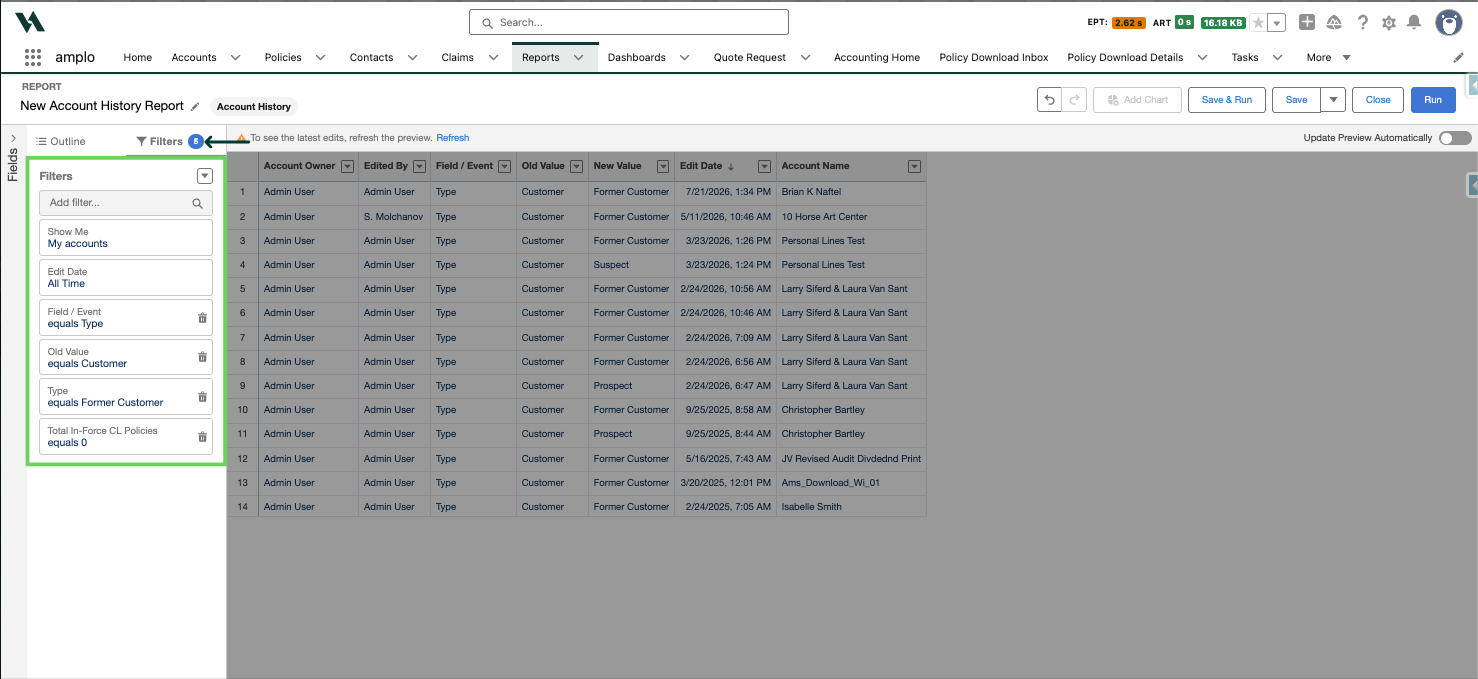
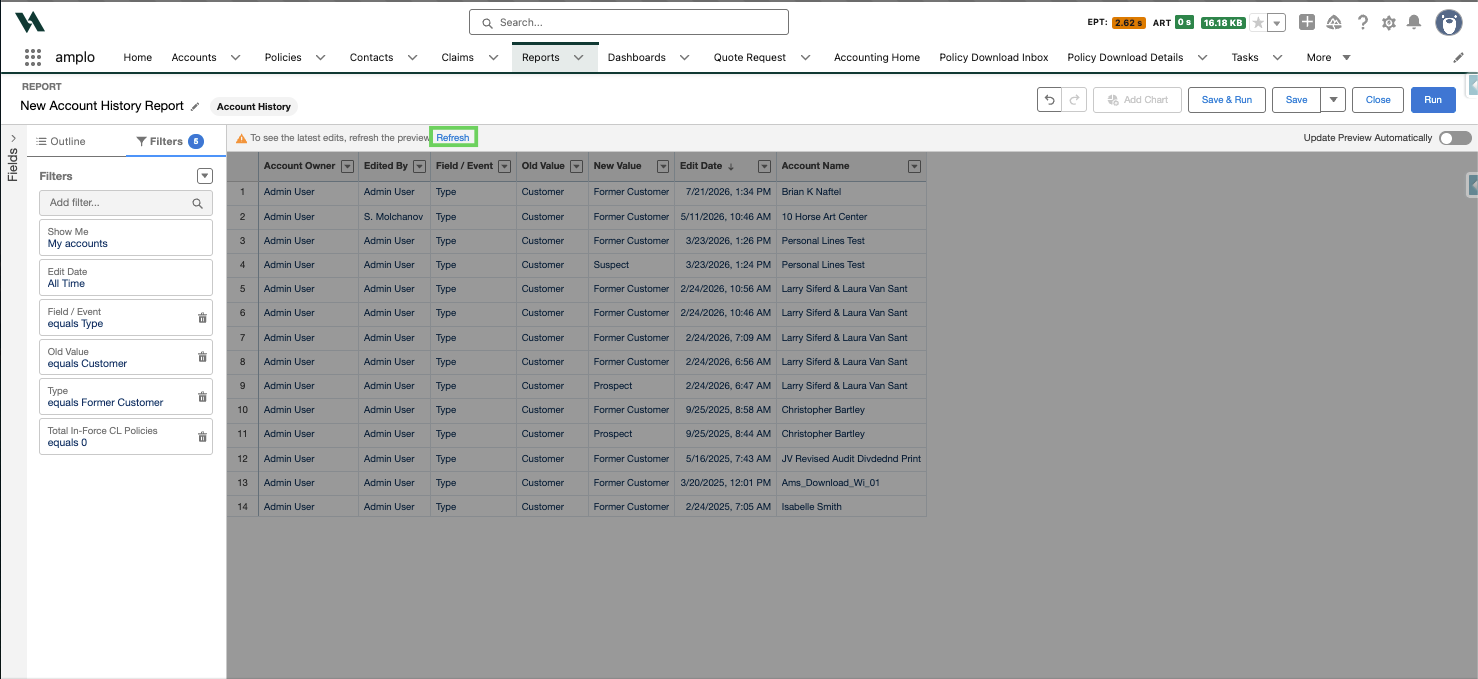
Click Refresh to run the report.
Note: Total In-Force Policies fields aren't enabled for field history tracking by default. To enable them, go to Setup > Object Manager > Account > Fields & Relationships > Set History Tracking. History tracking only captures changes going forward, so existing data won't be retroactively populated.
Count unique accounts
An account may appear multiple times in an Account History report, once for each field change event. Use one of the two options below to count unique accounts and get an accurate total.
Show unique count in columns
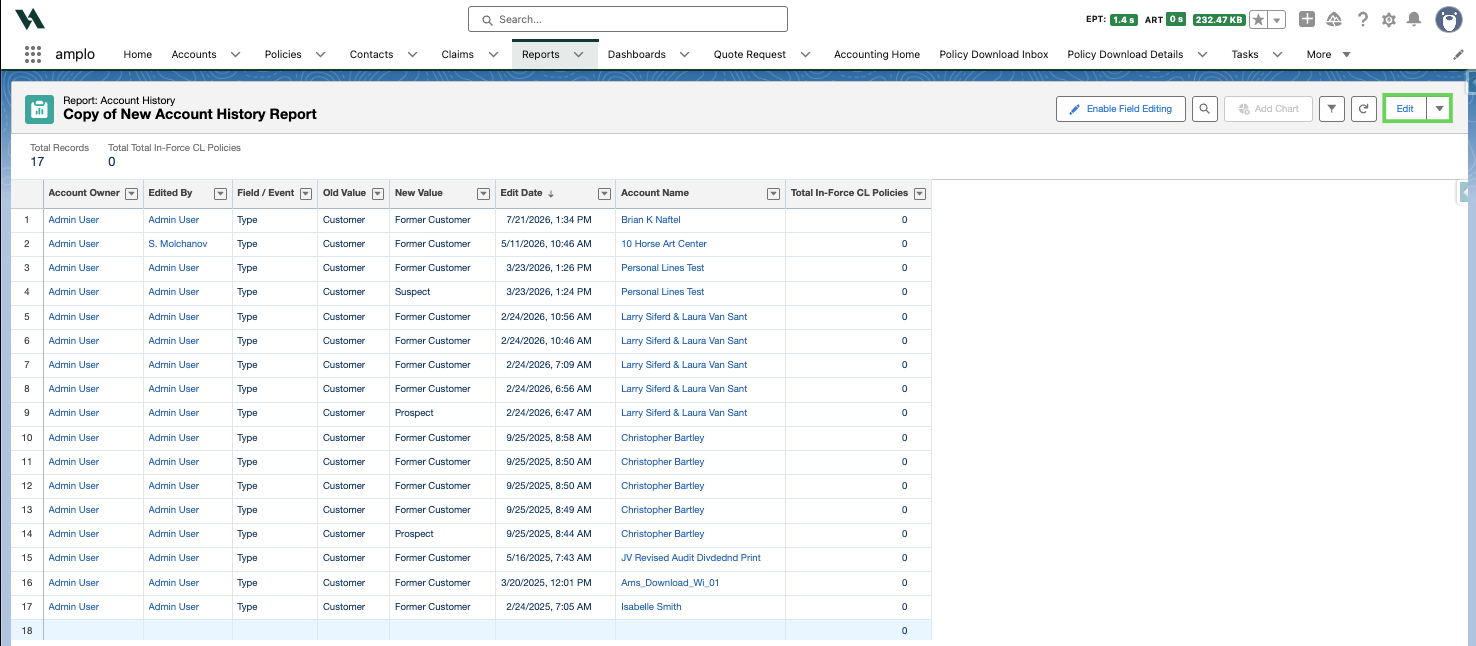
Select Edit on the report.
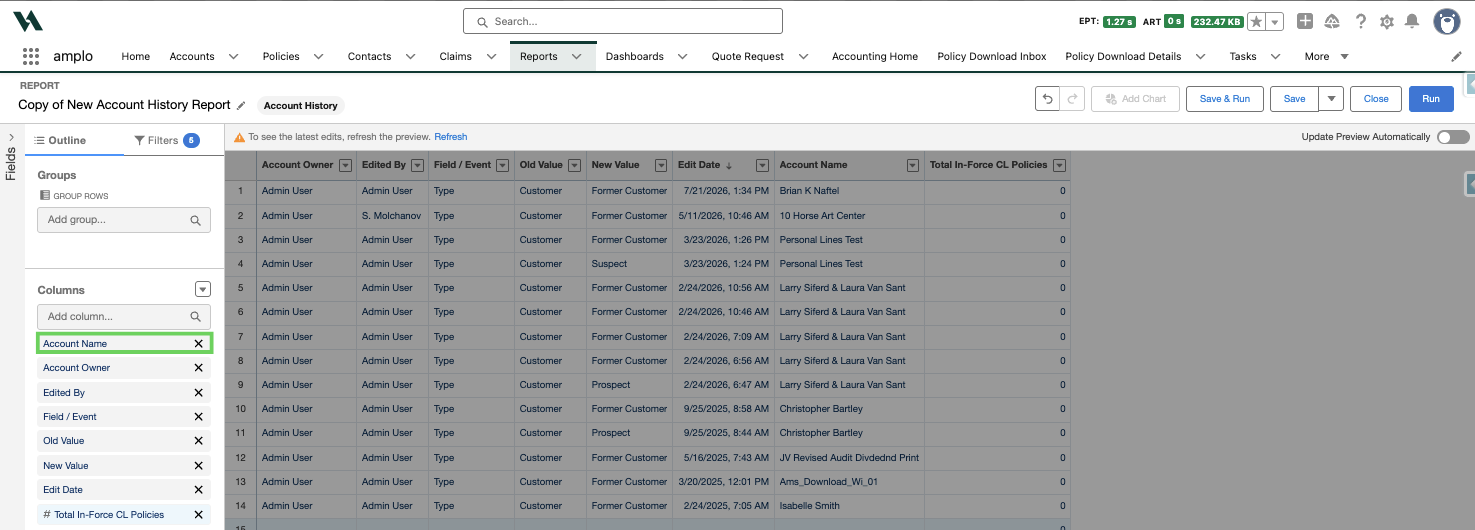
Drag and drop the Account Name field to the top of the Columns section.
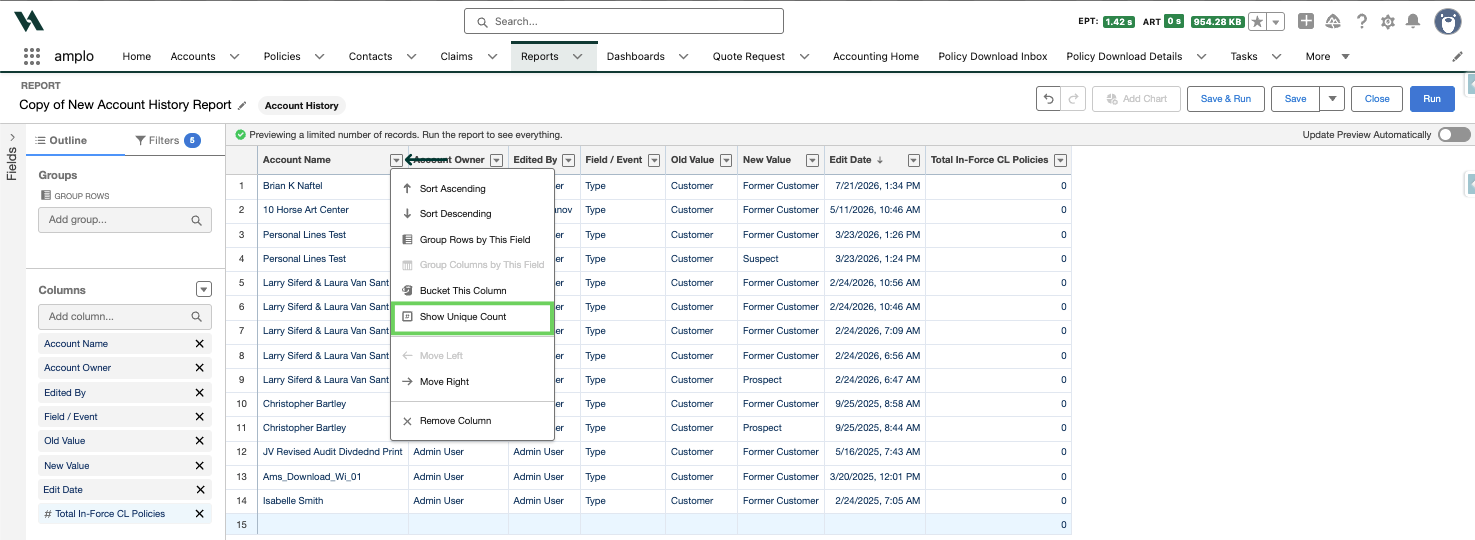
Click the drop-down arrow on the Account Name column header. and select Show Unique Count.
Add a summary formula
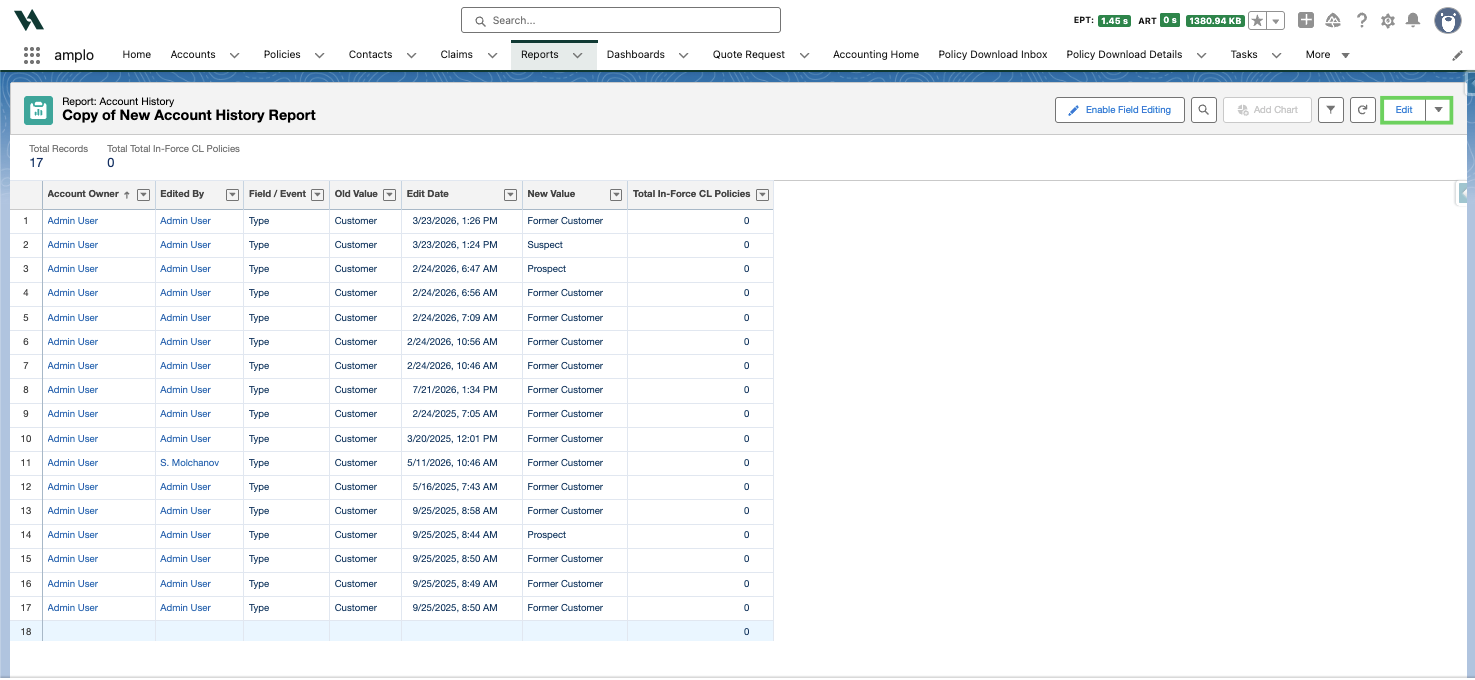
Select Edit on the report.
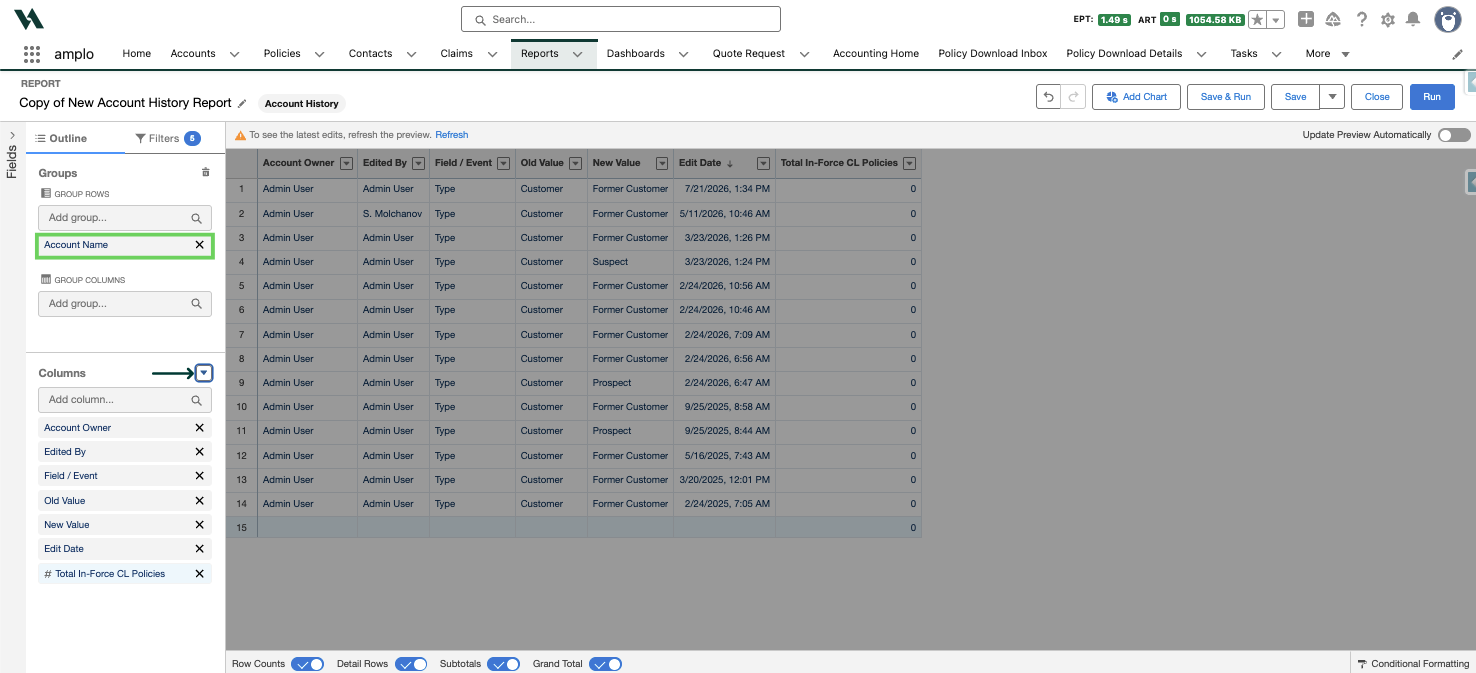
Add the Account Name field in the Groups section.
Click the drop-down arrow in the Columns area and select Add Summary Formula.
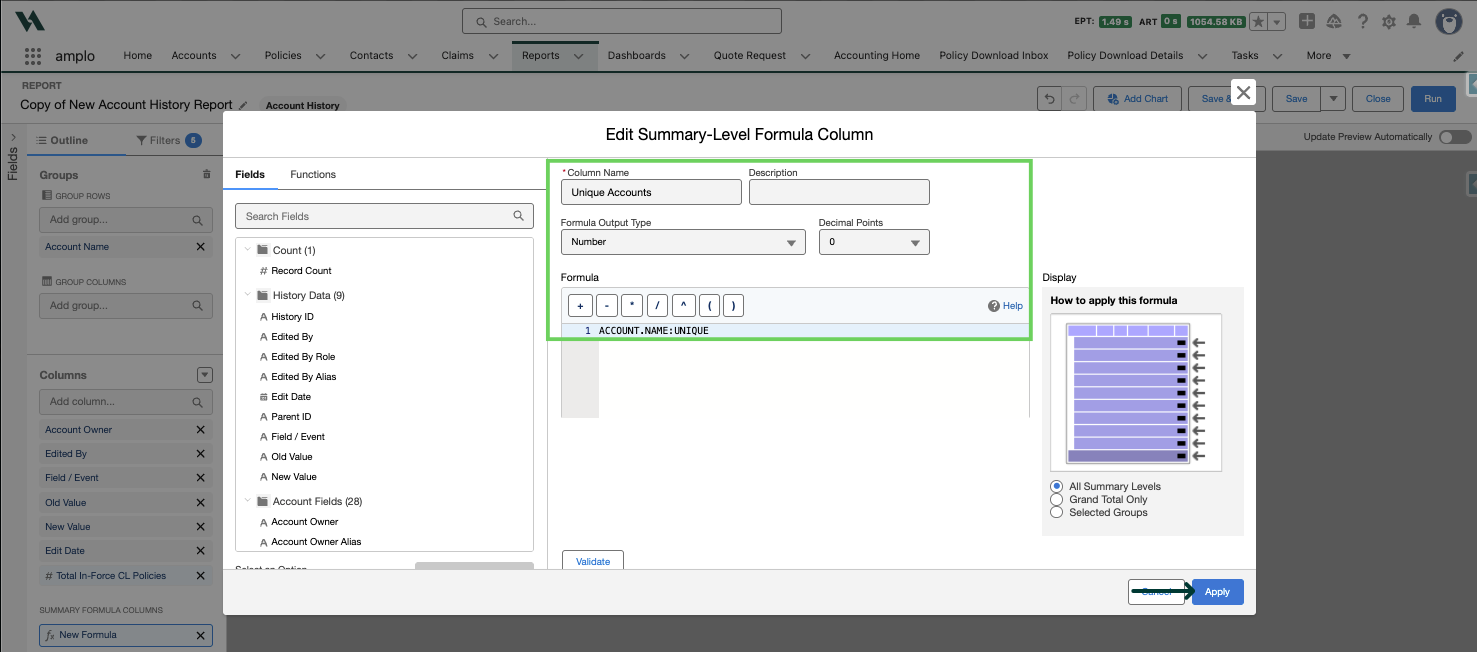
Enter the following:
Column Name: Enter a name (e.g., "Unique Accounts")
Formula Output Type: Number
Decimal Points: 0
Formula: ACCOUNT.NAME:UNIQUE
Click Apply.
Select Refresh
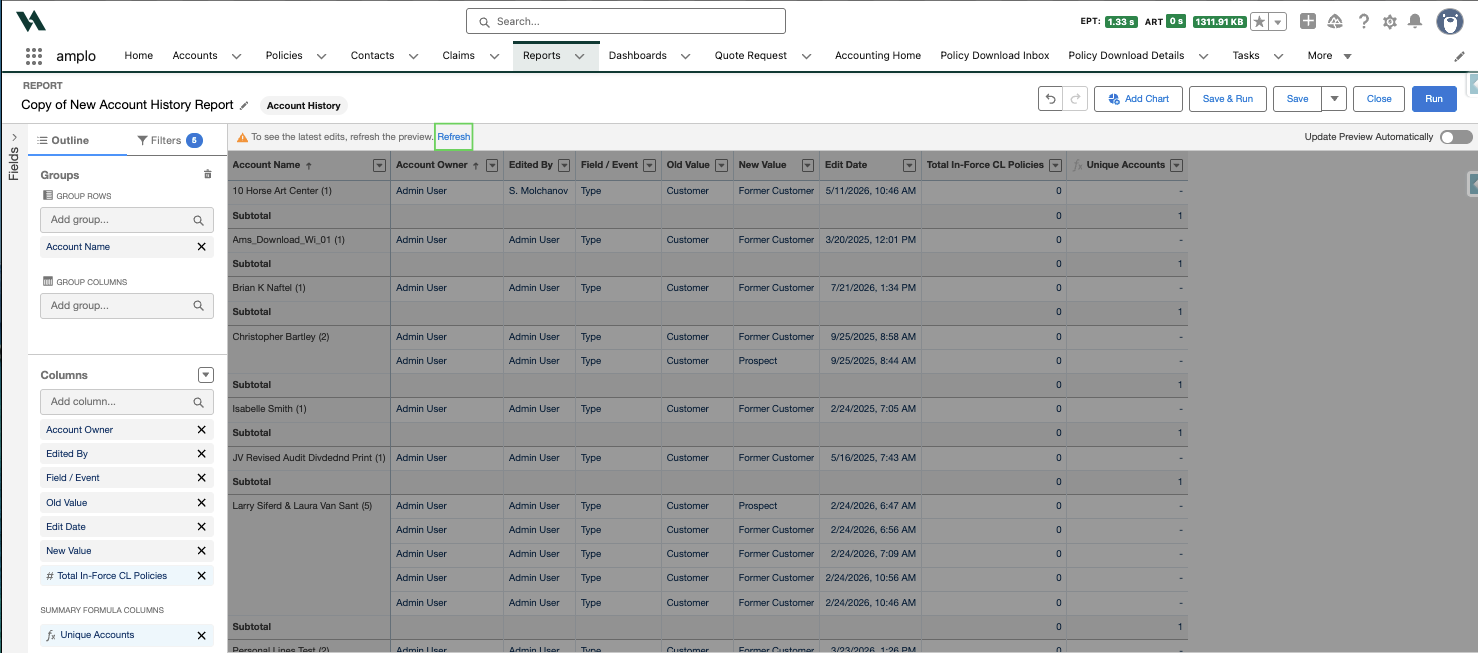
Once the report is run, the unique account count will appear at the top of the report summary.
Differentiating lost accounts by policy type (CL, PL, Benefits)
Account History reports don't support custom objects, so differentiating lost accounts by policy type requires separate reports for each type. Follow the steps below to build a report for a specific policy type.
On the reports tab, select New Report.
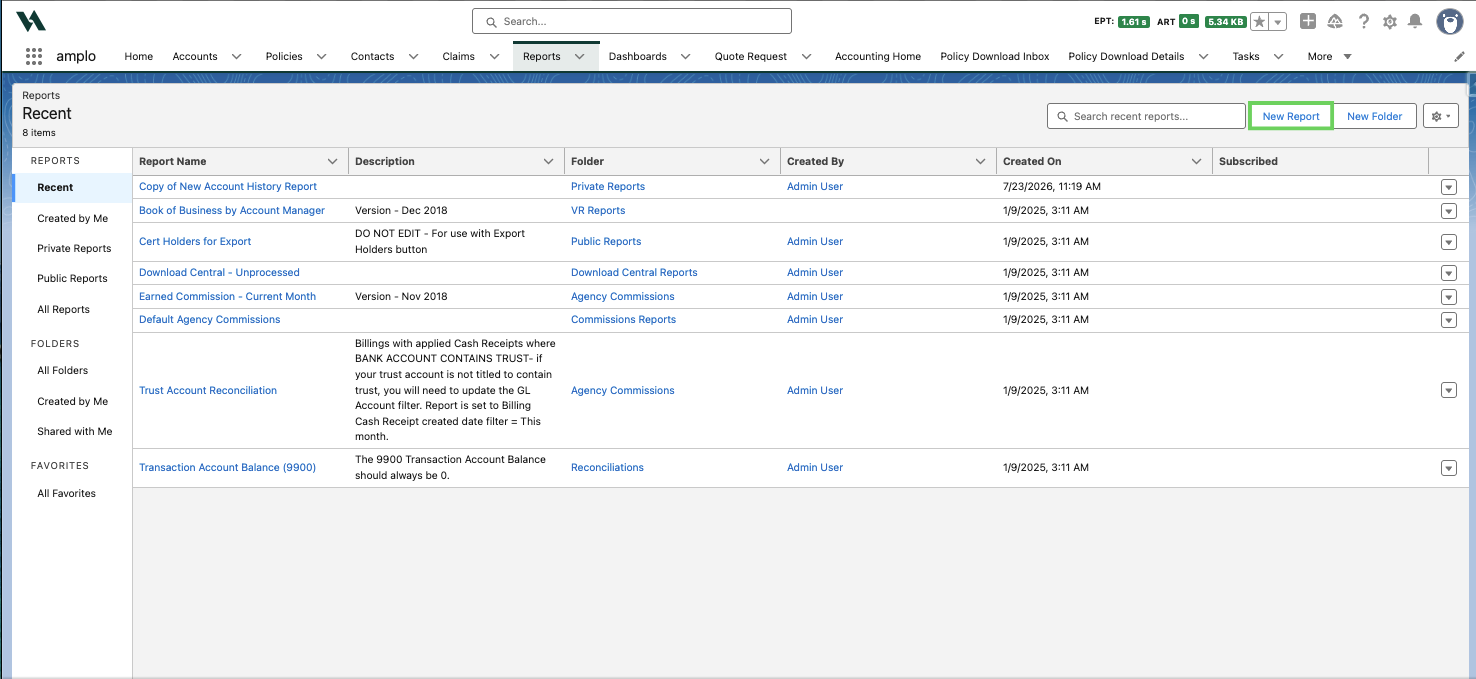
Switch the category to All and select Accounts with Policies as the report type.
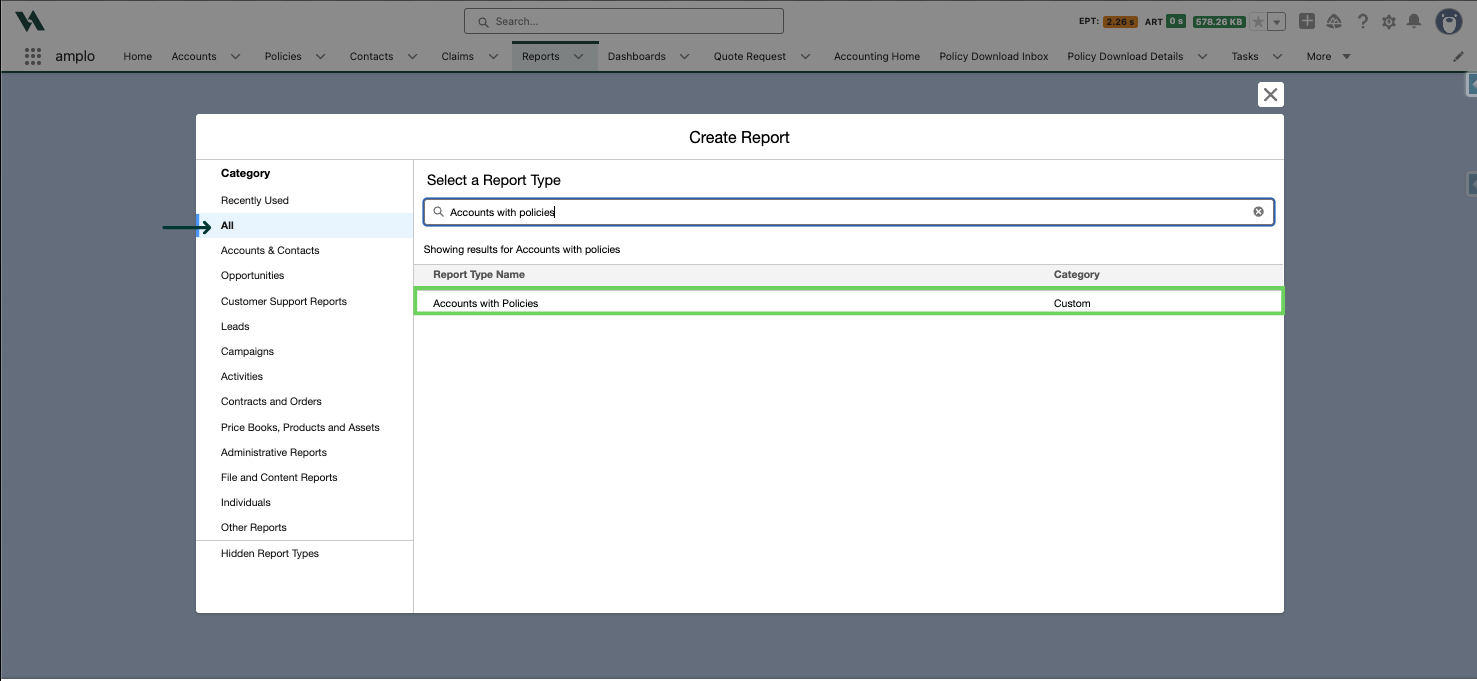
Select Start Report.
Select filters and enter the following information:
Show Me: All accounts
Created Date: All Time
Record Type: equals Written PL
Type: equals Former Customer
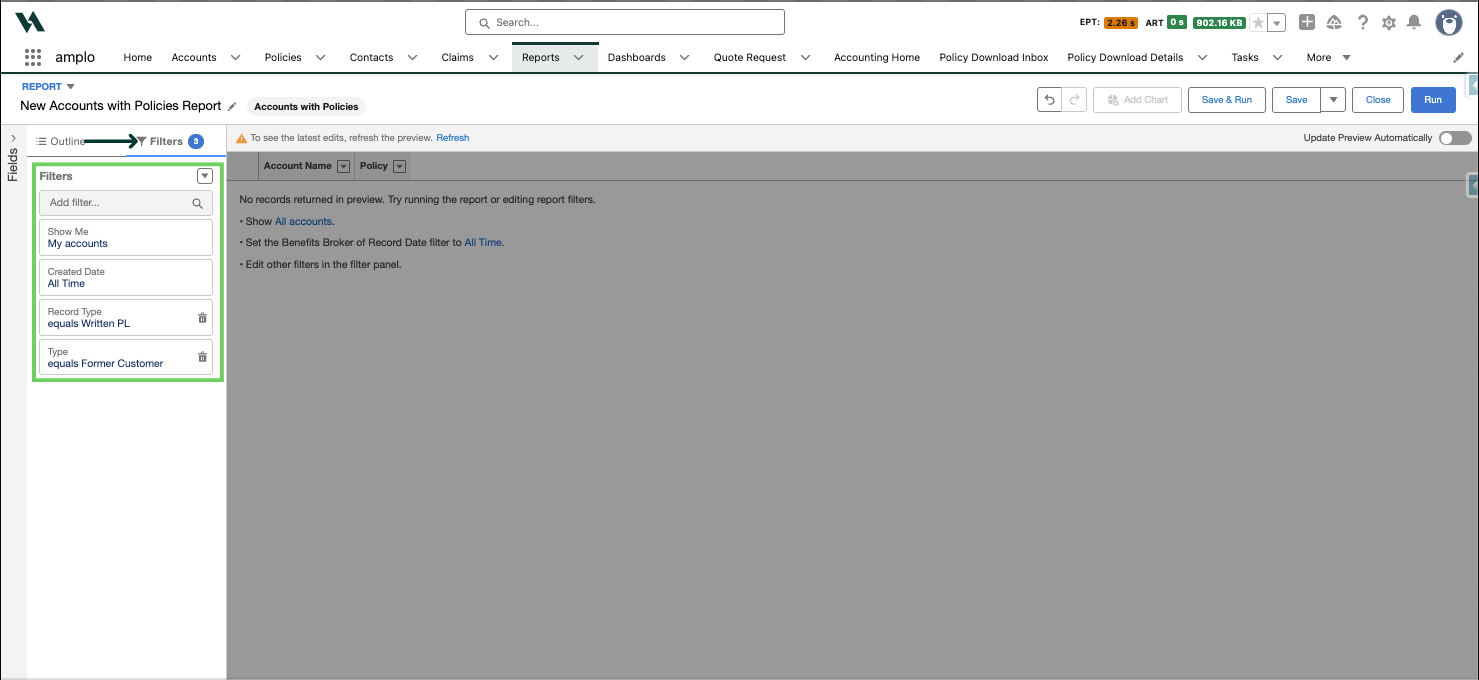
Then, select the down arrow to Add Cross Filter.
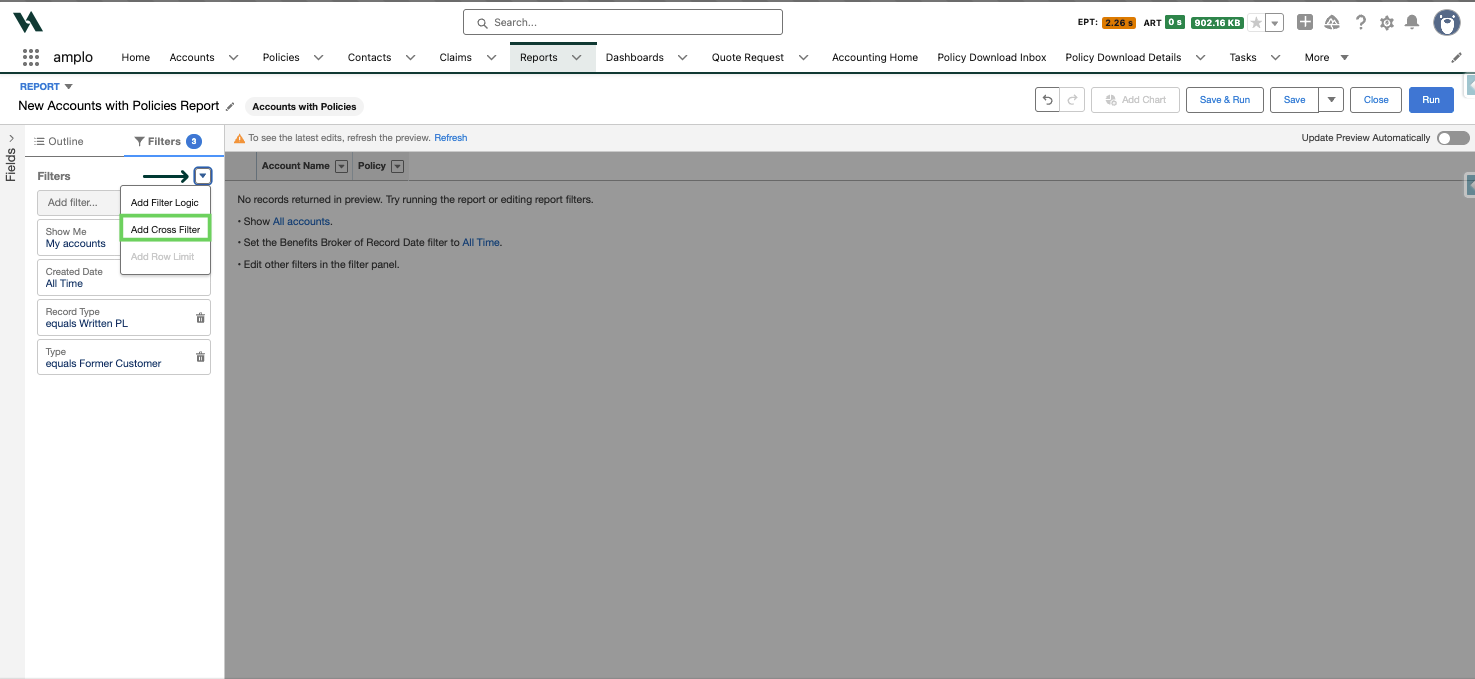
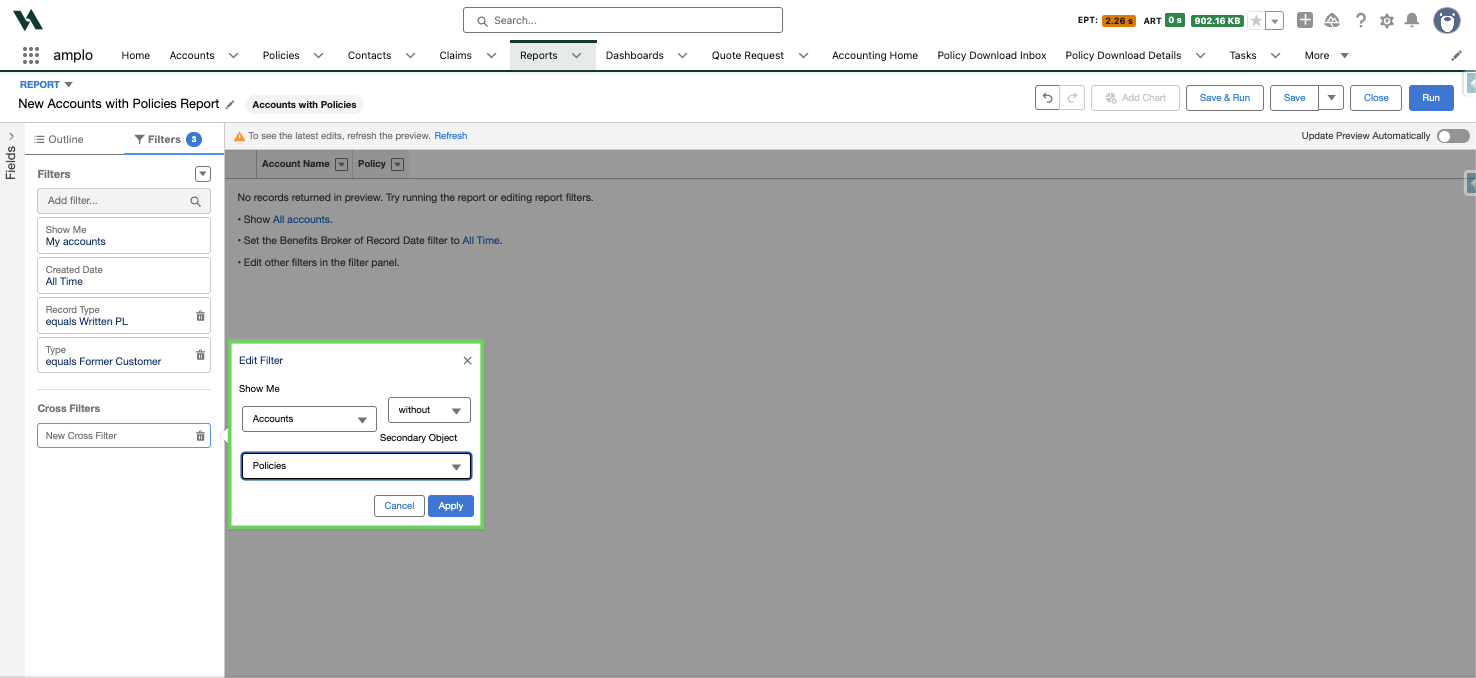
6. Enter the following: Accounts without Policies
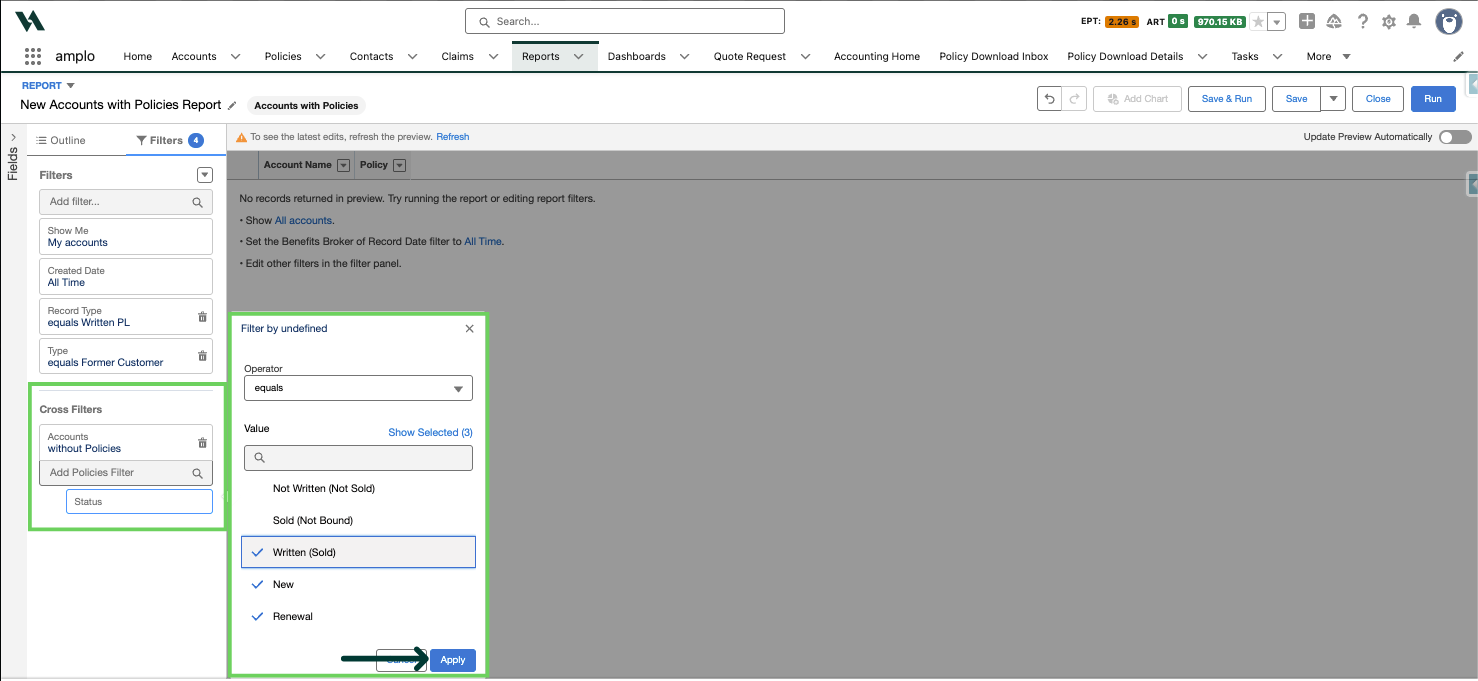
Add the following Status to Add Policies Filter: New, Written, or Renewal and select Apply.
Repeat this process for each policy type (CL, PL, Benefits) as separate reports.