Certificate templates
Last updated: March 16, 2026
Overview
Certificate templates help you generate certificates of insurance (COIs) quickly and consistently by pre-mapping policies, holders, and coverage details. Using templates reduces manual entry and ensures the correct information appears on each form.
Templates are available for the following ACORD forms:
ACORD 25 – Certificate of Liability Insurance
ACORD 24 – Certificate of Property Insurance
ACORD 28 – Evidence of Commercial Property Insurance
ACORD 27 – Evidence of Property Insurance
ACORD 23 – Vehicle or Equipment Certificate of Insurance
This article explains when to use certificate templates and how to create, configure, and use them.
Note: Use a certificate template whenever generating a supported ACORD form, especially when issuing multiple COIs, maintaining consistent coverage language, handling high request volumes, or managing complex holder or additional insured requirements.
Creating a certificate or evidence template
Use Global Search to find the account for which you want to create the template.
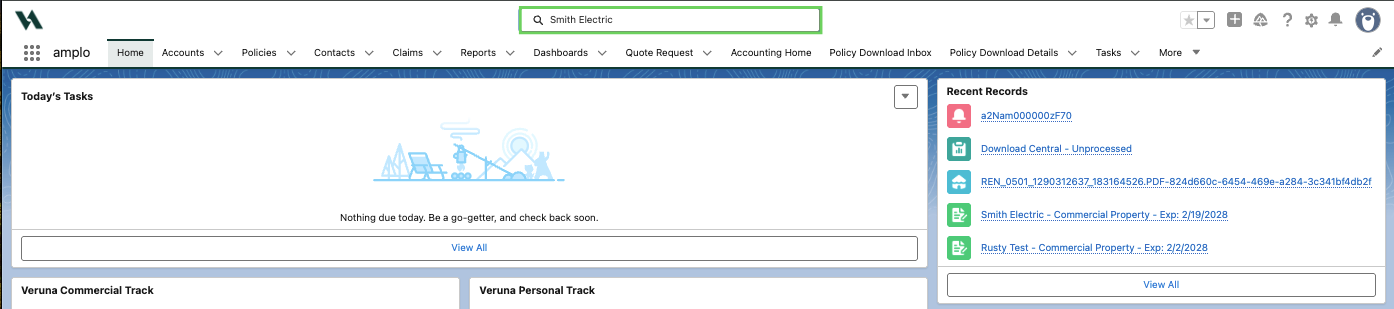
Select Certificates.

Then, click New.
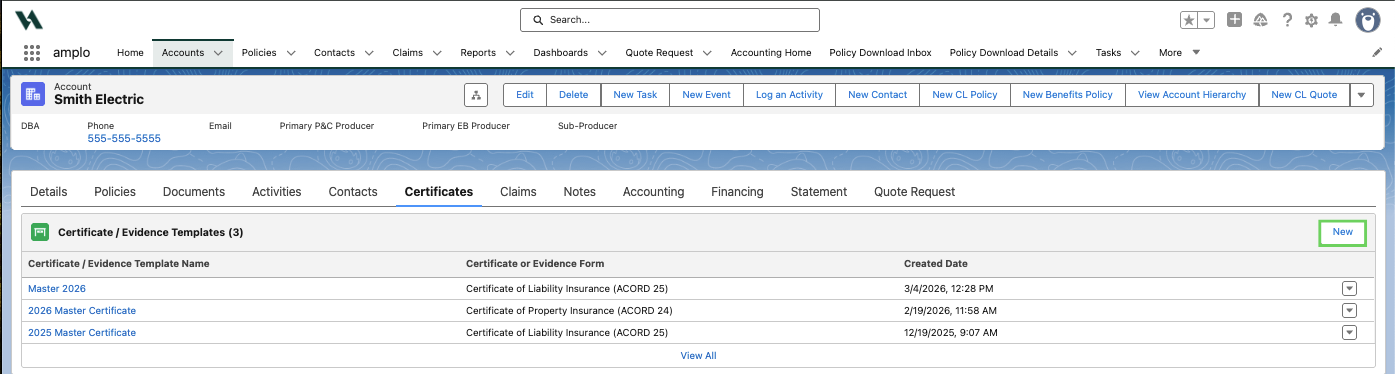
Choose your desired certificate, then select Next.

In the New Certificate/Evidence Template modal, enter the following:
Certificate/Evidence Template Name: Enter a descriptive name.
Account and Certificate Evidence Form: These fields auto-populate.
Signature: Select or add a signature for the certificate. If none is selected, the logged-in user's signature is used by default.

Note: If a template always generates with the same user’s signature, verify that the signature’s assigned user record has the User field populated. If no user is associated, the signature applies to all COIs by default. For more information, see 📄 Certificate signature verification.
Click Save.
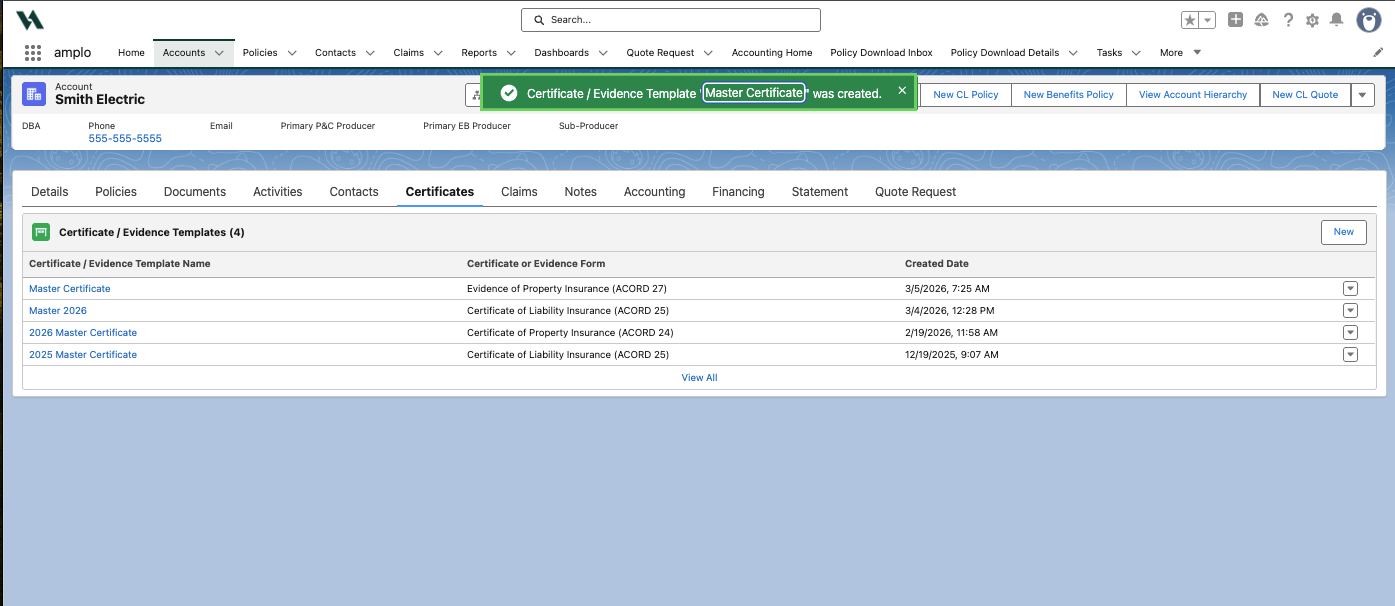
Click the link in the confirmation header or the template name in the list to open the template.
Adding related policies
After creating the template, follow the form-specific steps below to associate the relevant policy and location (if applicable).
Add related policy and miscellaneous coverages (ACORD 23)
In the Certificate/Evidence Template, click the Related Policies tab.

Click Add Related Policies.
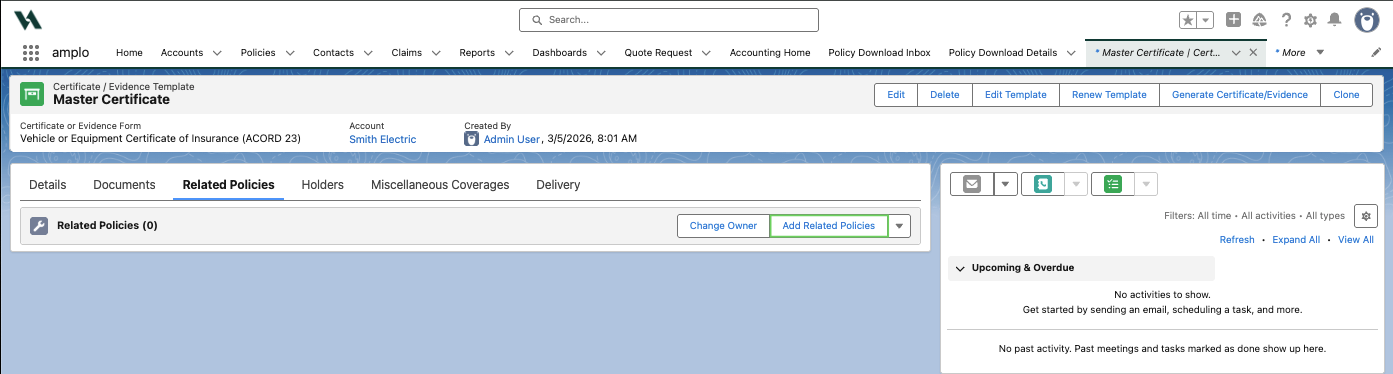
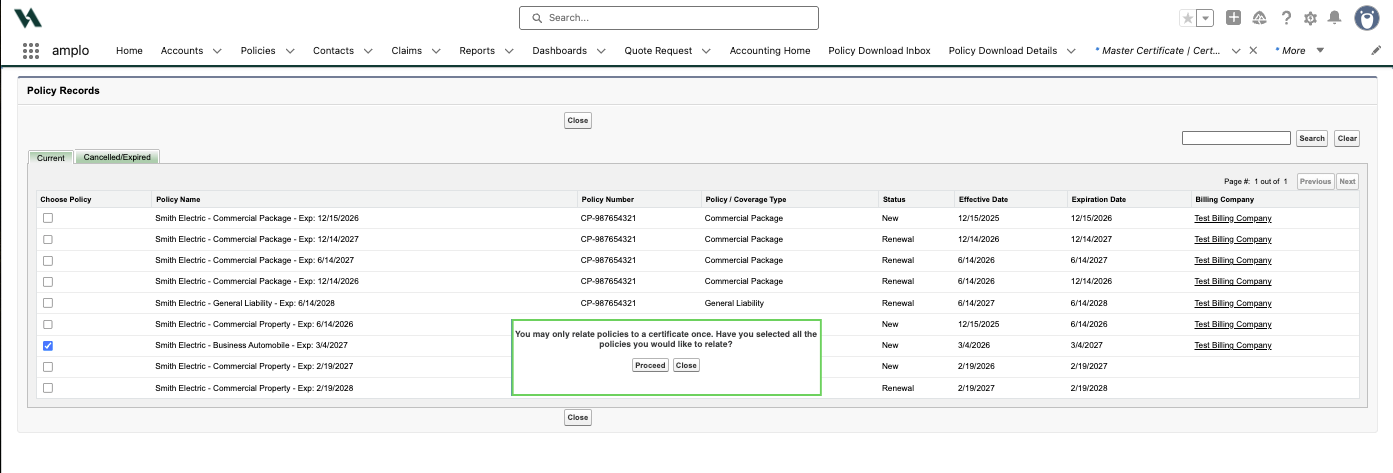
Select the applicable policy from the Current or Cancelled/Expired tabs.

Click Apply Policy.

In the confirmation modal, click Proceed to continue.
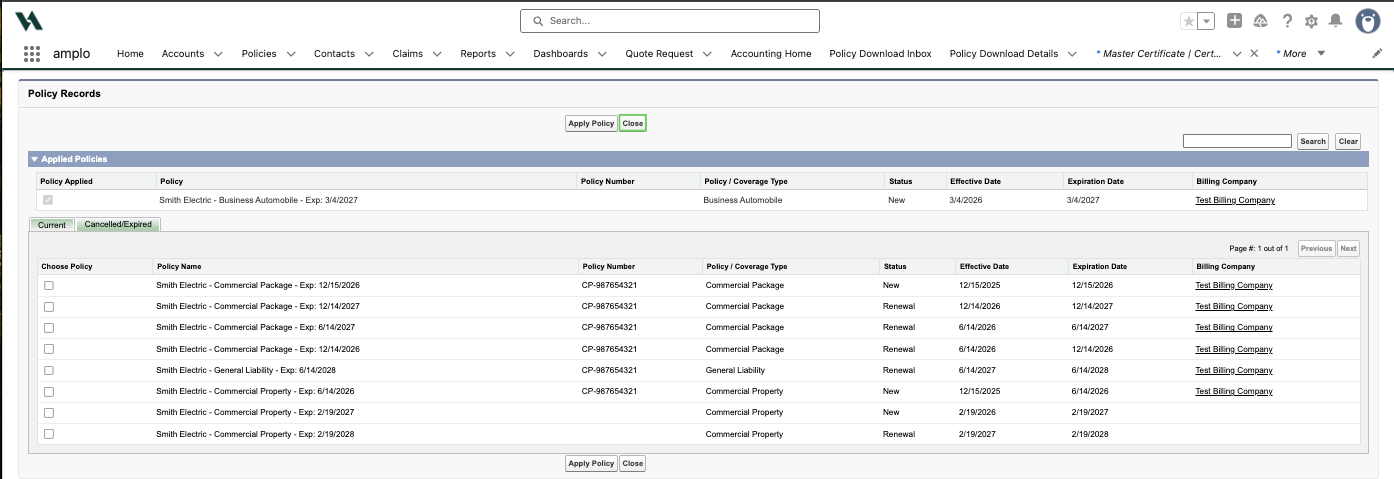
After you're redirected to the related policies page, select Close to return to the template.
If you need to add additional policies or miscellaneous coverages, you can use the Miscellaneous Coverages tab.
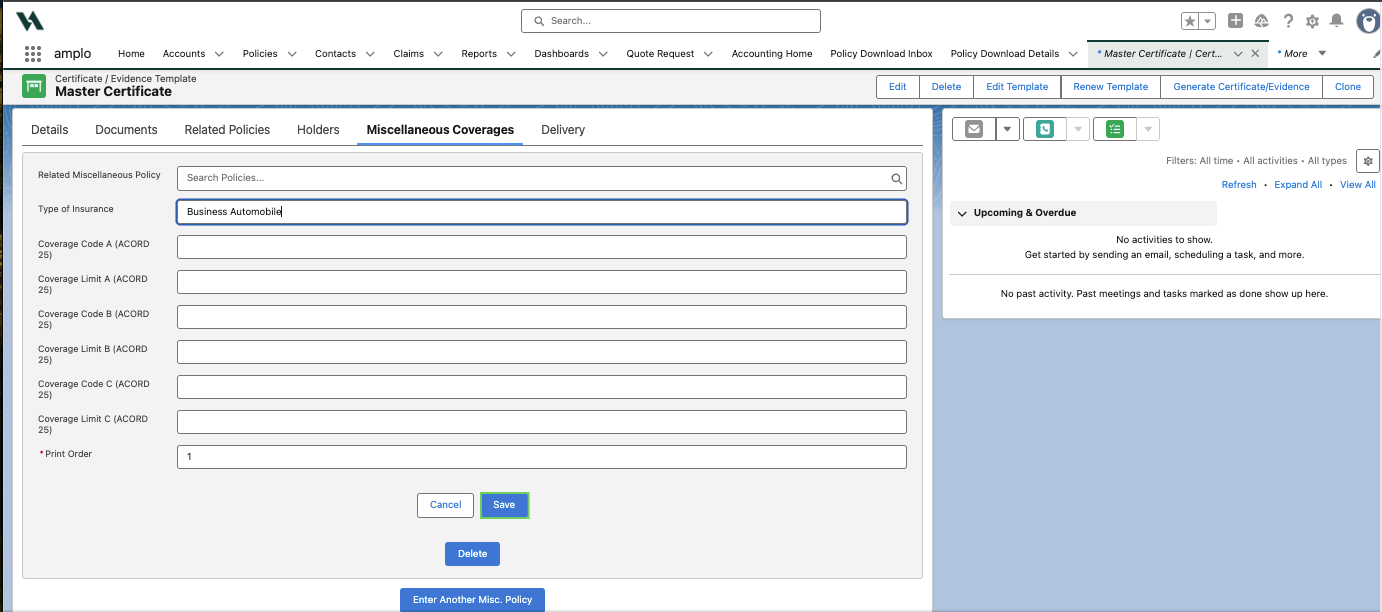
In the Certificate/Evidence Template, click the Miscellaneous Coverages tab.

Click the pencil icon in the Related Miscellaneous Policy field and add the applicable policy.
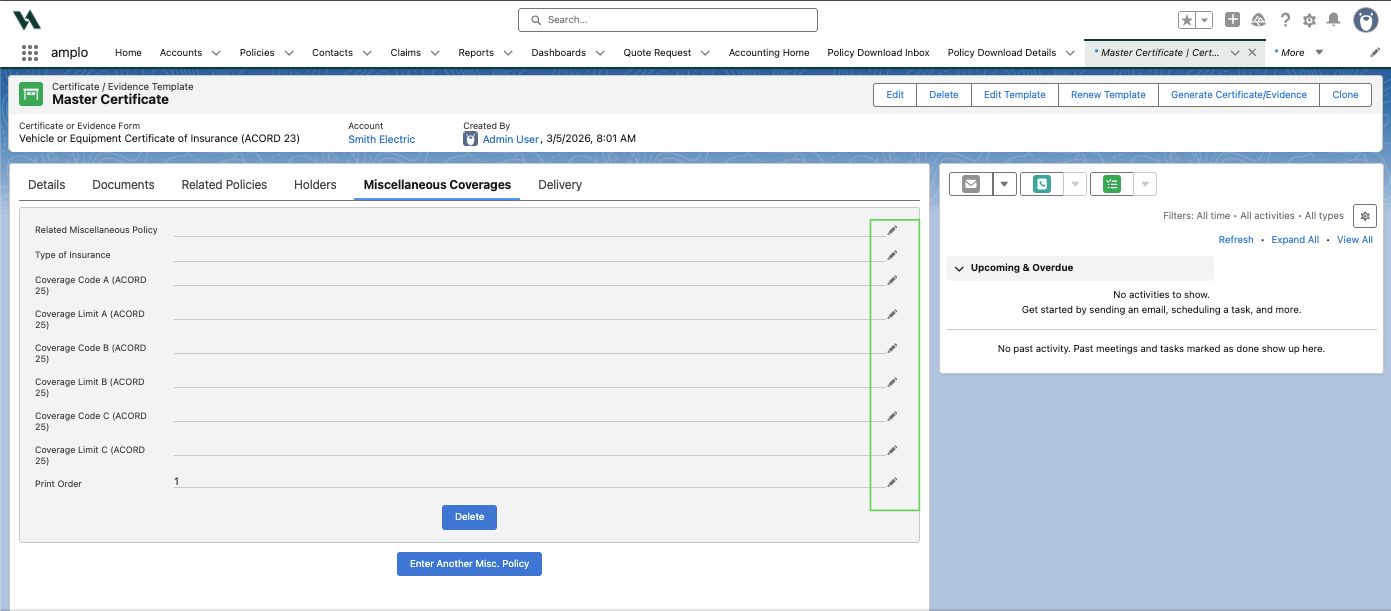
Use the additional fields to specify Type of Insurance and add any necessary coverages.
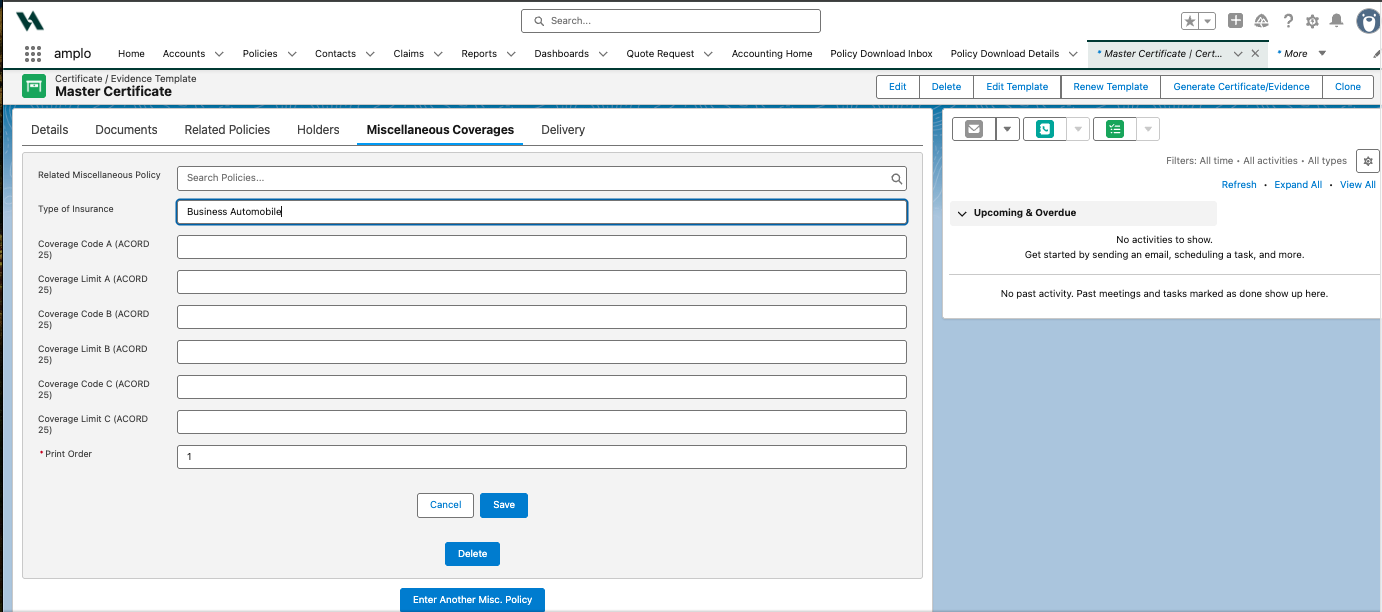
Select Save.
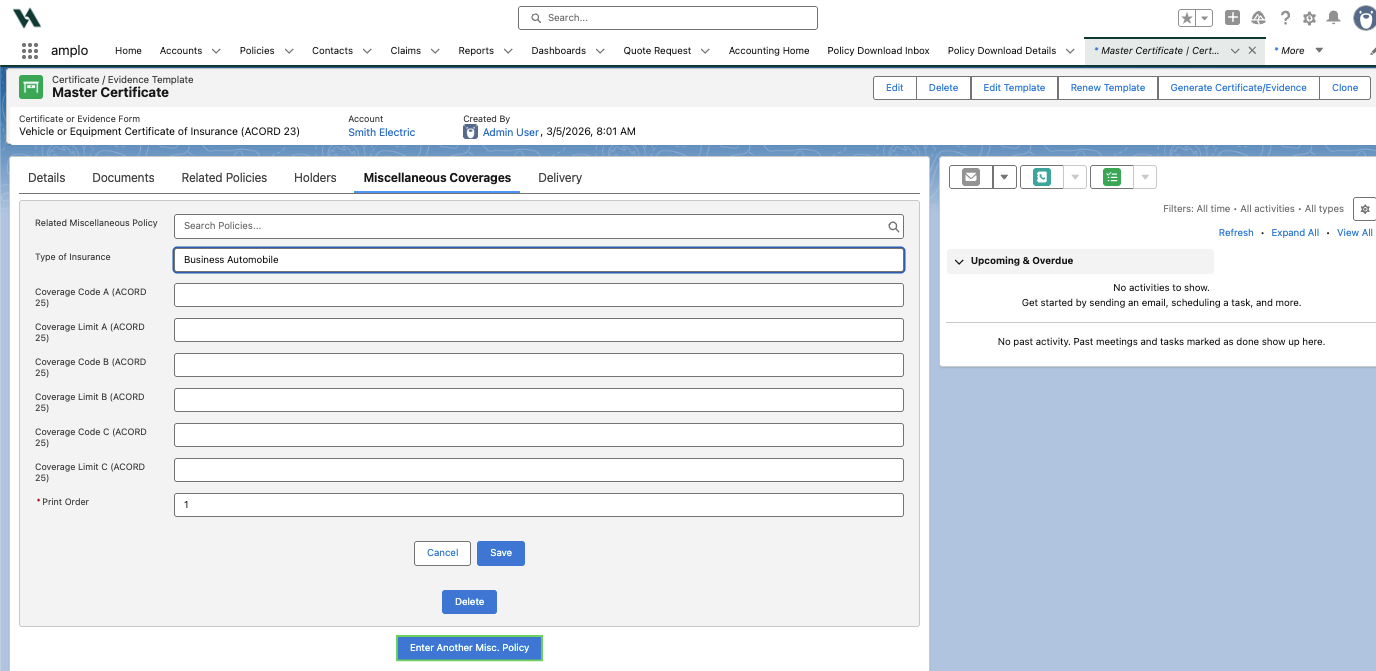
If needed, click Enter Another Misc. Policy to add an additional policy, and repeat steps 2-3 above.
Add related policy and location information (ACORD 24, 27, 28)
In the Certificate/Evidence Template, click the Related Policies tab.
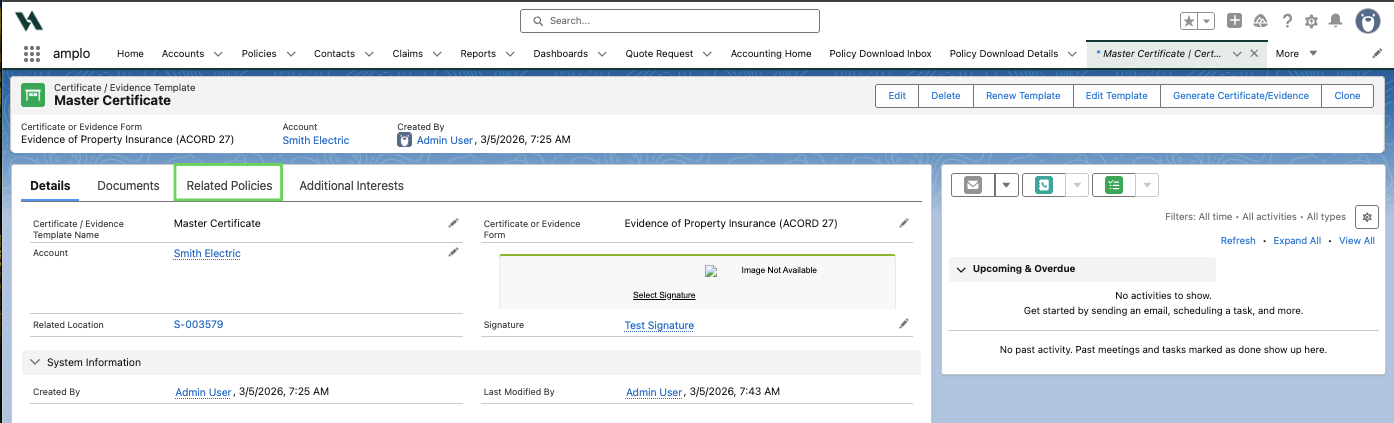
Click Add Related Policies.
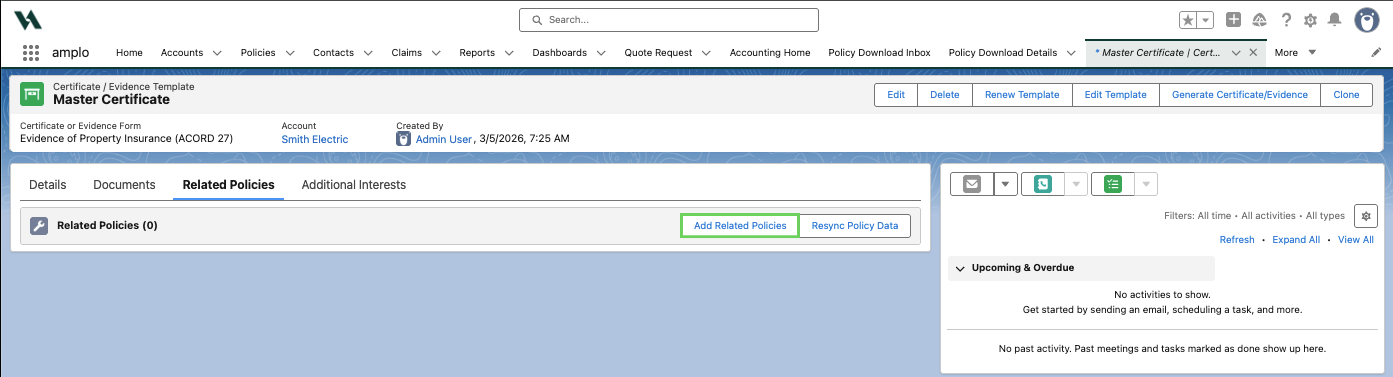
Select the applicable policy from the Current or Cancelled/Expired tabs.
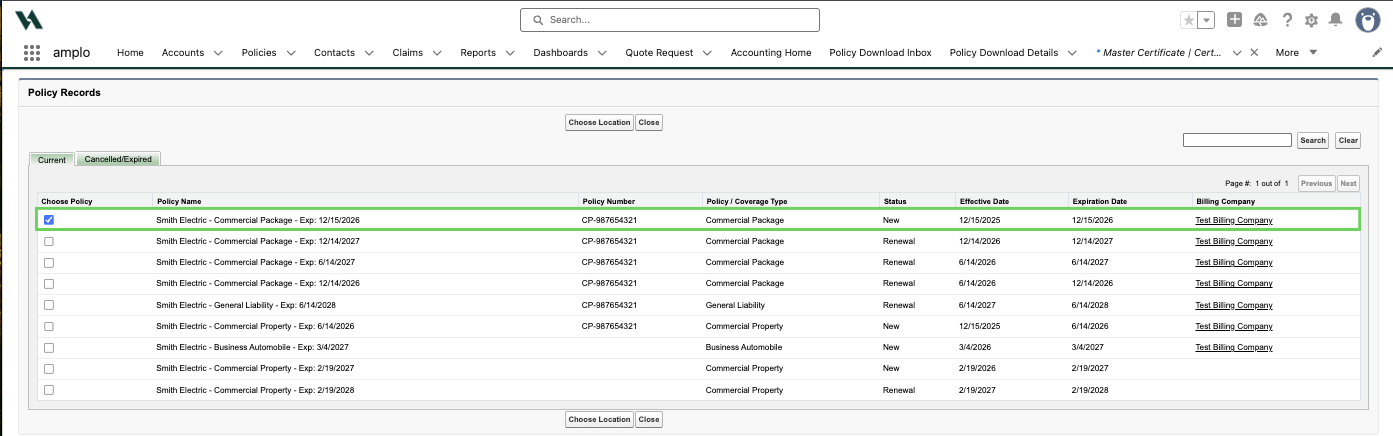
Click Choose Location.
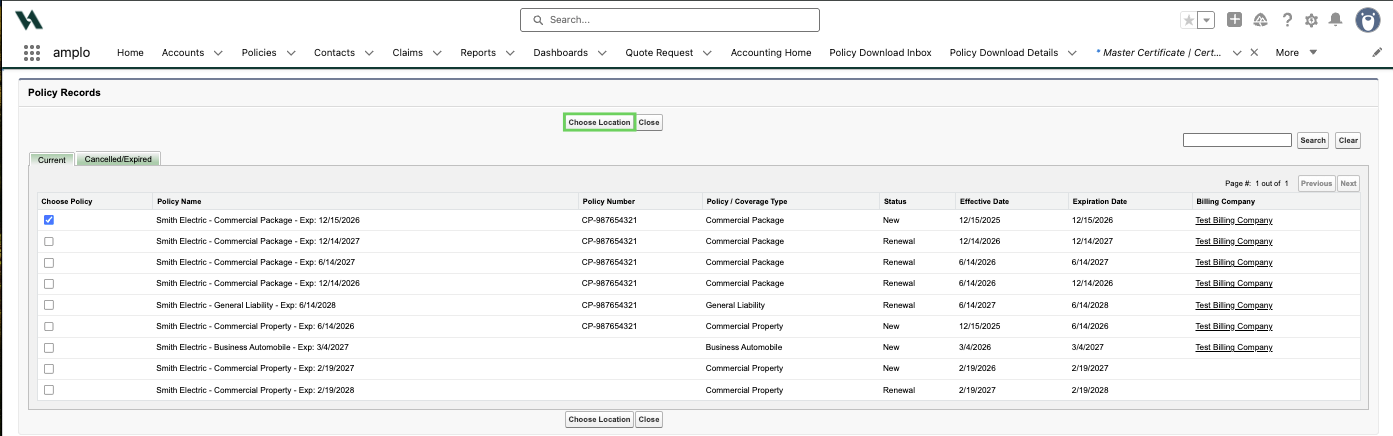
Select the applicable location.

If no location is available, you will not be able to successfully associate the policy. For information on adding a location to a policy, please see 📄 Adding policy schedules and coverages.
Click Apply and Save.

Add related policies and miscellaneous coverages (ACORD 25)
When associating a policy with an ACORD 25 template, identify the following:
Intended recipient and required information
Whether the policy is a commercial package (including its LOBs).
In the Certificate/Evidence Template, click the Related Policies tab.

Click Add Related Policies.
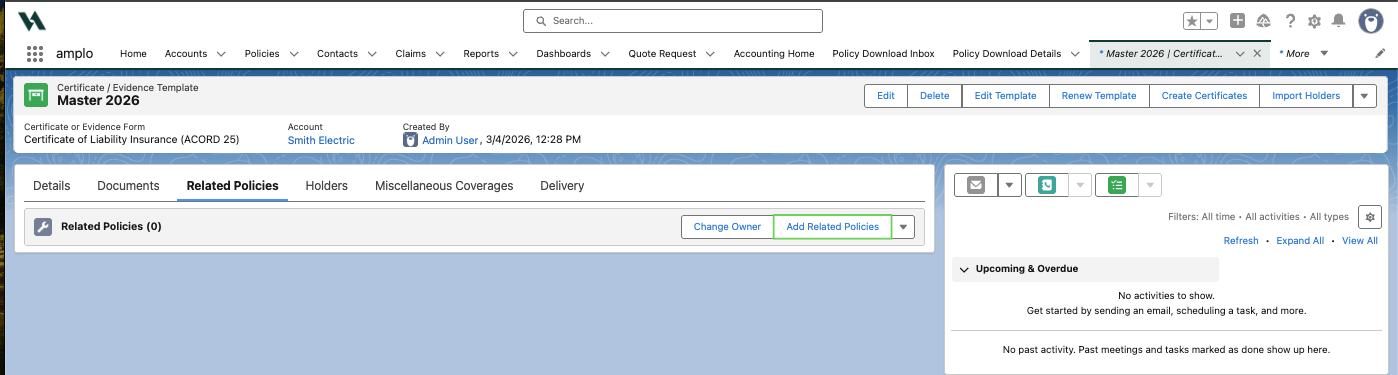
Select the applicable policy from the Current or Cancelled/Expired tabs for each coverage section required by the recipient. Ensure the policy is selected under the correct section so amplo can map values correctly to the ACORD form. If a policy doesn’t fit one of these categories, add it under Miscellaneous Coverages.
Commercial General Liability
Automobile Liability
Umbrella/Excess Liability
Workers Compensation and Employers Liability

Click Apply Policy.

Review the popup's information, and click Proceed.

Select Close to return to the certificate template.

If a policy you need to add is not part of the available categories in the Related Policies tab, you can use the Miscellaneous Coverages tab to add it.
In the Certificate/Evidence Template, click the Miscellaneous Coverages tab.
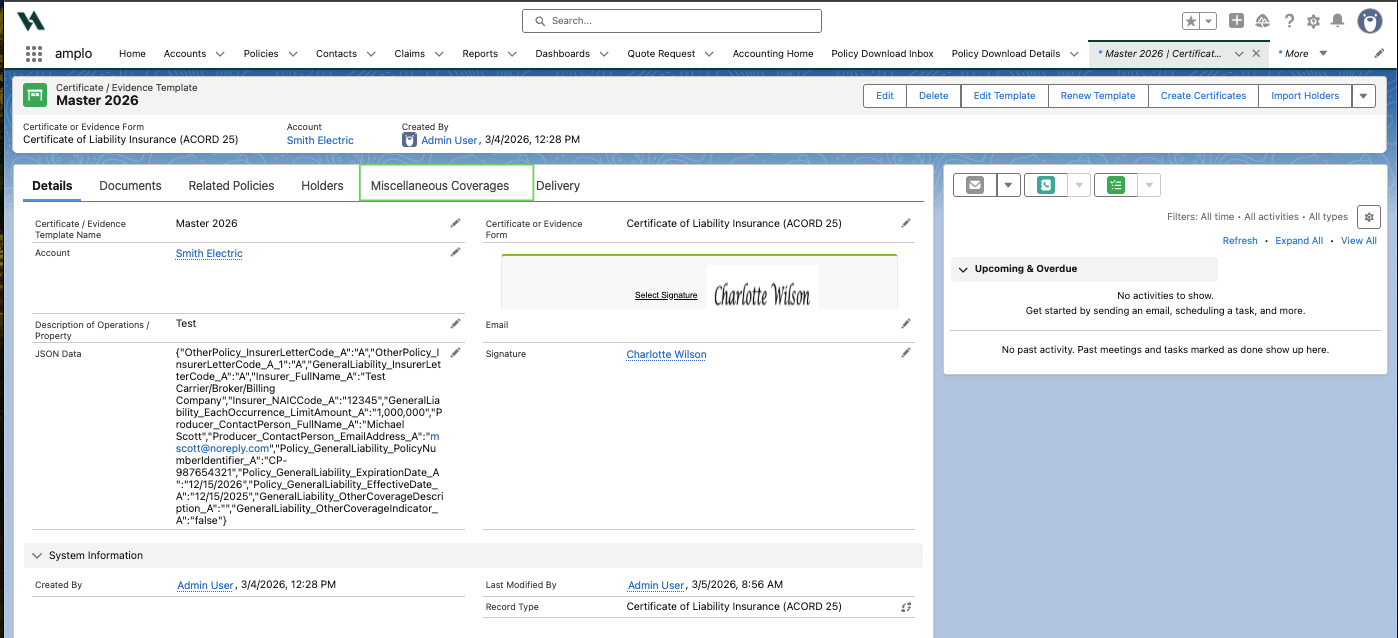
Click the pencil icon in the Related Miscellaneous Policy field and add the applicable policy.

Use the additional fields to specify Type of Insurance and add any necessary coverages.
If needed, click Enter Another Misc. Policy to add an additional policy, and repeat steps 2-3 above.

Link an additional interest
For ACORD 27 or 28 forms, verify that all required Additional Interests are linked to the template. To confirm:
In the Certificate/Evidence Template, click Additional Interests.

Verify the linked Additional Interest details.
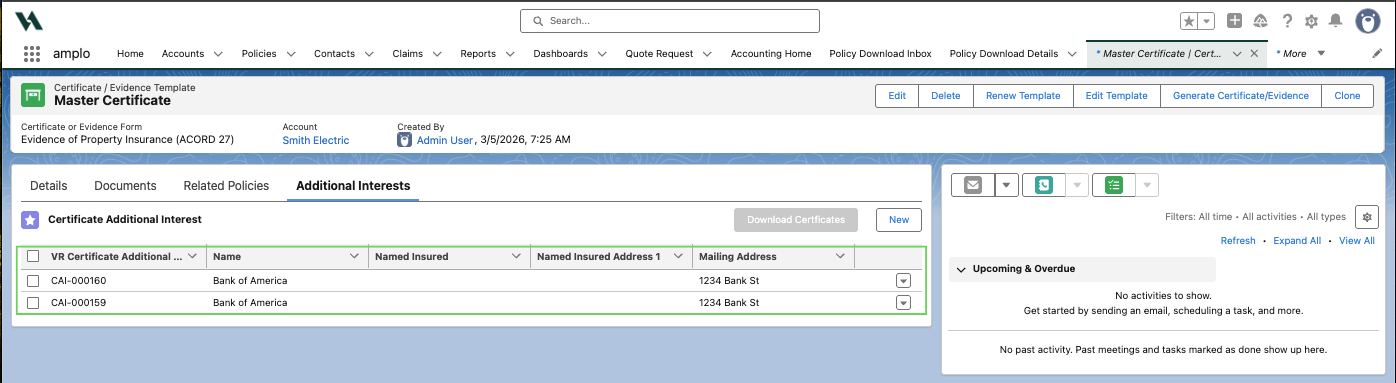
If an expected Additional Interest is missing, check the policy's Schedules. Once the Additional Interest has been added, select Resync Policy Data on the Related Policies tab to update the template.

Note: Avoid using the New button on the Additional Interests tab. Additional interests created here are not linked to the policy or a specific location.
Adding Holders
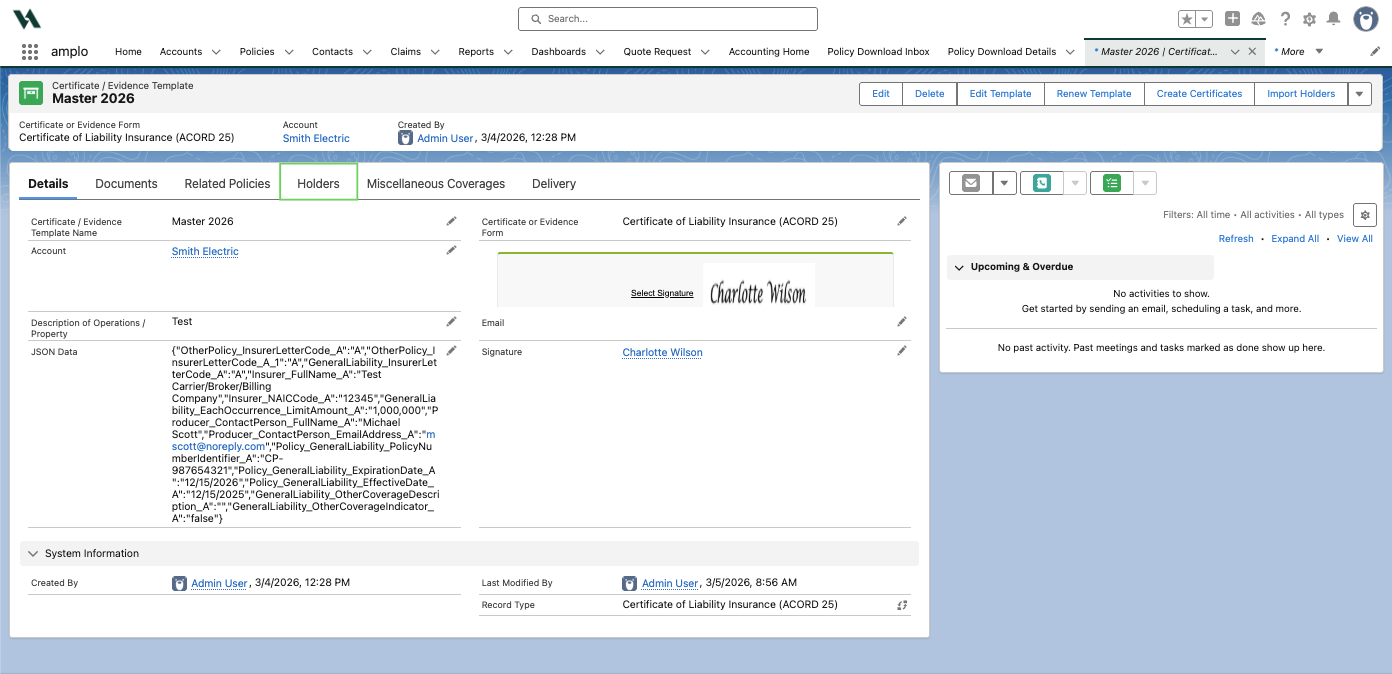
For ACORD 23, 24, and 25, you can add Holders on the template’s Holders tab. Holders are required for ACORD 23 and 24 and help when bulk generating certificates, emailing them from amplo, or managing holder updates. Use the steps below to add a holder:
On the Certificate/Evidence Template, click on the Holders tab.
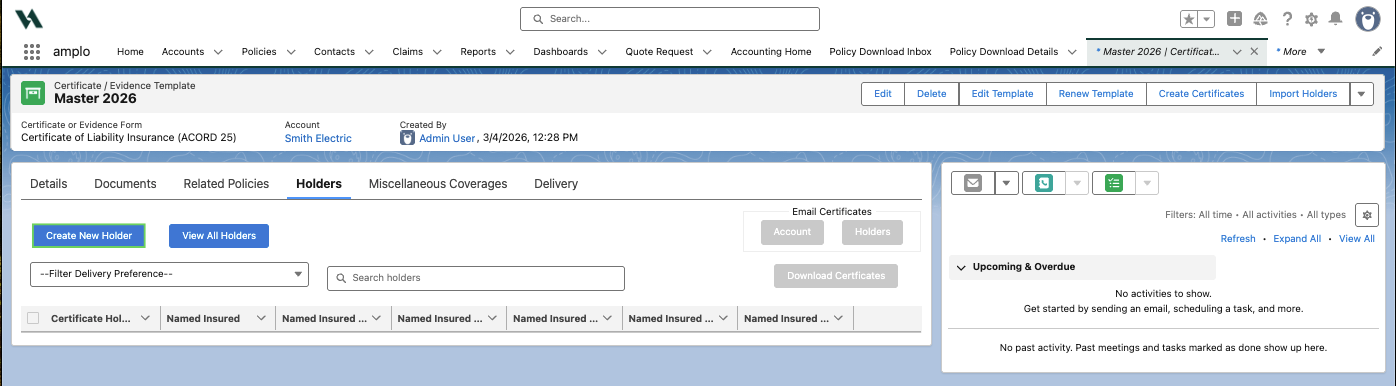
Click Create New Holder to open the New Certificate Holder modal.
If the holder is a Global Holder, search and select it from the Global Holder List. Holder details will populate automatically when the form is generated. For additional details, see 📄 Managing Global Holders.
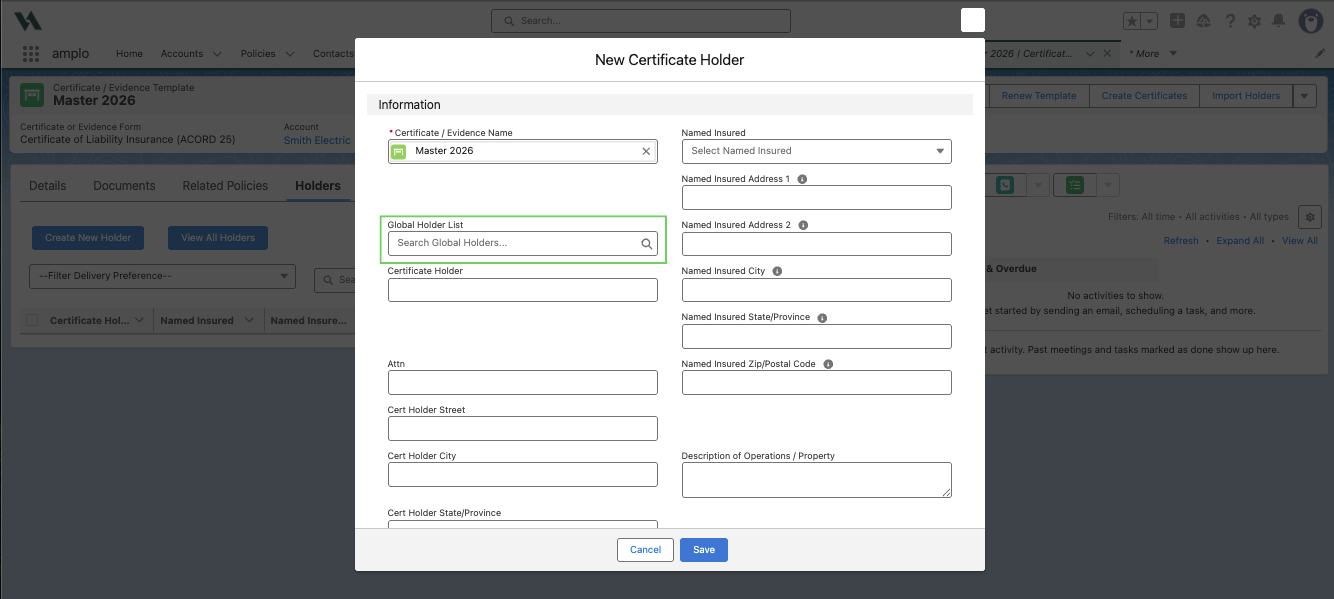
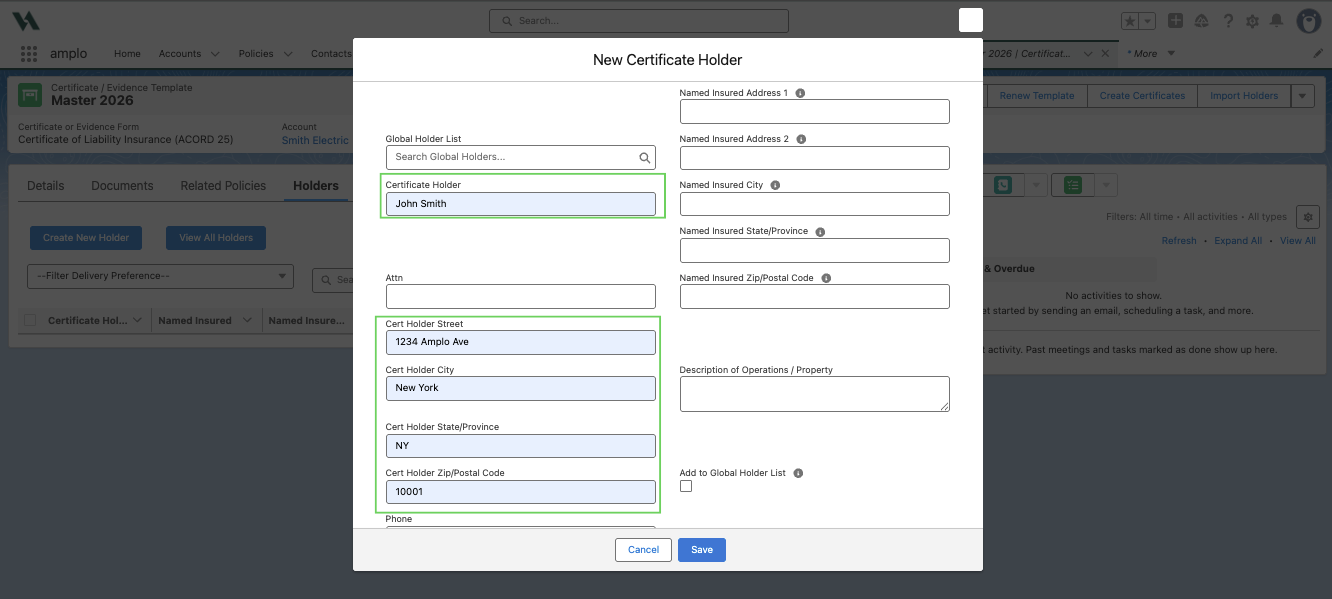
To create a new Holder, enter the details in the popup. The following fields map to the certificate:
Certificate Holder
Cert Holder Street
Cert Holder City
Cert Holder State/Province (abbreviation only)
Cert Holder Zip/Postal Code
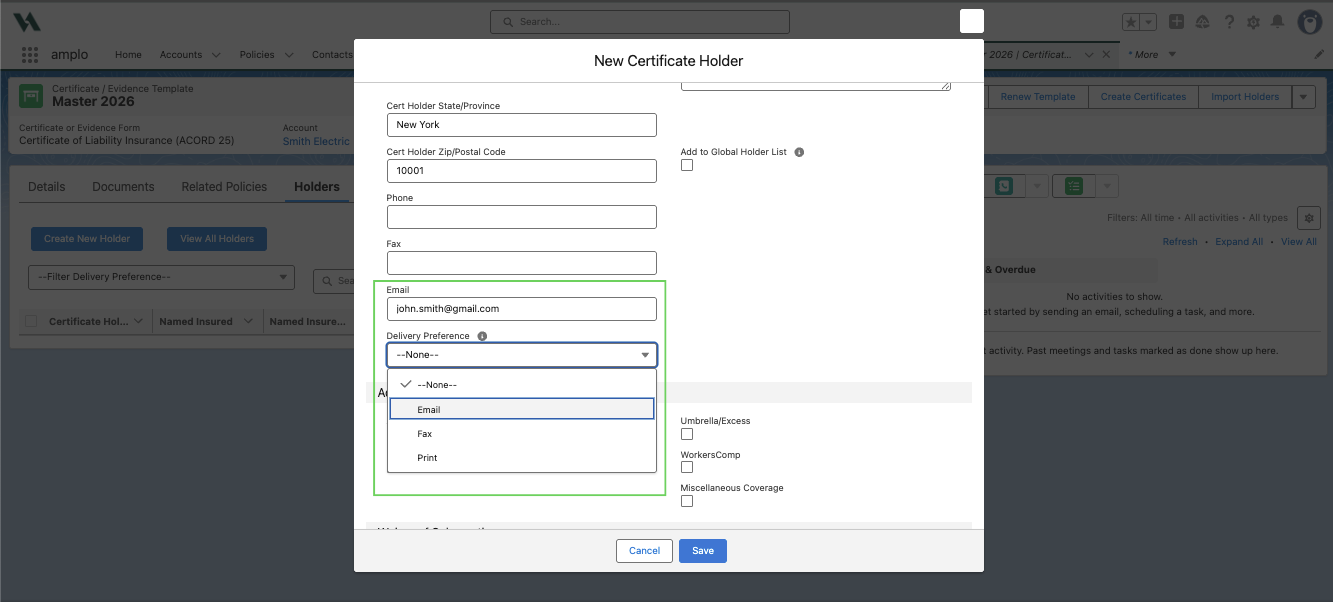
Select a Delivery Preference. To send the certificate by email through amplo, choose Email and enter an address in the Email field.
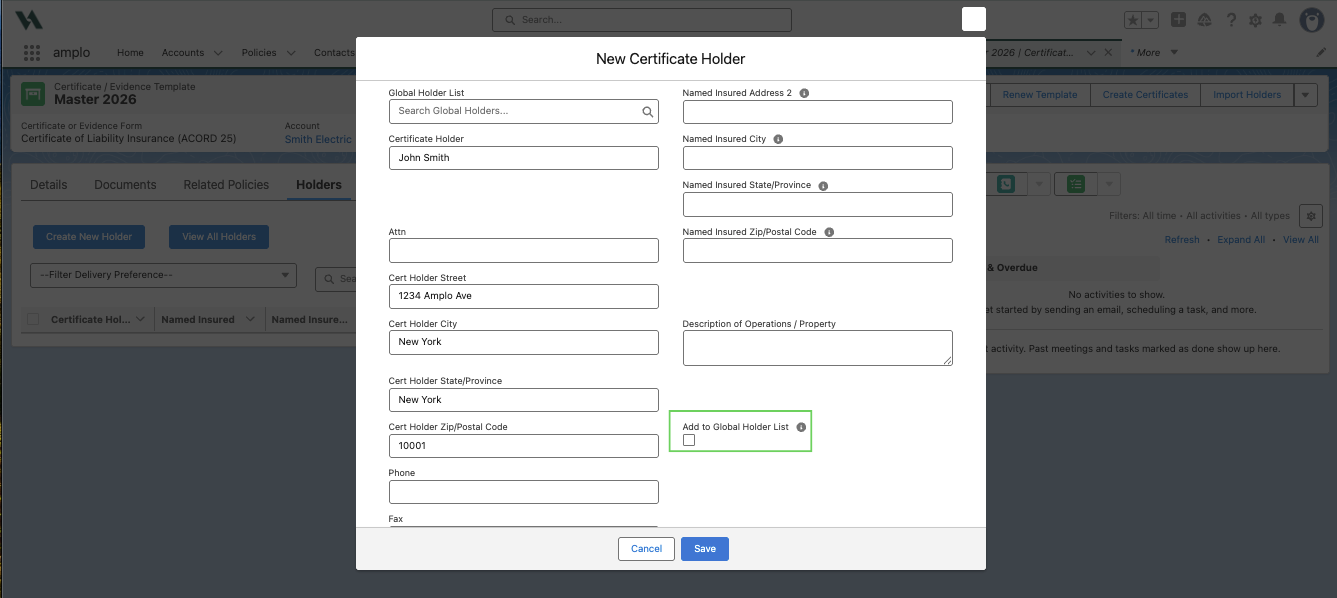
To add the new Holder to the Global Holder List, select the Add to Global Holder List checkbox.
You can use the Additional Insured and Waiver of Subrogation sections to indicate specific information about the holder's coverage.
Click Save.

Edit and finalize the form
On the Certificate/Evidence Template, click Edit Template.
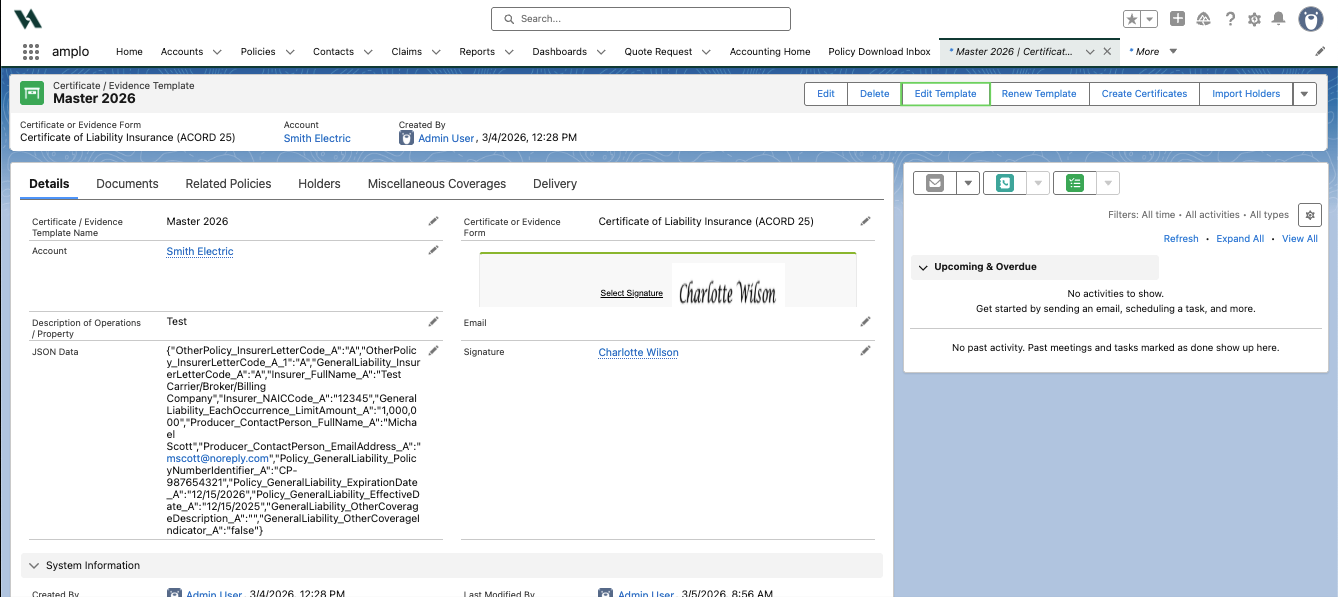
The ACORD Form Viewer will open and display the certificate form for your review.
Note: Green fields are read-only and map directly from policy or template data. Purple fields are editable. To make all fields editable, please refer to 📄 Managing ACORD forms.
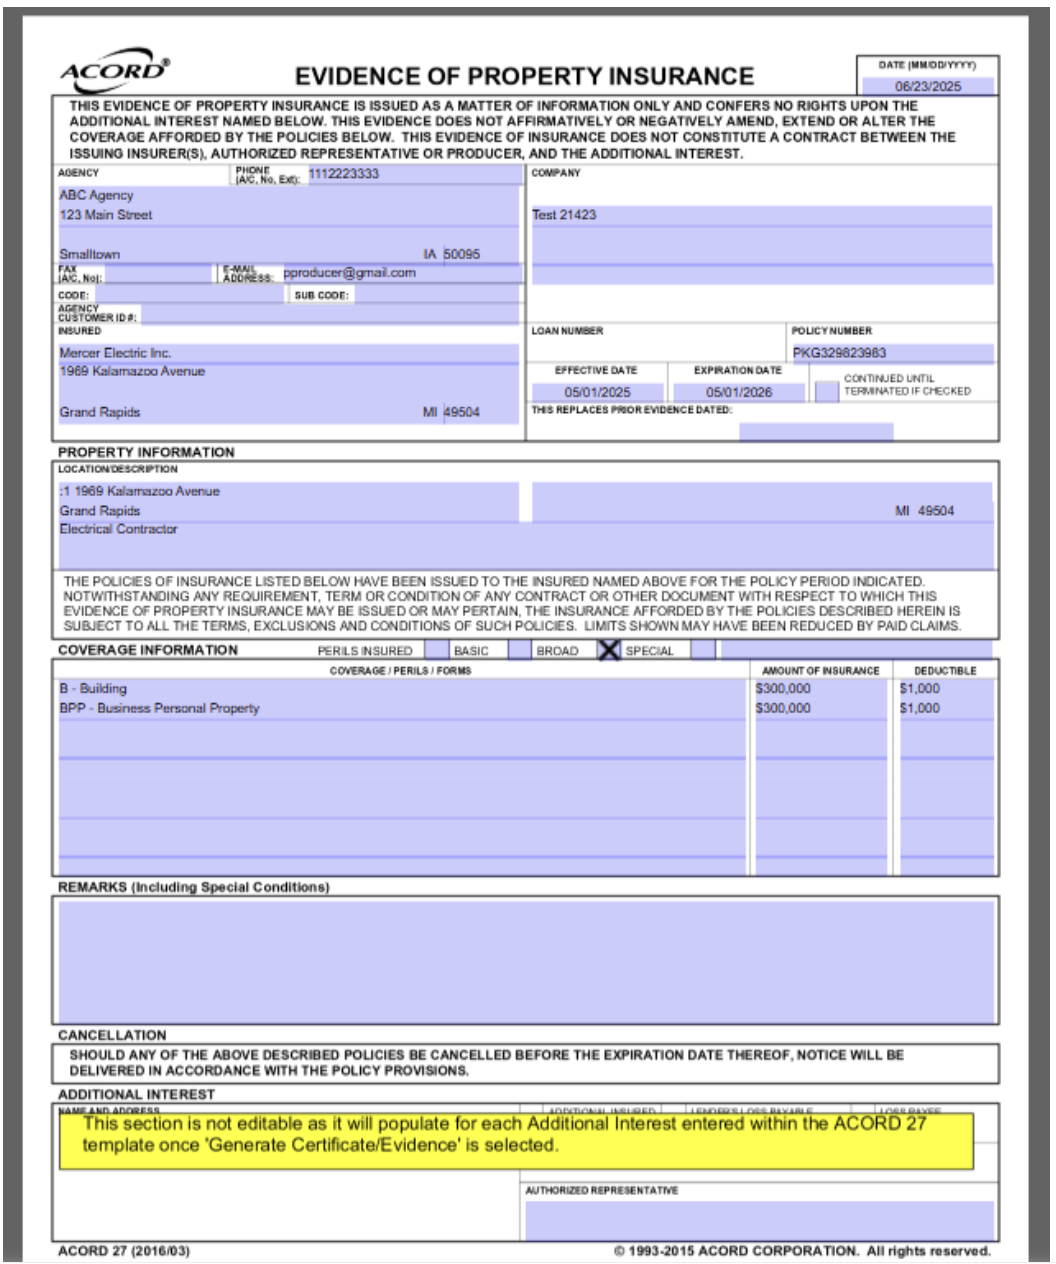
Save, Download, or Print the form as needed. Saved values will appear the next time you select Edit Template.

Generating the certificate
After saving the template, you can generate certificates in two ways:
From a Holder: Requires you to email the certificate from amplo.
From the Certificate/Evidence Template: Generates the certificate without automatic delivery.
Follow the steps below based on your preferred method.
Generate from a Holder
In the Certificate/Evidence Template, select Holders.

Check the box next to the Holder and select Holders under Email Certificates.

In the modal, select Confirm.
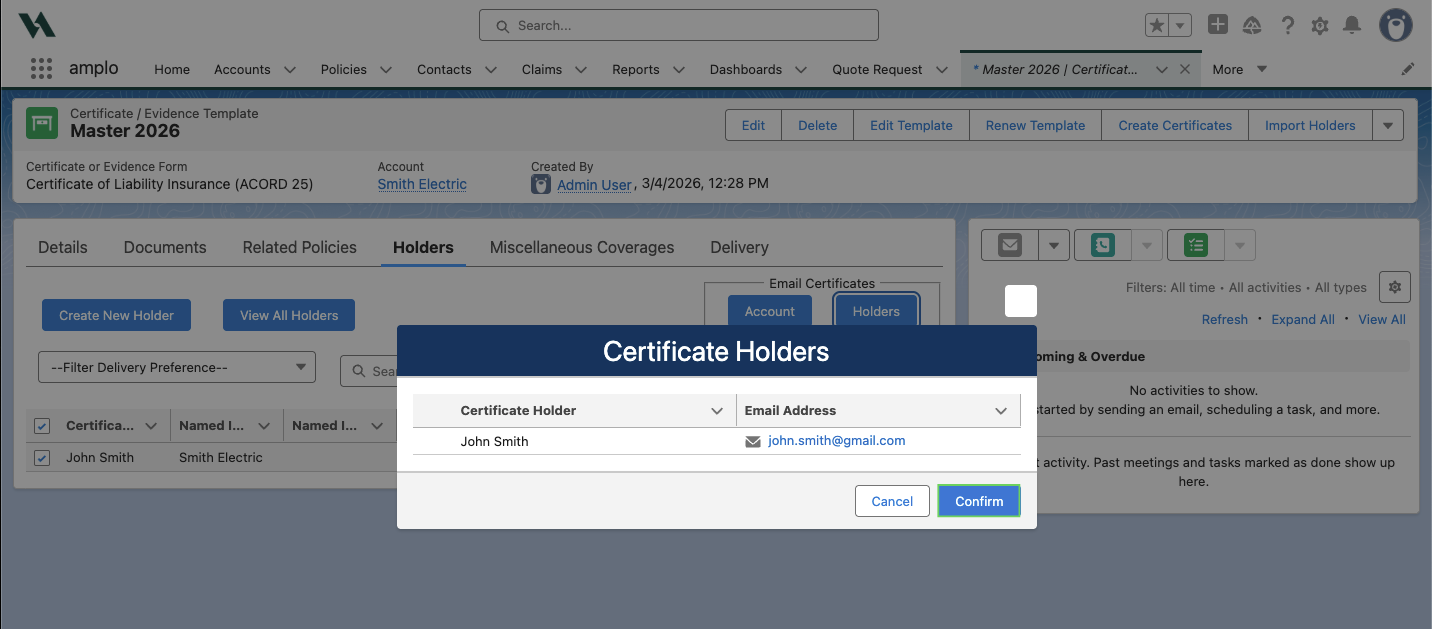
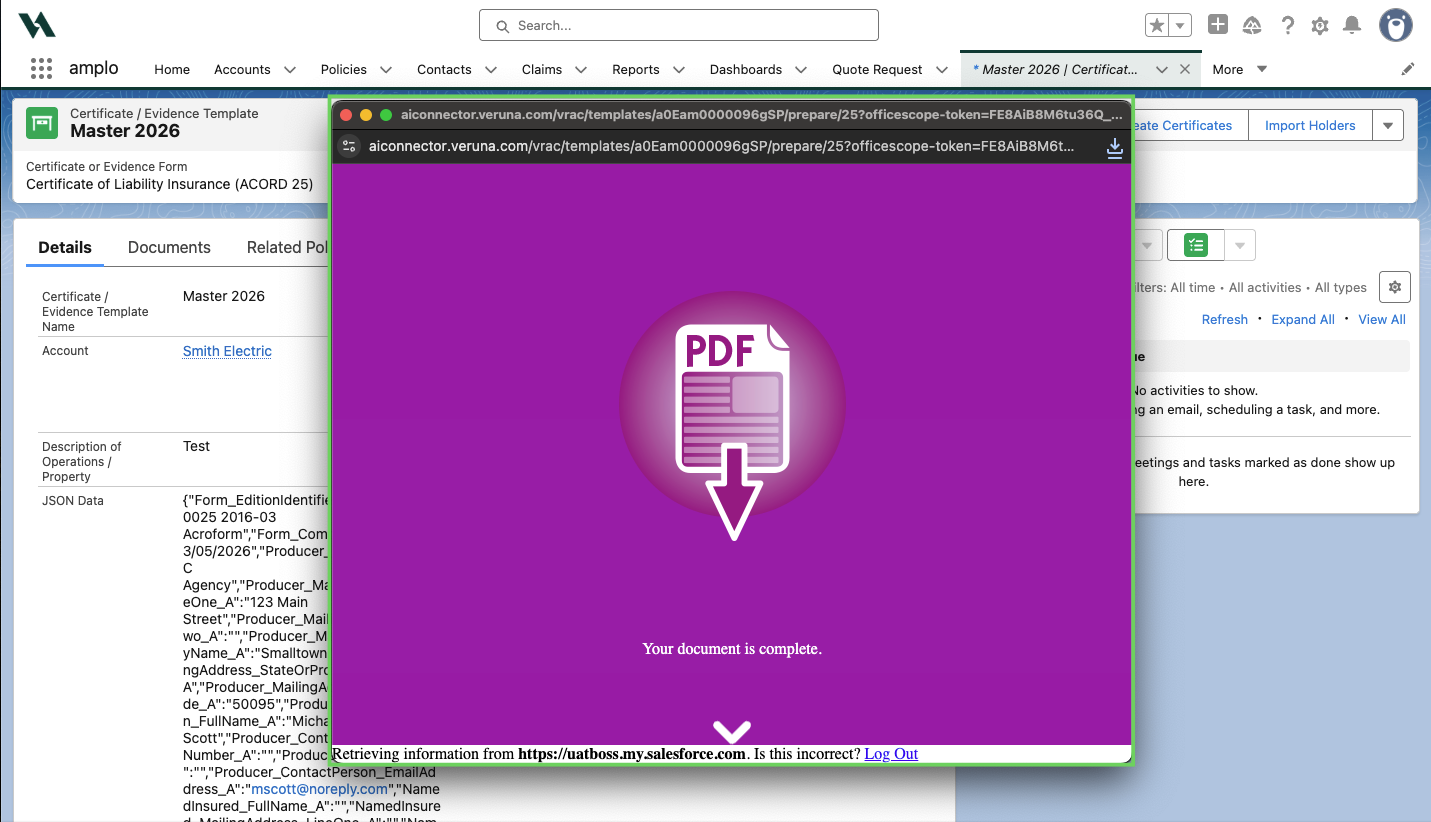
The PDF opens and downloads in a new window and is saved to the template’s Documents tab.

Generate from the Certificate/Evidence template
Select Create Certificates.

In the new window, check the Holder and select Download Certificates.
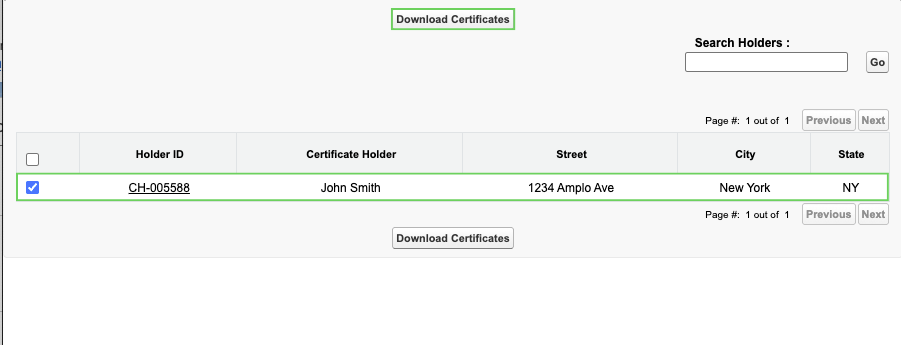
The PDF opens and downloads in a new window and is saved to the template’s Documents tab. Email the downloaded certificate to the insured.
Renewing the certificate template
Instead of creating a new COI template, you can renew the existing one to streamline certificate management and maintain data integrity.
Note: Certificate Holders from the prior term carry over to the renewal template.
In the Certificate/Evidence Template you need to renew, click Renew Template.
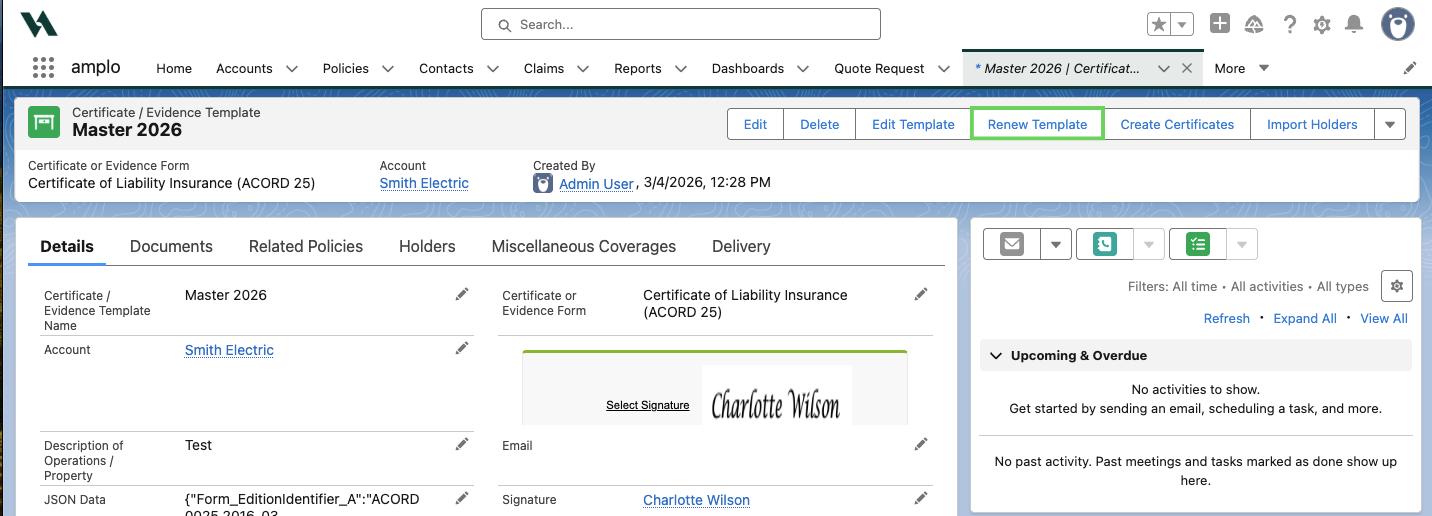
In the pop-up modal, enter a name for the new template and select OK.

Follow the steps above to add the Related Policies for the new term and finalize the form as needed.