Auditing a CL policy
Last updated: March 20, 2026
Overview
Audits on Commercial Line (CL) policies verify that reported exposures—such as payroll, sales, or operations—accurately reflect the insured’s actual business activity during the policy term. A CL policy audit is usually conducted at the end of the policy term, typically after the policy expires. Depending on the results, the audit may result in:
Additional premium owed if exposures were higher than estimated.
A return premium if exposures were lower than estimated.
This article explains how to record a policy audit and how policy updates or premium adjustments are handled based on the audit results. For more on manual policy changes, see 📄 Manual policy changes.
Note: In some cases, carriers may also perform interim audits during the policy term, especially for large accounts or policies with significant exposure fluctuations.
Create an audit policy change request
Follow the steps below to create a policy change request to record an audit on a commercial lines policy.
From the policy record, click Policy Changes.
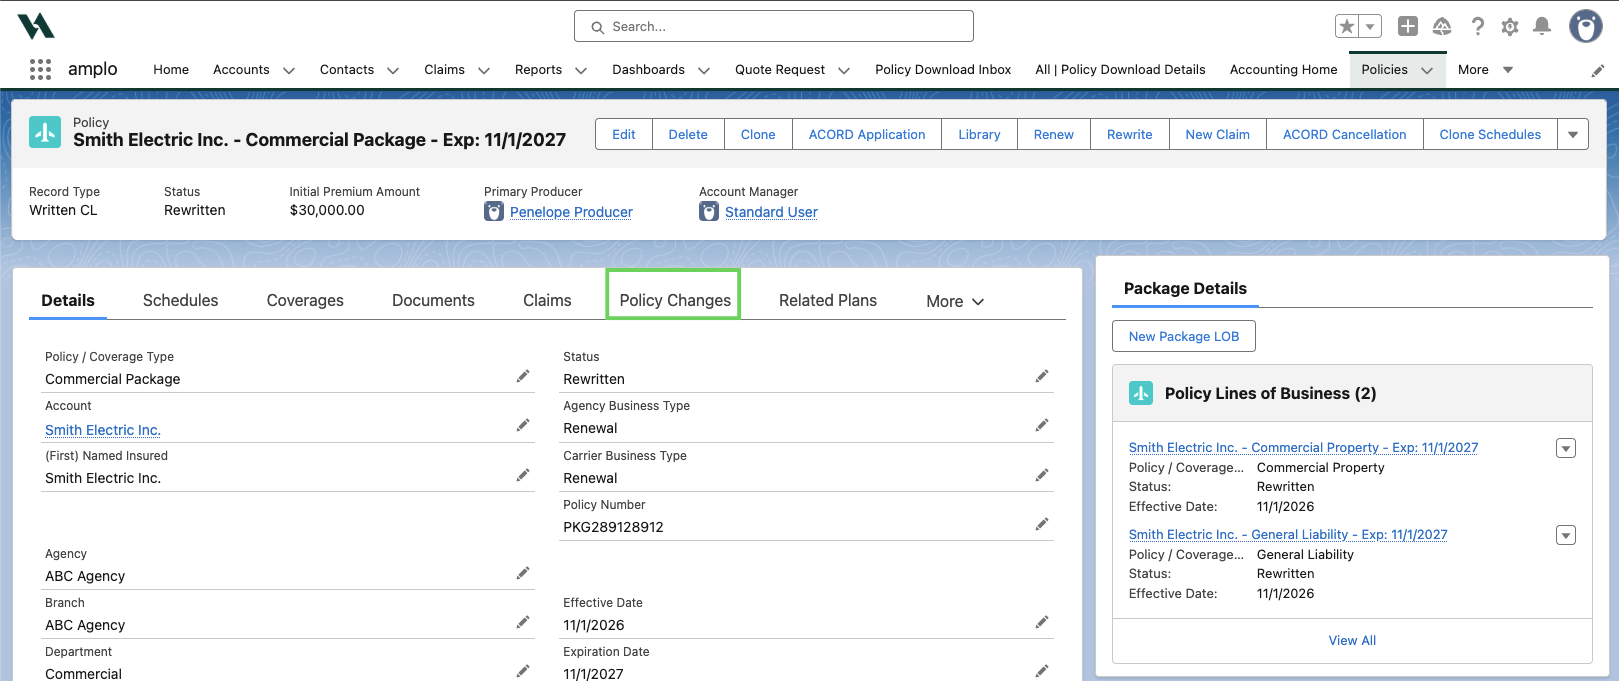
Click New CL Policy Change.

Enter the following details:
Status: Select Finished.
Type: Select Audit.
Endorsement Effective Date: Enter the policy's expiration date.
Description: Enter the reason for the audit.
Policy Type(s) Affected: Select the affected line(s) of business. If a monoline policy, leave this blank.
Premium Amount: Enter the premium amount sent by the carrier. This will update the Current Term Premium and Annualized Premium on the policy.
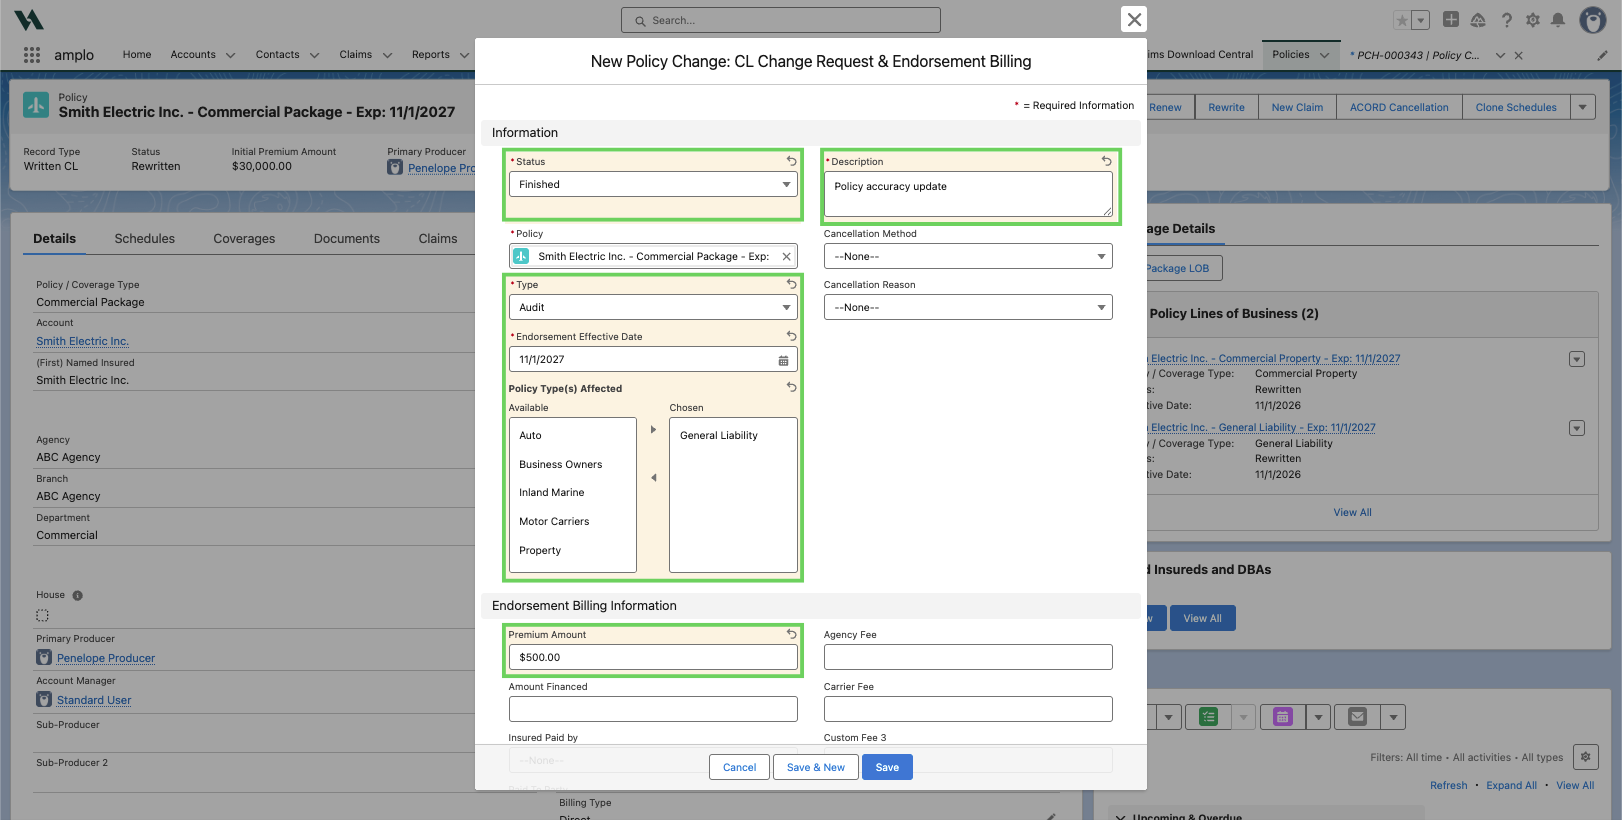
If you already have the information for the remaining sections, you can input the values here.
Click Save. You'll be redirected to the new policy change record.
Edit exposures
Based on the audit results, you may need to update exposures to ensure the audited values are reflected correctly.
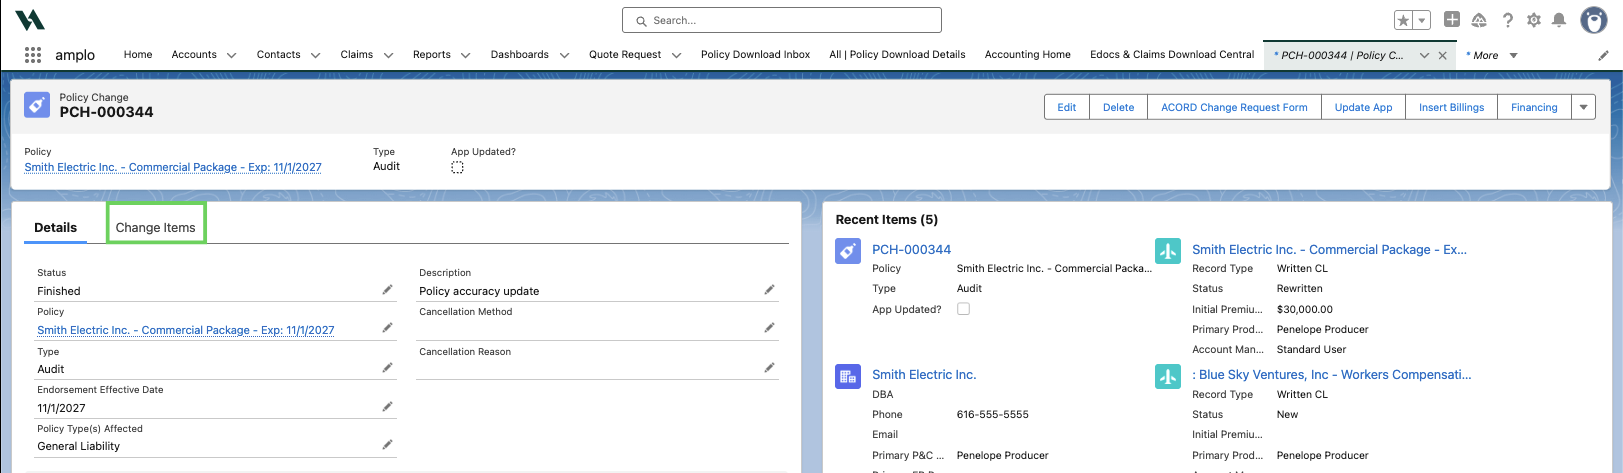
Select Change Items on the policy change record.
Click Change/Delete next to the exposure that needs to be updated.
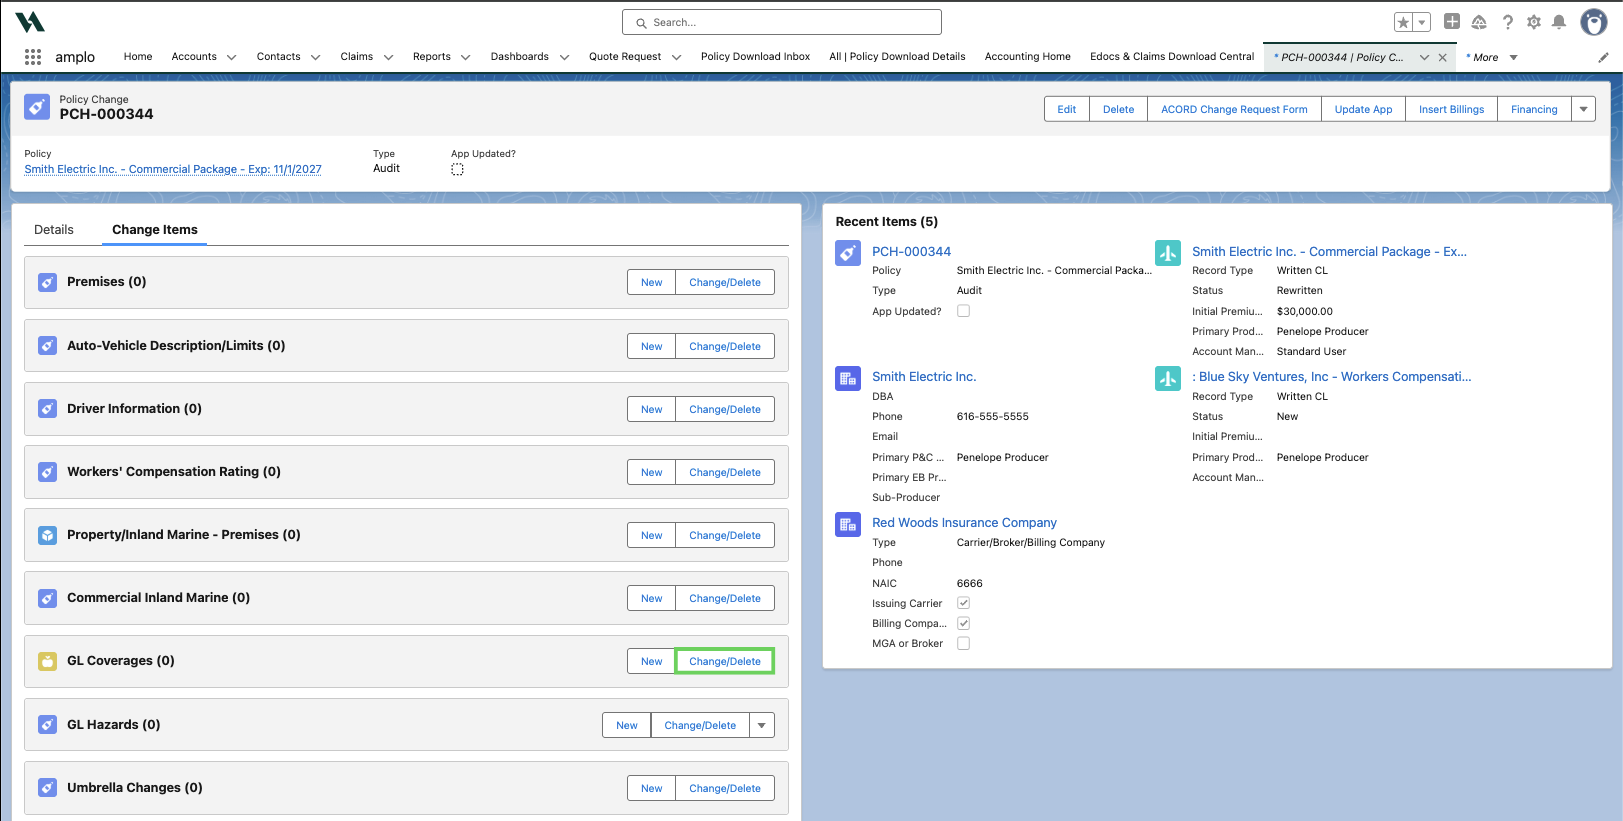
Note: If your environment has custom schedules enabled, you will see them on the right side of the screen.
In the Action dropdown, select either Change or Delete, depending on the action you want to take, then click Submit.
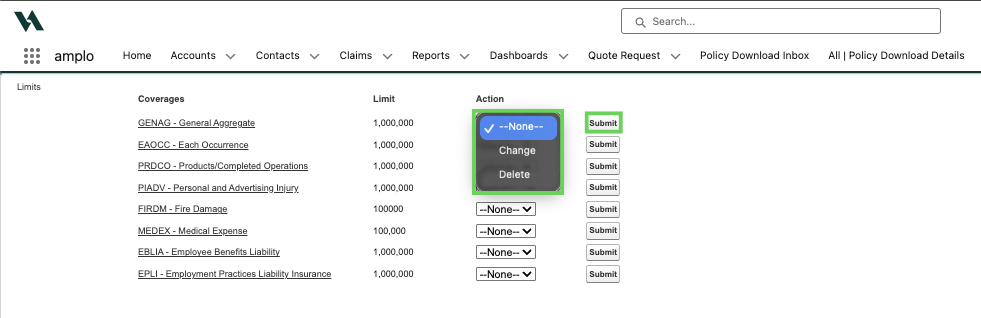
If Change is selected, enter the relevant information in the Edit Coverage modal. Then, click Save.

Note: Don't click Save & New as the selected change request will not auto-populate.
Confirm the changes are accurate by clicking the hyperlink on the Details page.
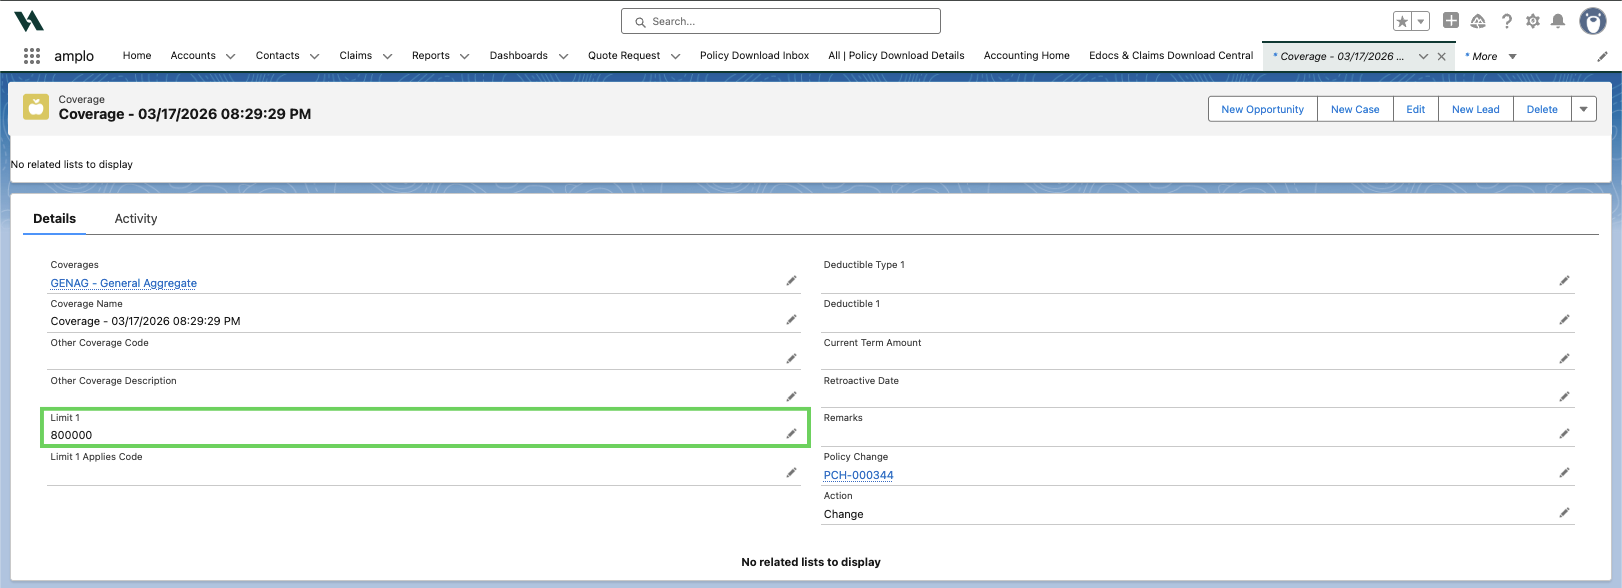
Use the hyperlink to navigate back to the Policy Change record.

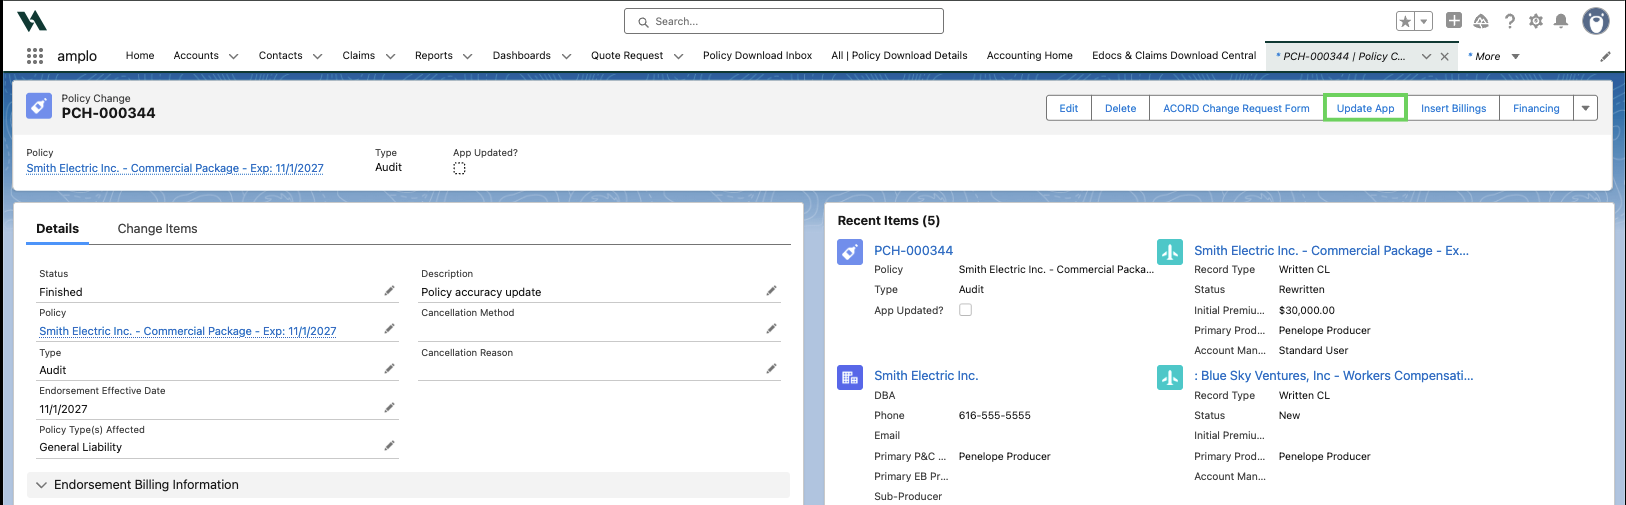
Click Update App to apply the changes to the policy. This step is critical in ensuring the updates reflect back to the policy.
Process audit premium adjustments
After the audit is complete, the carrier may adjust the premium based on the actual exposures. This can result in either an additional amount due or a refund to the insured. Use the steps below to generate the billing and finalize the audit.
Click Insert Billings on the policy change record to generate the invoice.
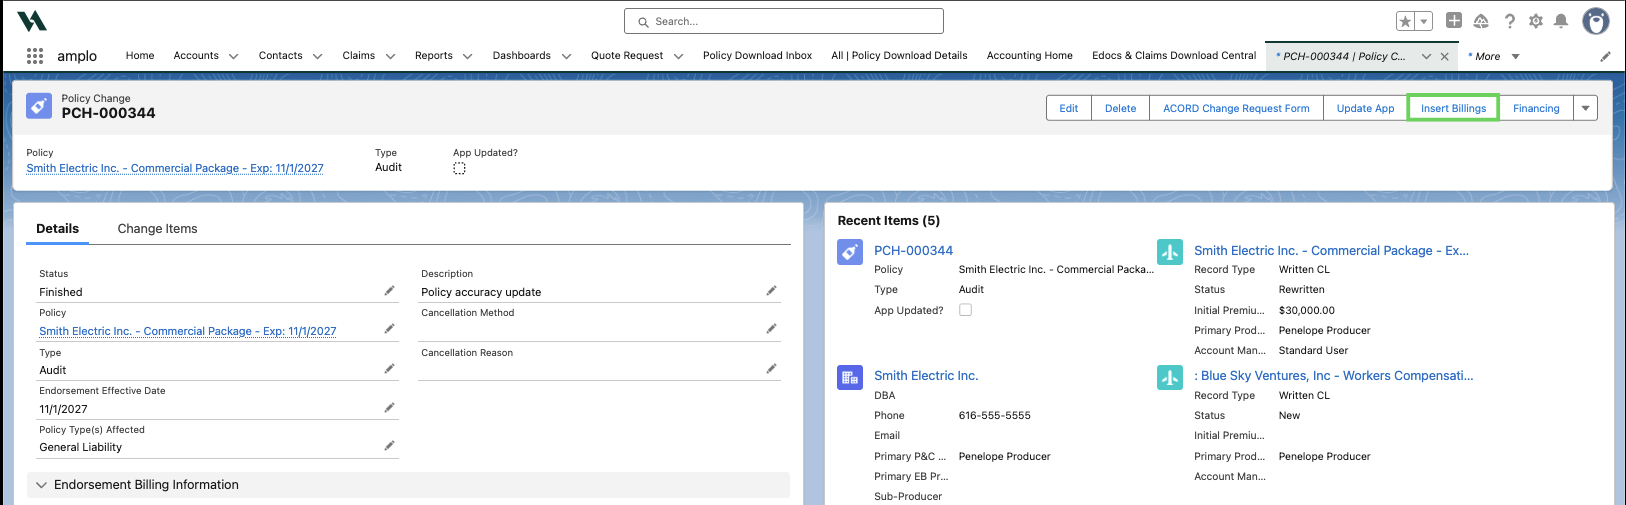
In the confirmation pop-up, click Proceed.

Select OK to proceed or Cancel to return to the policy change record.
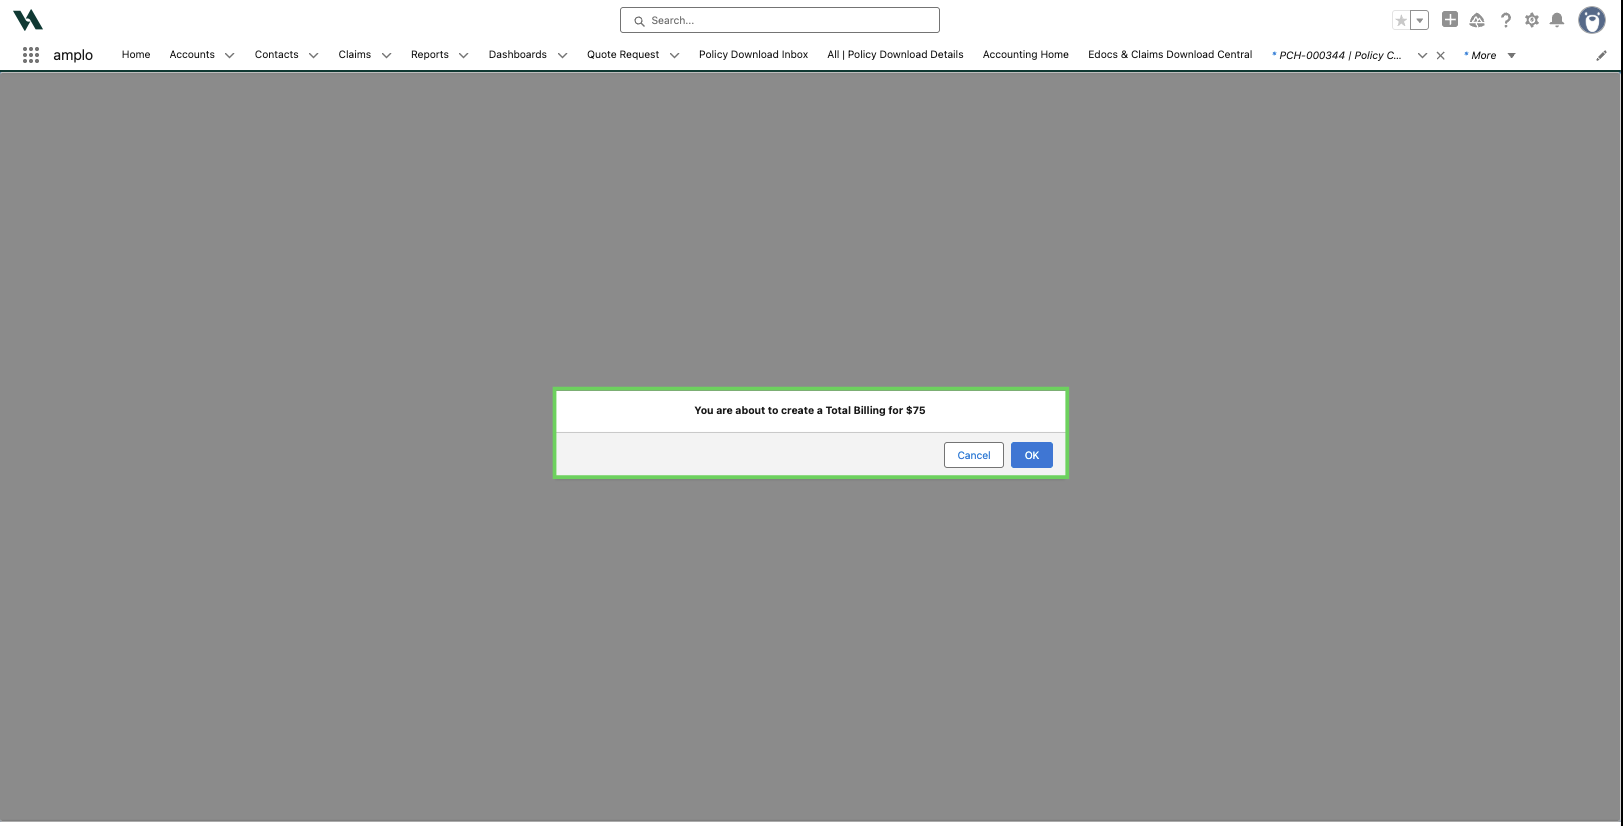
To confirm the billing was successfully added, navigate back to the Policy record, click the Accounting tab, and confirm the billing appears.

Dispute an audit
After the audit is complete, the insured can dispute the audit premium if they believe it's incorrect. If a carrier issues an audit and the insured reports that amount is inaccurate, the agency should dispute the audit with the carrier. To document a dispute, follow the steps below.
From the policy record, select Policy Changes.

Then, click New CL Policy Change.
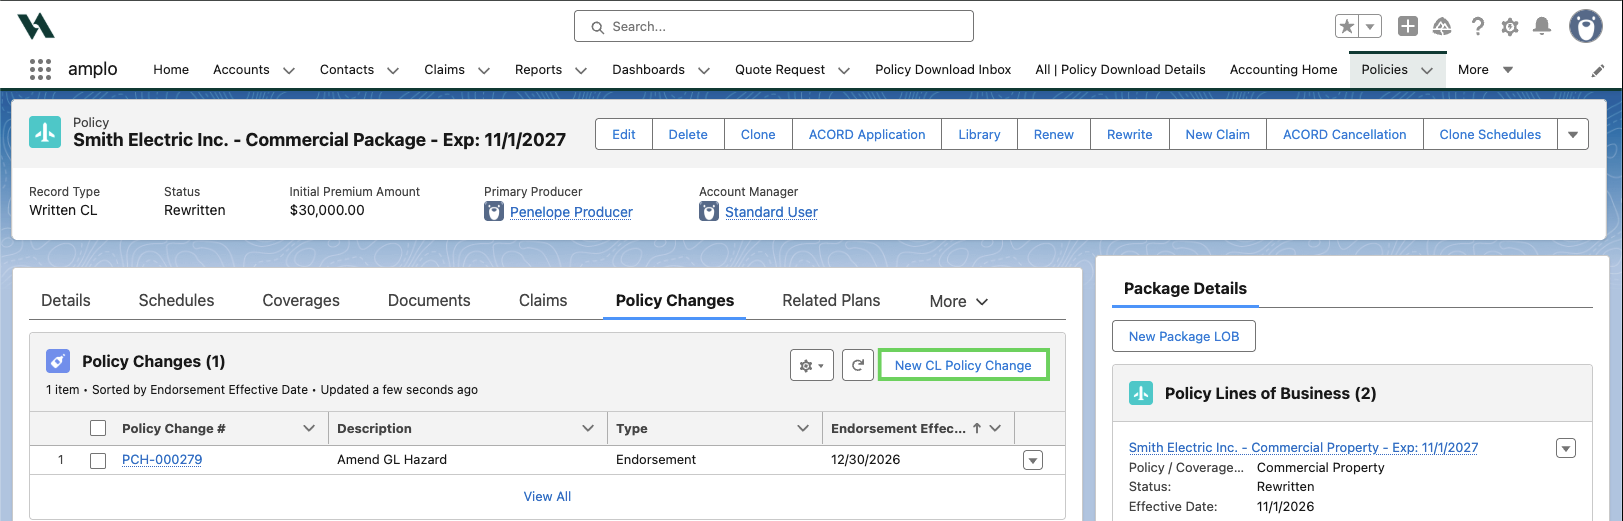
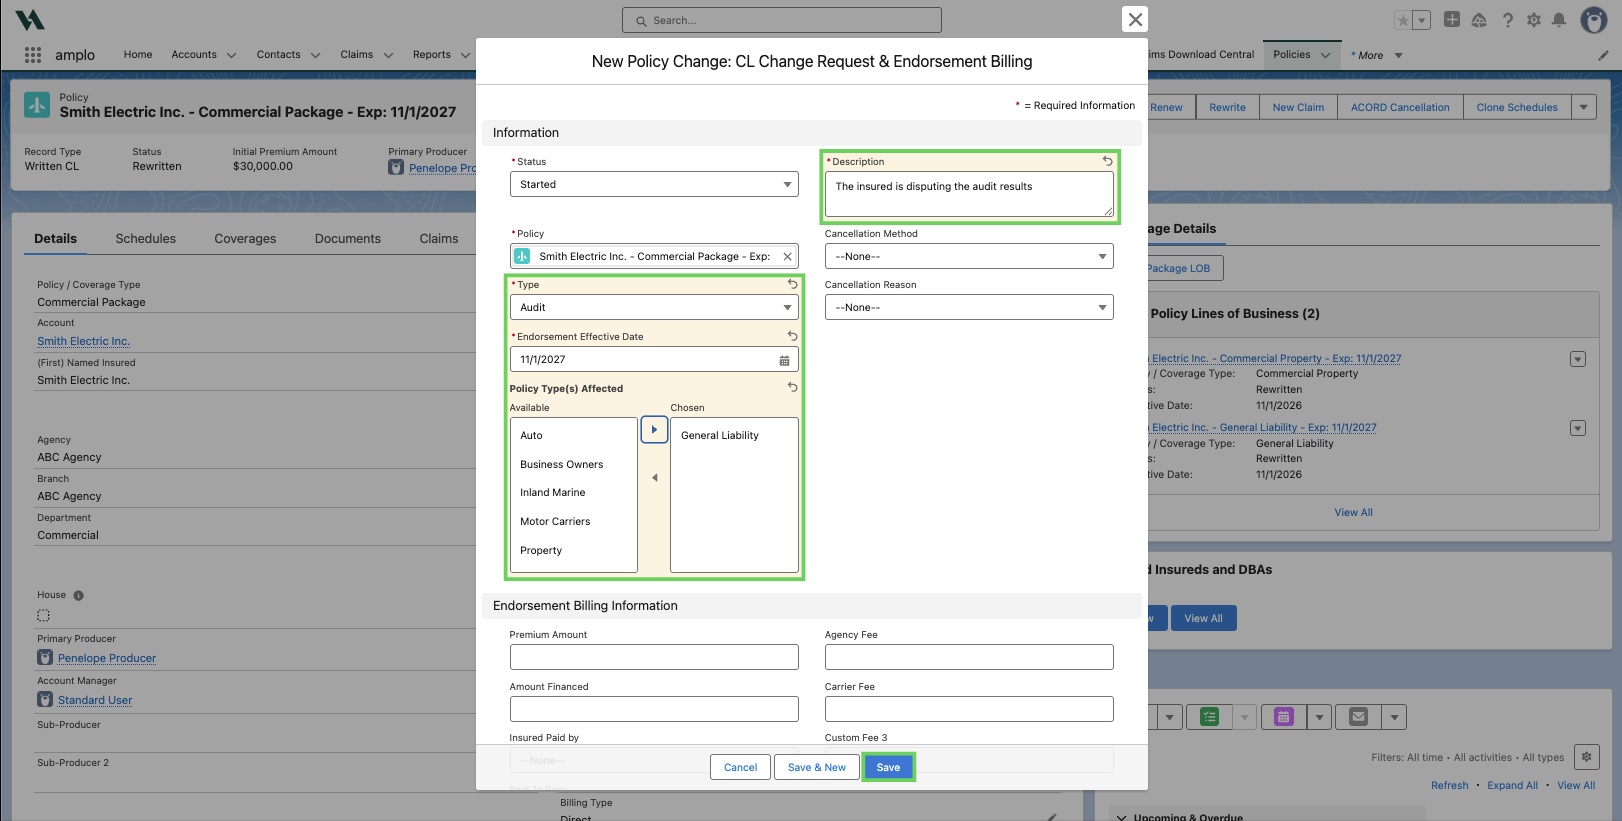
Enter the following details:
Type: Select Audit.
Endorsement Effective Date: Enter the policy's expiration date.
Description: "The insured is disputing the audit results."
Policy Type(s) Affected: Select the affected line(s) of business. If a monoline policy, leave this blank
Click Save.
Finalize the dispute
If the carrier issues an amended audit, follow the steps below.
Click the edit pencil next to Premium Amount and enter the new premium amount.

Change the Status to Finished.

Click Save.
Note: It's best practice to add a task to document the change. For more information on creating a task, see 📄 Manage activities and client interactions.