Document management (VerunaDocs)
Last updated: February 20, 2026
Overview
VerunaDocs enables users to store, retrieve, and manage insurance-related documents directly within amplo. This allows teams to handle documentation without leaving the platform. This article explains the most common document management actions in VerunaDocs.
Import documents
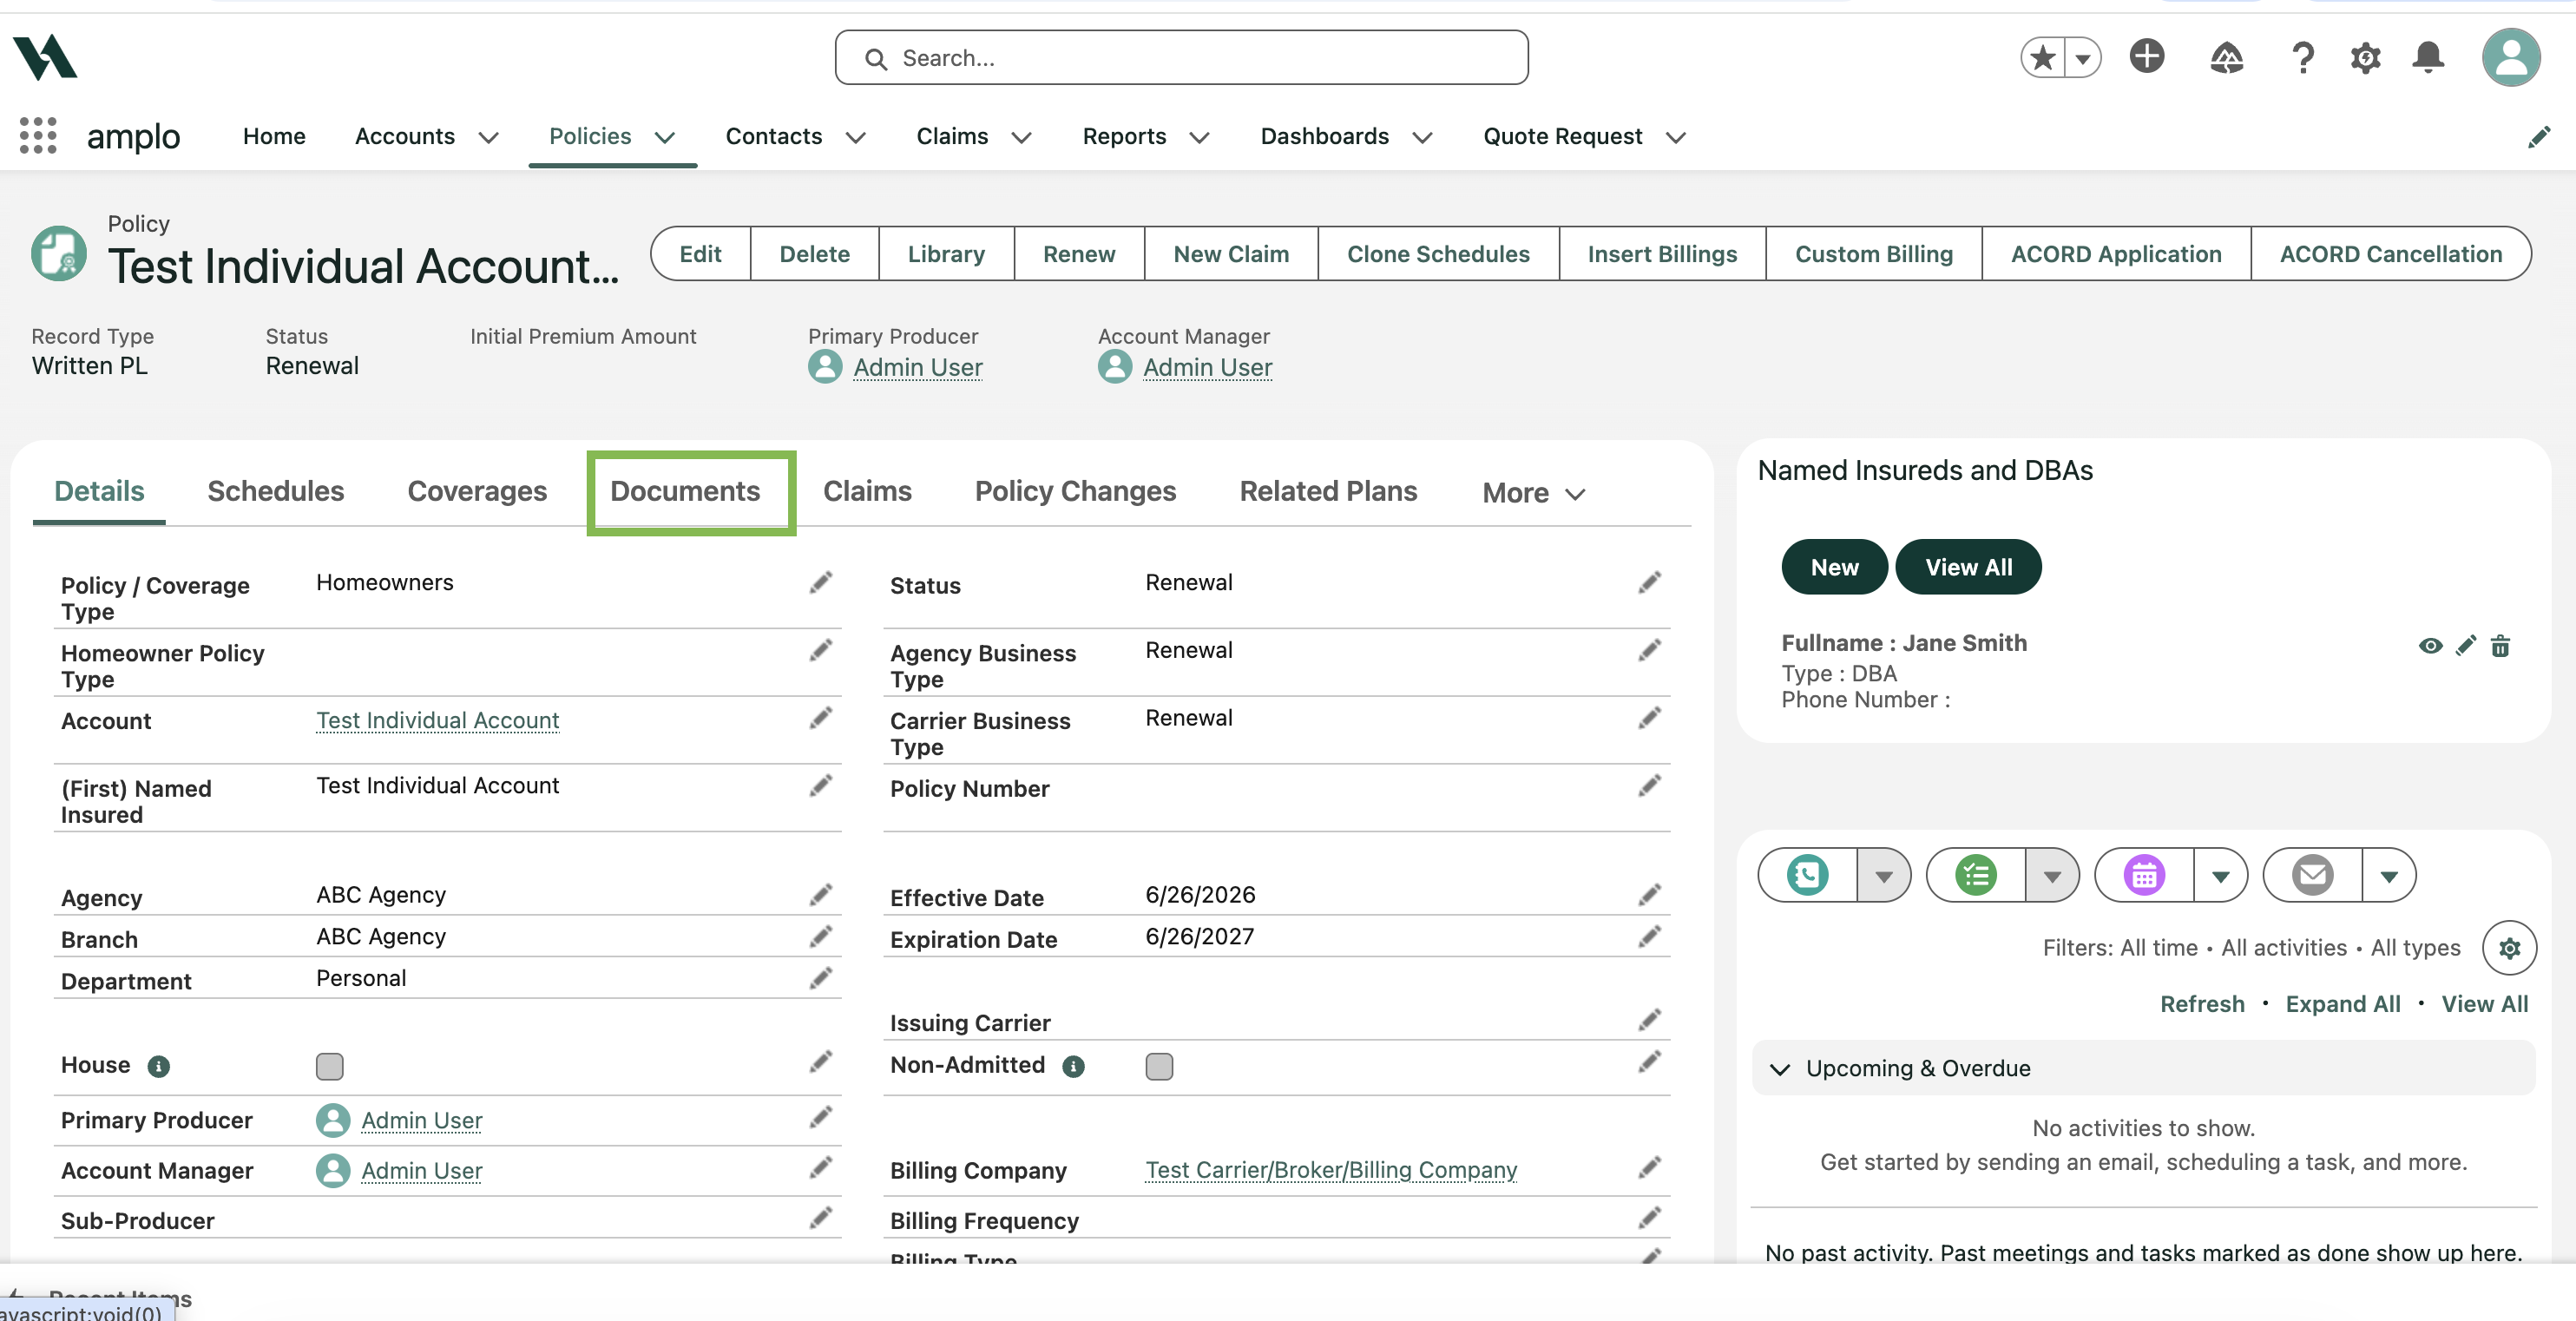
Navigate to the Documents tab from either the Account or Policy page.
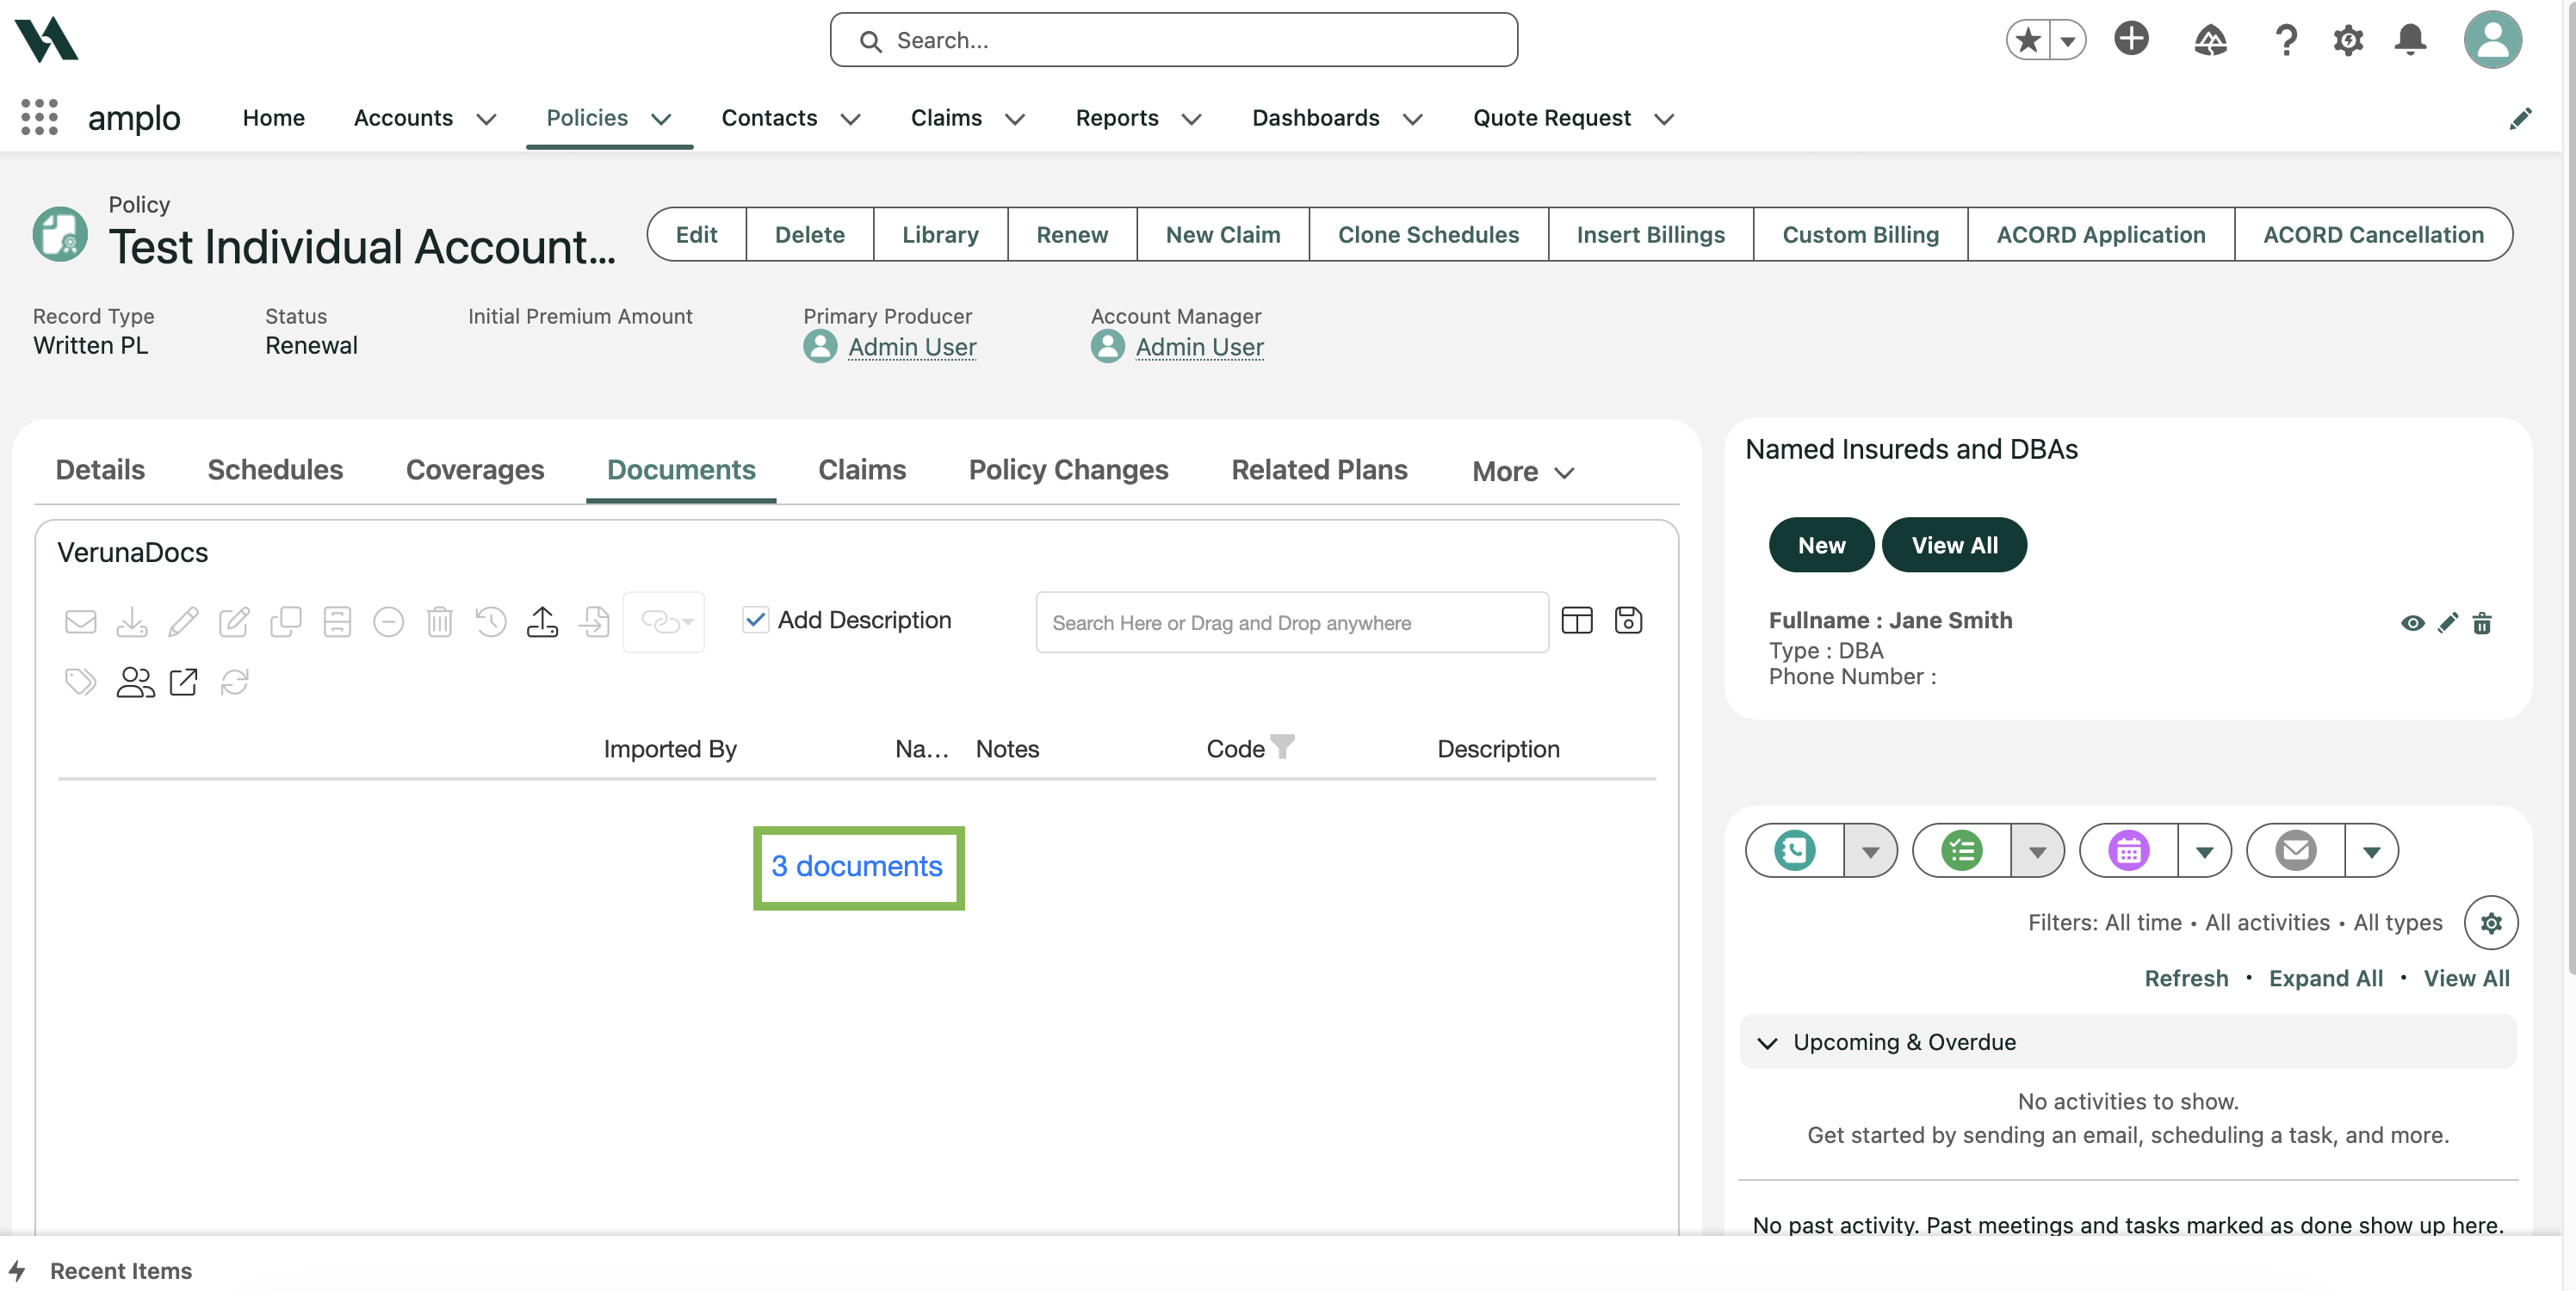
Click the documents hyperlink to view all stored documents.
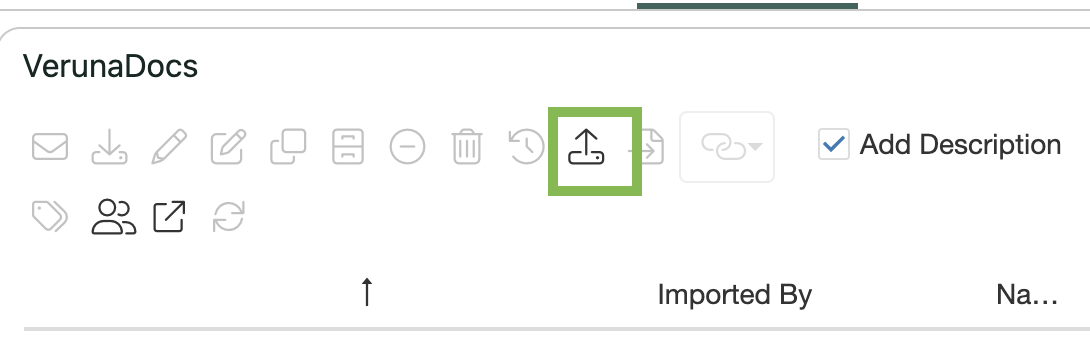
Click the Import Documents icon, or drag and drop a document from your desktop into the designated window.
Choose the correct code from the Code column. Your select will populate in the Description field.

Utilize the Notes field for any additional comments or information relevant to the document, then click Select Cabinet.
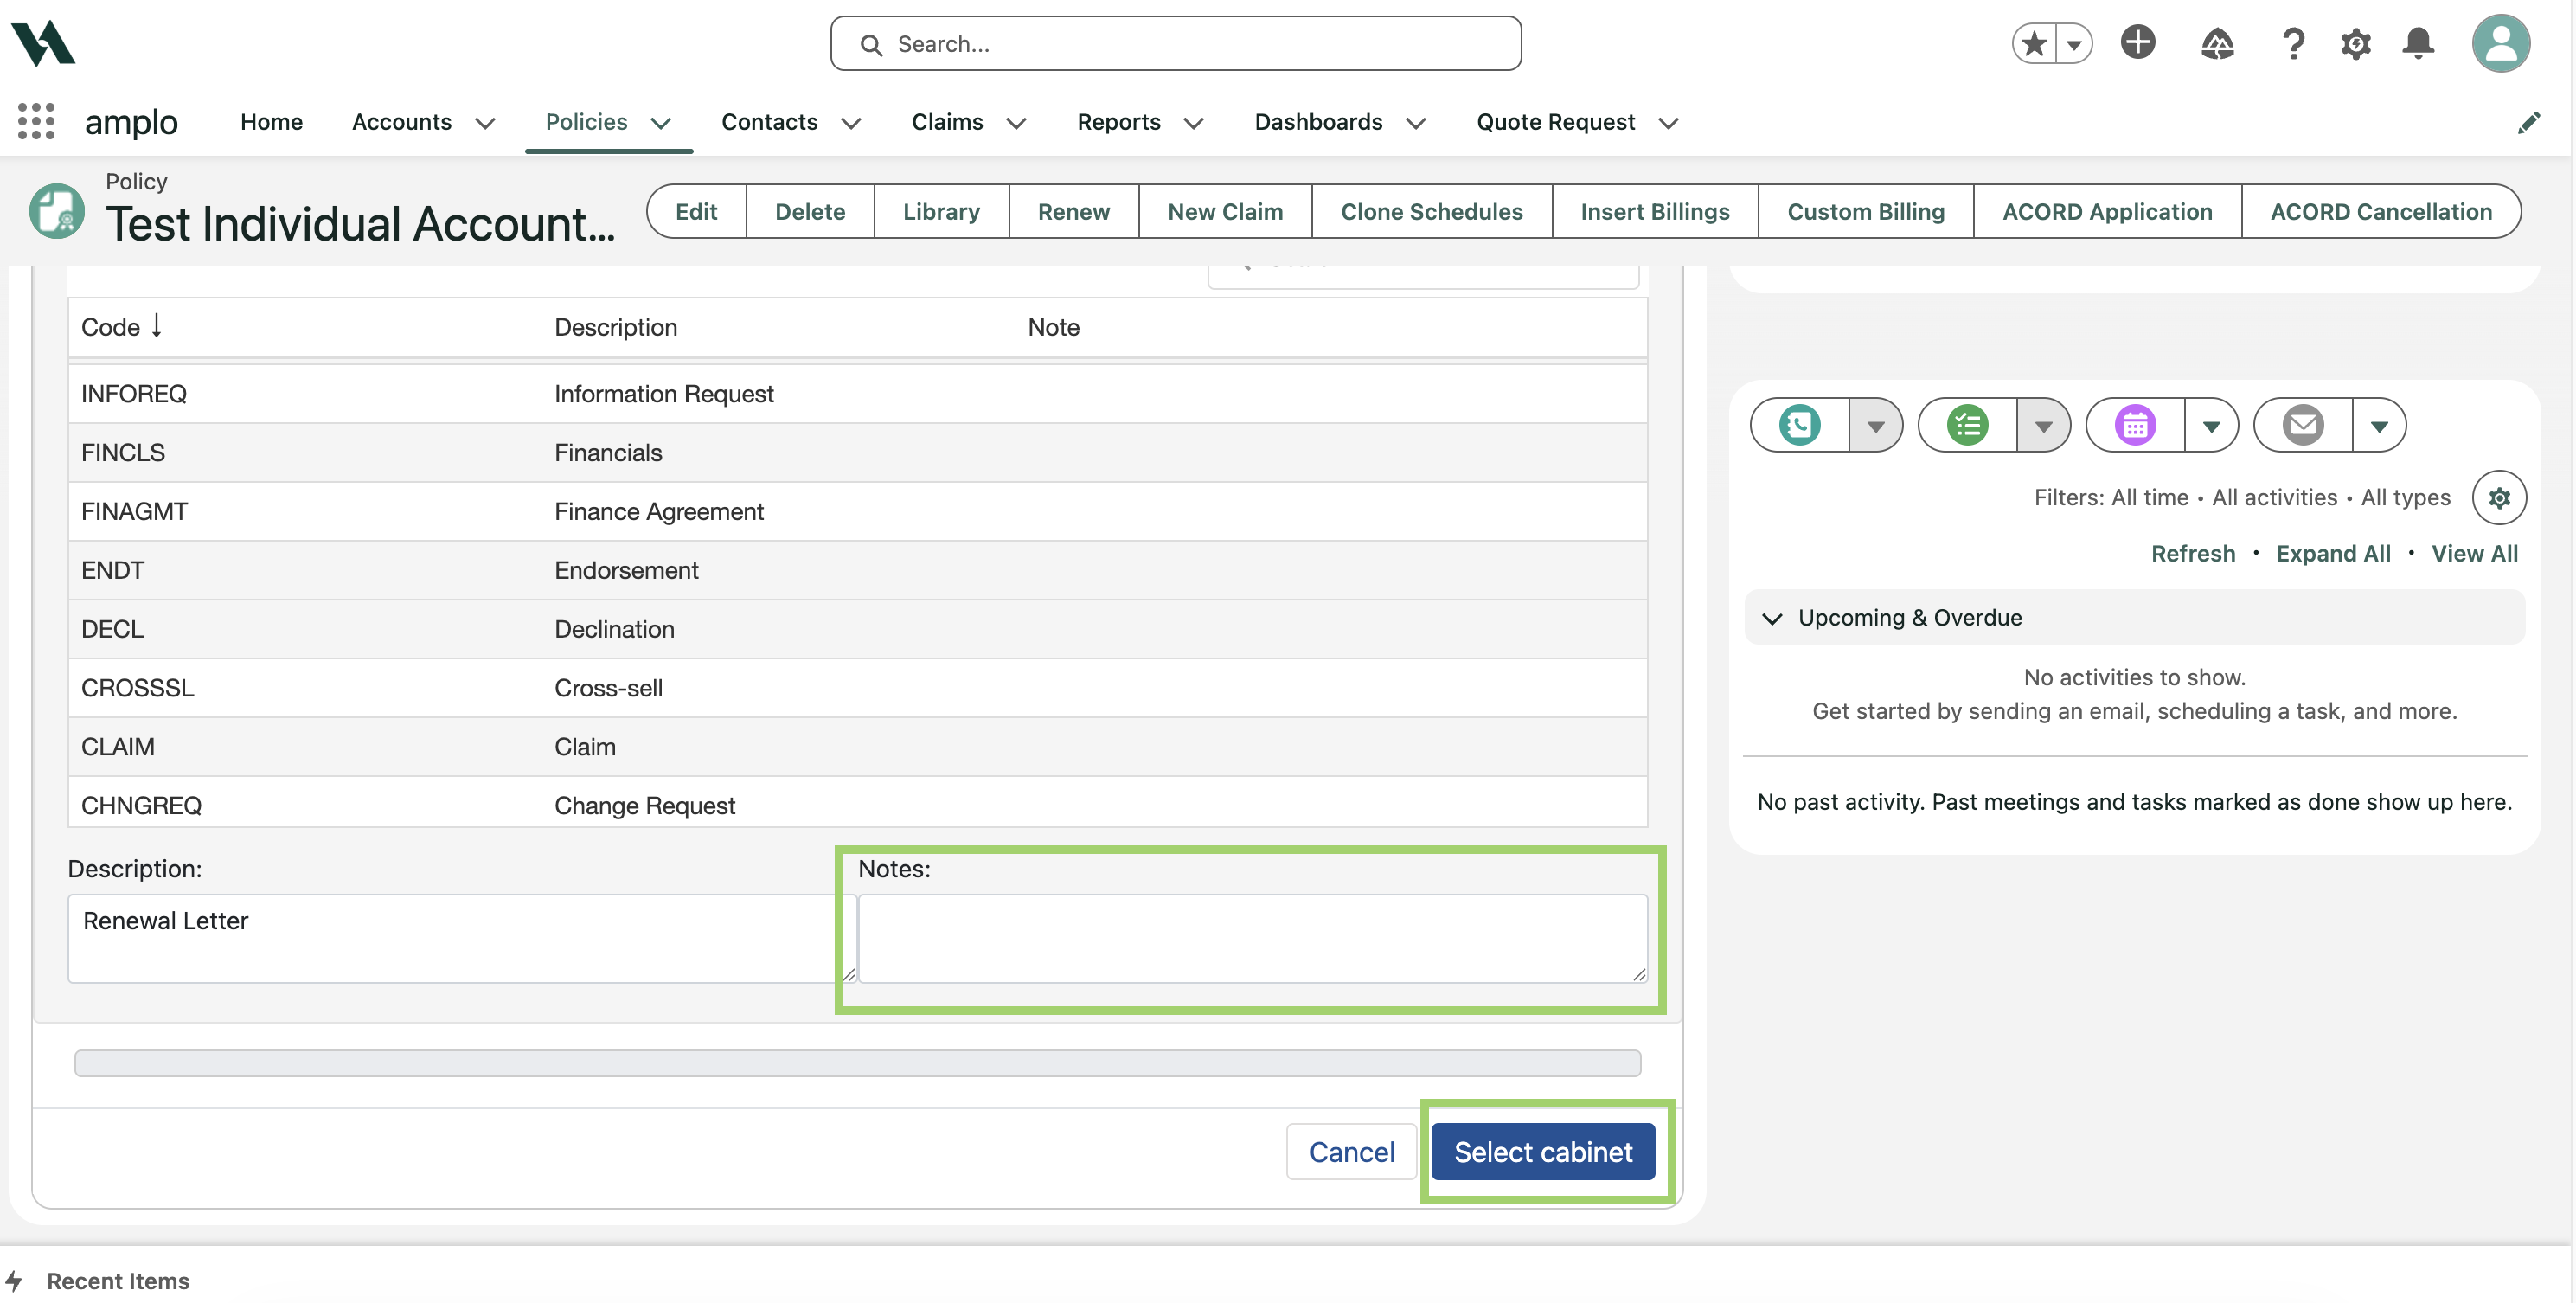
Important: Do not edit the Description field.
Change the location of the file if necessary, then click Import.

Note: Documents automatically “roll up” through the object hierarchy. For example, when a document is saved to a Policy, it will also appear on the associated Account record, with a copy stored there as well.
Update the cabinet location
Sometimes, you may need to adjust the cabinet location of a previously imported or created document.
Select the document(s) you want to move.
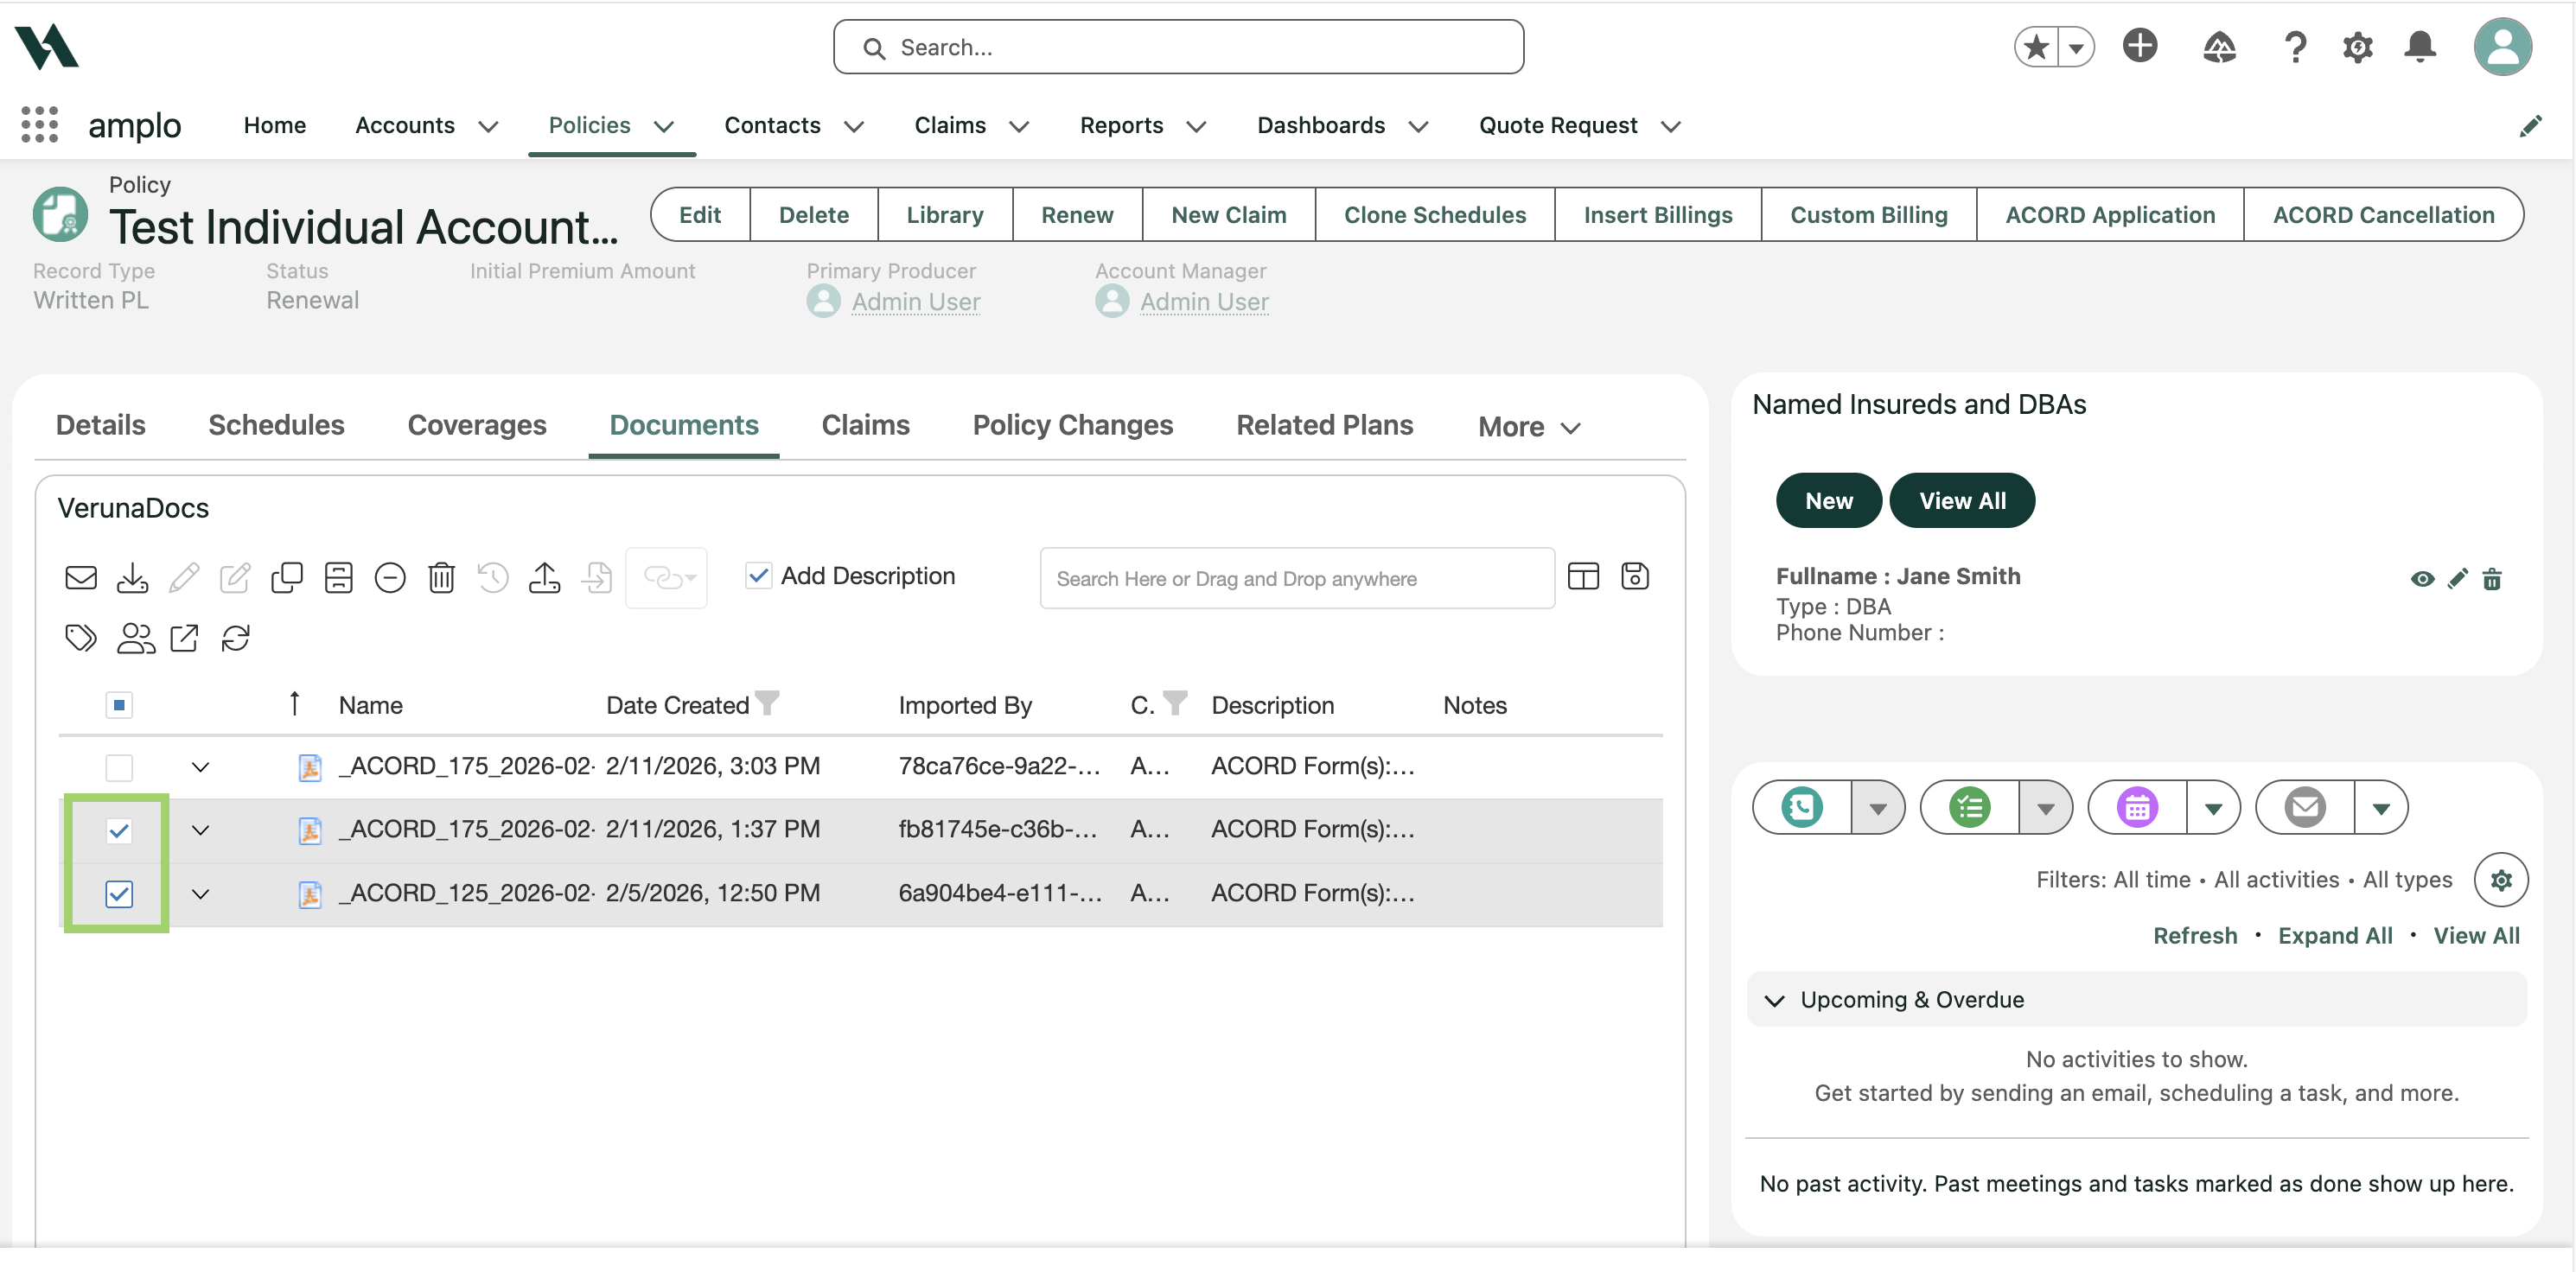
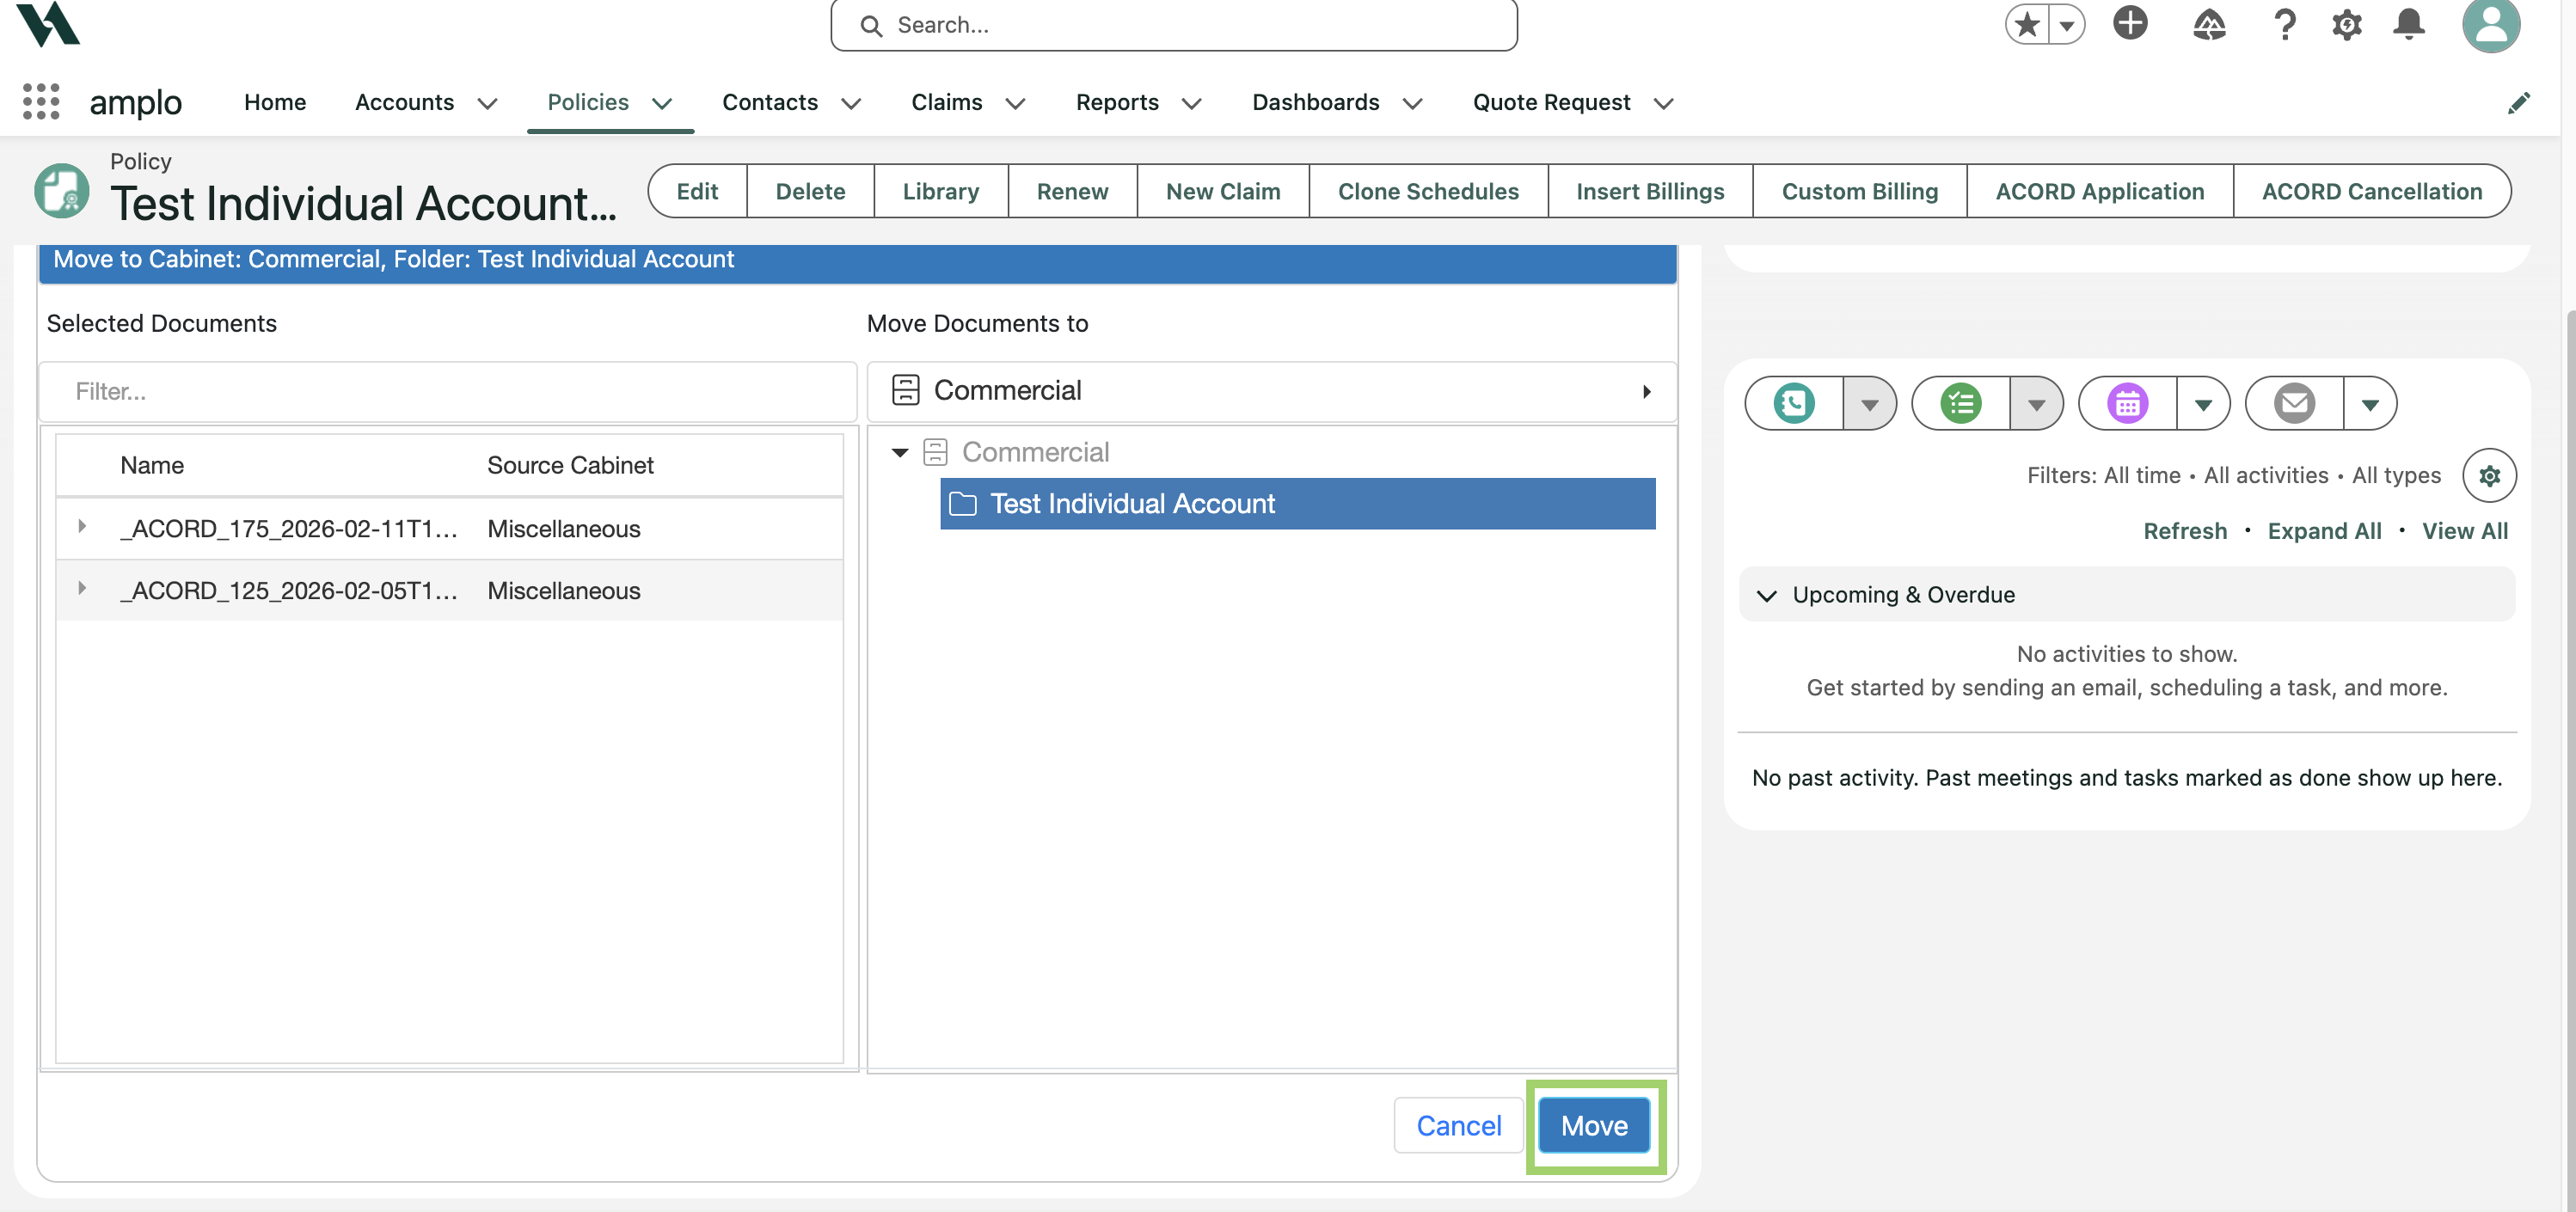
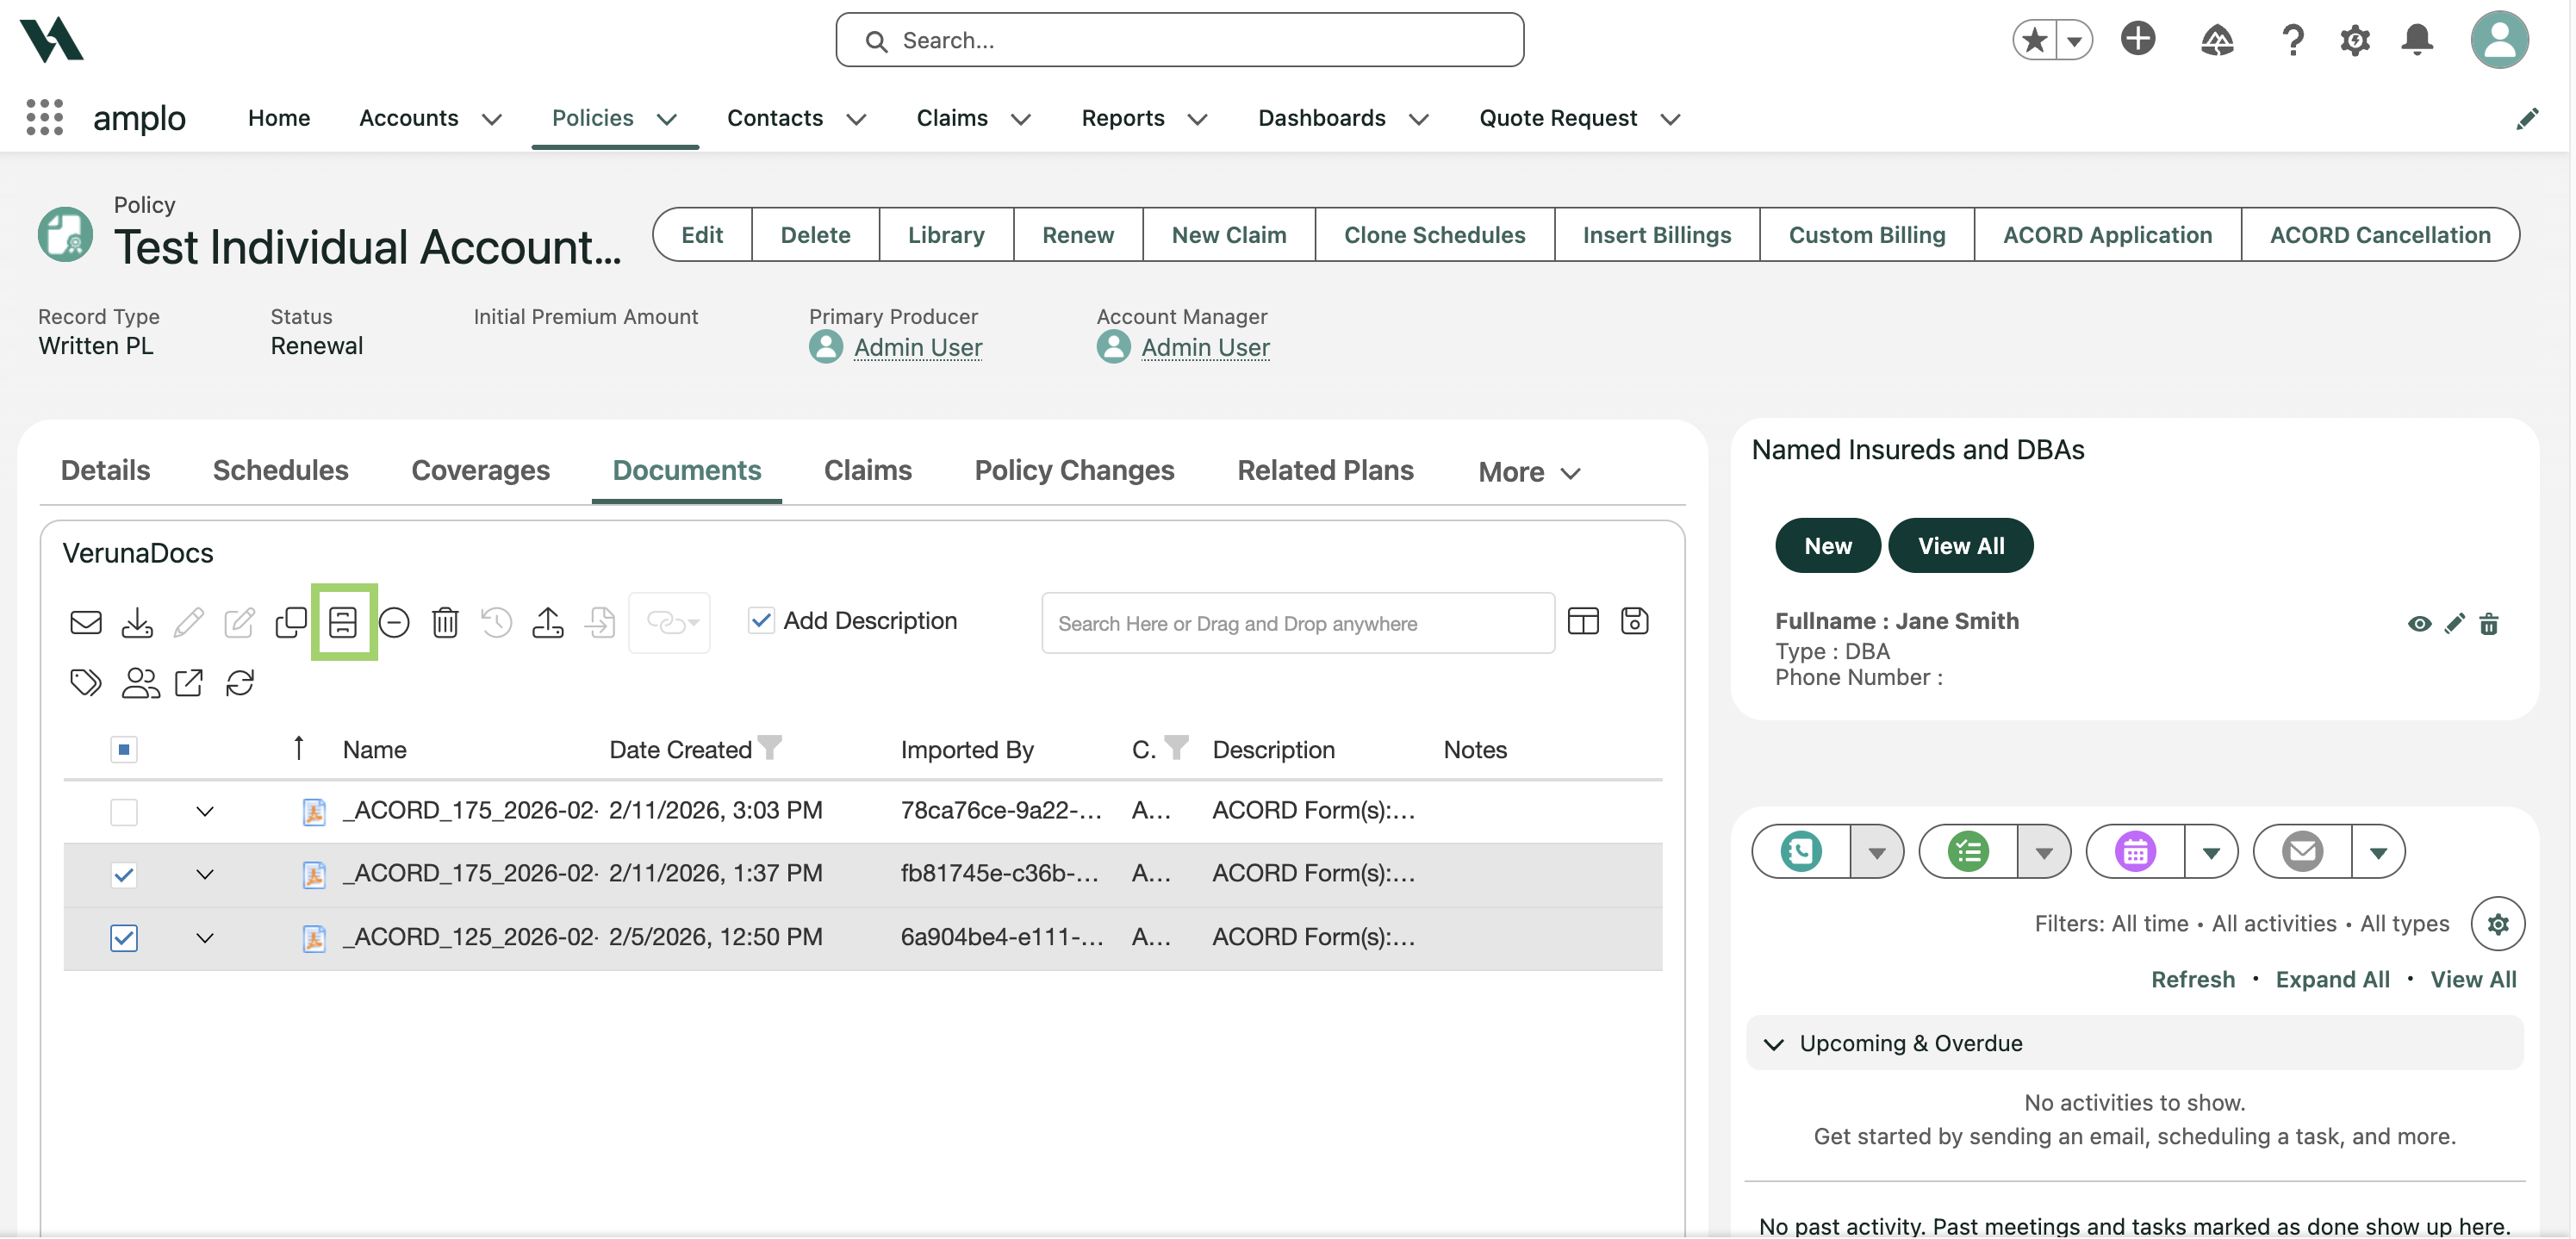
Click on the Move to Cabinet icon.
In the Move Documents to panel, click the side arrow to see other cabinet choices.

Select the new cabinet, and click Move.