Managing Journal Entries
Last updated: March 3, 2026
Overview
Journal entries are used to manually record financial transactions that are not captured through standard billing, payment, or reconciliation processes. Because they directly impact the general ledger, journal entries must follow strict accounting rules to ensure accuracy and compliance. In this article, you’ll learn how to:
Create a journal entry
Post a journal entry
Clone or reverse an entry
Create a new Journal Entry
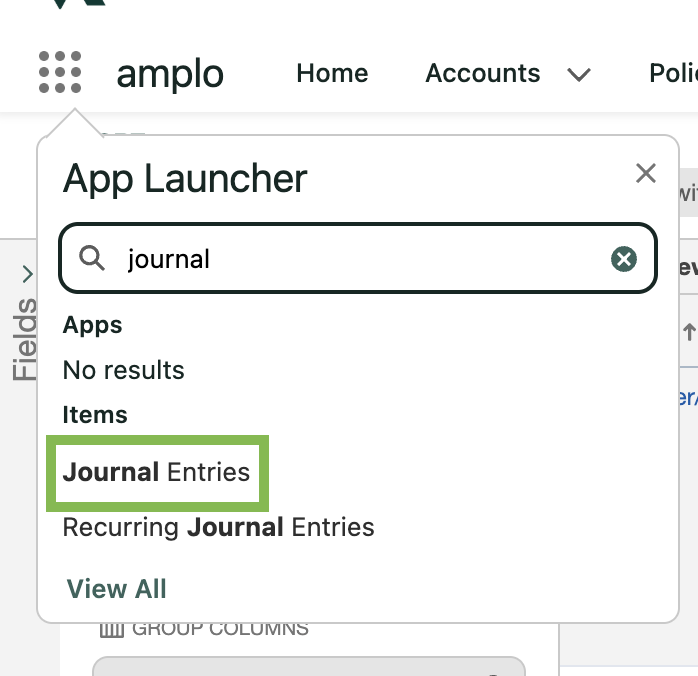
In the App Launcher, search and select Journal Entries.
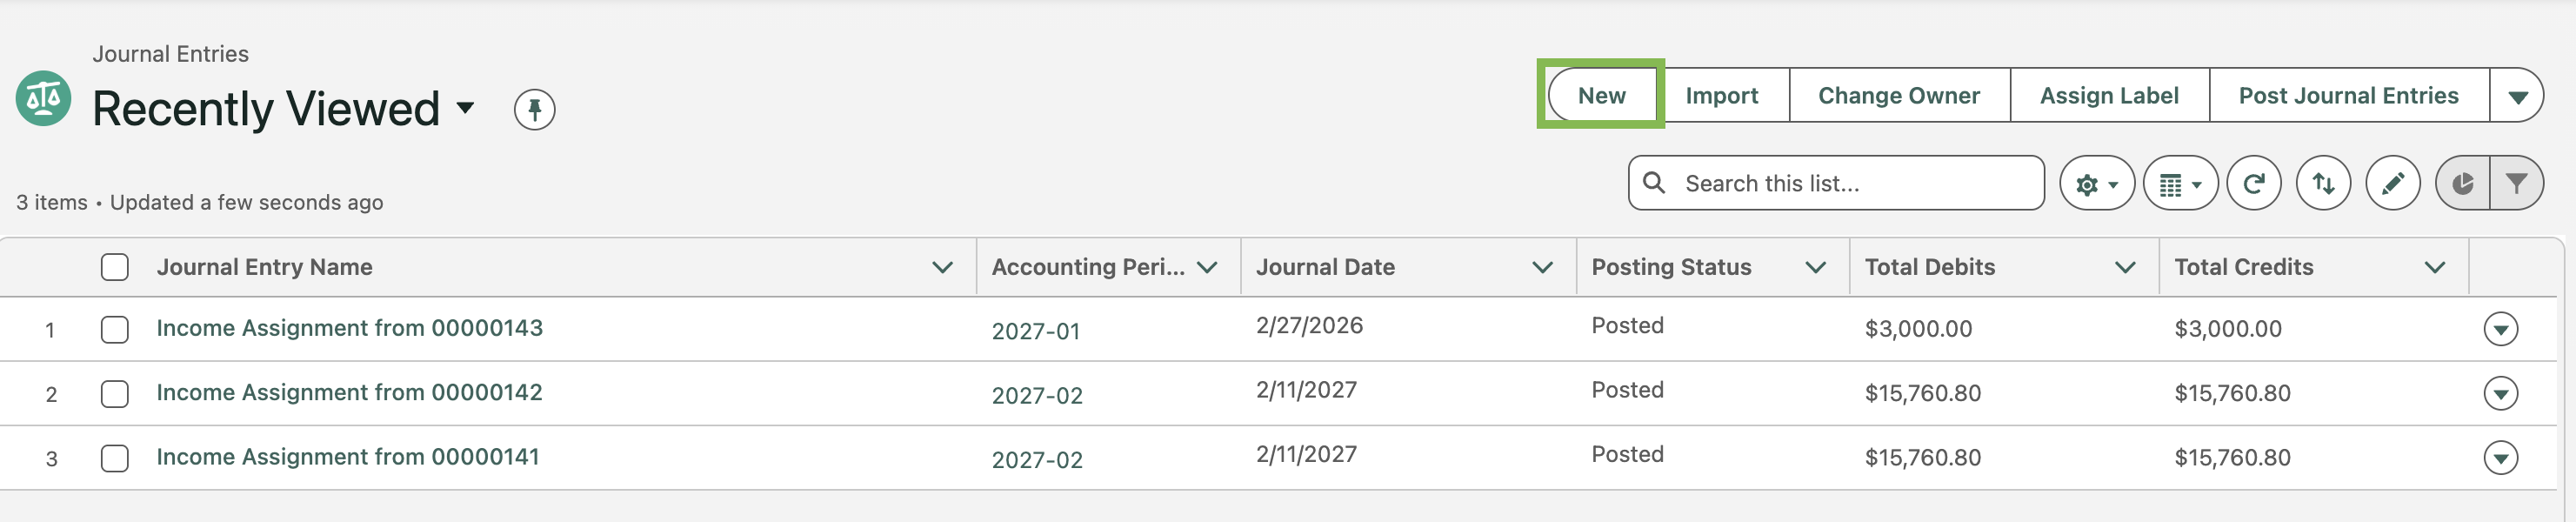
Click New.
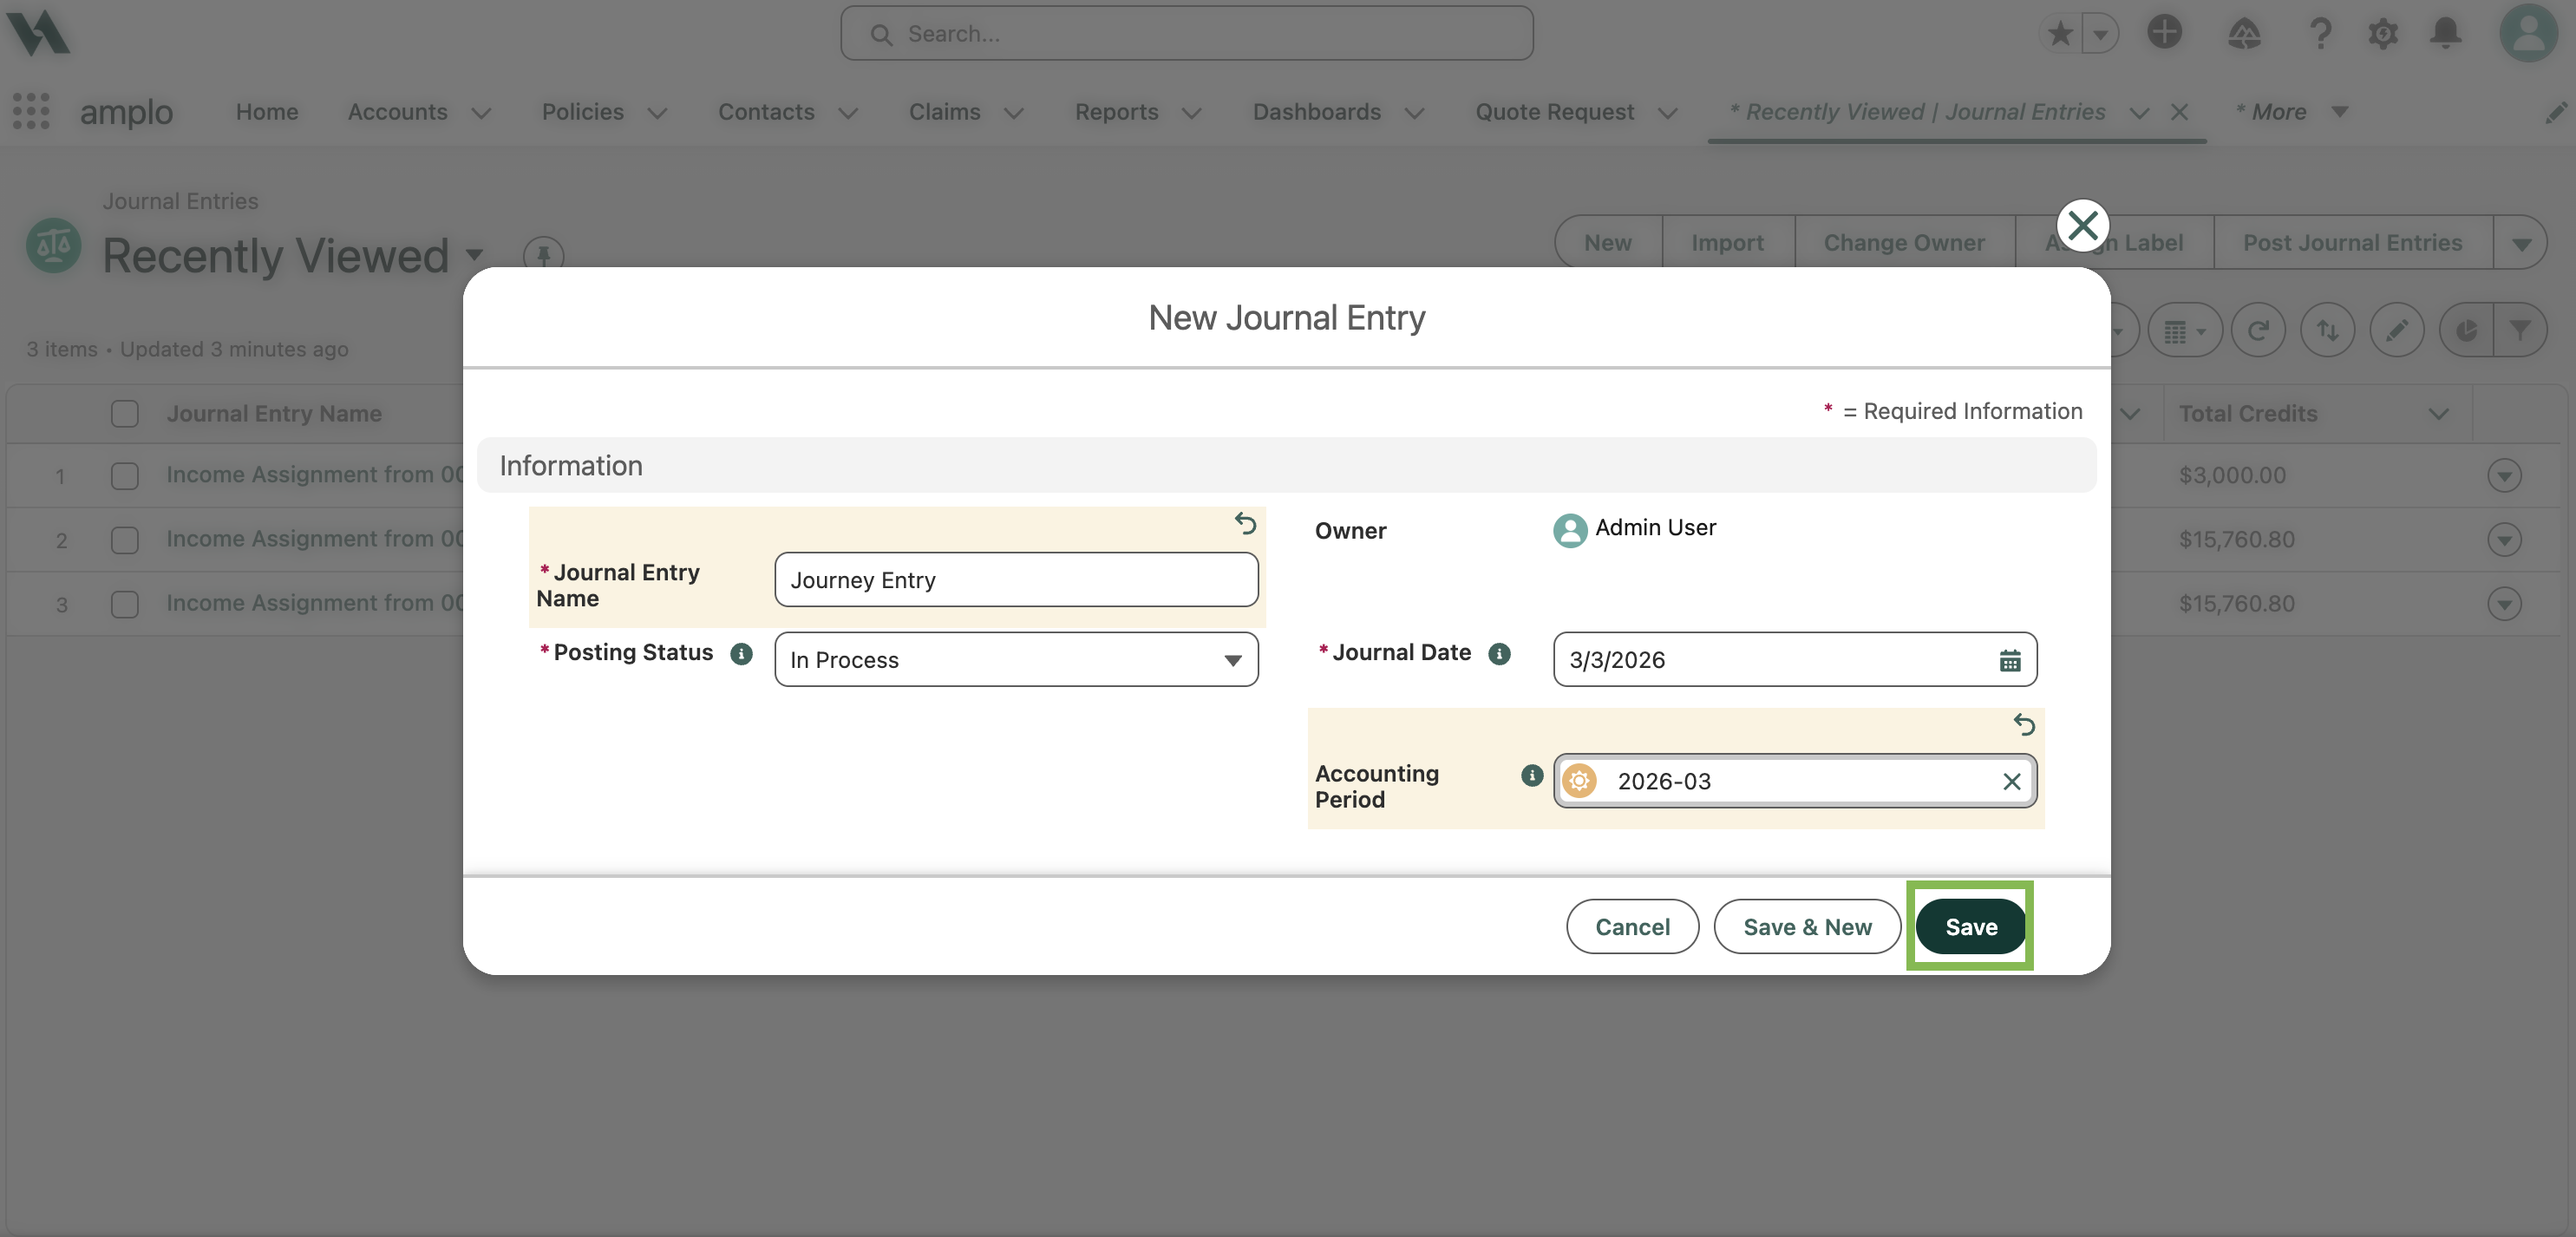
In the New Journal Entry modal, enter the required fields:
Journal Entry Name: A unique identifier for the entry.
Posting Status: Select the status of the entry.
Journal Date: Defaults to the current date. Edit if needed
Accounting Period: Select from the list of open accounting period.
Click Save.
Add Journal Entry Lines
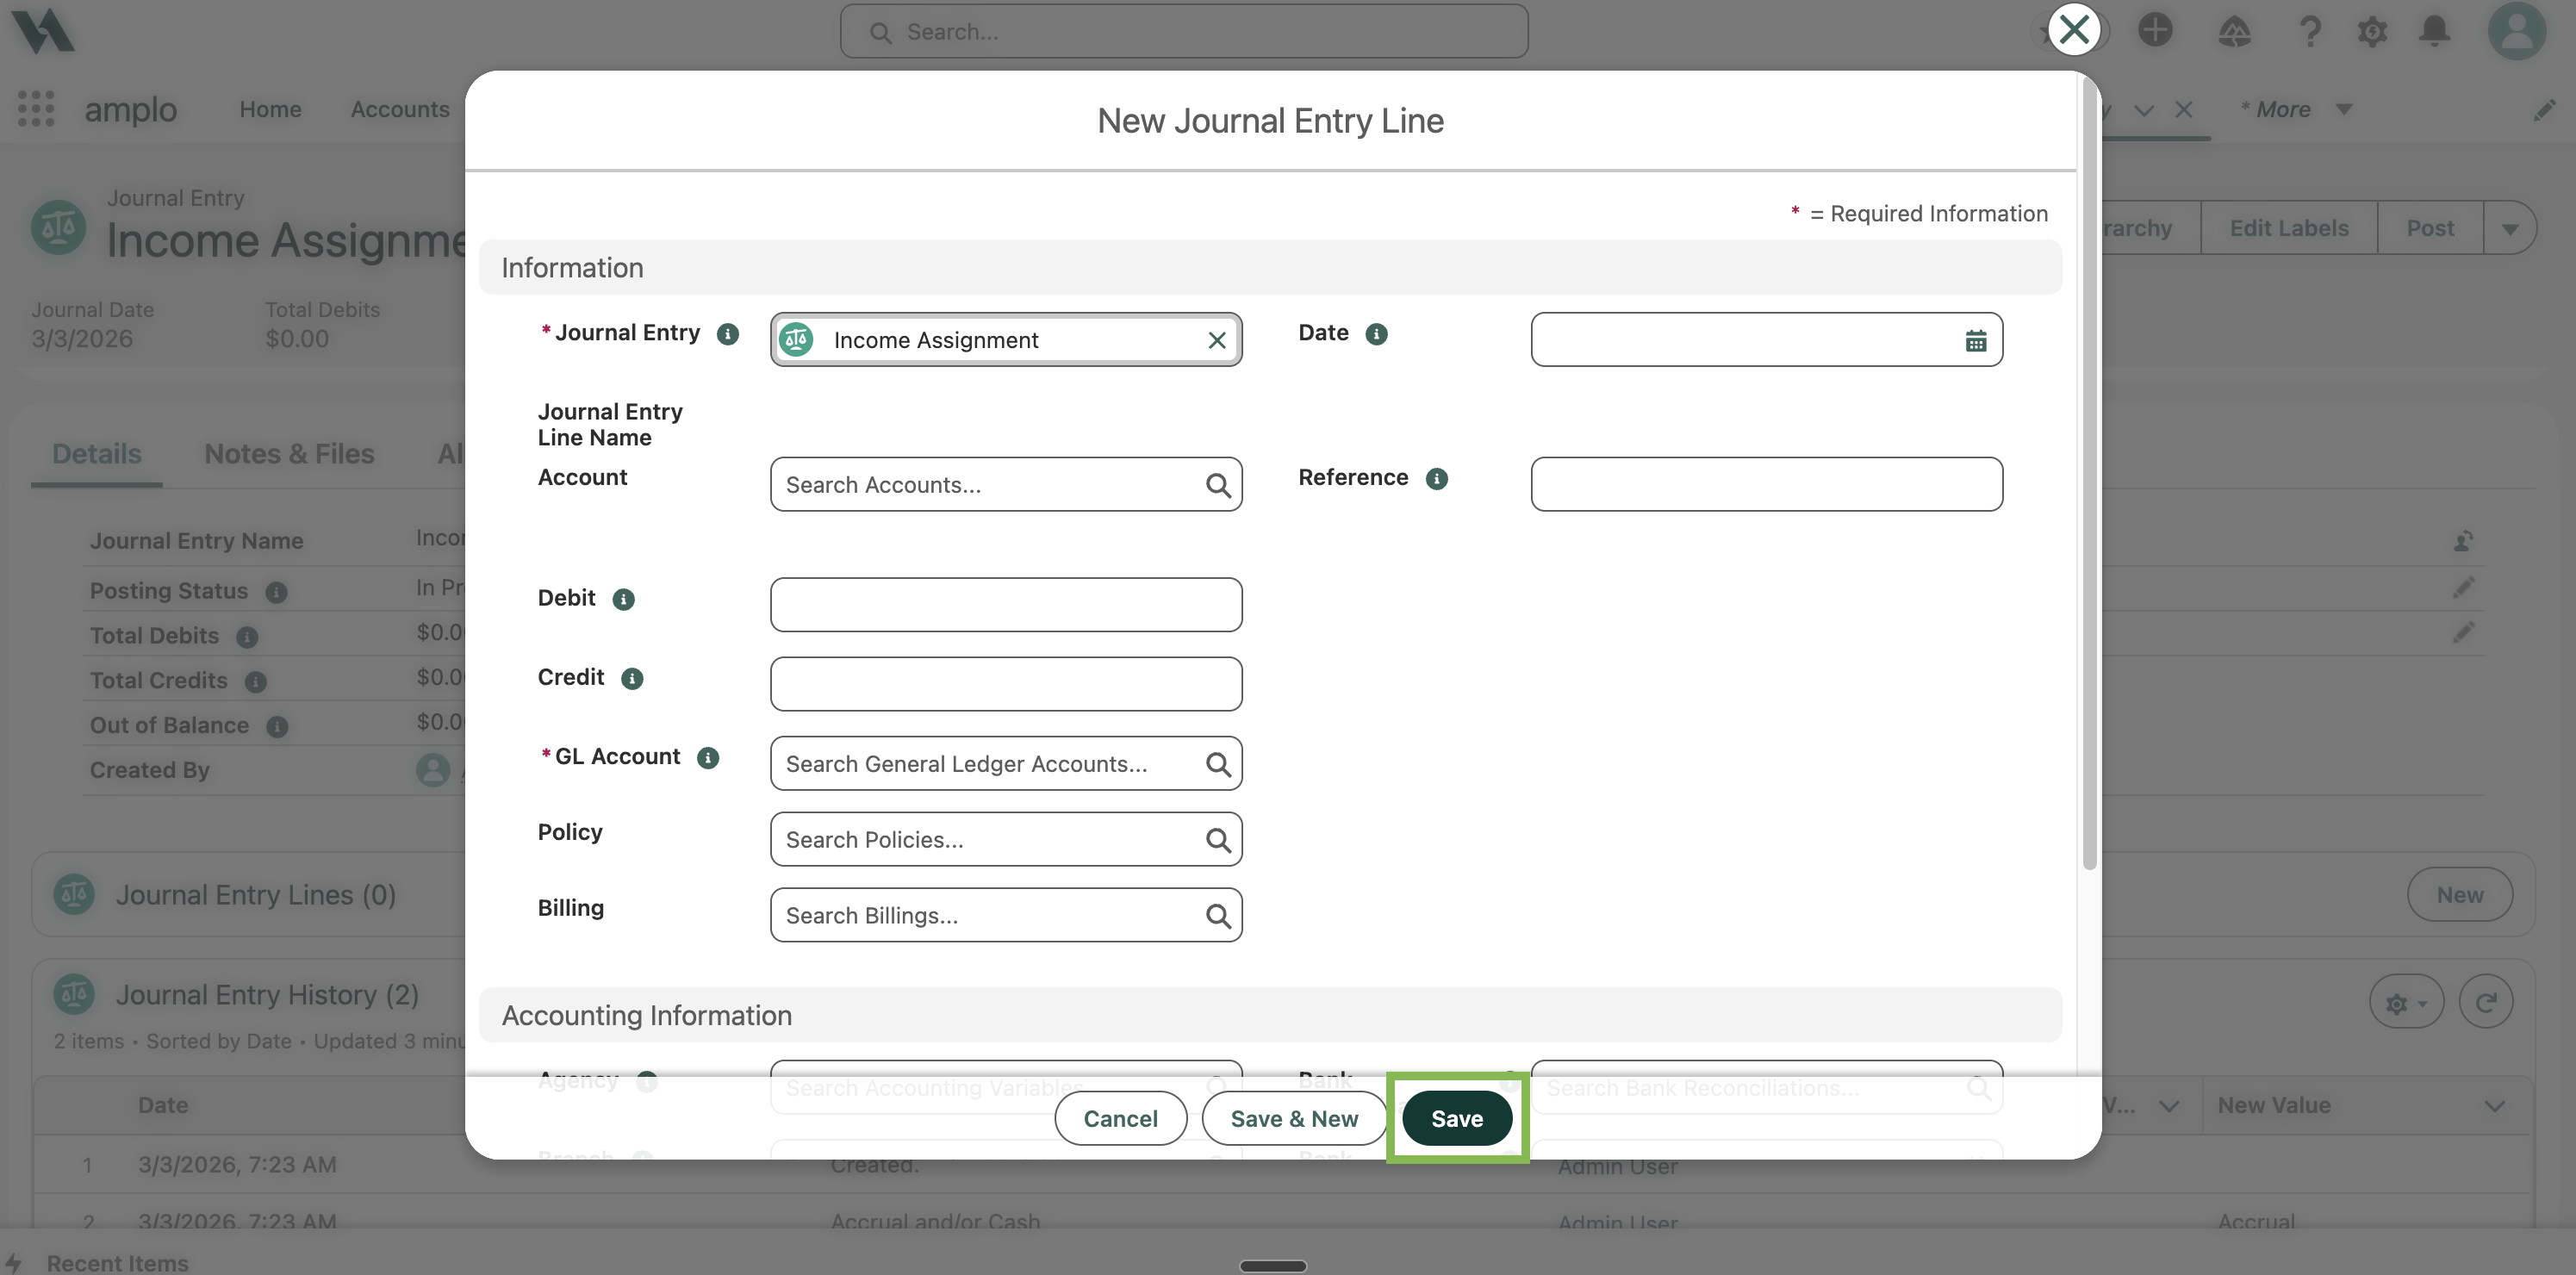
On the Journal Entry record, click New in the Journal Entry Lines section.

On the New Journal Entry Line modal, complete the fields:
Account: Select the appropriate account.
GL Account: Select the GL account.
Debit: Enter the debit amount (if applicable).
Credit: Enter the credit amount (if applicable).
Date: Enter the date.
Note: Make sure the total debits equal credits. You cannot post an entry that is out of balance.
Click Save, or Save & New to add additional lines.
Post a Journal Entry
To post a journal entry, its status must be set to Approved.
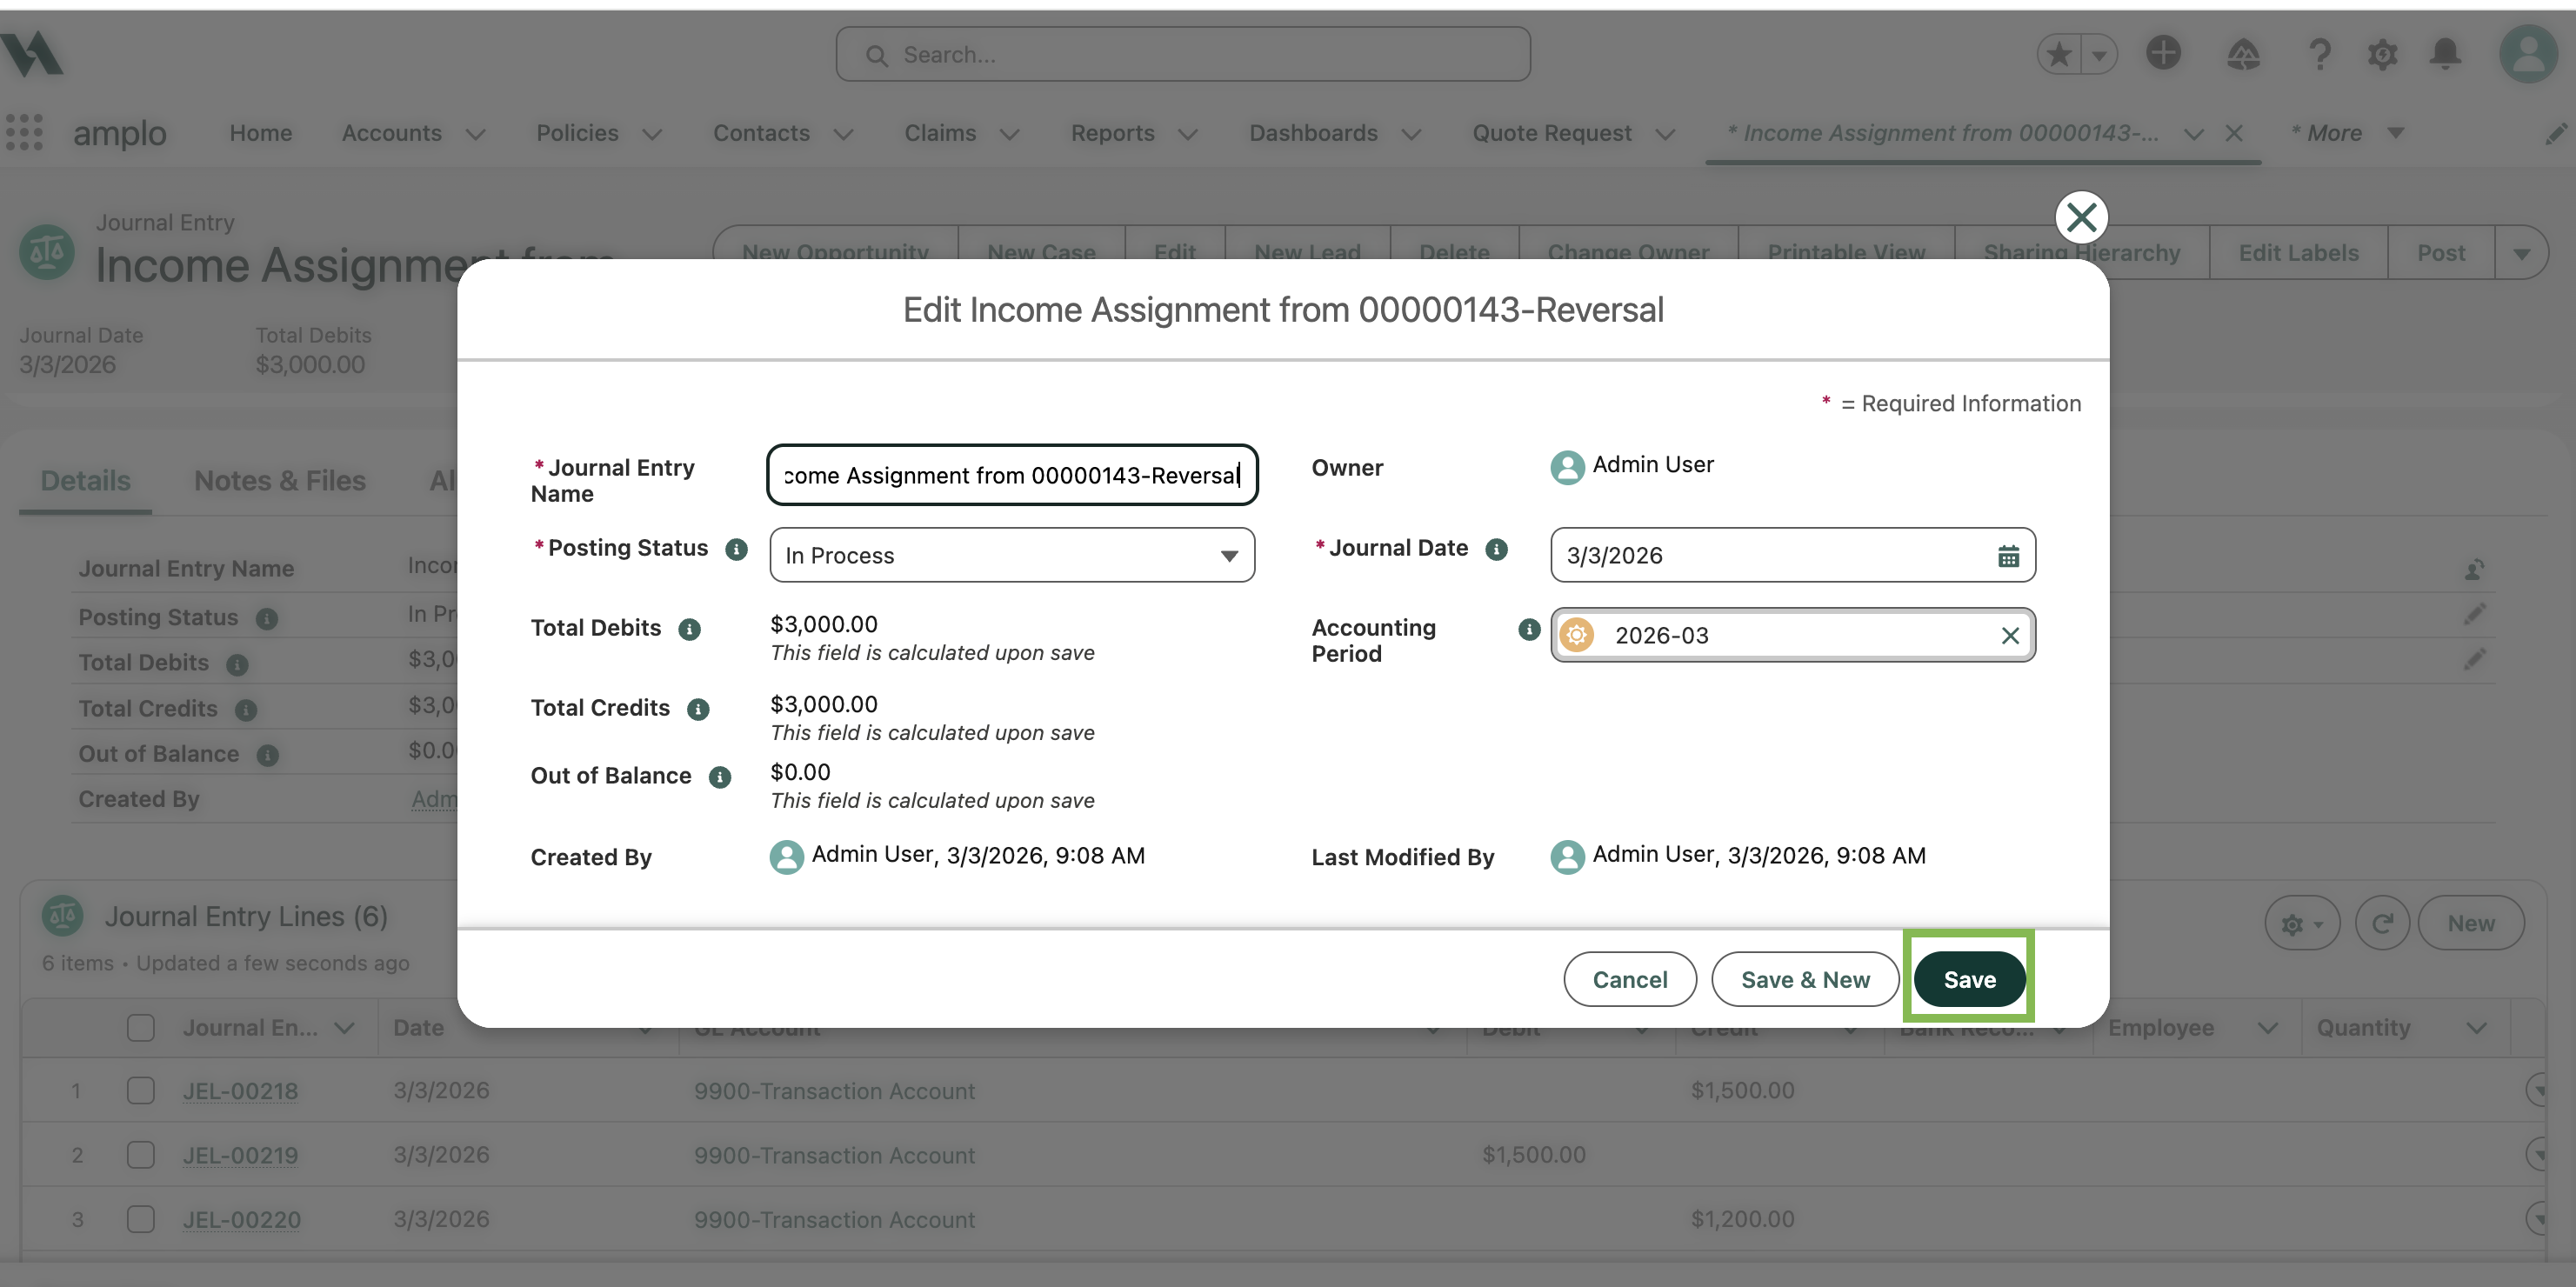
Back on the Journal Entry record, click Edit.
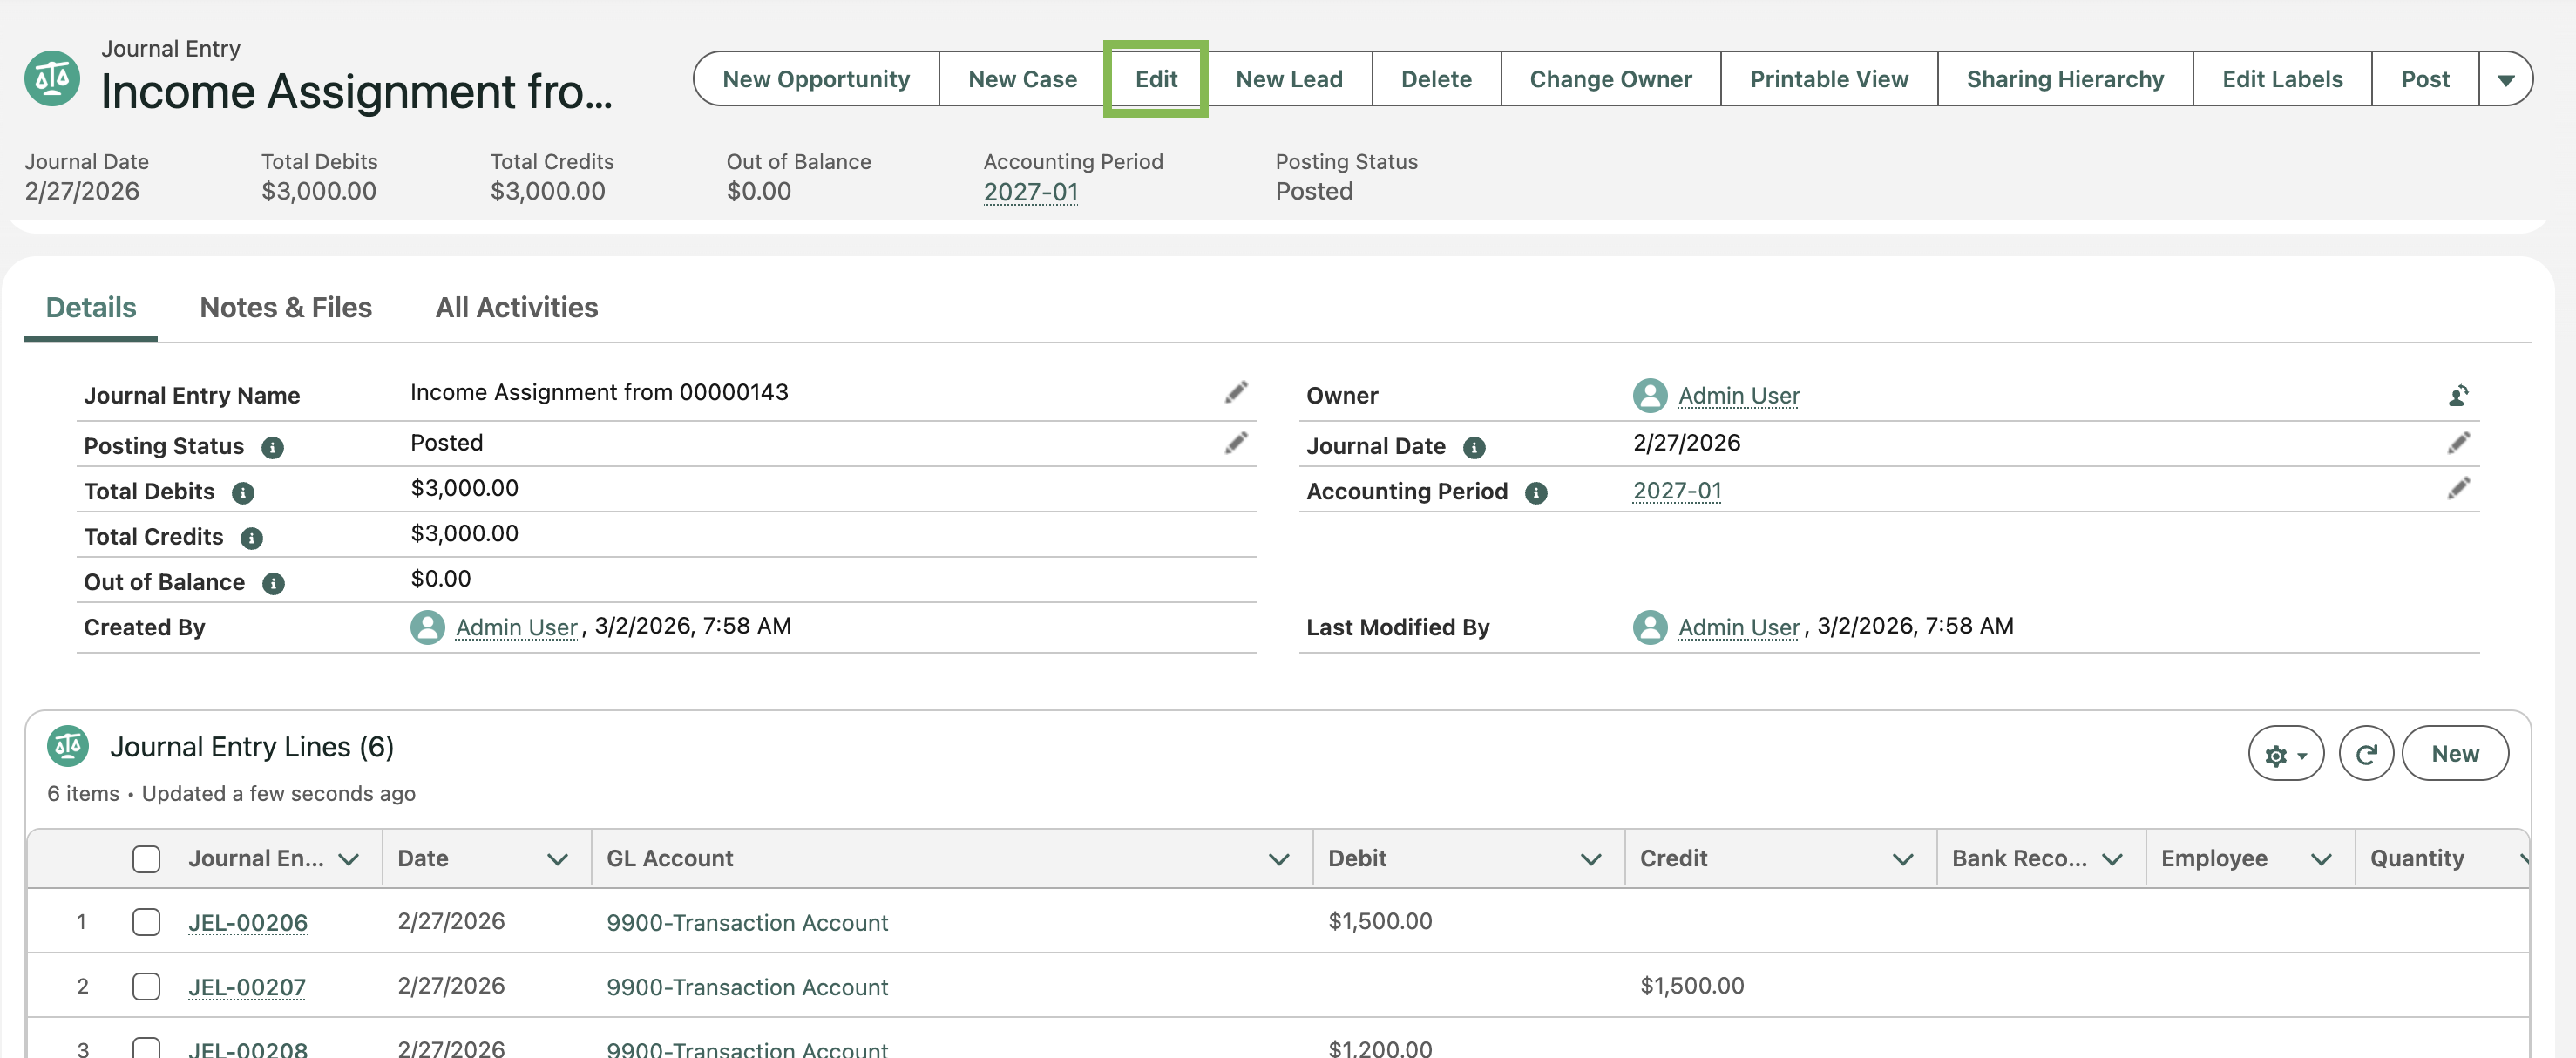
Update the Posting Status field to Approved.

Click Post.

Clone a Journal Entry
Cloning saves time when creating recurring or similar transactions. It is especially useful for:
Monthly accruals
Multi-branch allocations
Reversing prior entries
There are two cloning options available: Clone with Lines and Reverse Clone with Lines.
Clone with Lines
This option creates a duplicate of the journal entry, including all debit and credit lines.
Open the Journal Entry record you want to copy.
Click the down arrow next to Post, and select Clone with Lines.

Review the auto-filled date (defaults to the current date) and update if needed.
Click Clone Journal Entry.

Review and edit the entry as needed.
Click Save.
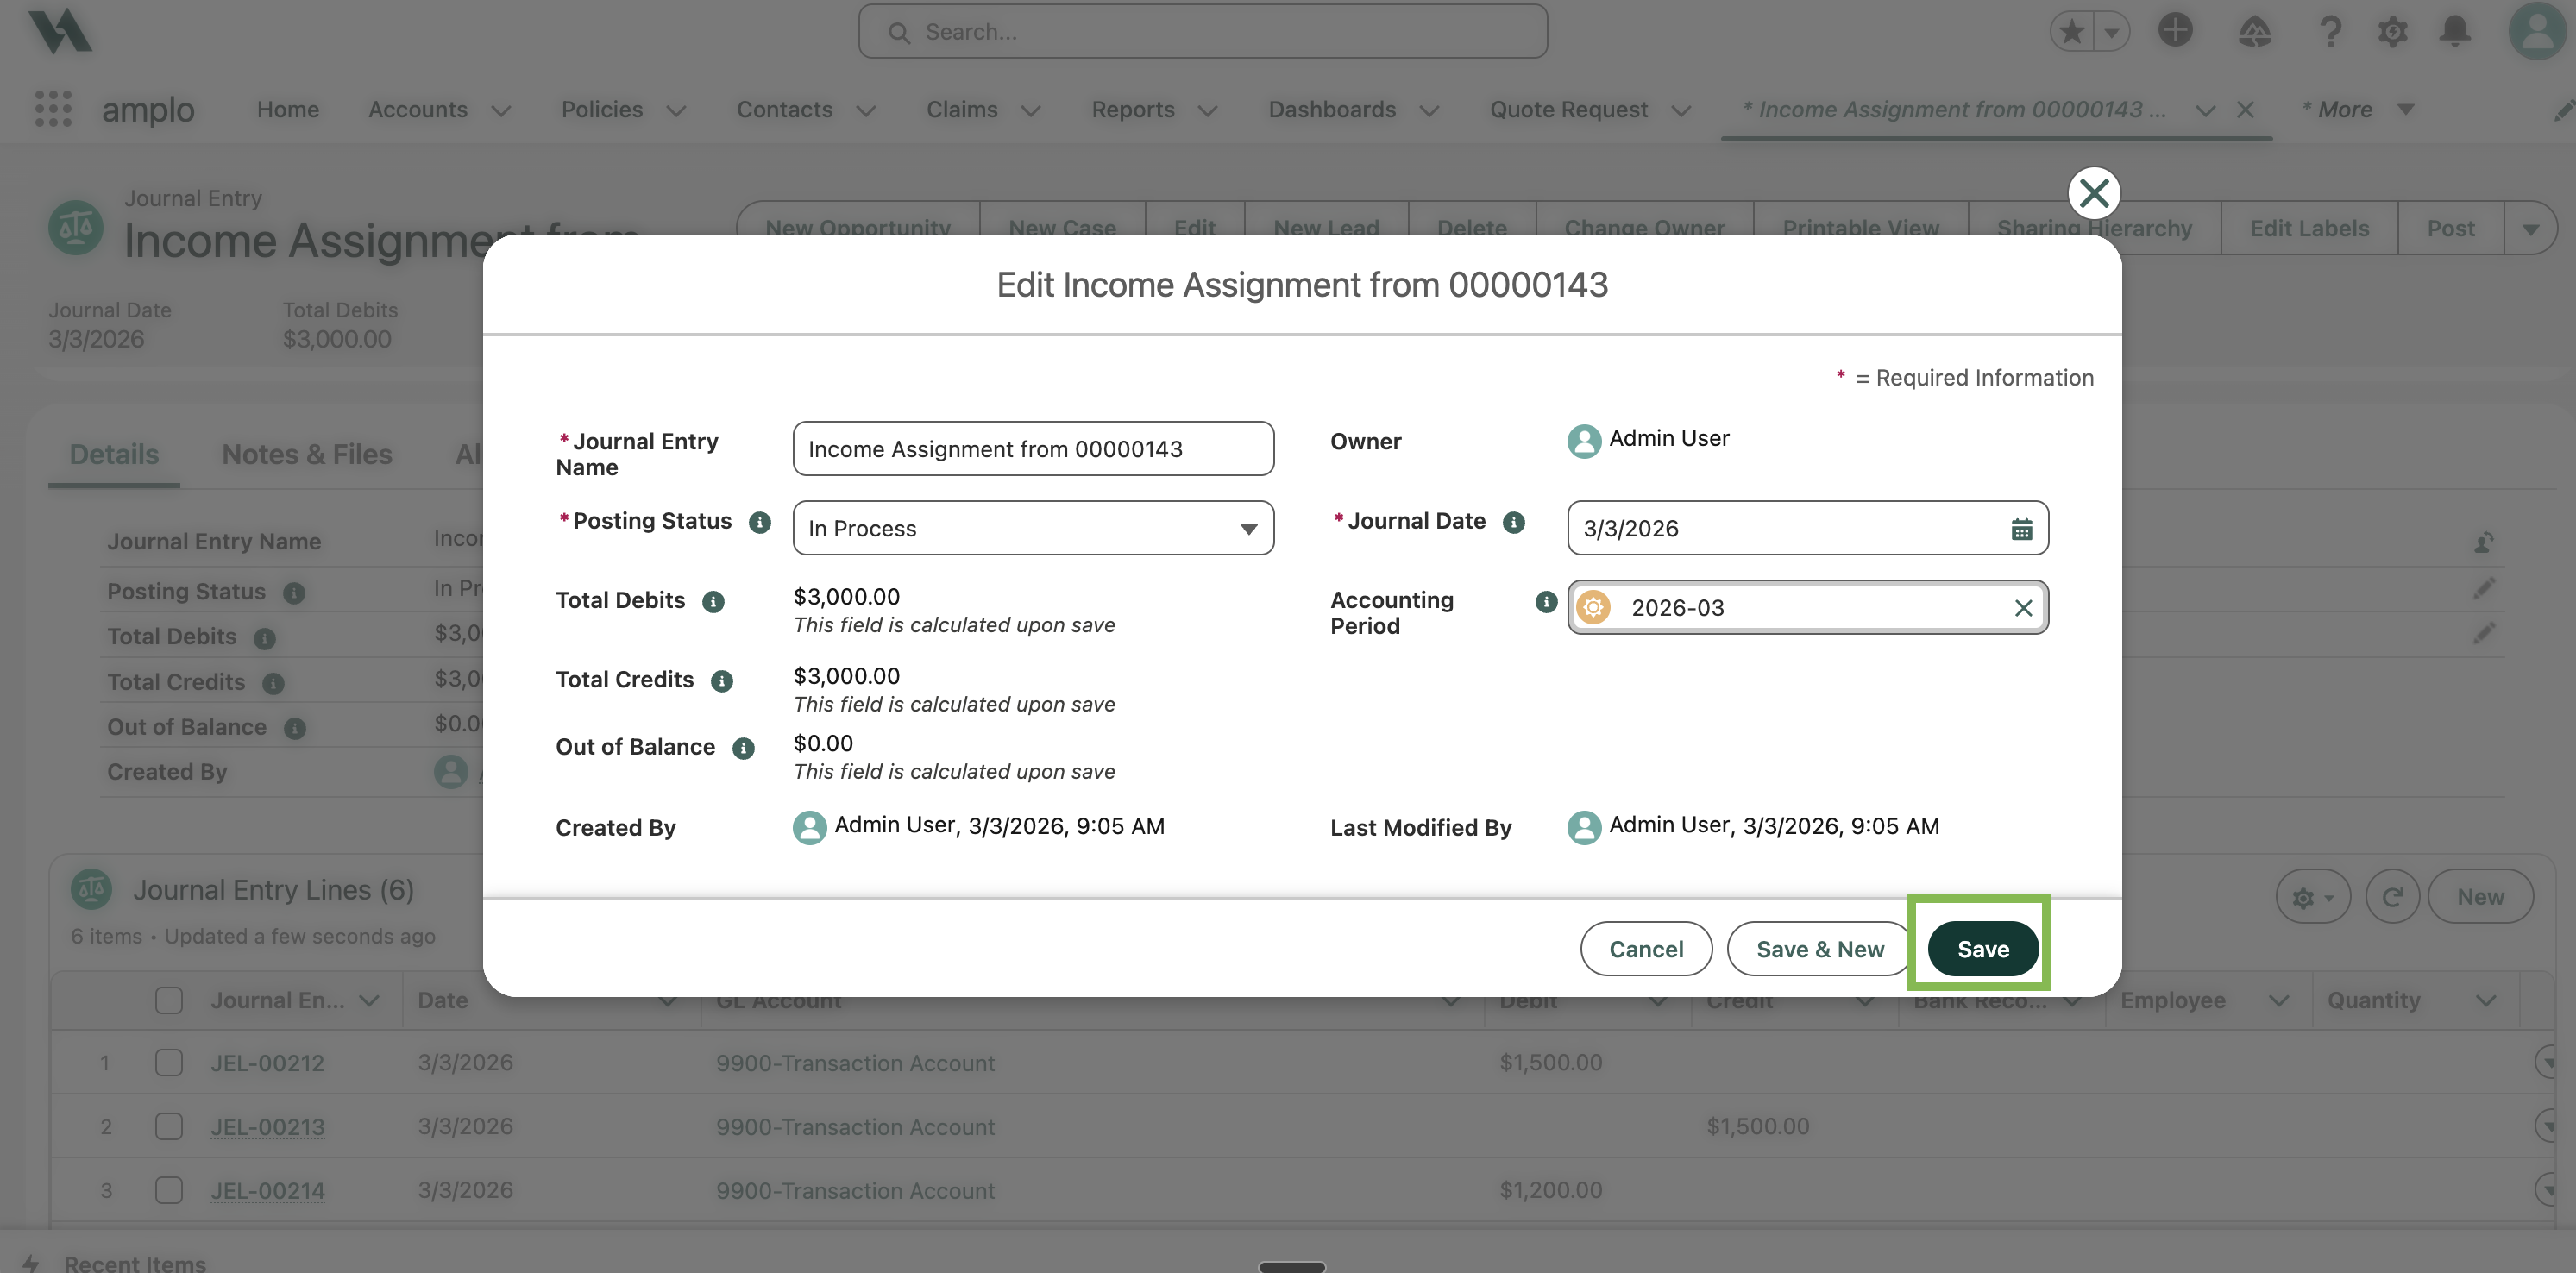
Reverse Clone with Lines
This option creates a copy of the journal entry and automatically reverses all debit and credit amounts. It is used to reverse a previously posted entry while preserving its structure.
Open the Journal Entry record you want to copy.
click the down arrow next to Post, and select Reverse Clone with Lines.
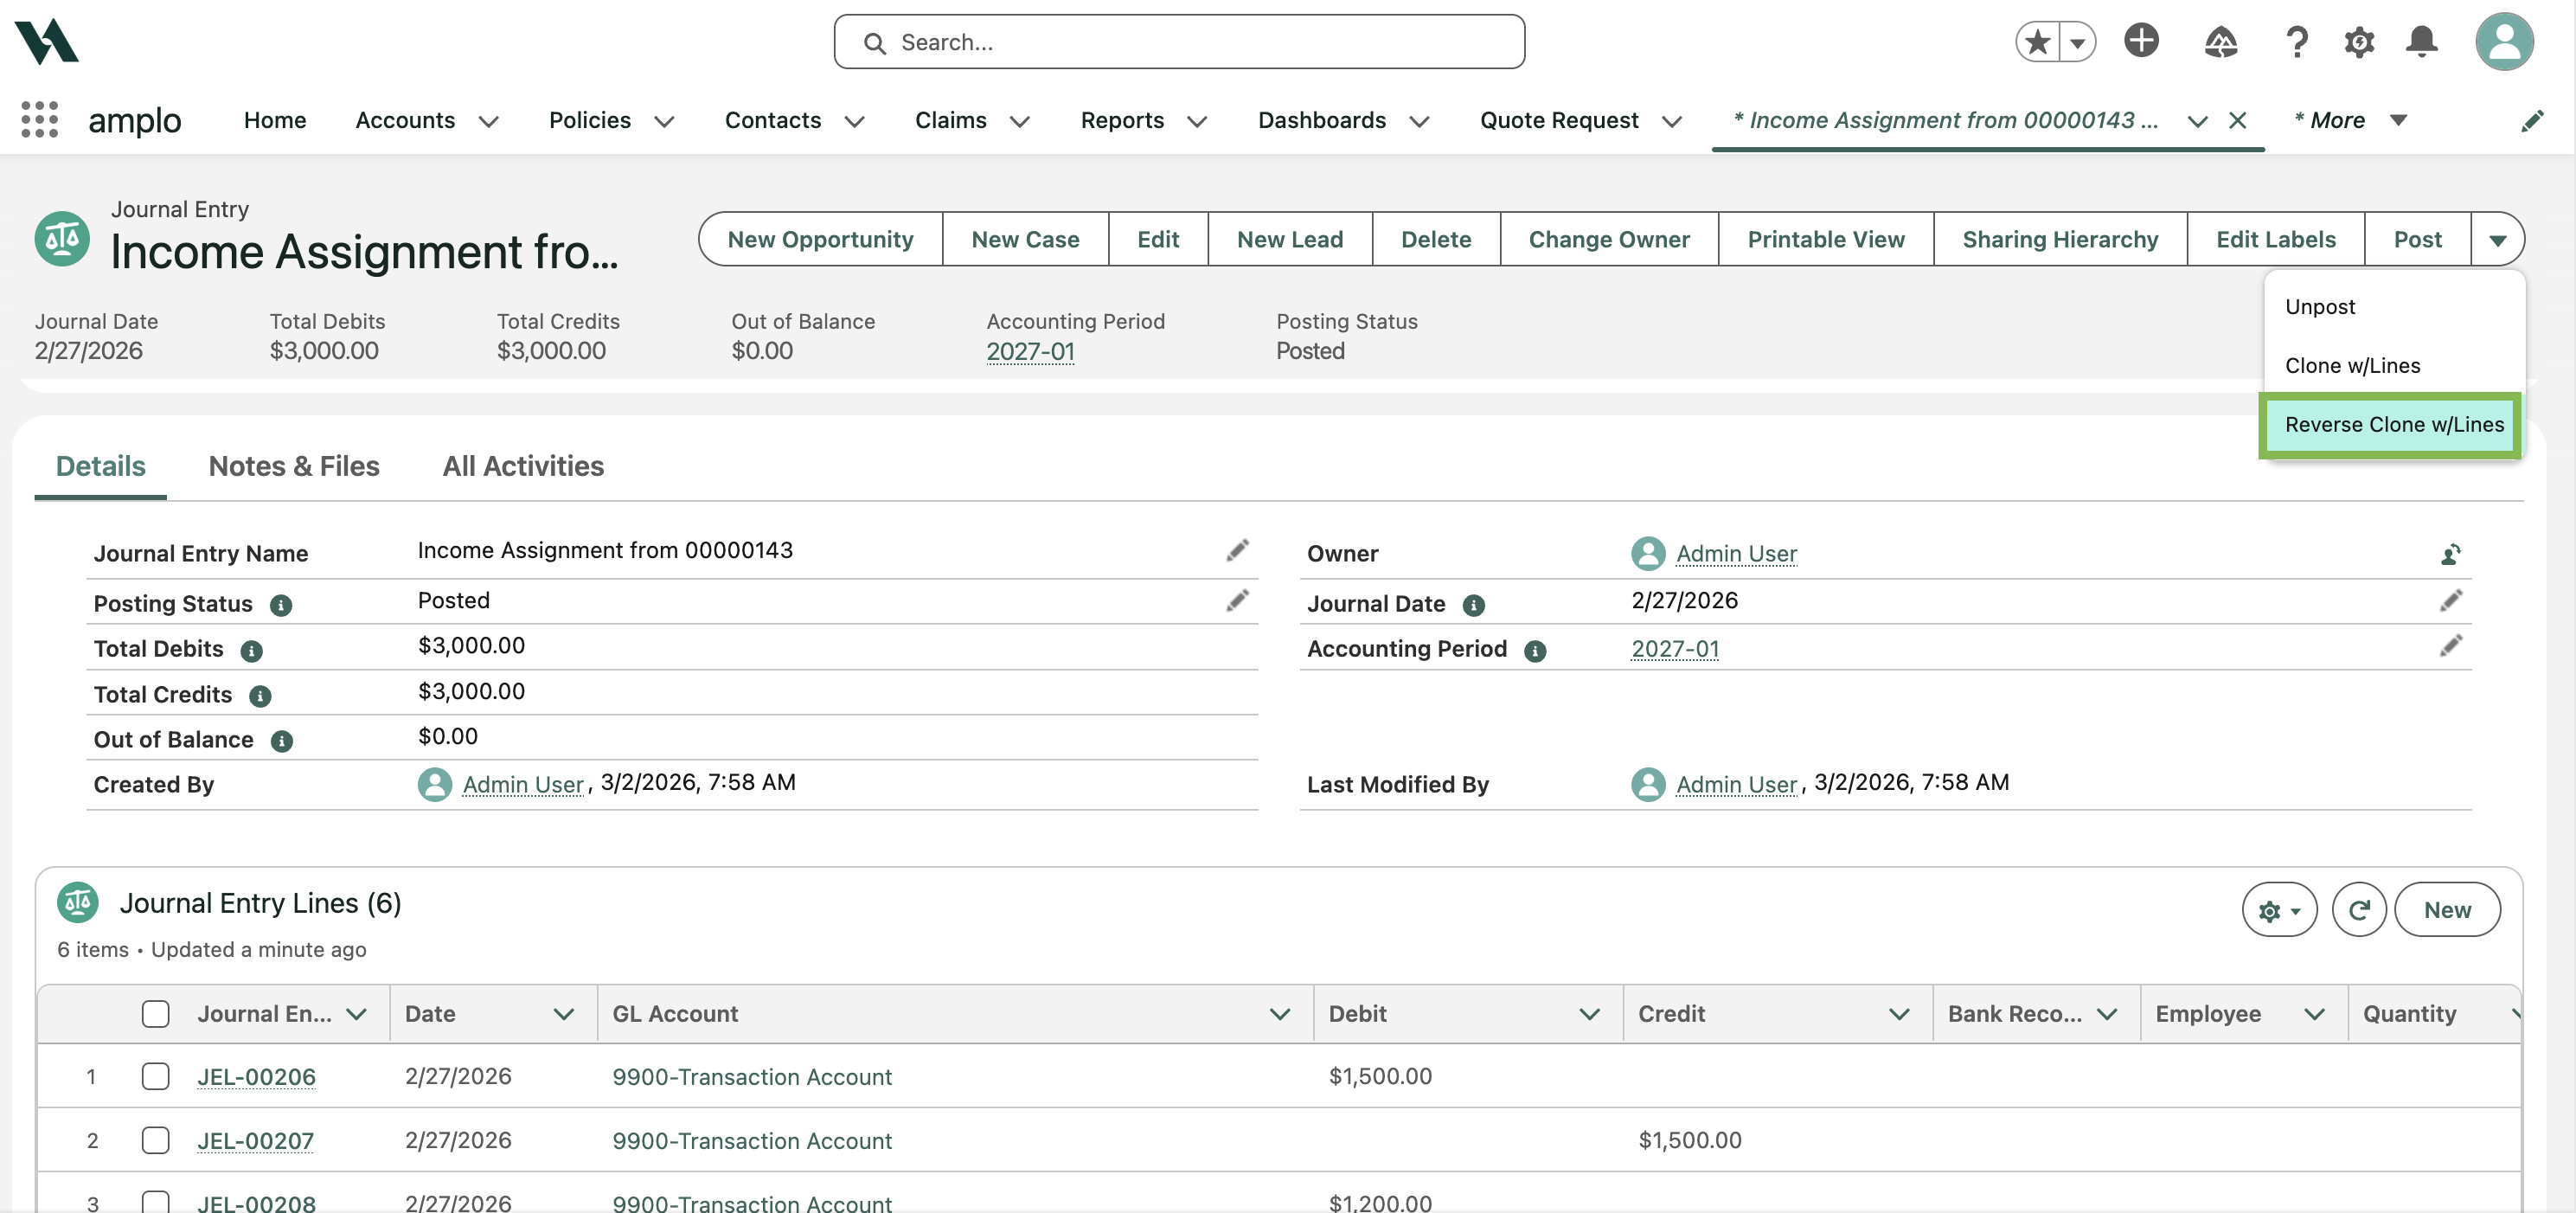
Review the auto-filled date (defaults to the current date) and update if needed.
Click Reverse Clone Journal Entry.
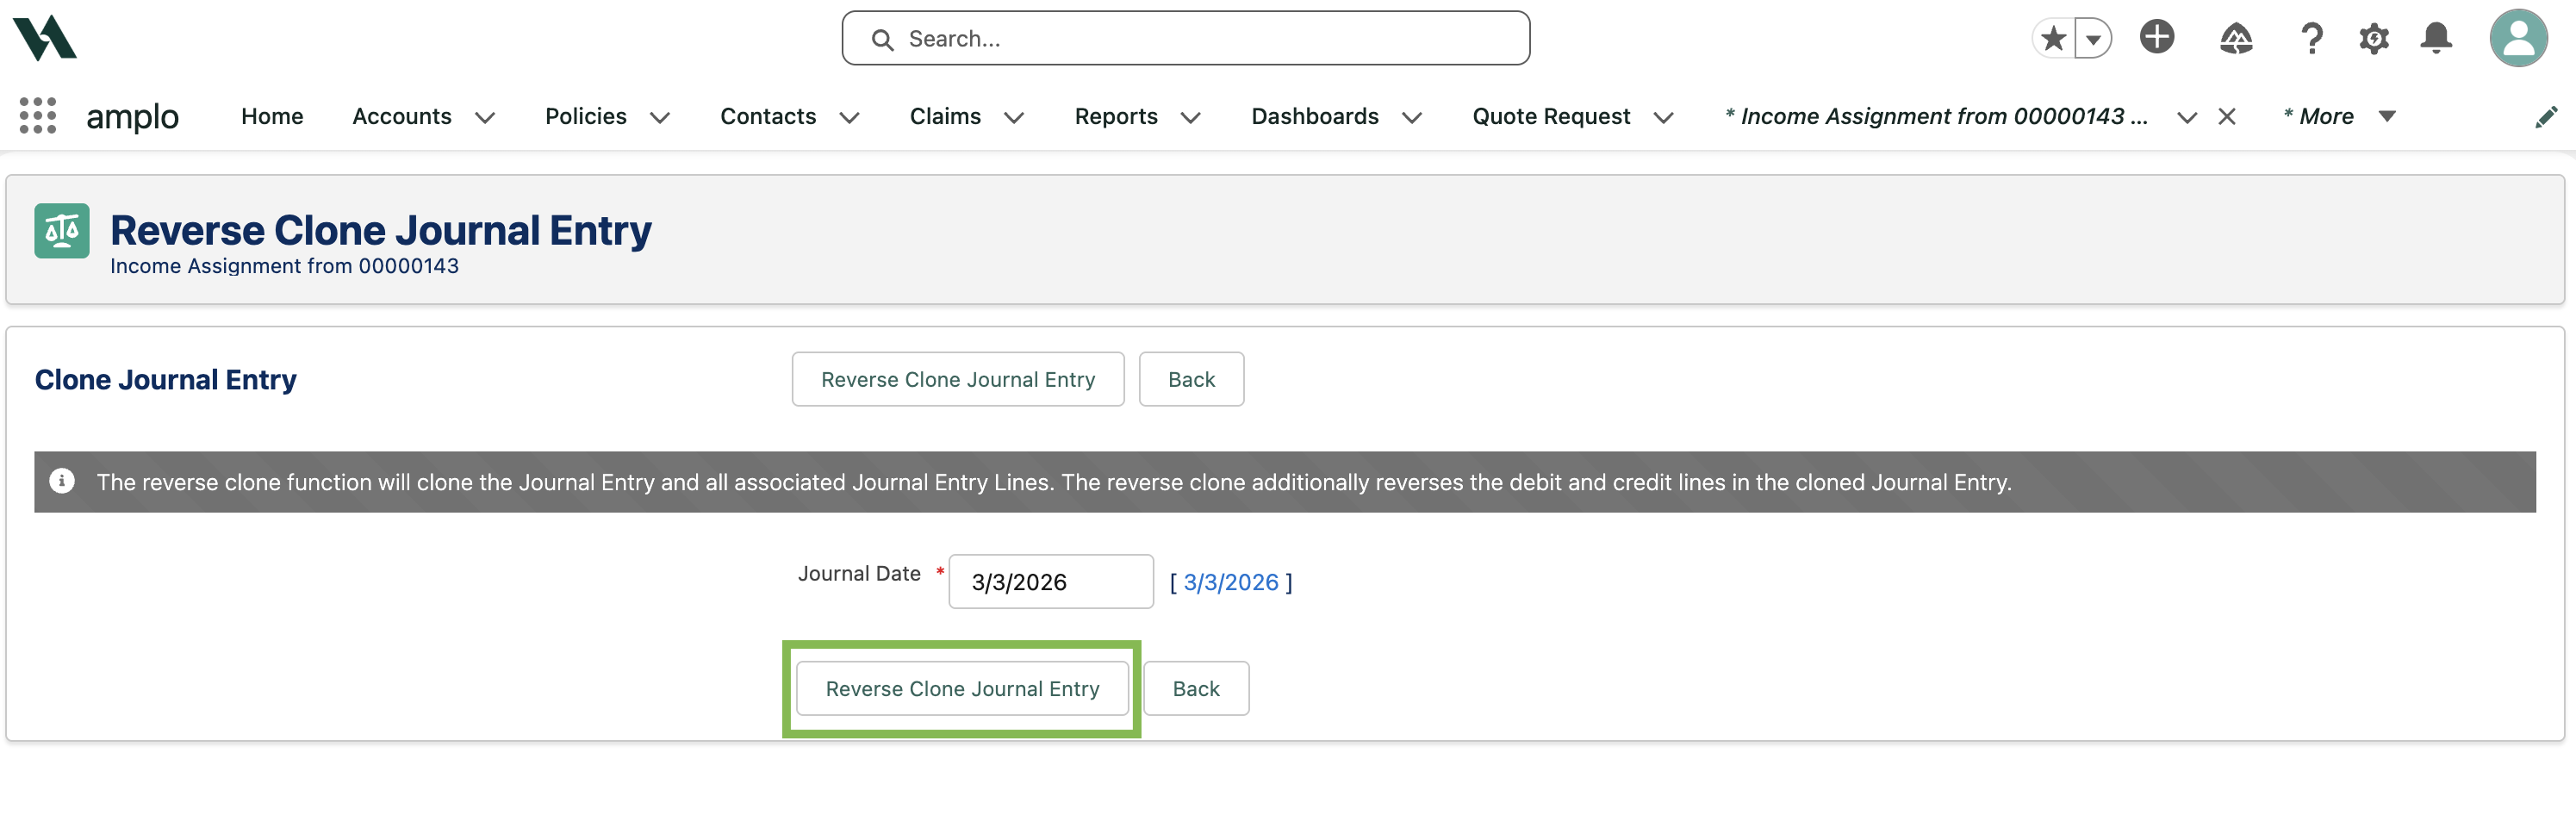
Review and edit the entry as needed.
Click Save.
Transfer funds
A funds transfer is used to move money between agency or account buckets inside your accounting system. This action is typically done to correct misallocations, rebalance cash or receivables, or attribute funds to specific branches for reporting.
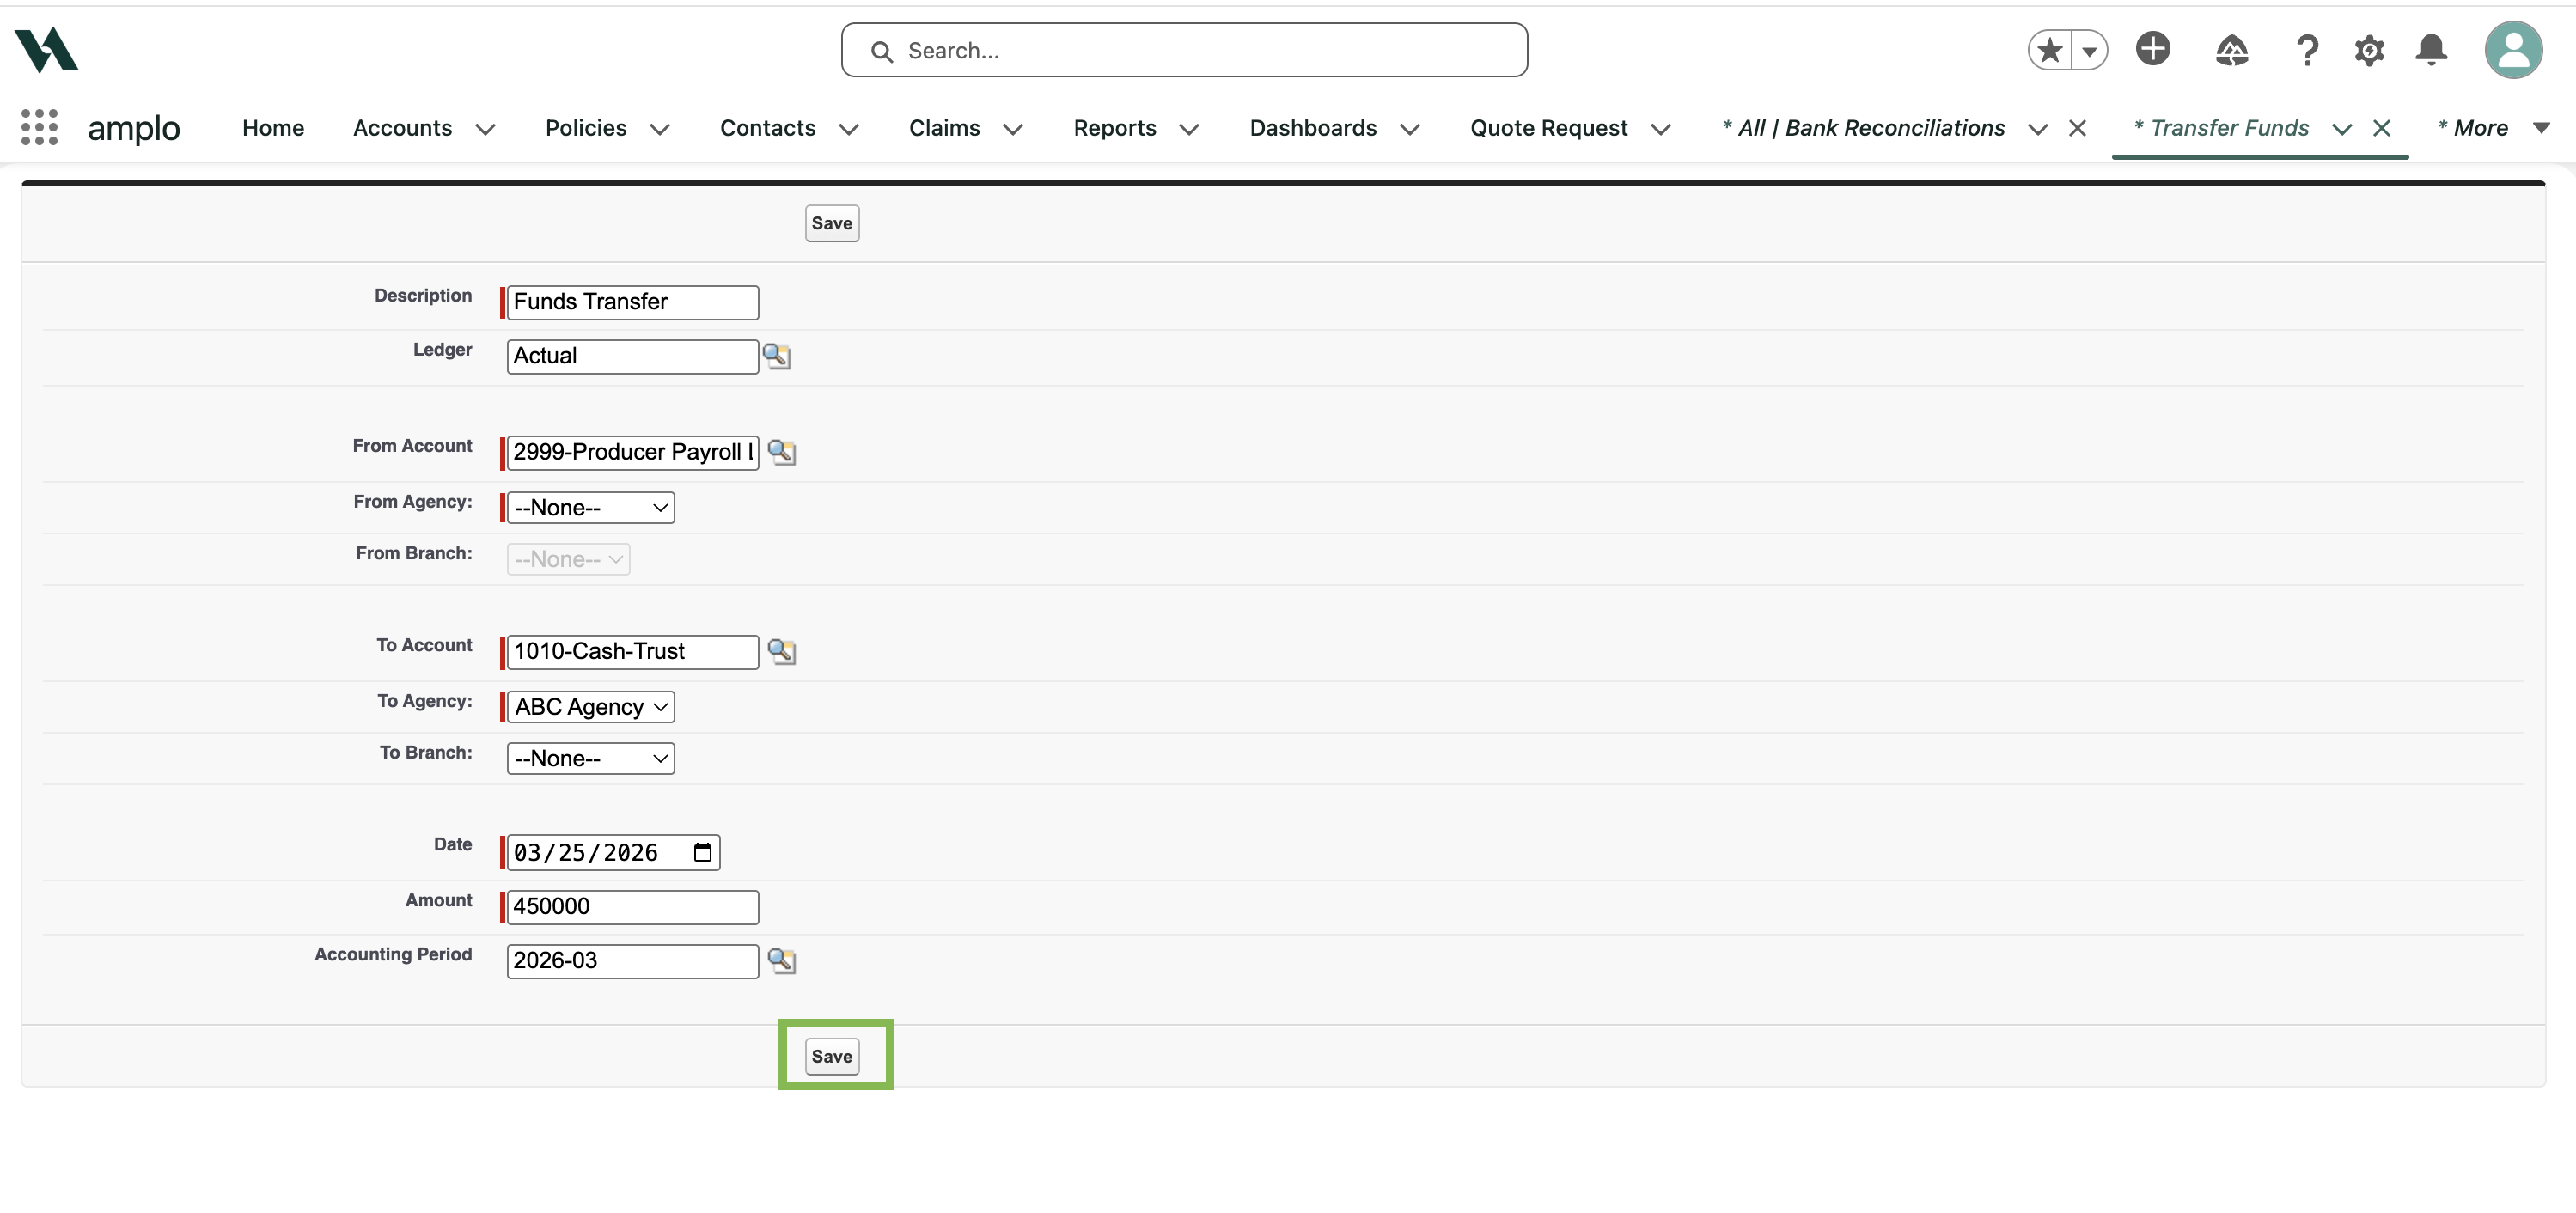
In the App Launcher, search and select Transfer Funds.
Enter the information as detailed as possible:
Description: Add a detailed description for your records.
From Account: Select the source account for the transfer.
From Agency: Select from the listed options.
To Account: Select the receiving account.
To Agency: Select the receiving agency.
Note: Branch attribution will populate only if matching Accounting Variables exist.
Add the transfer Date and Amount.
Select the Accounting Period.
Click Save.
The system will create a new Journal Entry.