Creating new accounting periods
Last updated: May 27, 2026
Accounting periods define the timeframes used to record financial transactions, including premium collections, commission payments, carrier payables, and trust account activity. Without defined periods, transactions may post to the wrong timeframe, which can affect reporting and reconciliation. This article explains how to create accounting periods and import them in bulk.
Before you begin
Confirm whether your organization uses a calendar year or fiscal year for reporting.
Calendar year: January is Period 1 and December is Period 12.
Fiscal year: Number periods sequentially based on your fiscal schedule. For example, if your fiscal year runs September 1 through August 31, September is Period 1 and August is Period 12.
Accessing Accounting Periods
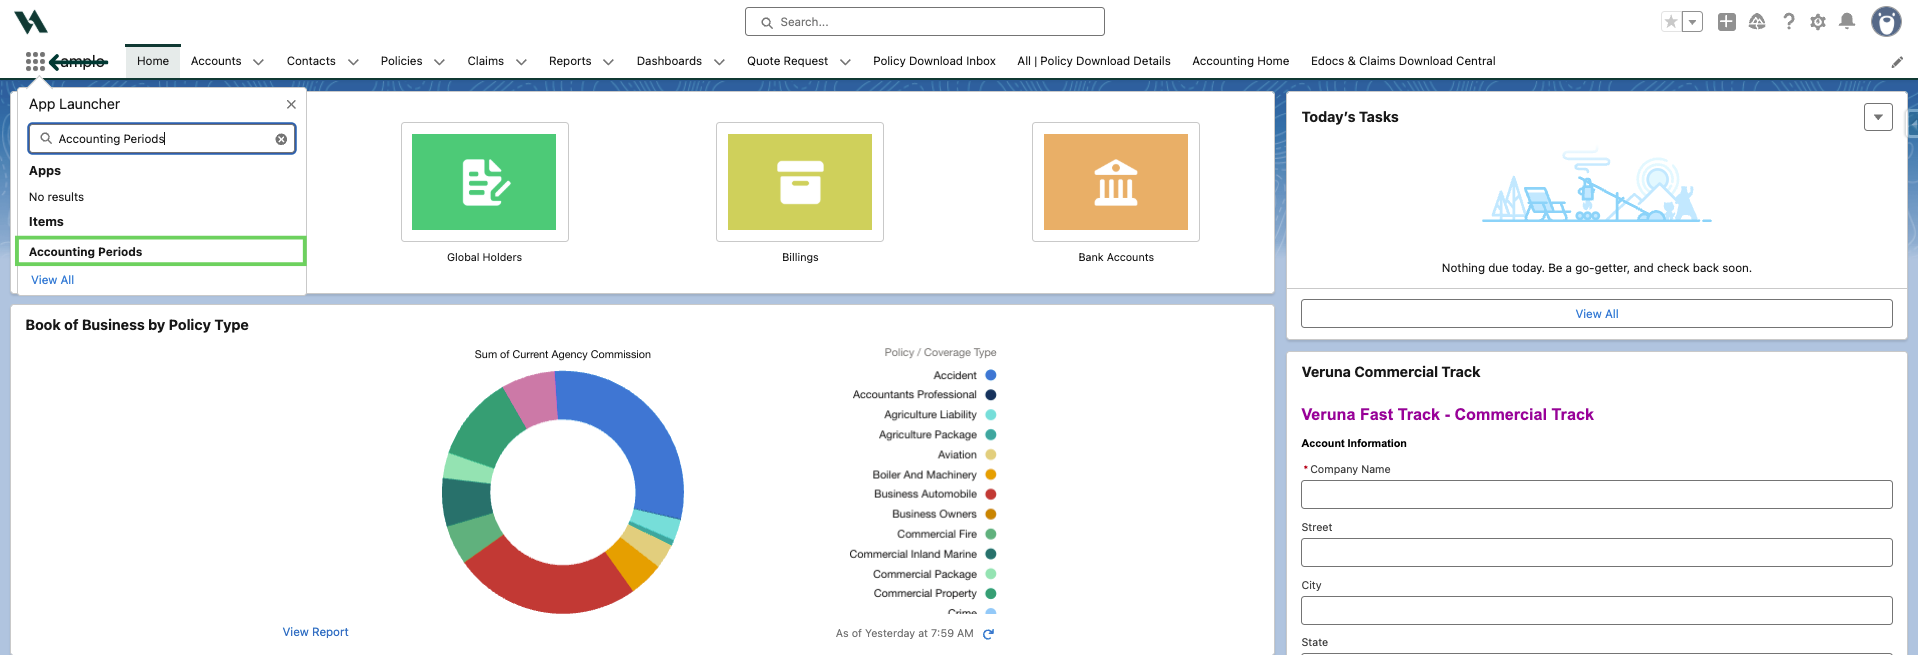
Use the App Launcher to access your Accounting Periods.
In the App Launcher, search and select Accounting Periods.
Creating Accounting Periods
Create periods manually or import them using a CSV file. Follow the steps below for each method.
Creating Accounting Periods manually
On the Accounting Periods page, click New.

On the New Accounting Period modal, enter the required information:
Accounting Period Name: Accounting periods always follow the format YYYY-MM and are organized into 12 periods each year.
Start Date: Enter the first of the month for the first period.
End Date: Enter the end of the month for the first period.
Status: Open
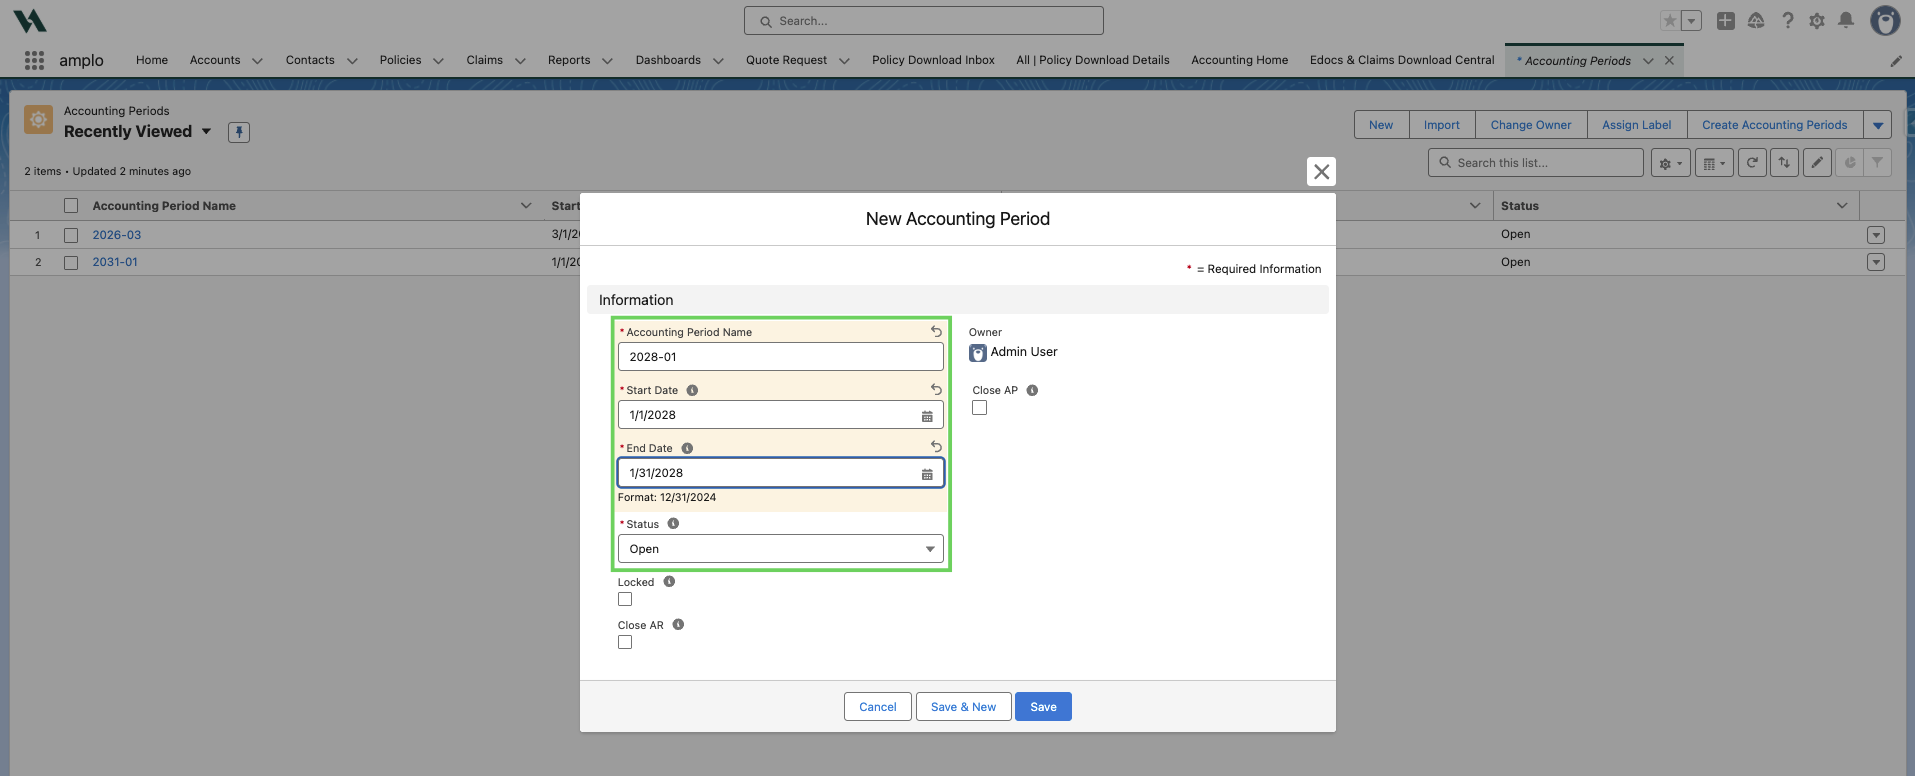
Click Save & New

Repeat steps 2-3 until all 12 periods are created.
Importing Accounting Periods
Use a CSV import to create multiple periods at once.
Download the template:
Enter all required accounting period information.
Save the file as a CSV.
On the Accounting Period page, click Import.

On the Custom objects tab, click Accounting Periods.

Click Add New Records.
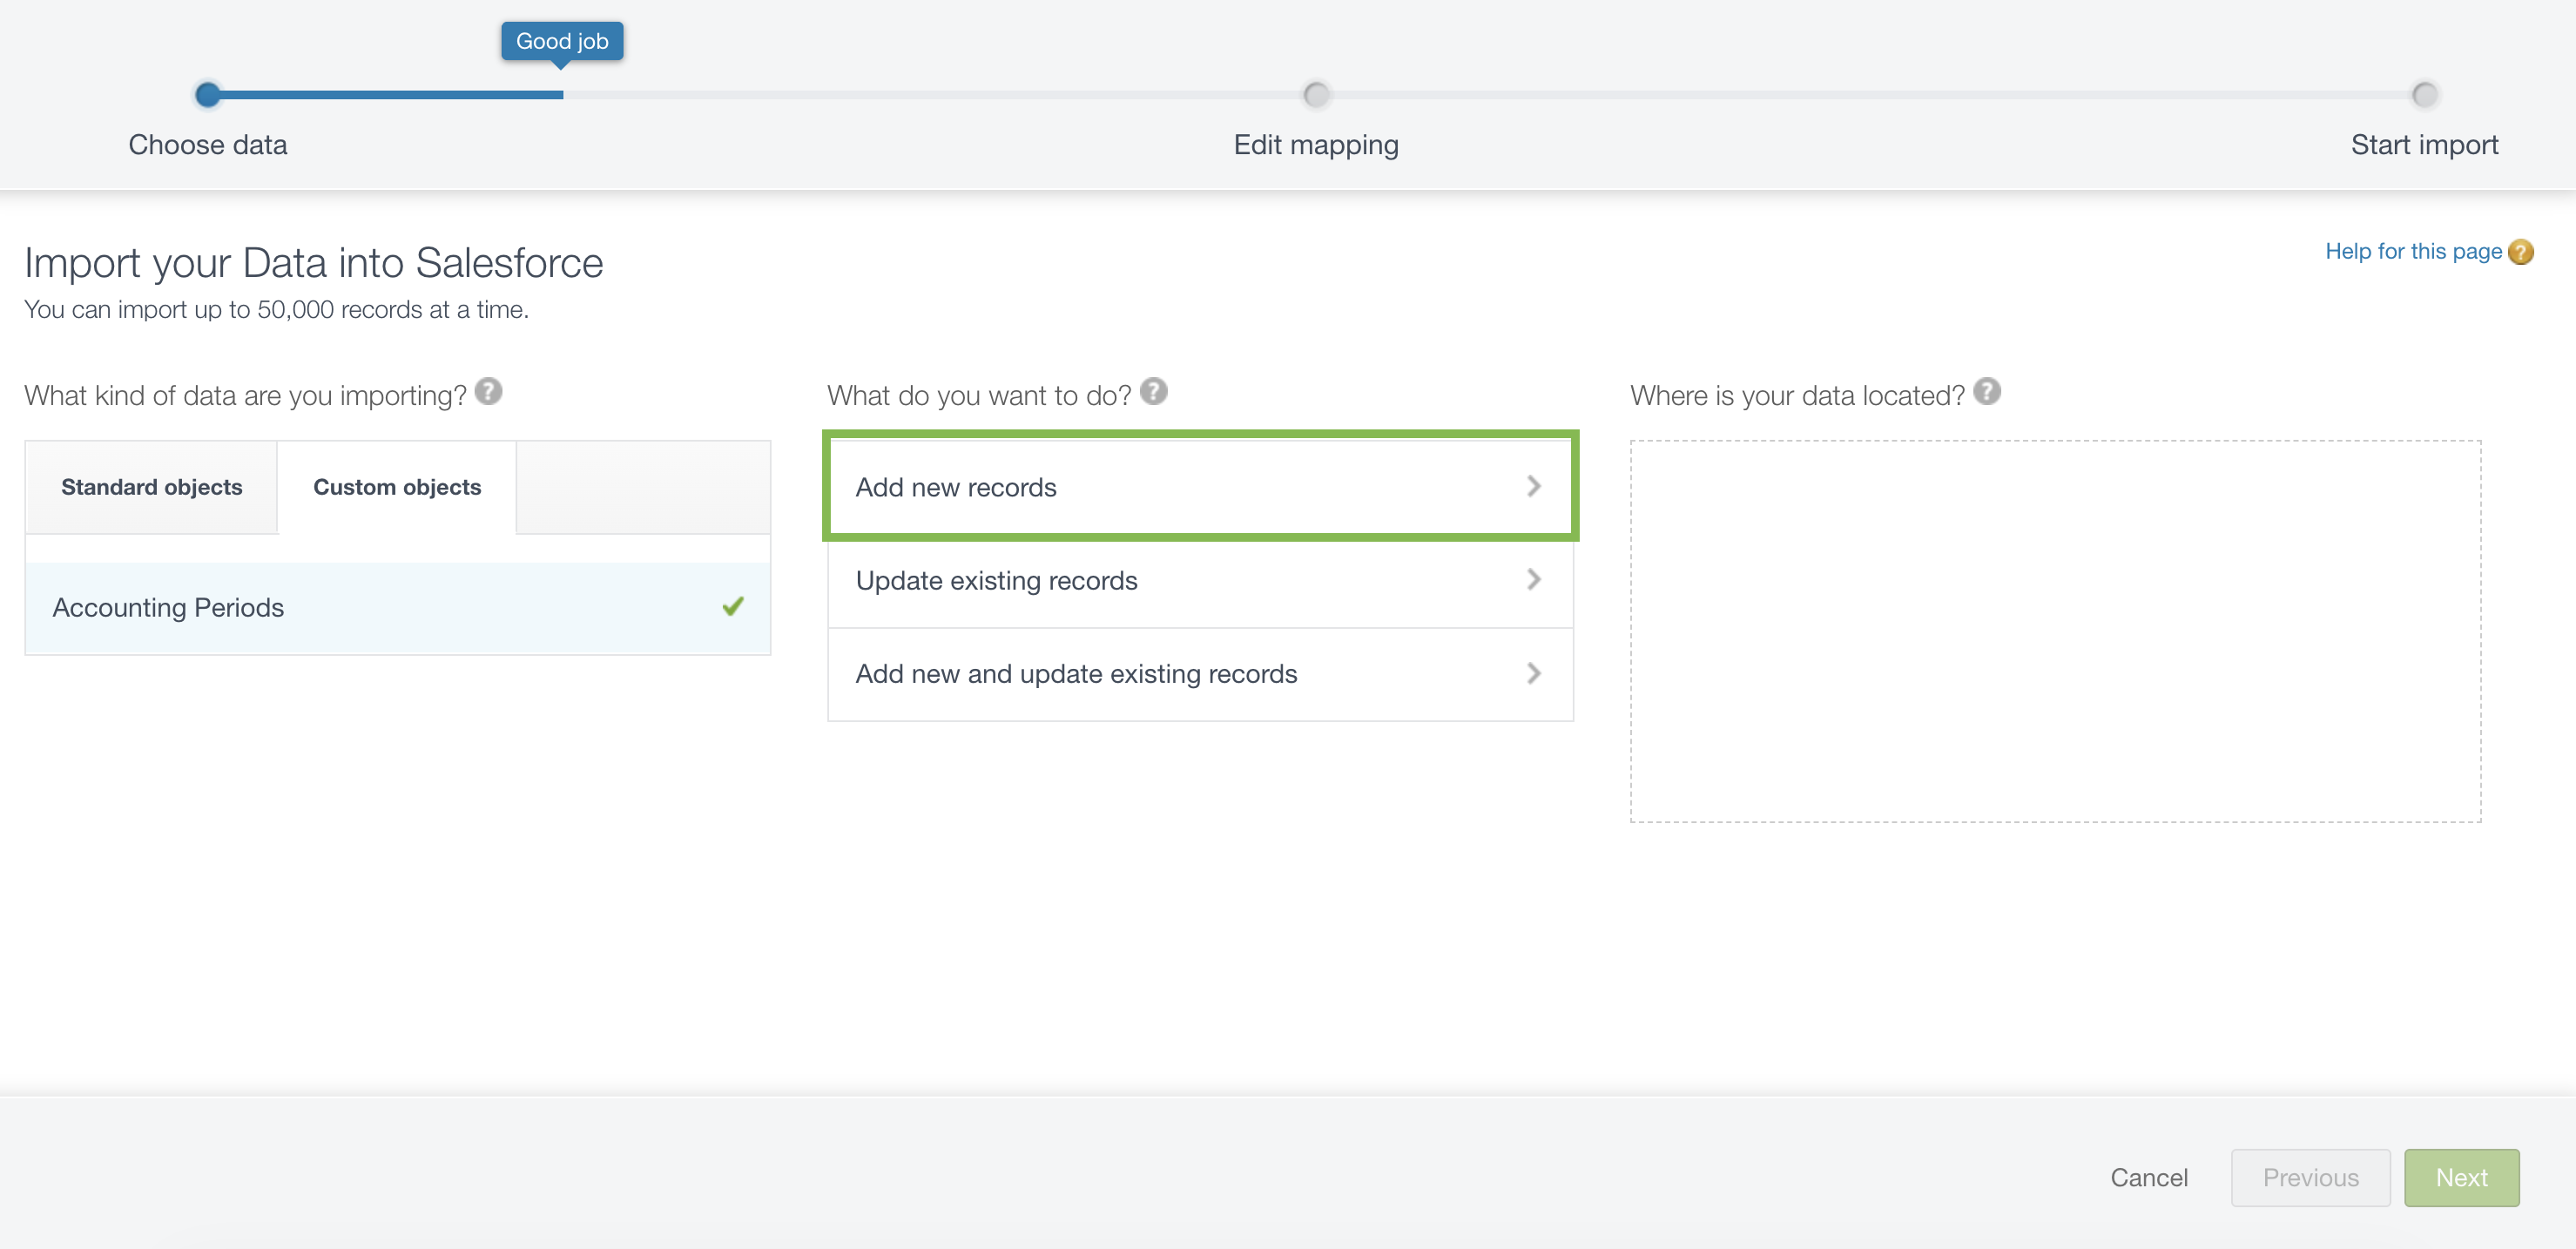
Note: The additional fields that appear below (Match by, etc) is not required to proceed and should be skipped.
Upload your completed CSV file, then click Next.

In the Edit column, click Map.
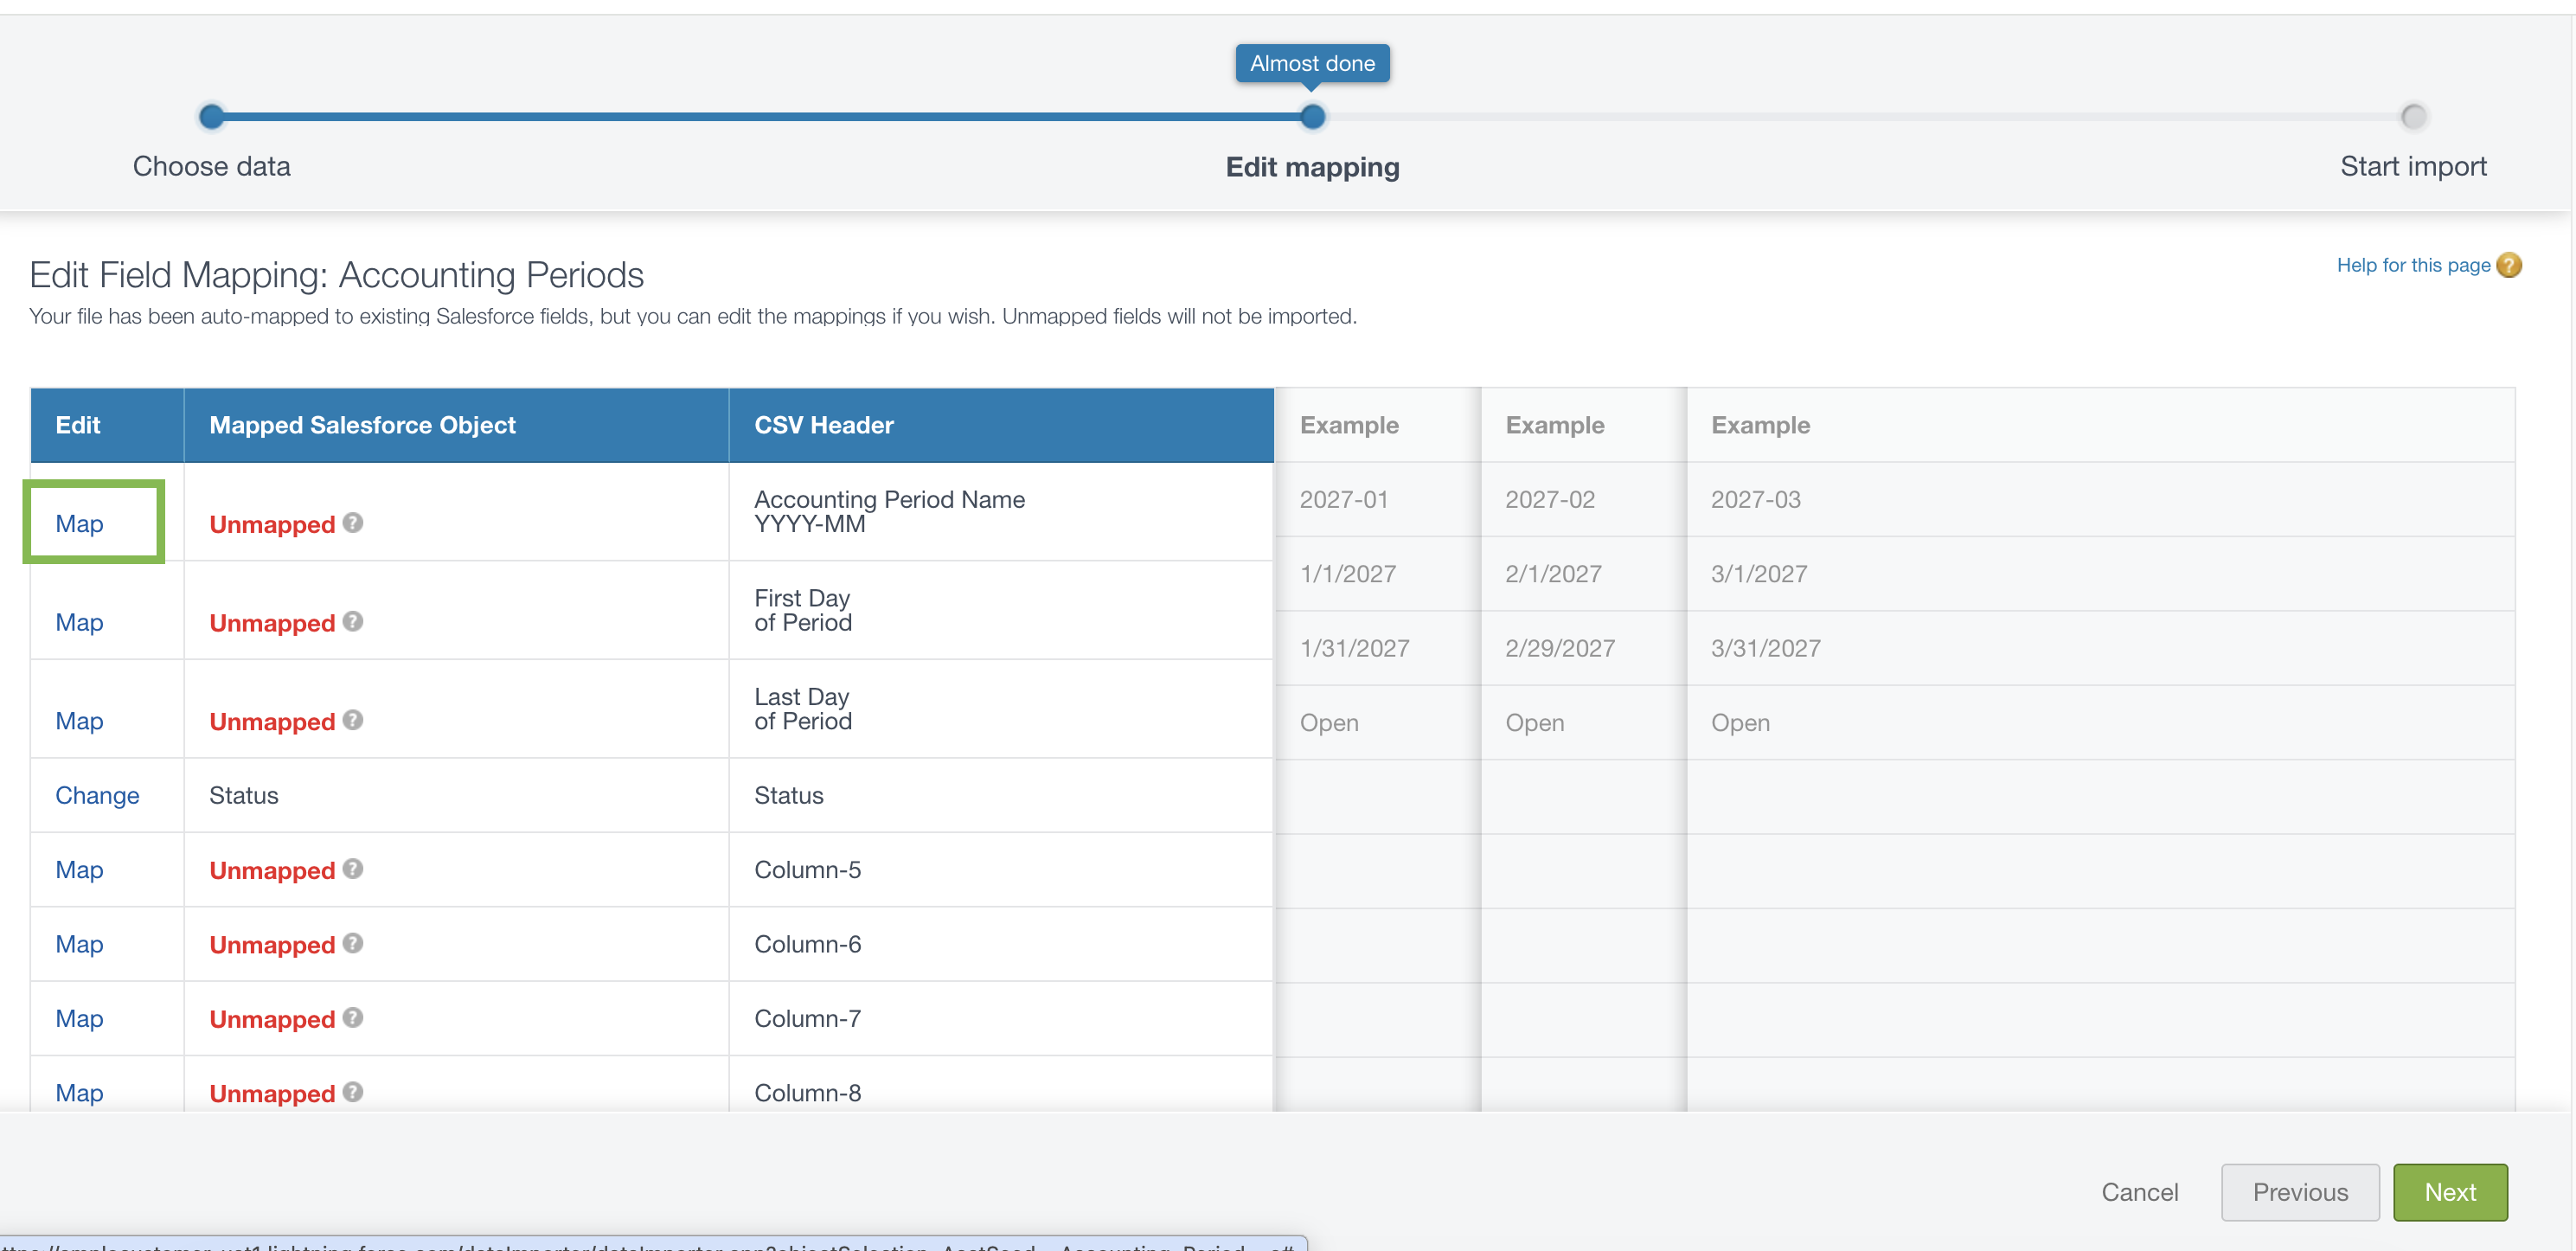
Select the corresponding name of the field. In this example, Accounting Period Name YYYY-MM maps to Accounting Period Name. Click Map.

Repeat for all remaining fields and click Next.

On the Review & Start Import screen, click Start Import.
On the confirmation modal, click OK.
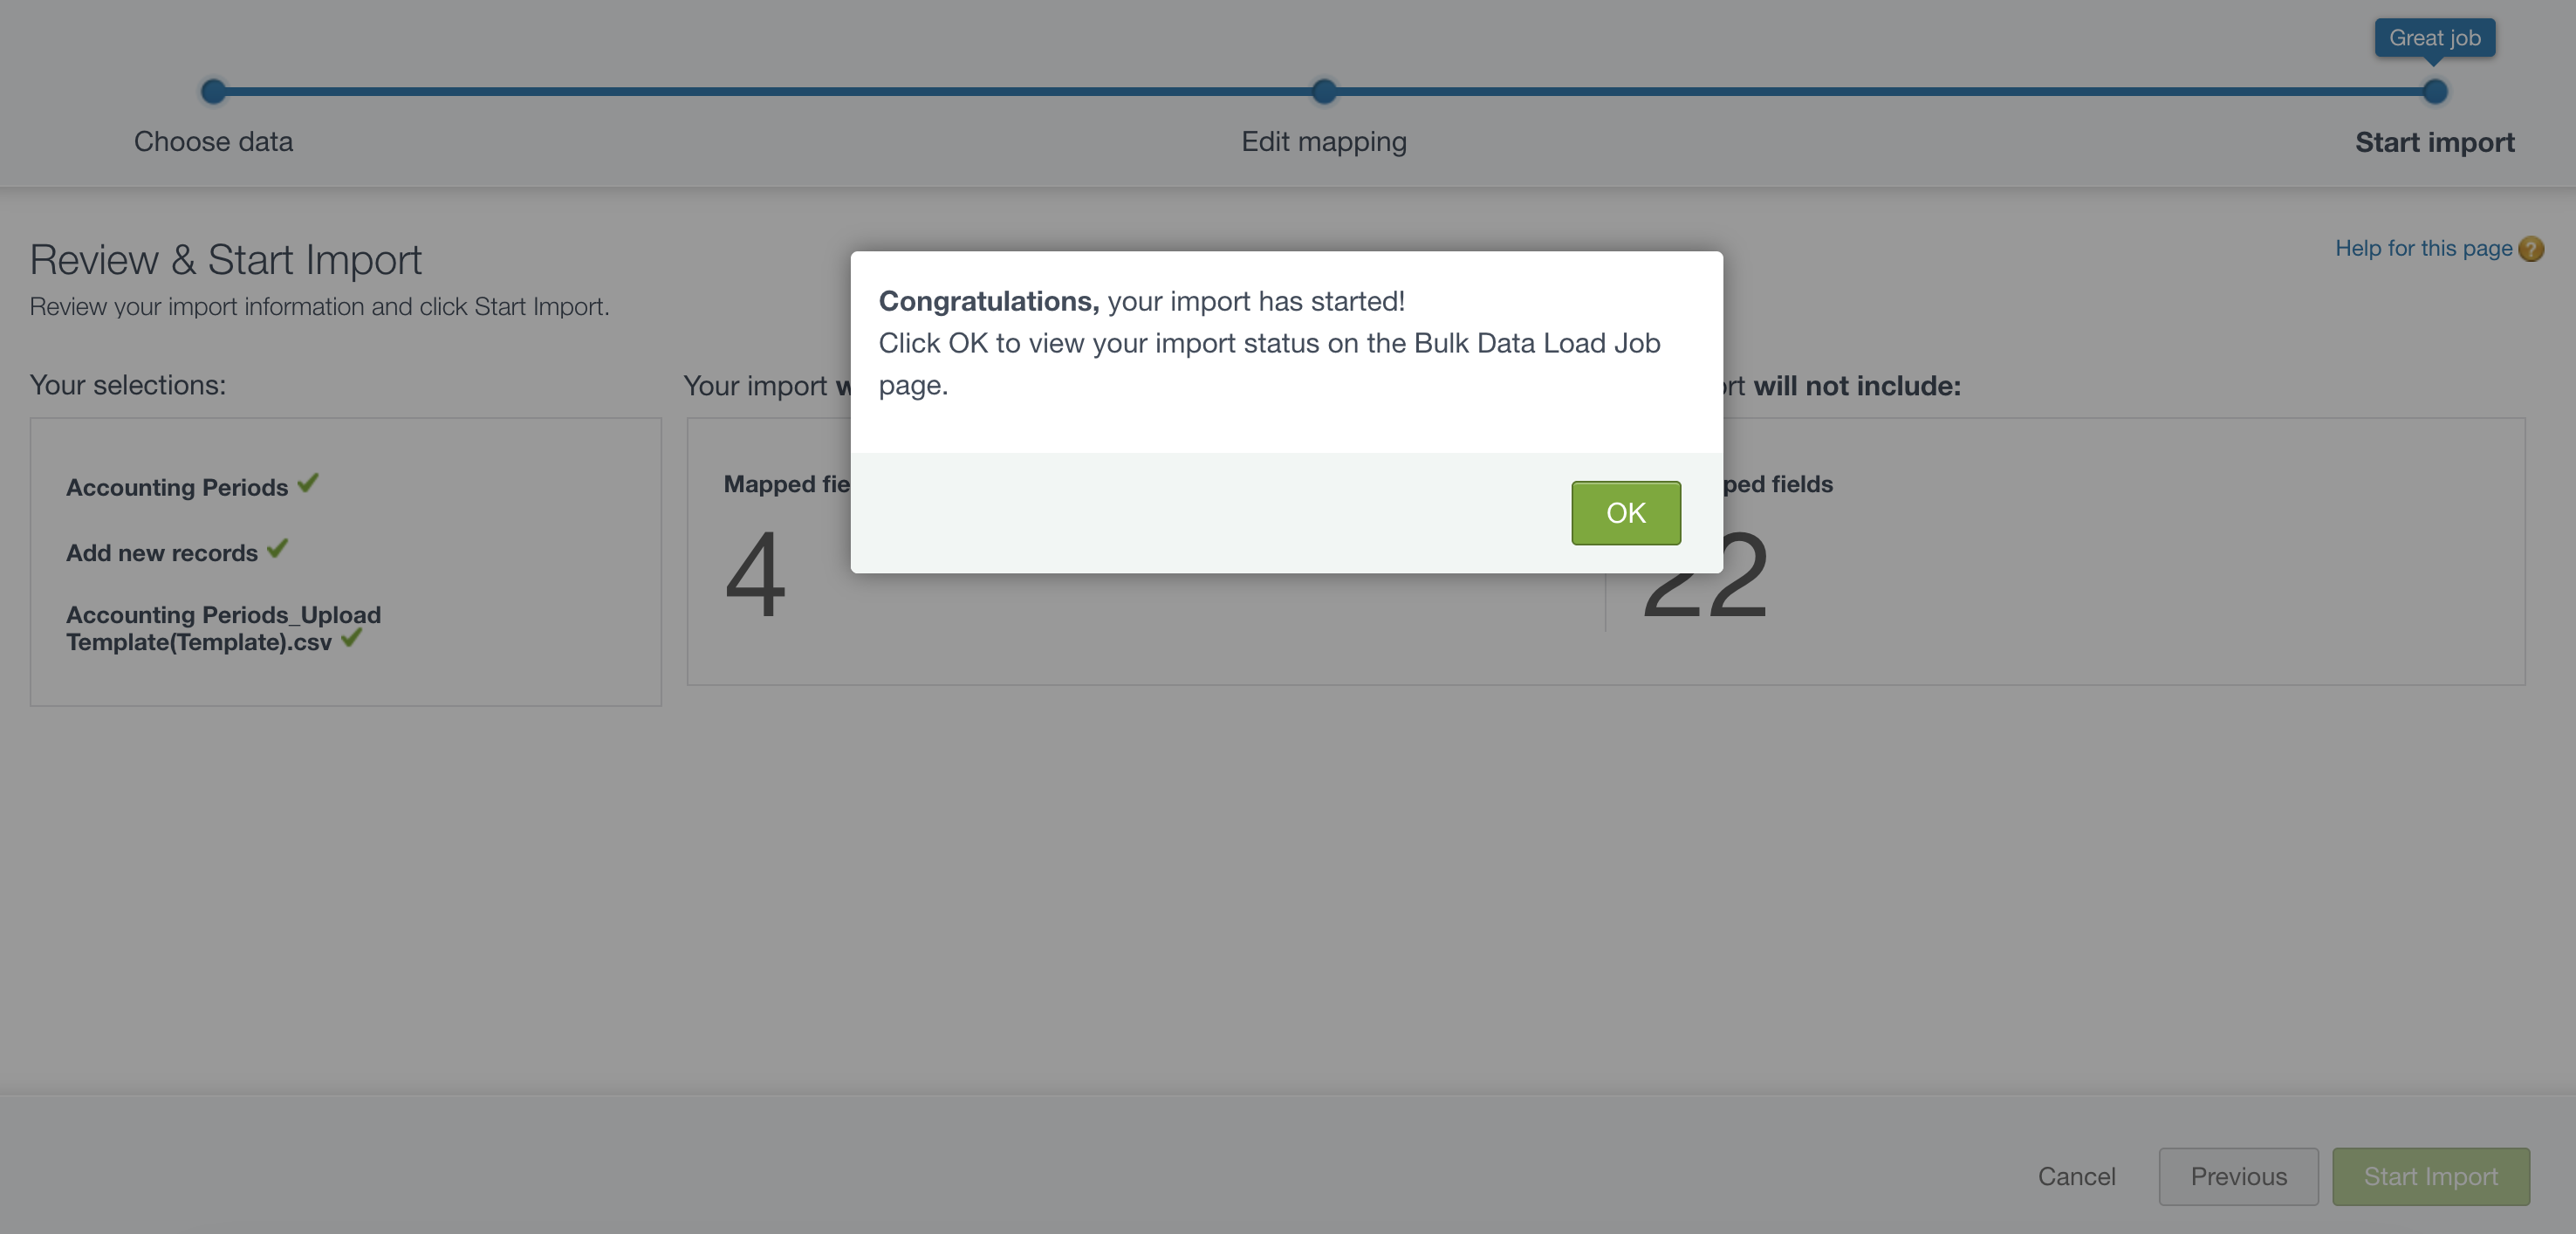
On the Bulk Data Load Job page, review the job status.

Click the link in the View Result column to download and view the results file.

Once your accounting periods are created, you can restrict, close, and archive them as needed. For more information, see 📄 Managing accounting periods.