eDocs setup and configuration
Last updated: April 29, 2026
Overview
eDocs lets agencies automatically download and process carrier documents through IVANS, so your team doesn't have to manually retrieve files from carrier portals. Once set up, documents are matched to policies and stored in VerunaDocs automatically.
This article walks administrators through enabling and configuring eDocs in amplo, including permissions, mapping verification, and post-setup steps. For instructions on managing eDocs, see 📄 Managing eDocs downloads.
Before you begin
Contact support@amplo.com to enable eDocs in your org.
Make sure your organization is set up to receive downloads from IVANS.
Confirm you have System Administrator access in Salesforce.
Enable eDocs Custom Settings
First, verify that the required eDocs custom settings are enabled.
Click the gear icon and select Setup.

Use the Search to find and select Custom Settings.

Click Manage to open Veruna Support.

Confirm the following settings are enabled:
Carrier Mapping Decision Creator Enabled
eDocs Is Active
eDocs Queueable Job
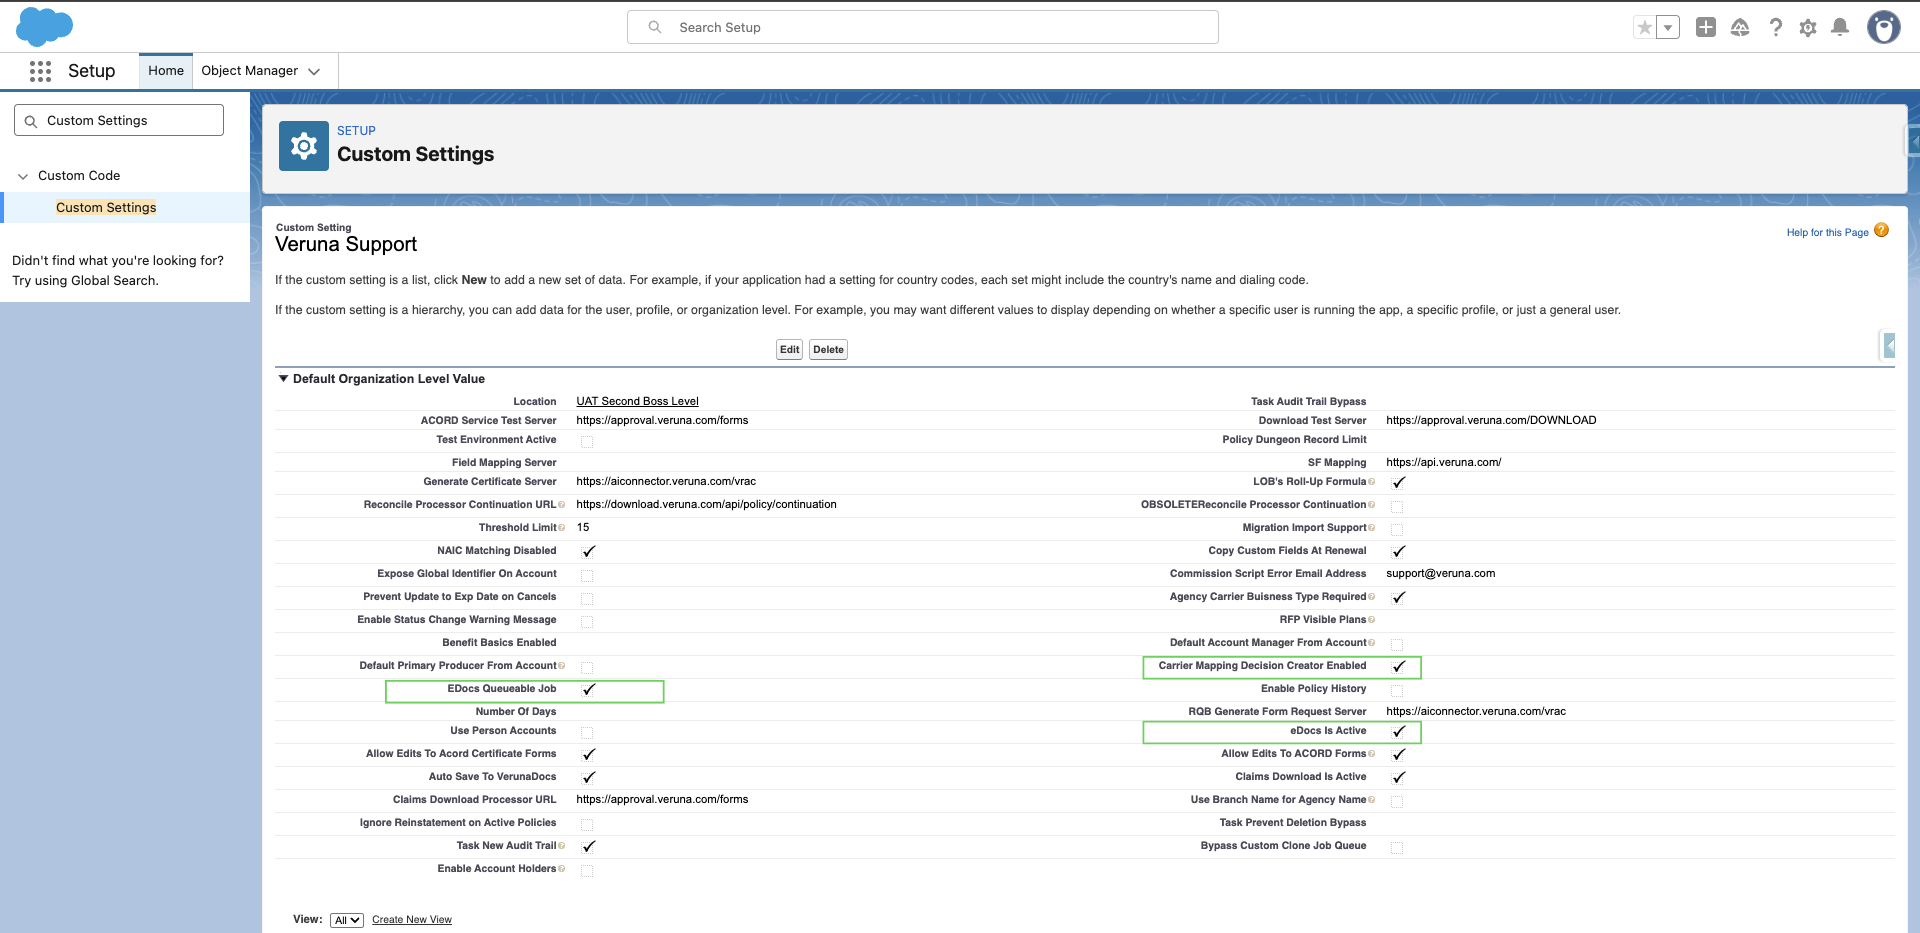
These settings turn on the background processes that allow eDocs to download and process documents.
Assign eDocs Permission Sets
Users must be assigned to the eDocs Fix permission set to configure or process eDocs. For more information, see 📄 User management.
Verify eDocs Mappings
Mappings tell amplo which document type to assign to each transaction code from carrier downloads. If mappings are missing, proceed to the next section.
From the App Launcher, search for and select eDocs and Claims Download Central.

Select the Configure tab.

Select Mapping.
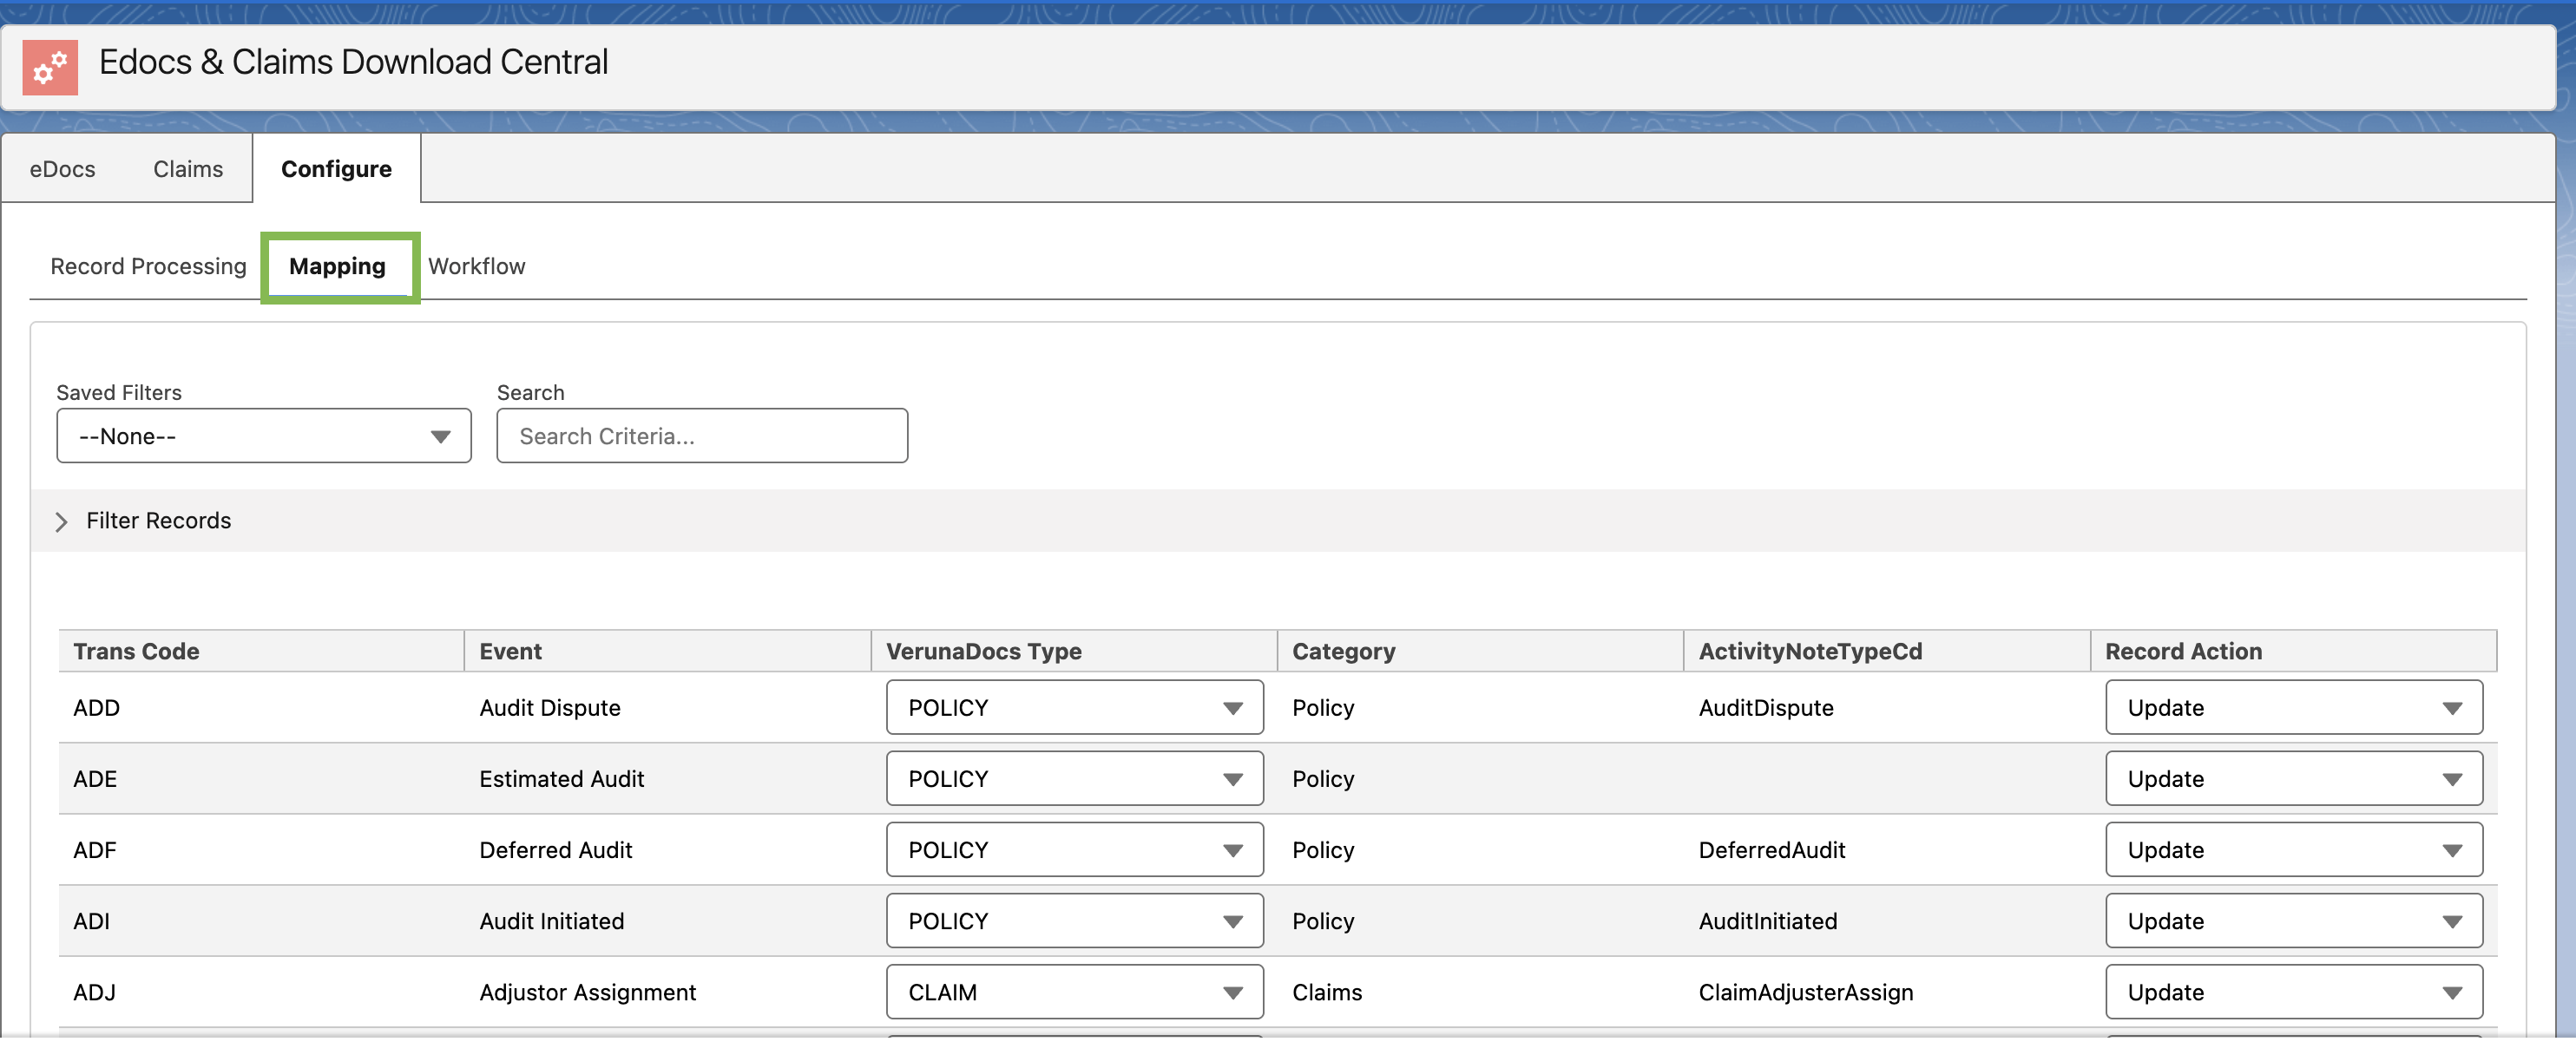
Confirm that mapping records are present. If the mappings page is blank, contact support@amplo.com.
Add custom objects
To add a new custom object to your VerunaDocs setup, contact support@amplo.com. The amplo support team will coordinate with OfficeScope (VerunaDocs partner) to configure it. To complete the setup, provide the following:
The name of the environment where the object should be added (production or sandbox)
The name of the custom object
Whether documents attached to the custom object should automatically roll up to the associated account
Whether documents should be linked to other related records, such as policies or opportunities
Add or edit cabinets
Cabinets organize your documents into folders, making it easier to find and manage files stored in VerunaDocs.
Open the App Launcher to search and select VerunaDocs Setup.

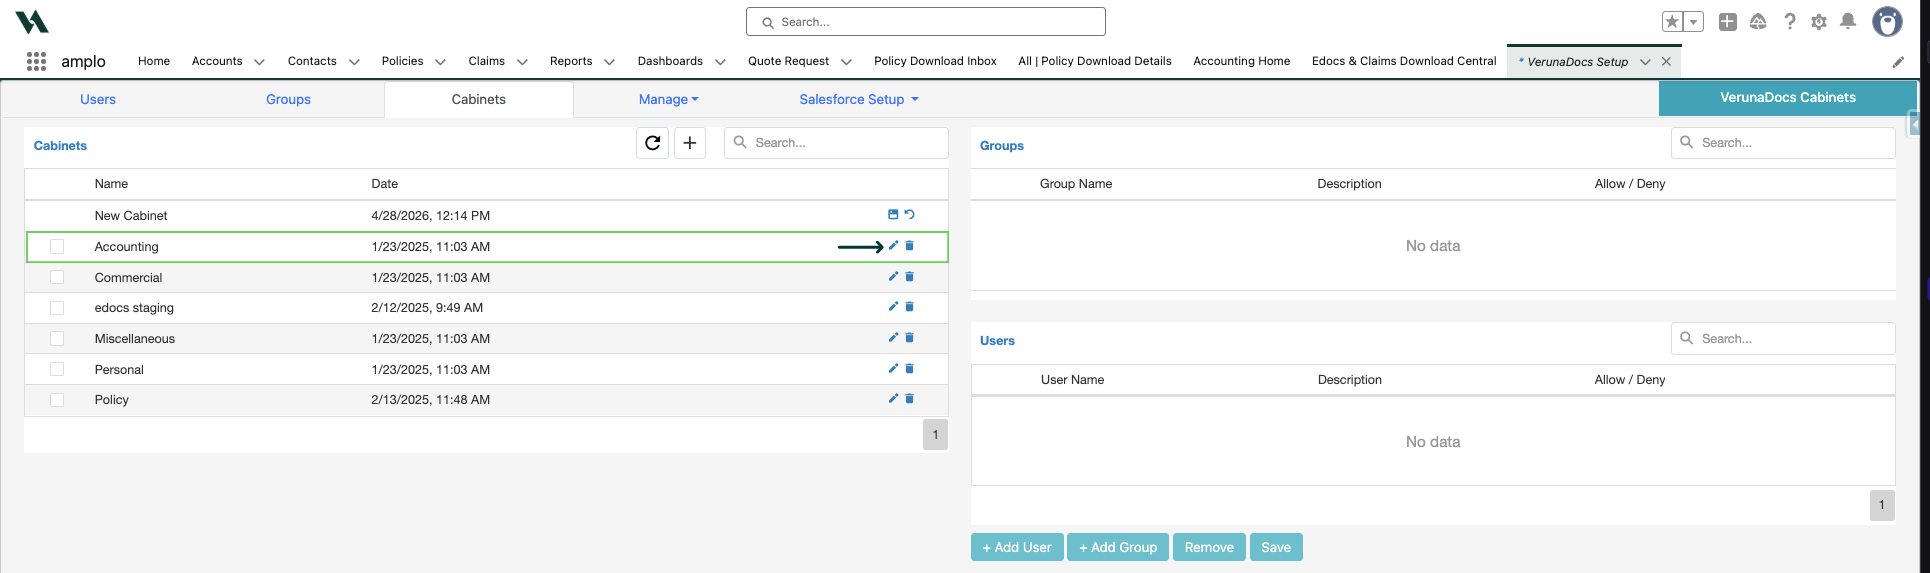
Click Cabinets.

To create a new cabinet:
Click the + symbol.
Name the new cabinet.
Click the Save icon.

To edit the name of an existing cabinet:
Click the pencil icon.
Rename the cabinet.
Save.
Add or edit descriptions
Descriptions let you name and label the codes used in VerunaDocs so they're easier to identify across your org.
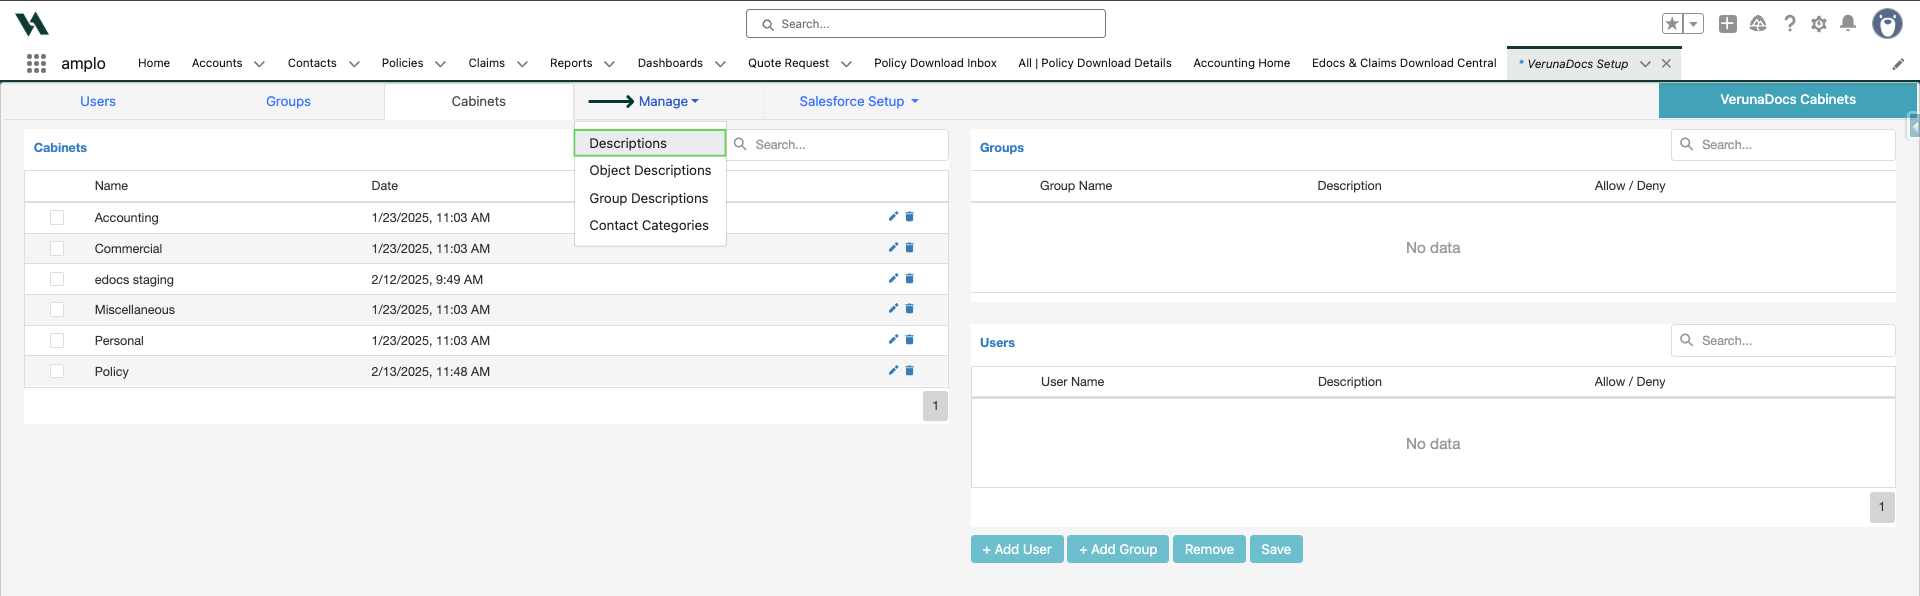
In VerunaDocs Setup, hover over Manage and select Descriptions.
Select the checkbox(es) next to the description you need to change.
To add a new code and description, select Add.
Click Edit.
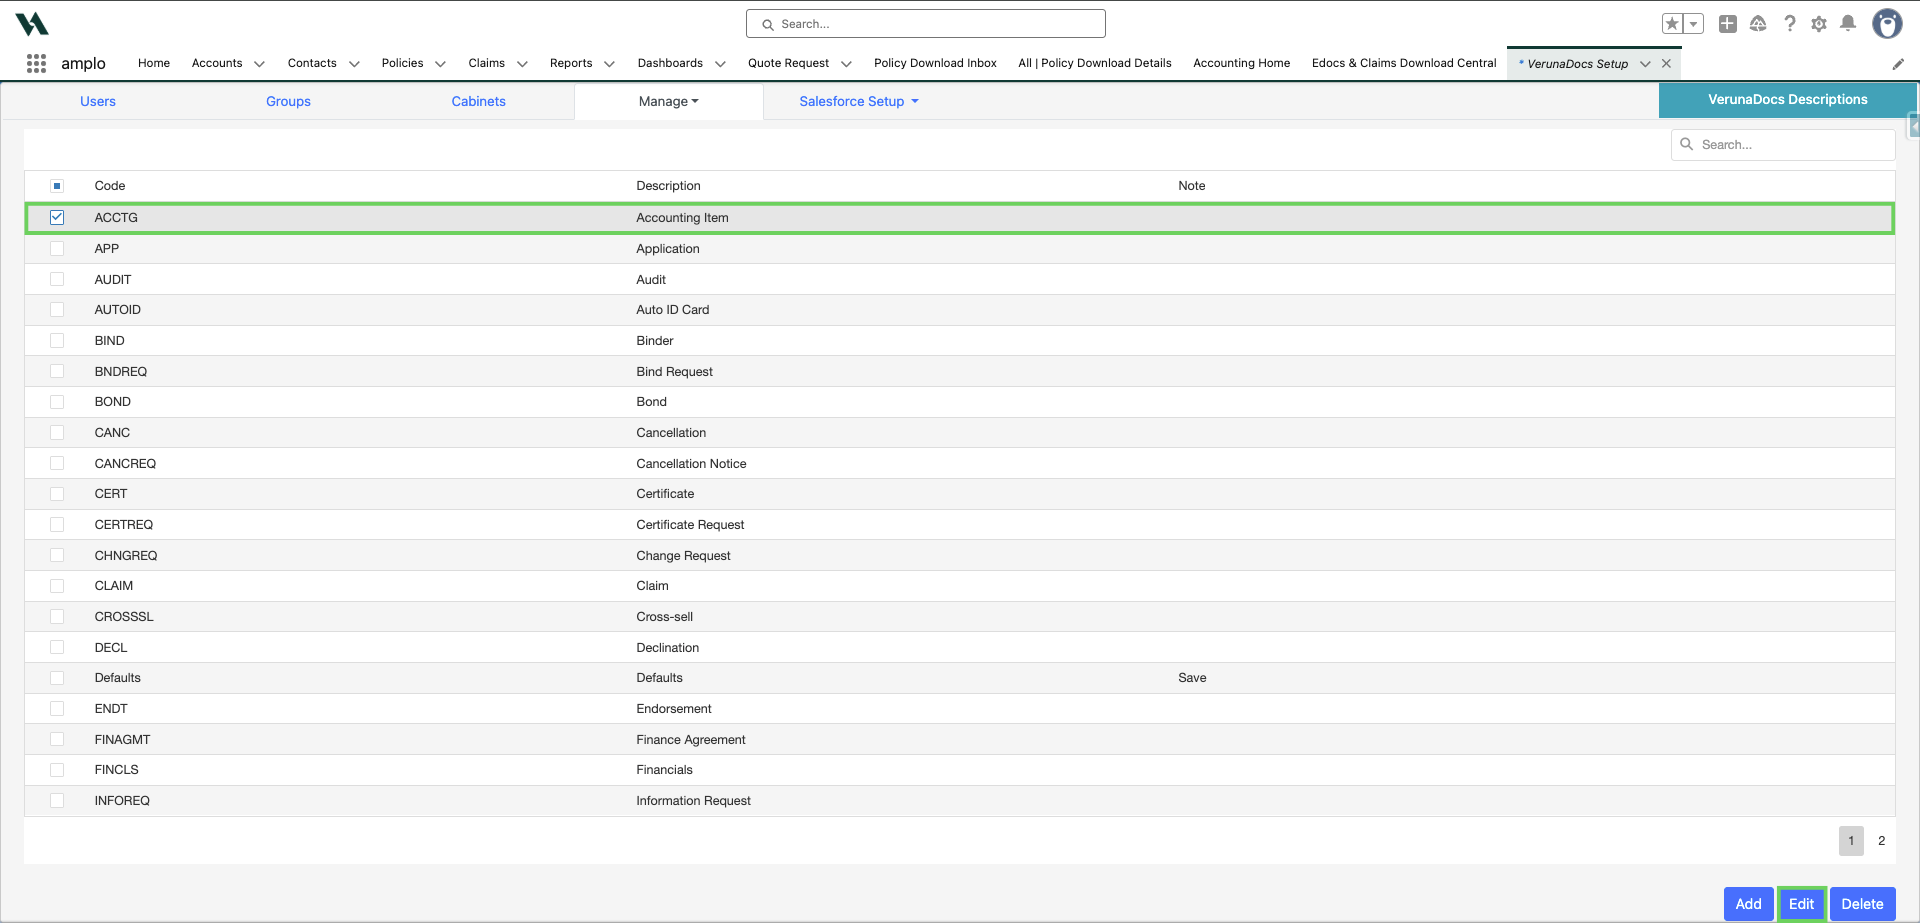
Adjust the description. Then, click Save.

Create workflows and automation
Select Edocs & Claims Download Central from the menu.

Click Configure.

Click the Workflow tab.

Set the following fields according to your preferences for each transaction:
Task, Activity
Send To
Priority
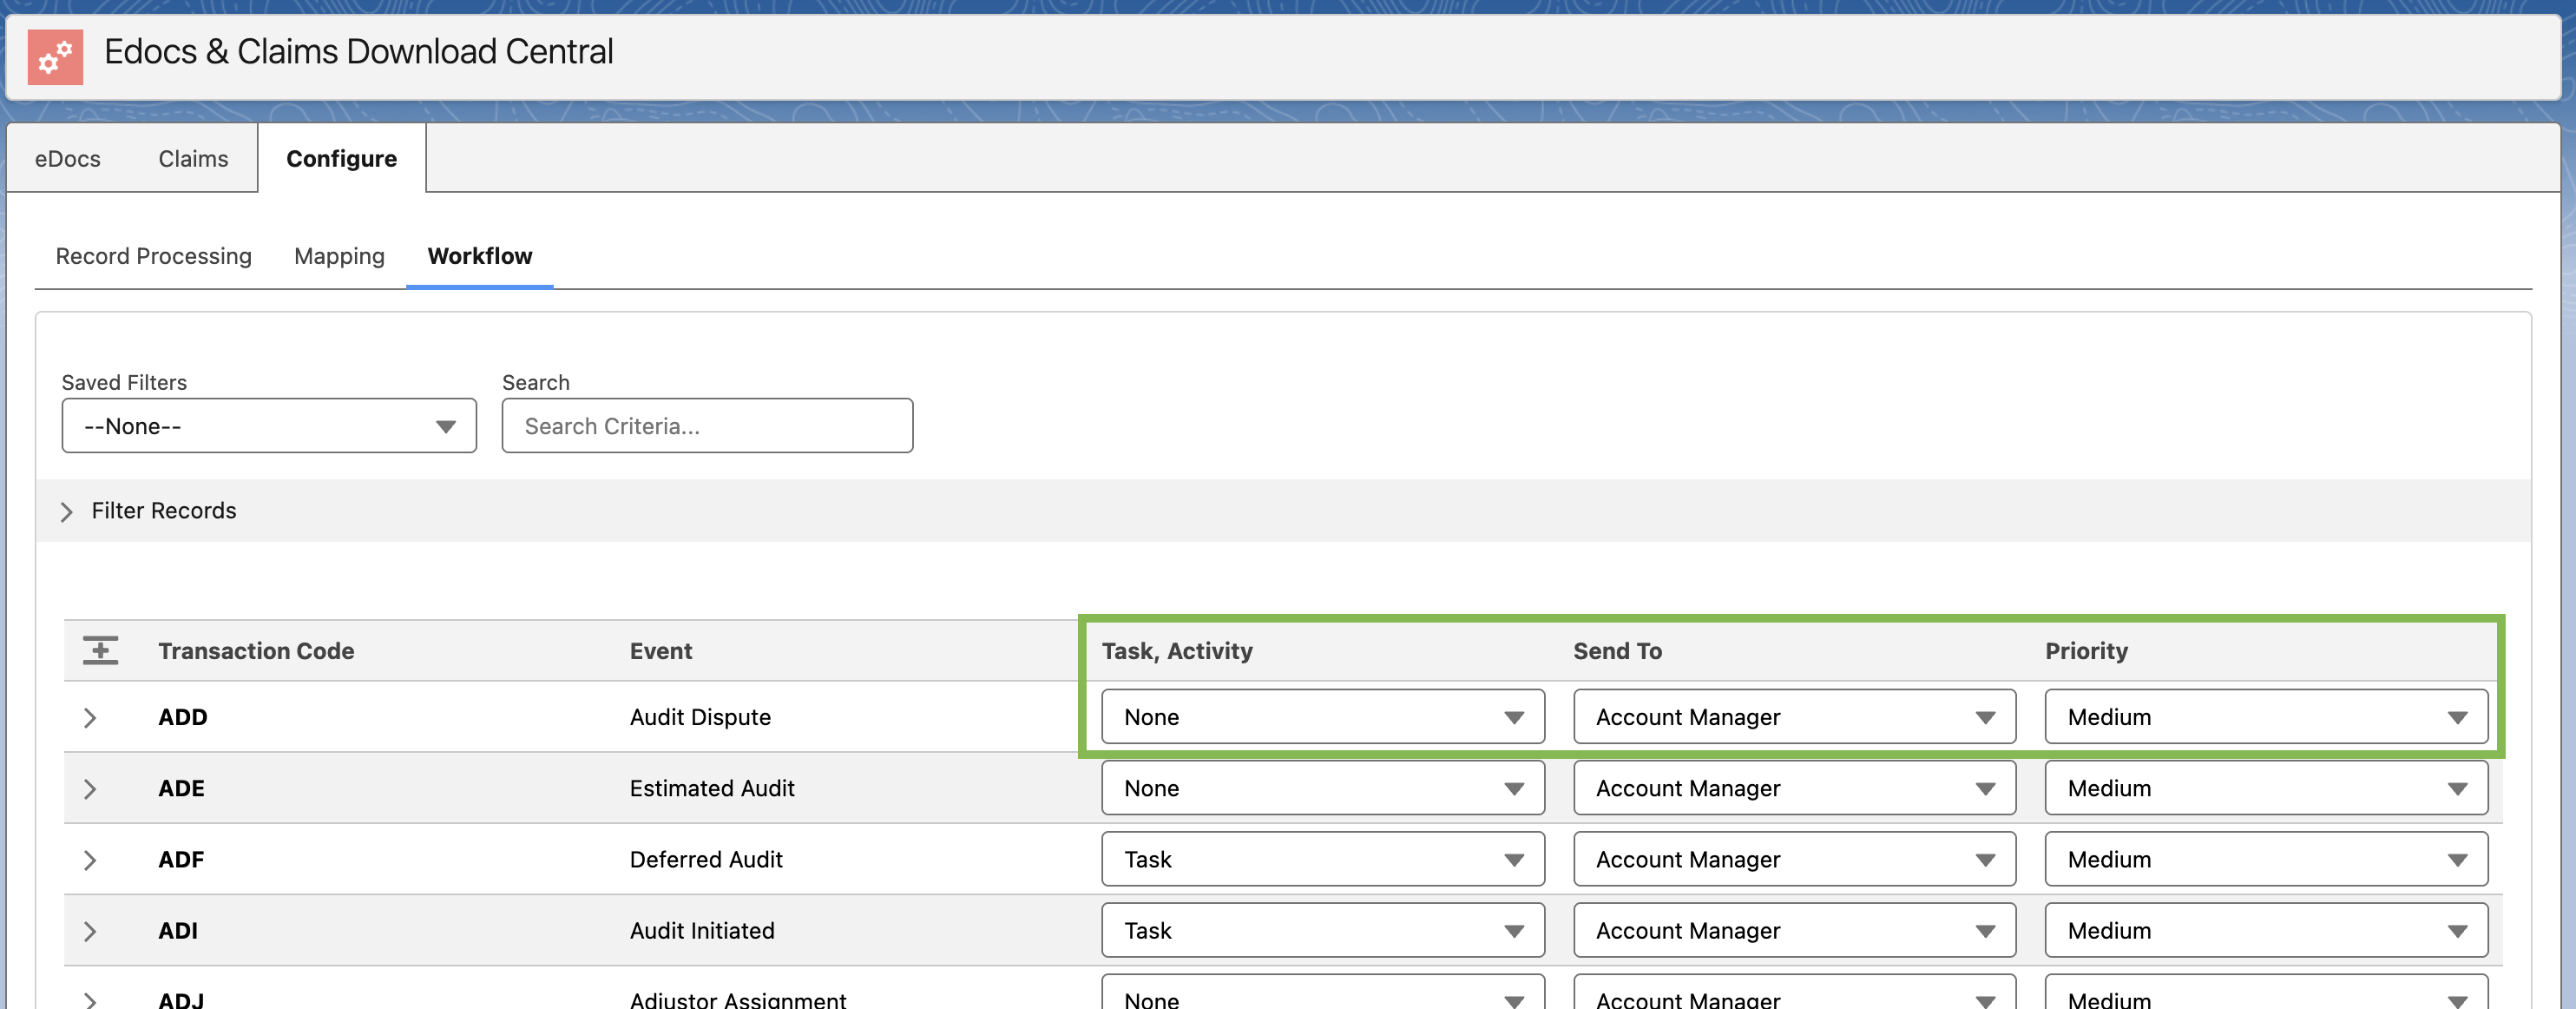
Click the right arrow to expand the list of options.

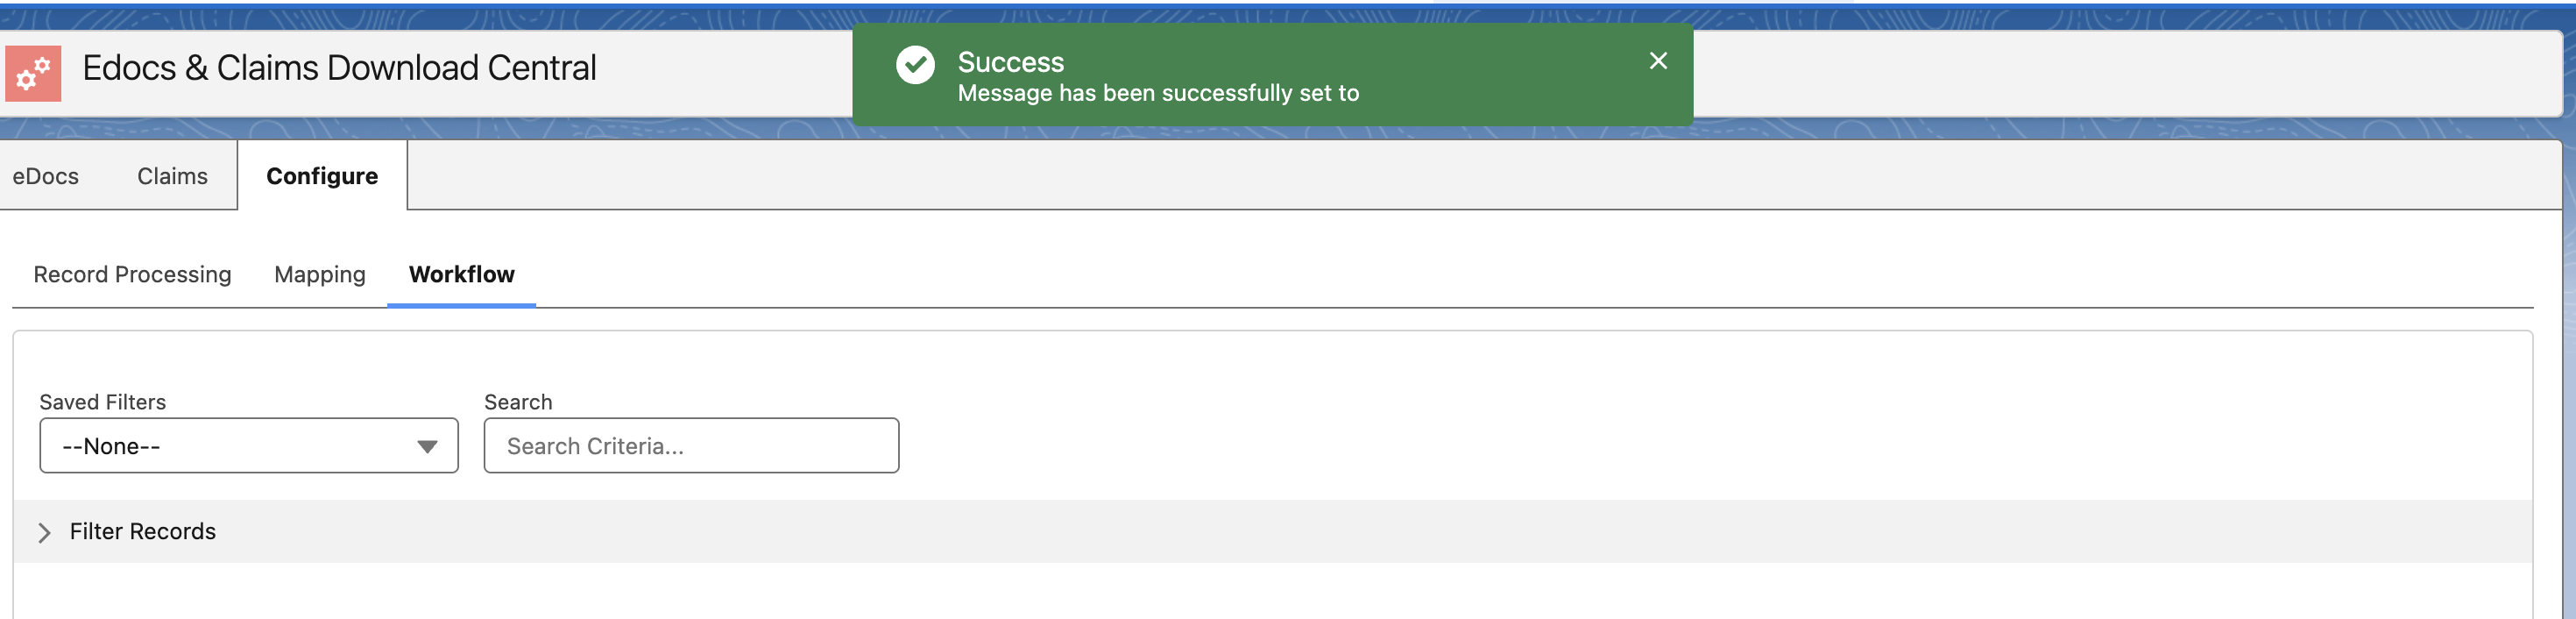
Add a Task/Activity message, if desired.

Tab outside of the field to save the changes.
Enable scheduled deletion job
A scheduled deletion job automatically removes temporary PDF preview files at a set time each day, keeping your Salesforce file storage clean without any manual effort. This code creates a scheduled job and runs it daily at 11:00 p.m. To enable the scheduled deletion job, contact support@amplo.com.
Disable AutoSave
To turn off automatic saving, use the following steps:
Use the gear icon and select Setup.

Search and select Custom Settings.

Select Manage next to Veruna Support.
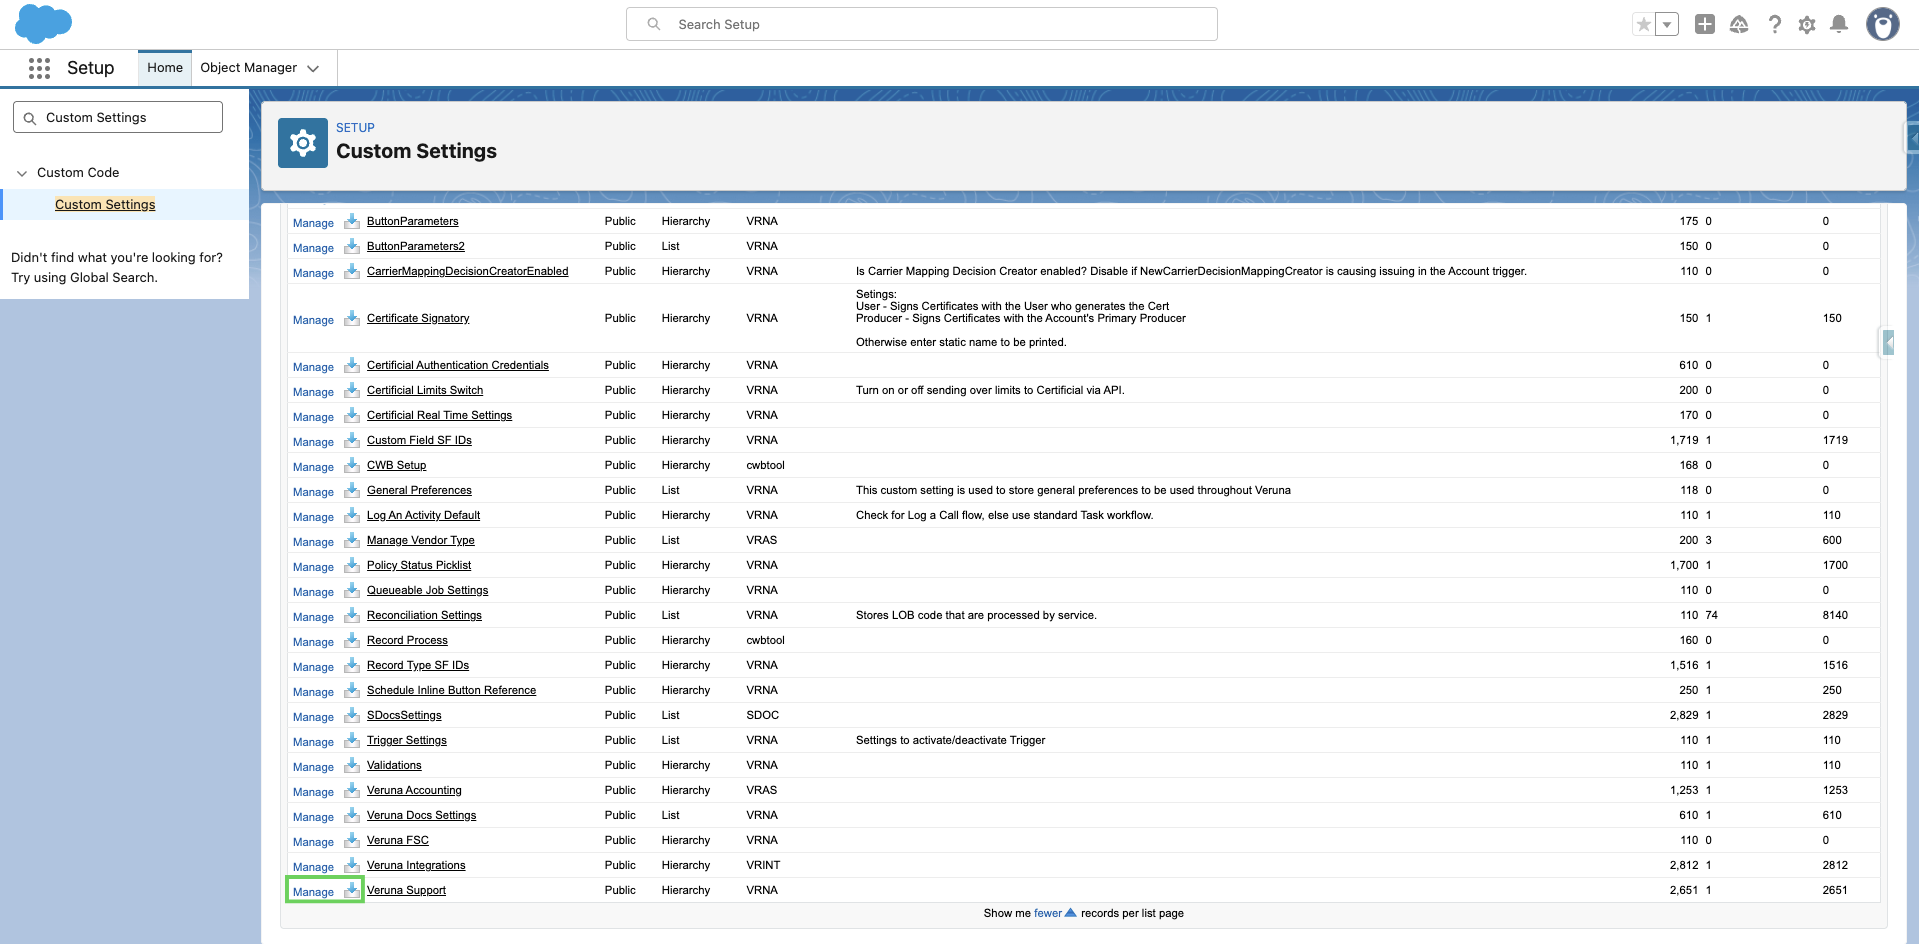
Then, select Edit.
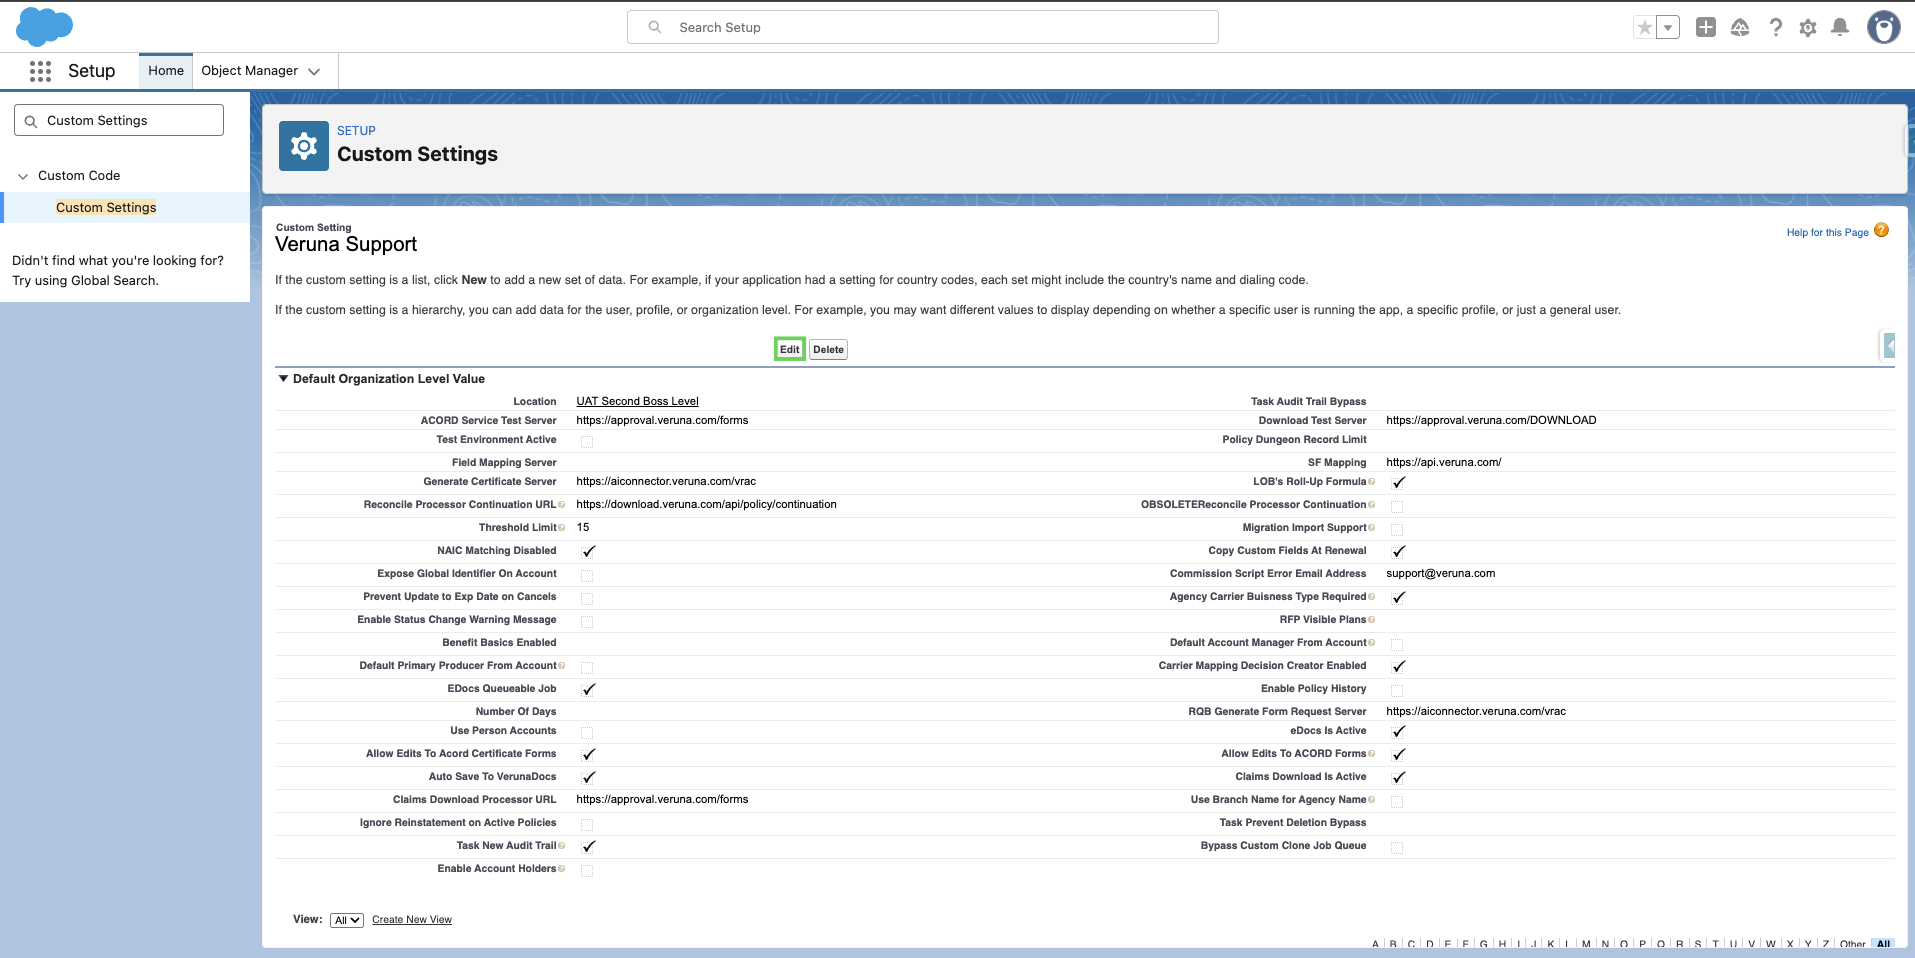
Uncheck Auto Save to VerunaDocs.

Select Save.
