Document extraction
Last updated: April 16, 2026
Overview
This article covers the extraction types available in VerunaDocs, what to expect during the process, and how to securely transfer files using Azure. For information on extracting data from Salesforce, please see Export Backup Data from Salesforce.
Request a document extraction
To request an extraction, email support@amplo.com with a subject line "Request: VerunaDocs Extraction". OfficeScope provides a one-time extraction at no cost.
Note: For any additional document back-ups requested, the cost is $750.
Extraction Process
After you submit your request, here’s what to expect:
Our team will coordinate with you and OfficeScope to confirm an extraction date.
Important: Avoid uploading documents after the confirmed extraction date, as doing so will result in missing documents.
Once the extraction begins, it’s typically completed within a few days.
The extracted data includes:
A complete SQL database backup of the original database
The extracted indexes database.
All document metadata
Note: Documents aren't stored through Salesforce's standard ContentDocumentLink object. OfficeScope maintains a separate extraction database with a DocumentIndex table listing documents and their associated indexes, such as claims, policies, and accounts.
After the extraction is complete, you'll receive an Azure Storage link and access details for your files.
Using Azure to transfer files
If preferred, use Azure to securely migrate legacy documents, support integrations, maintain compliance, and manage large file volumes.
Before you begin, make sure you have:
A Shared Access Signature (SAS) key
Azure Storage Explorer installed on your computer
Installing Azure Storage Explorer
Visit the Azure Storage Explorer download page.
Select Download Now and choose the version for your operating system.
Save and run the
StorageExplorer.exefile.
Follow the installation prompts to complete setup.
Connect to your storage account
Follow these steps to connect using your SAS key:
Open Azure Storage Explorer.
Click Connect, then select Storage Accounts.

Click Storage account or service, then click Next.
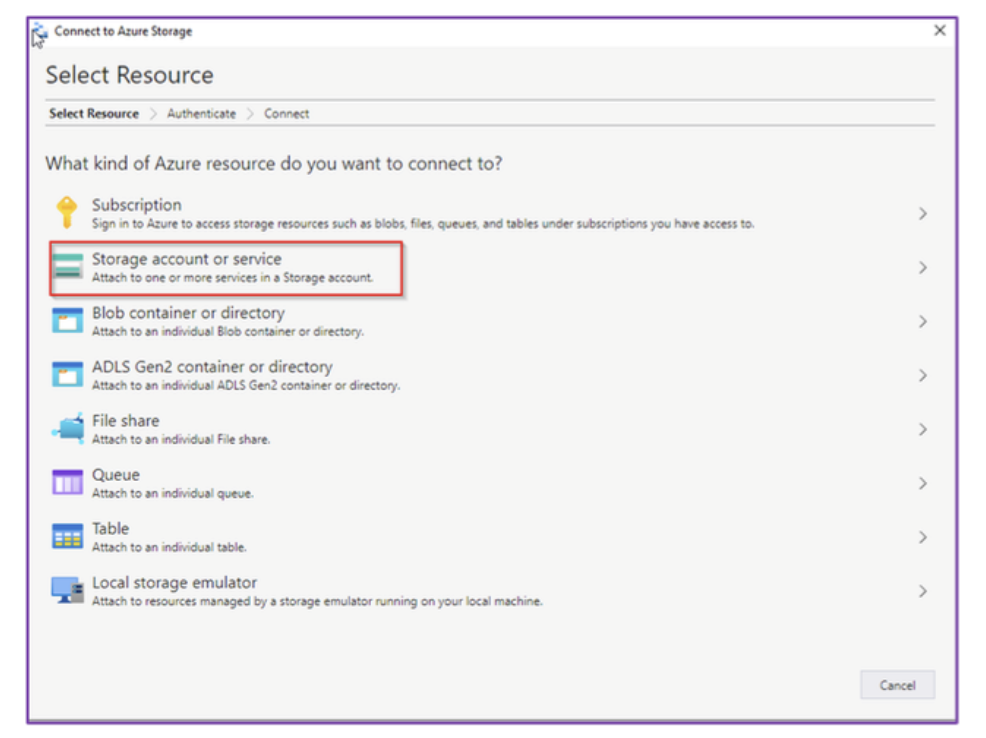
Click Shared access signature URL (SAS) option, then click Next.

Paste your SAS Key into the Service URL field.
The Display Name should auto-fill in the format:
cst4[agencyname].If the name looks correct, click Next to review the Summary.
If the name looks incorrect, stop and contact support@amplo.com.
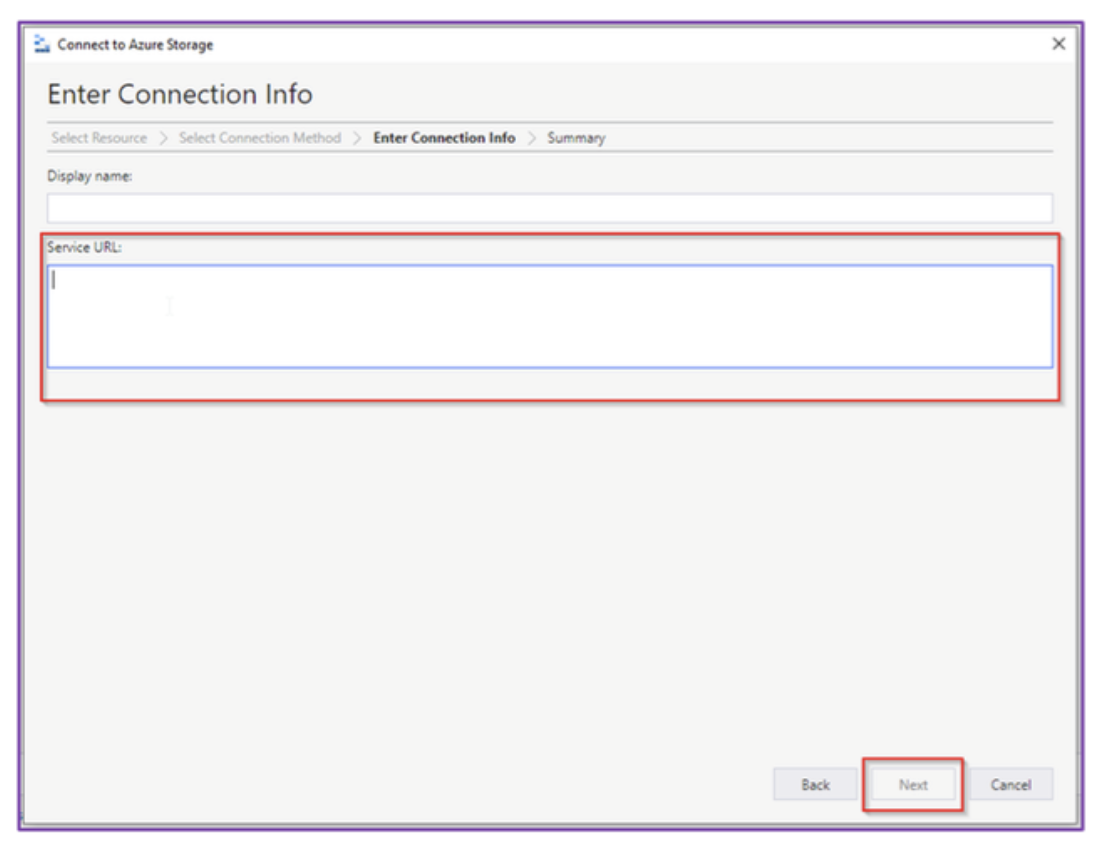
Important: The SAS Key is shared via saltify.io. Clicking the Copy button can incorrectly change the & to amp; whereas copying the text itself, instead of clicking the button, will keep the & when pasting to an external document.
Click Connect to access your storage space.

You’ll now have access to your storage space.
File management
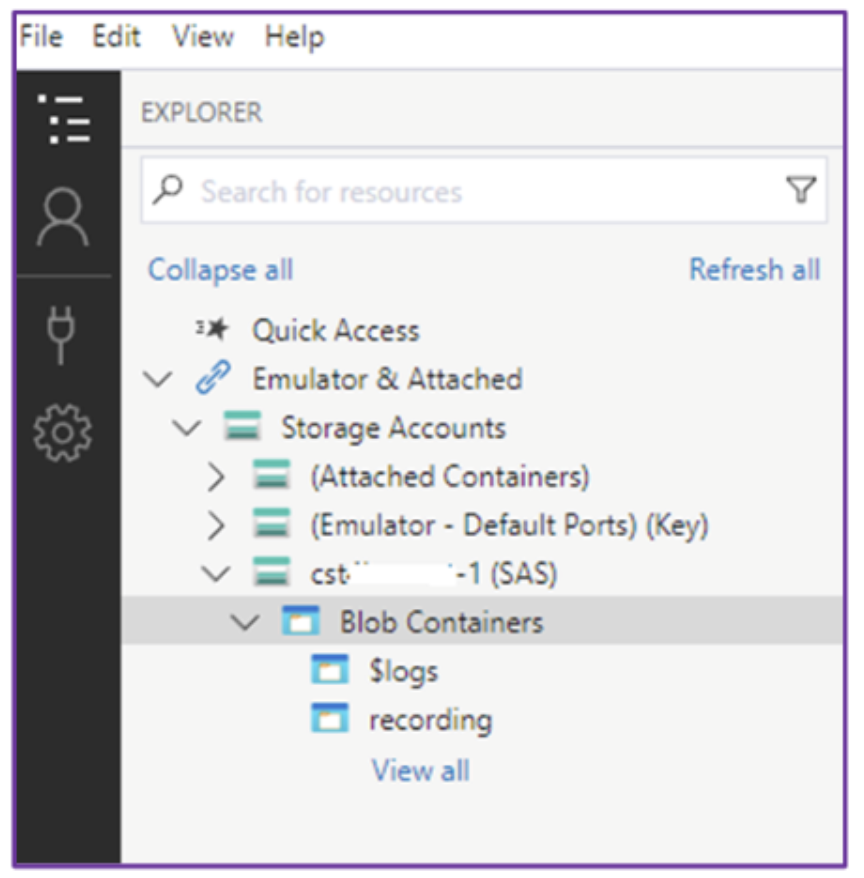
To locate your storage container:
In the Explorer panel, navigate to:
Emulator and Attached > Storage Accounts > your SAS connection
Select Blob Containers.
Open the appropriate container for your data transfer.
Upload files
Click Upload, then select the Files or Folder to upload.

Select Upload to begin the transfer.
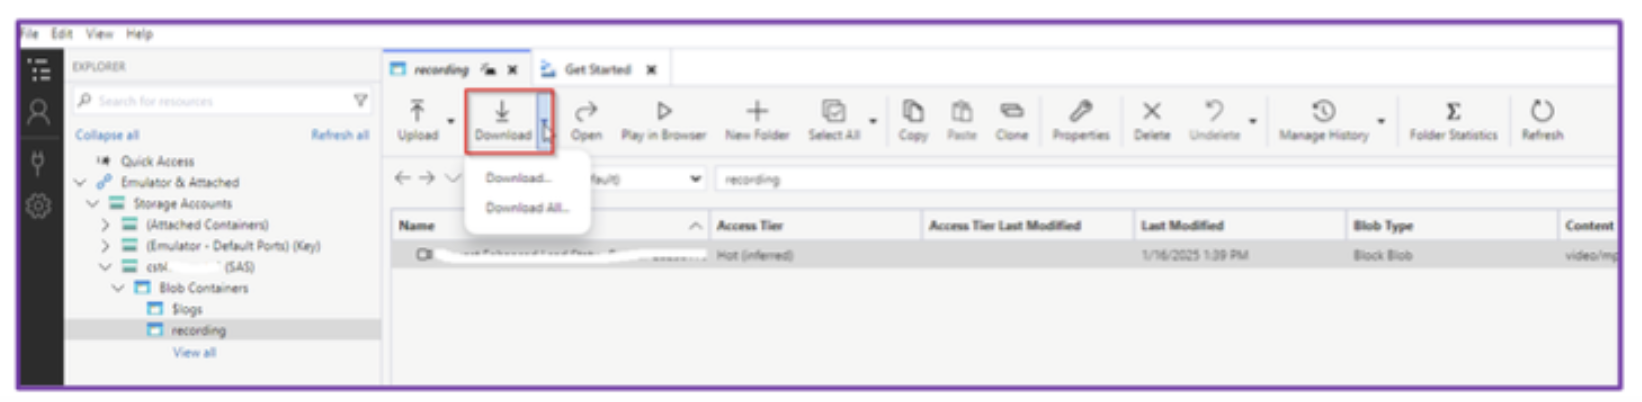
Download files
Navigate to the file or folder in Azure Storage Explorer.
Select Download.
Choose the destination on your computer.
Note: Transfers may take some time depending on file size. You can monitor progress within Azure Storage Explorer. If you experience any issues, contact support@amplo.com.