Configuring policy downloads in amplo
Last updated: May 27, 2026
Overview
IVANS downloads bring carrier data into amplo so your policy records stay current. There are two ways to set this up: a direct IVANS connection, which sends carrier data into amplo automatically, or a manual import, where you upload IVANS files directly to your environment.
This article explains what you need to get started and walks you through setting up either method.
Set up a direct IVANs connection
Make sure you've established relationships with the carriers you want to receive downloads from and that you have authorization to access your organization's IVANS credentials.
Connect an existing IVANS account
If you already have an IVANS Exchange account, follow these steps to locate your credentials.
Log into your IVANS Exchange account.
Locate your IVANS credentials in the top-right corner of the screen.
Note the following:
IVANS Mailbox ID: A five-digit number starting with "Y"
User ID: A seven-digit number
Send your credentials to amplo Support to complete the connection.
Note: If you cannot locate your IVANS credentials, contact IVANS Support directly for assistance.
Set up a new IVANS account
If you don't have an IVANS mailbox yet, contact IVANS to request one.
Email: support@ivans.com
Phone: (855) 233-9128
Your IVANS representative, if you have one
Once you receive your credentials, send them to amplo Support to complete the setup.
Manual import setup
In some cases, you may need to manually upload IVANS files instead of receiving them directly. To do this, you’ll create a local downloads folder and install the required uploader. amplo supports AL3, DAT, XML, and JSON file formats. Make sure your IVANS files are in one of these formats before uploading.
Create the downloads folder
Note: Manual import is only supported on Windows devices.
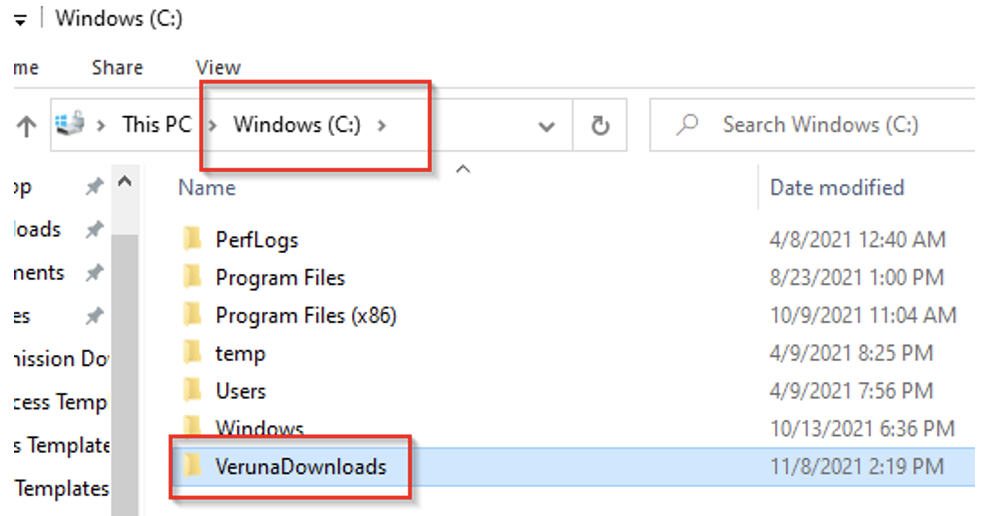
Add a folder on your computer directly on the C: called
VerunaDownloadsIt needs to be directly on the C drive and not in a User folder. The path should be named:
C:\VerunaDownloads
Install the uploader
Once the folder is created, go to this portal: https://al3.veruna.com/portal.
Download and Run the .NET Framework installer.
Download and Install the Veruna Cloud Uploader.
Note: The uploader does not have a user interface. Download and run the installer to complete setup.

Send required information to amplo
Contact support@amplo with the following:
Salesforce org ID
IP address of your computer
Name of the download folder and path