Adding components to a record page
Last updated: April 15, 2026
Overview
Adding new components to layouts within the amplo managed package requires a few considerations before you start. Before you start, make sure you're familiar with the following Salesforce concepts:
You'll also want to know where your component should display. Consider the following:
What object should this component appear on?
Are there specific record types the component should be associated with?
Should specific personas have access to this component?
Visibility is controlled through page layouts and component visibility within the lightning page itself. Expand the menu to learn more:
Page layouts
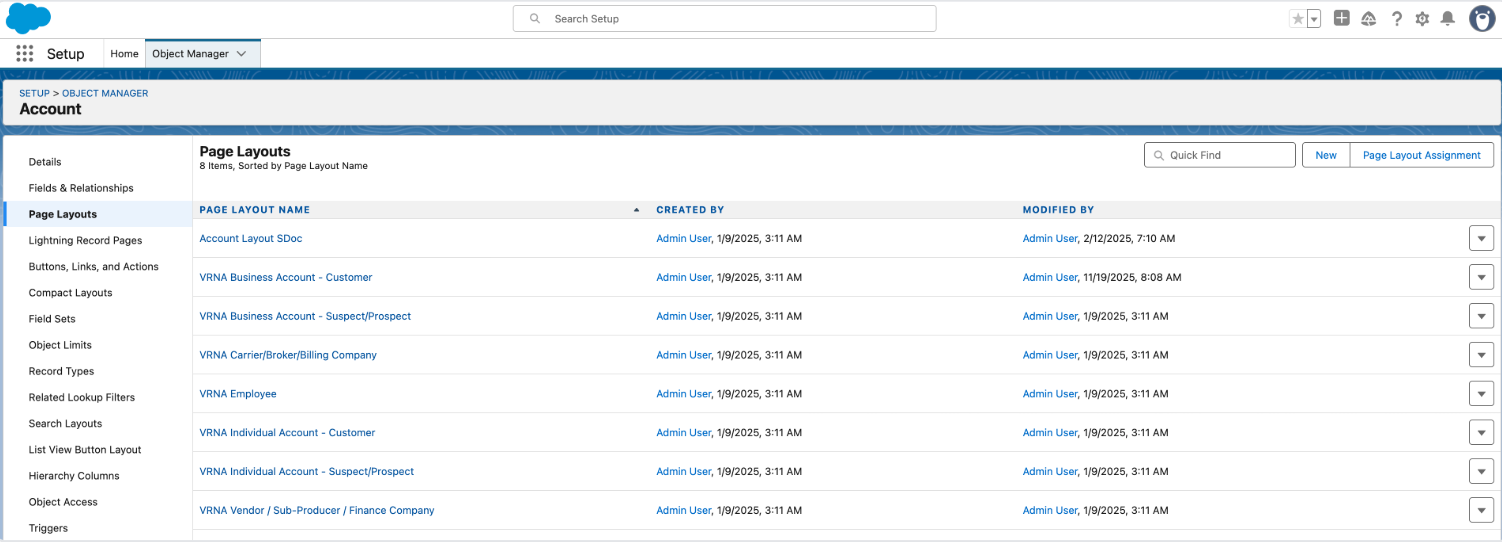
Objects can have multiple page layouts that display information based on context.
For example, the Account object has eight default layouts assigned based on profiles and record types.
Component visibility
Next, review the component visibility settings on the Lightning Page. In the Lightning App Builder, an Account page has five configurations based on account type:
Record > Account Record Type > Name Contains Customer
Record > Account Record Type > Name Contains Vendor
Record > Account Record Type > Name Contains Prospect
Record > Account Record Type > Name Contains Carrier
Record > Account Record Type > Name Contains Employee

Add or confirm the component is on the page layout
Click the gear icon and select Setup.
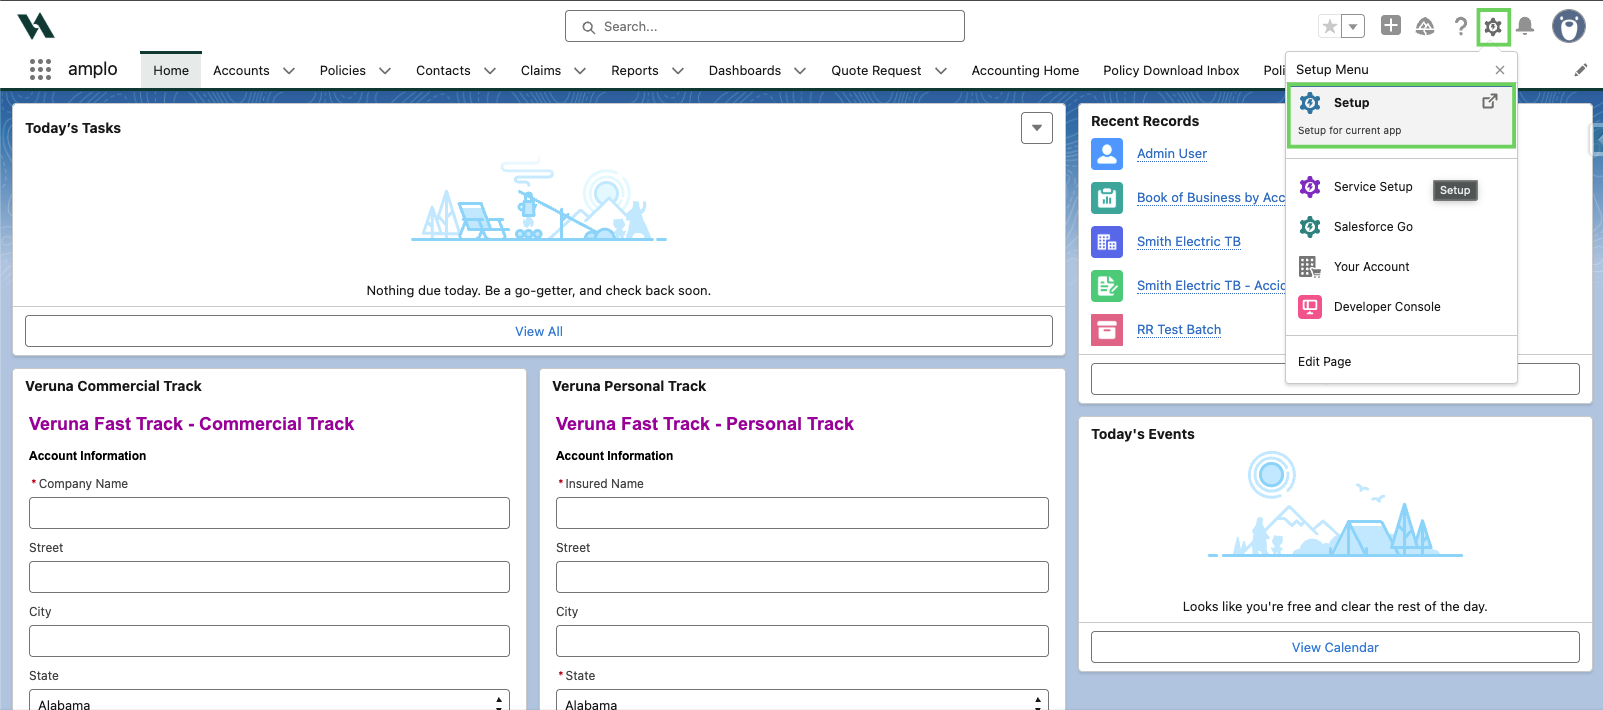
In Quick Find, search and select Object Manager.

Select the object where you want to add the component.
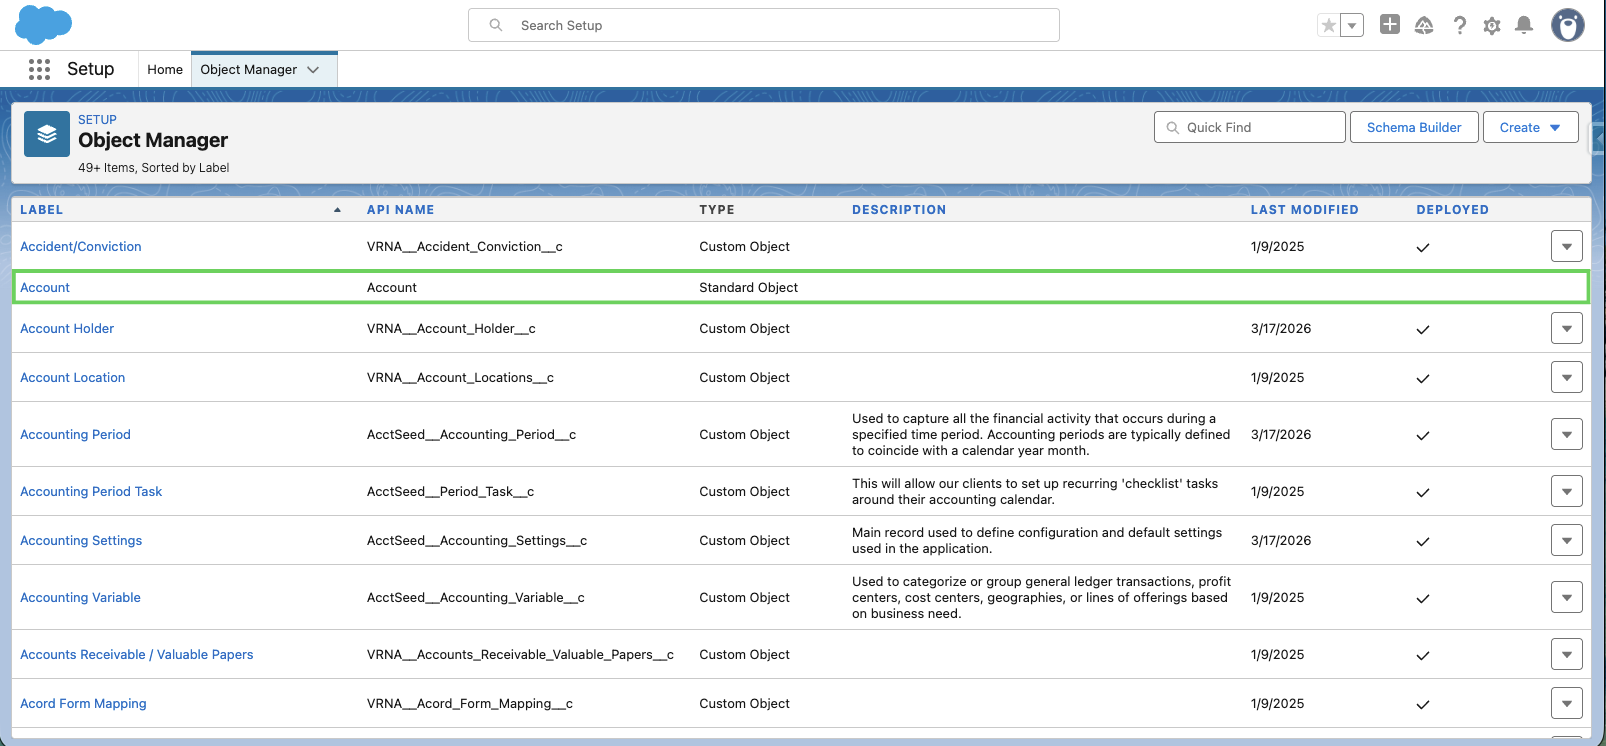
Then, click on Page Layouts.

Find the page layout where you want to add the component.
Confirm the component you wish to add is available, then drag and drop it into the desired section.
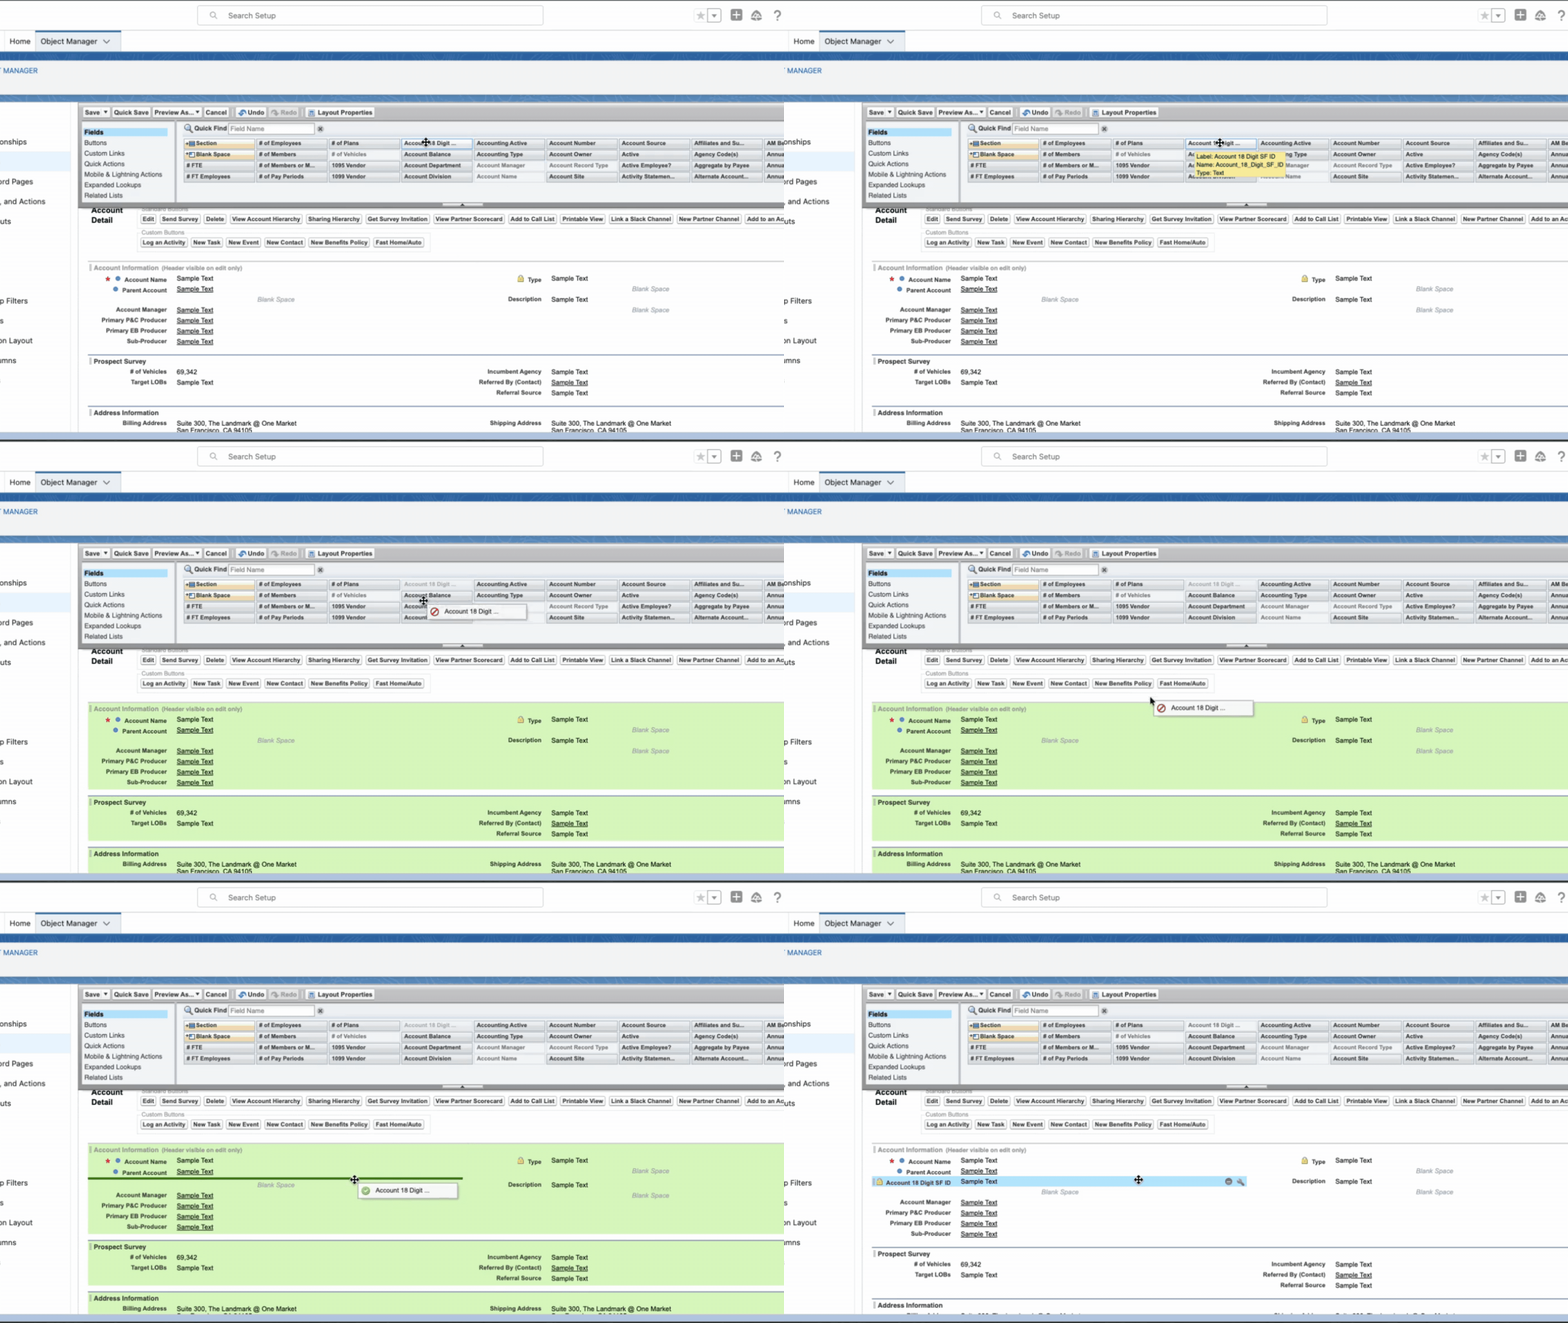
Note: You can also follow this process to add a Related List.
If you made any changes, click Save.

Configure the Lightning App page
Navigate to a record where you would like to see the new component.
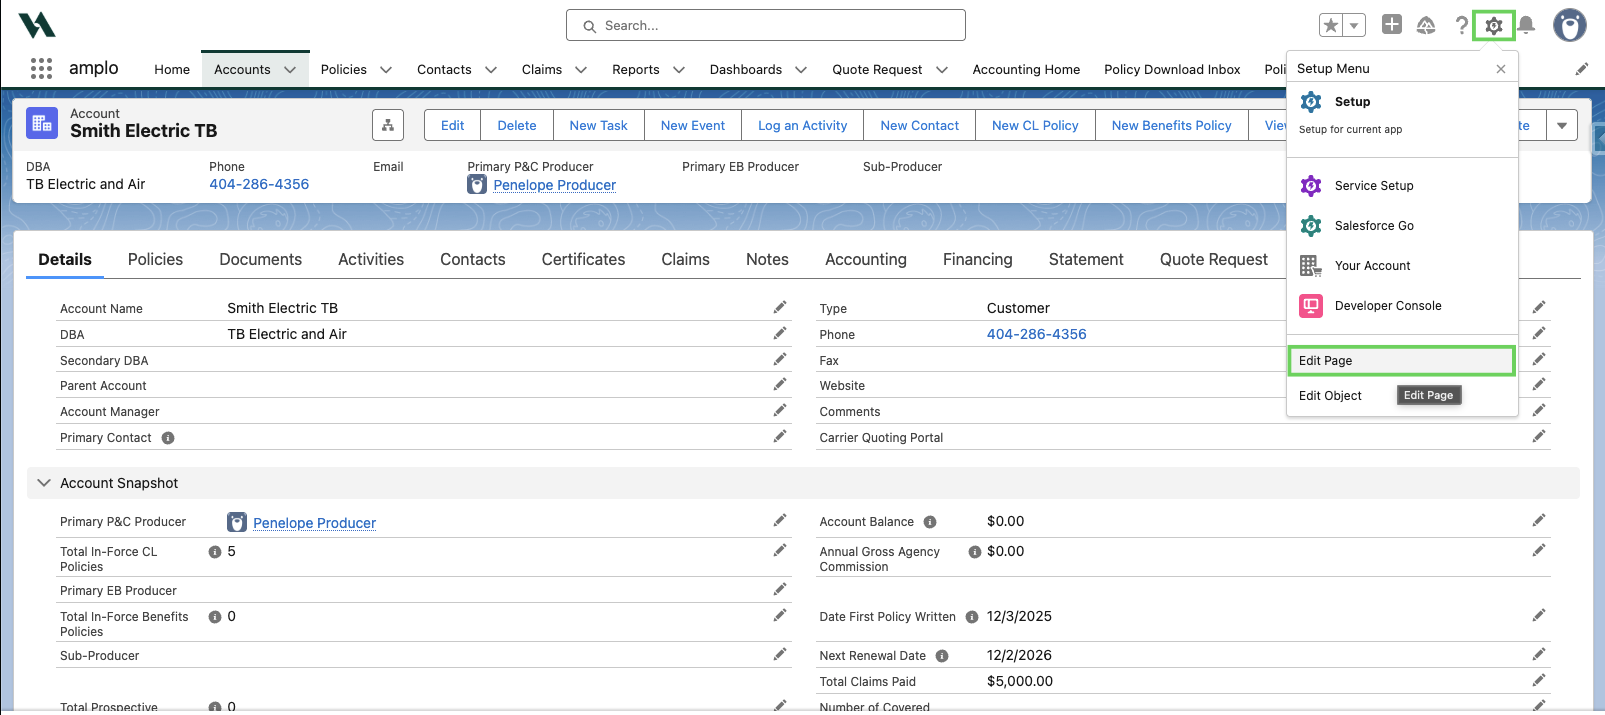
Click the gear icon and select Edit Page.
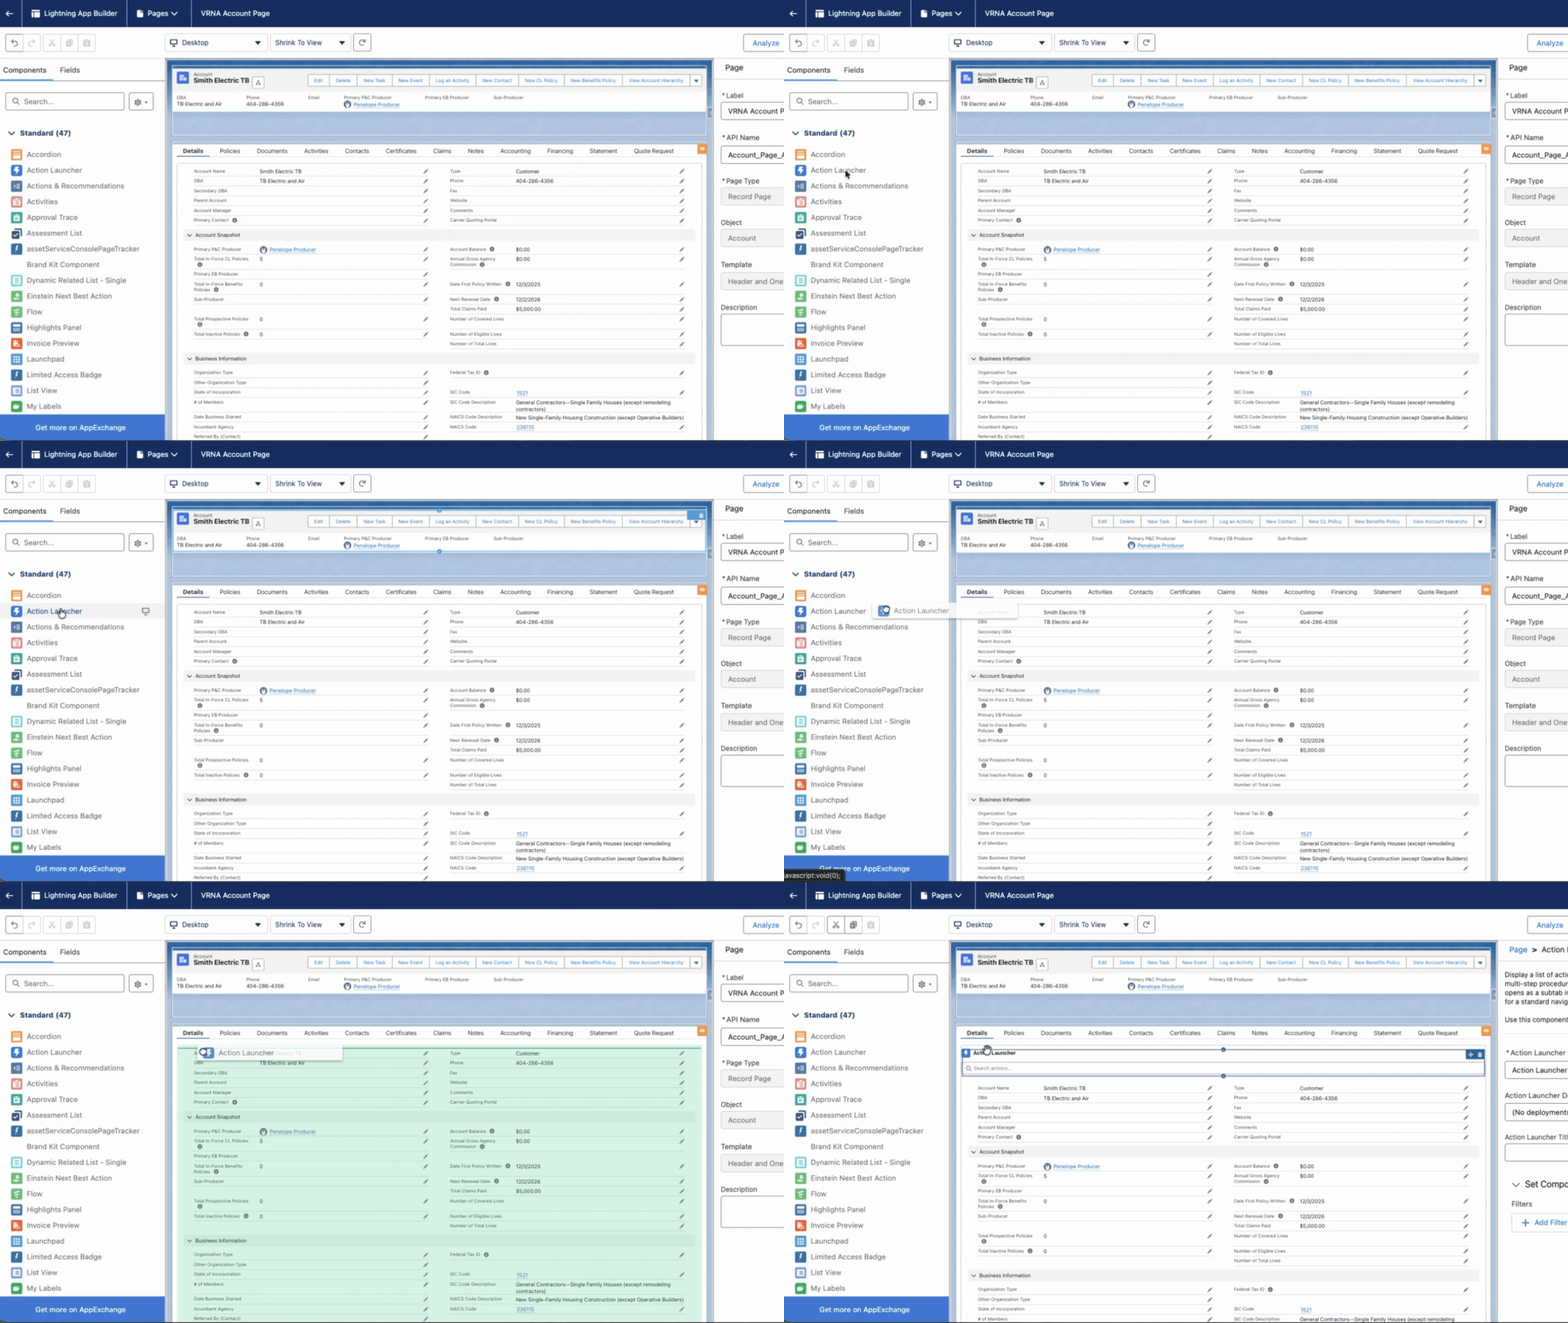
Find the component(s) you wish to add in the left hand panel, and drag it onto the page where you wish to see it.
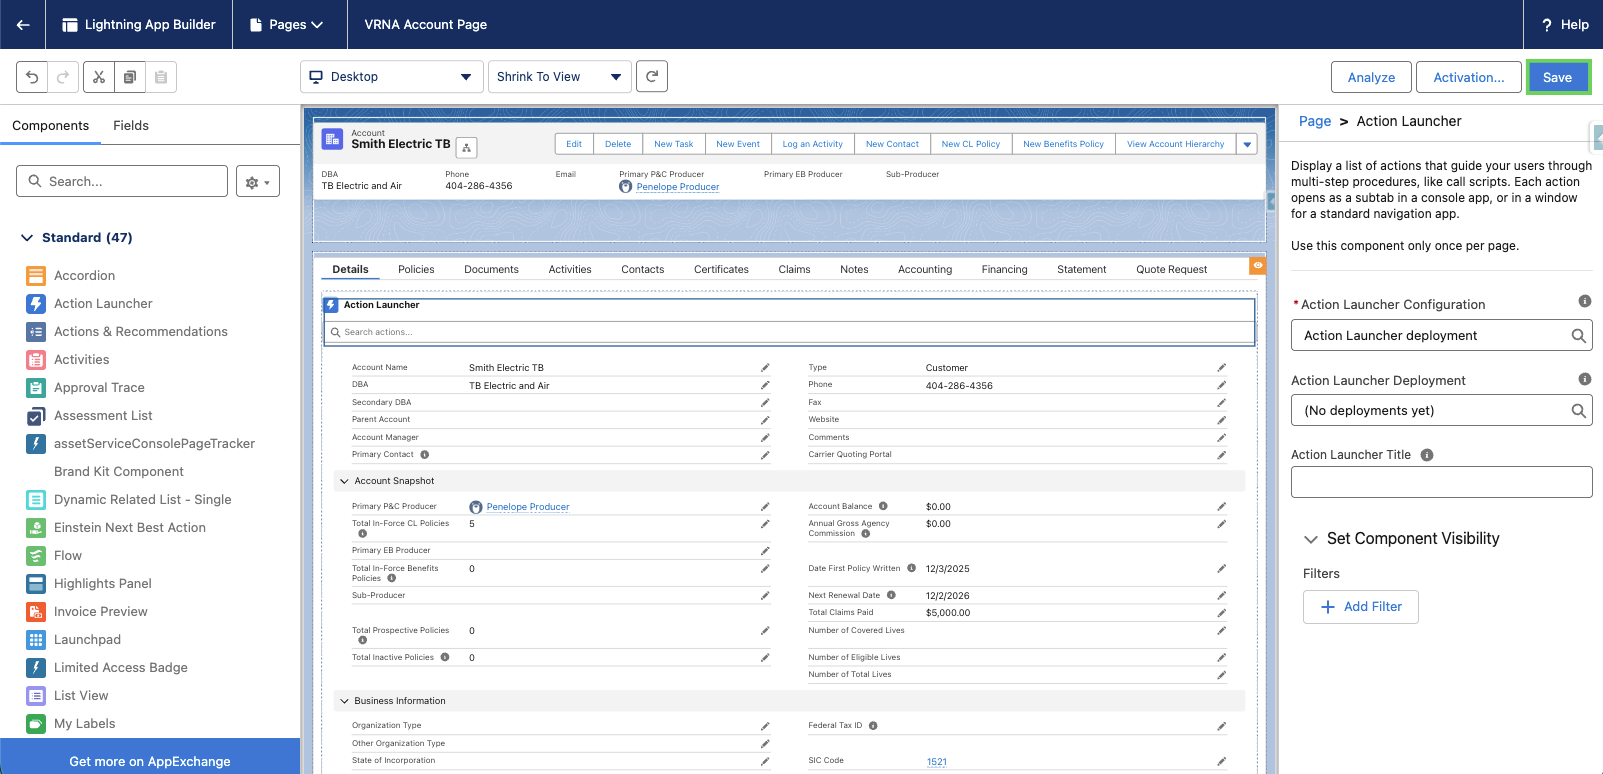
Save.
Adding a related list
Schedules related lists on policies
By default, the Policy object displays Schedules using a managed-package component with non-configurable fields. Follow the steps below to add a standard Schedule related list that allows field customization.
Note: If you are using Salesforce Classic, follow steps 1-3 below. If you are using Salesforce Lightening, open the page editor and skip to step 5.
Determine if you will be adding Schedules on a commercial or personal lines policy.
Click the gear icon and select Edit Page.
Select Related Lists.
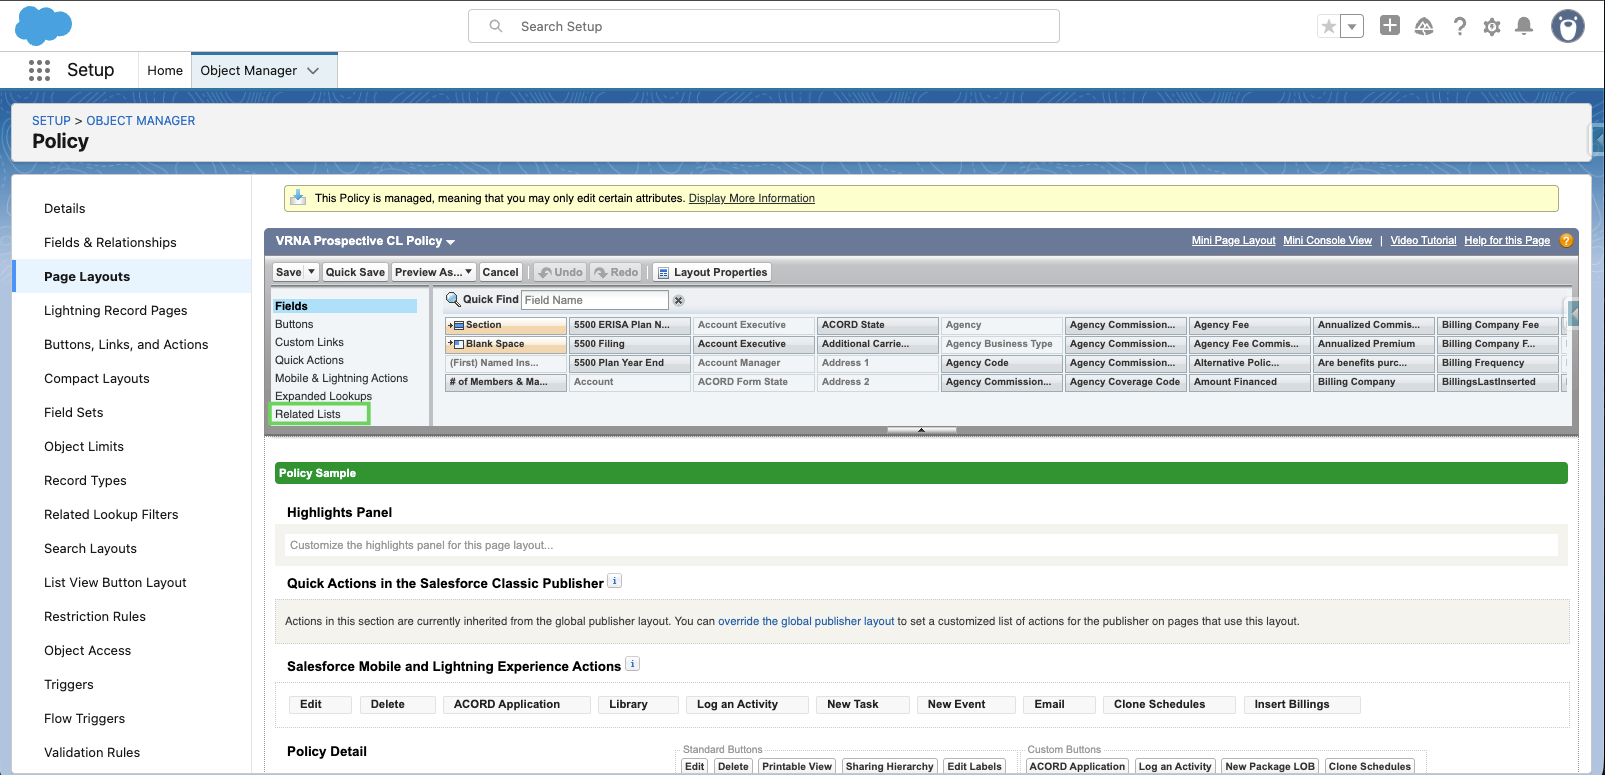
Drag and drop Schedules into the Related Lists.
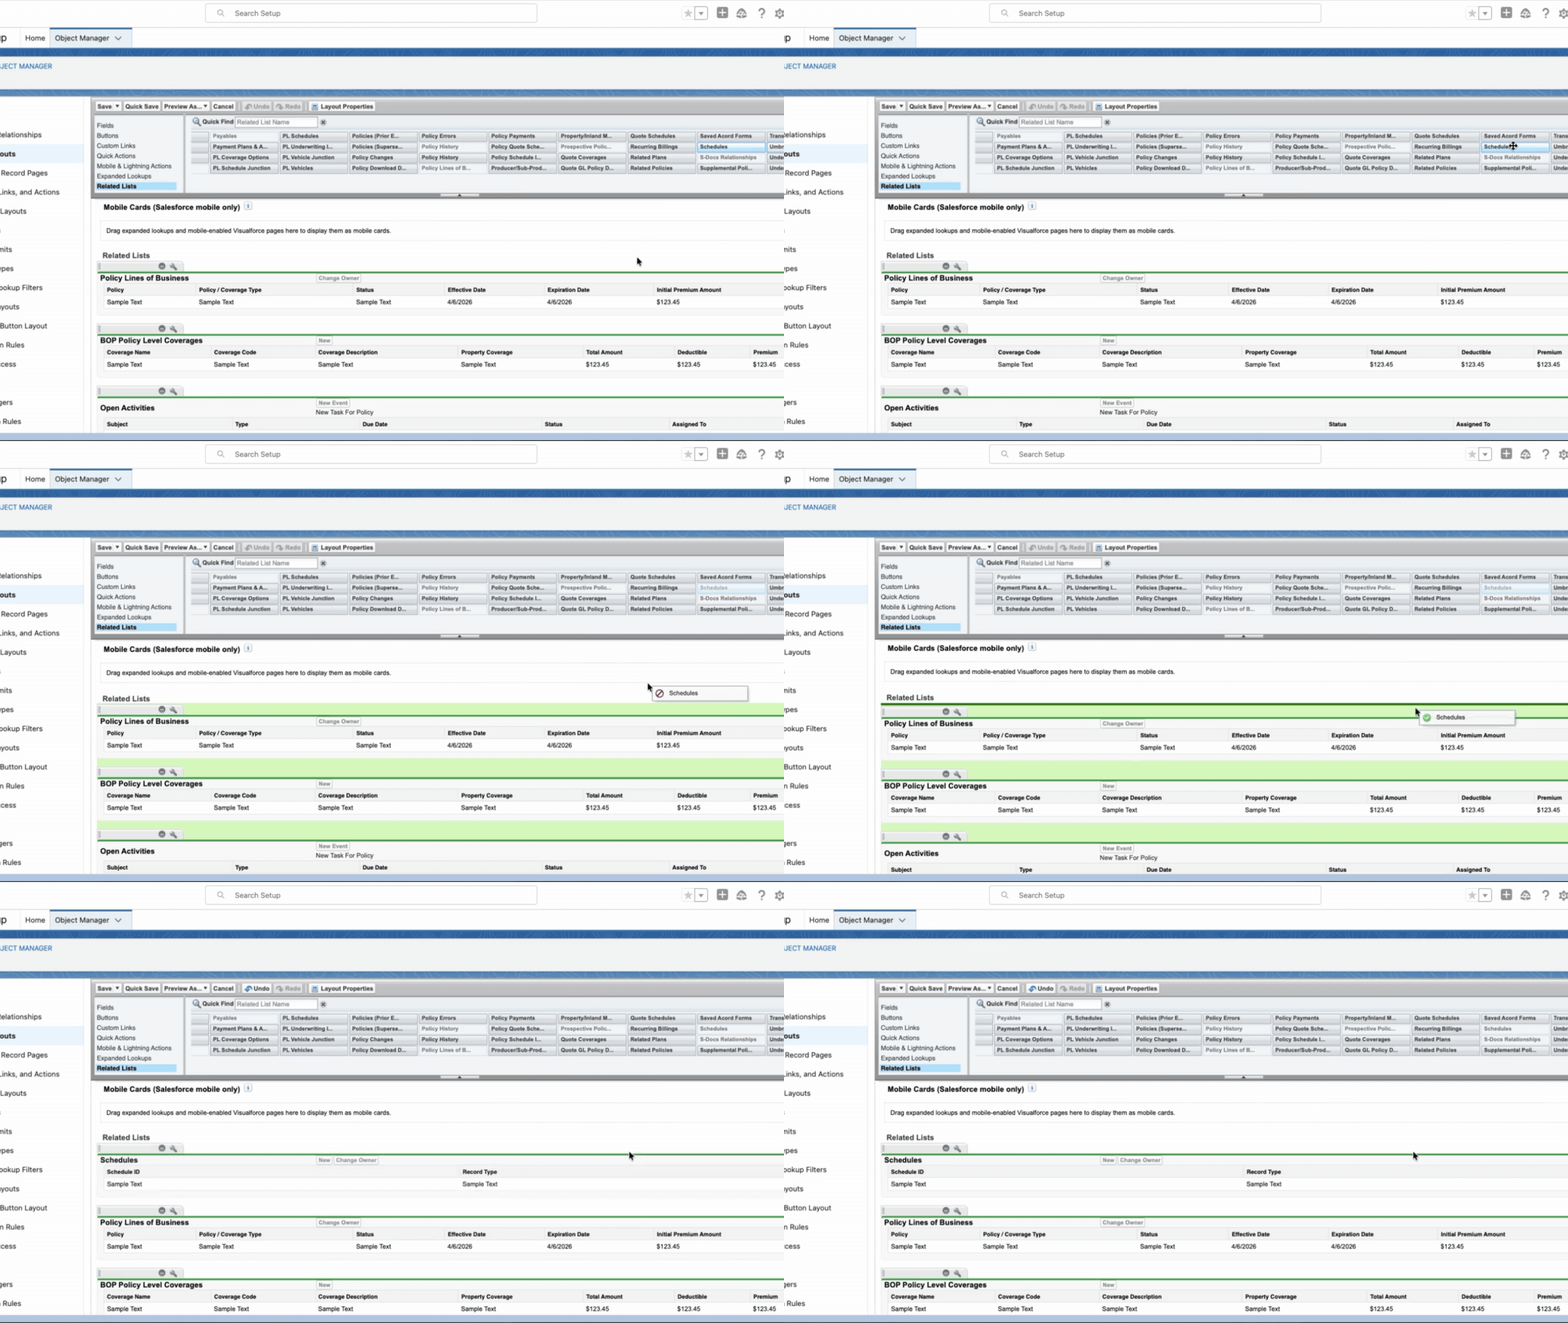
Select Save.
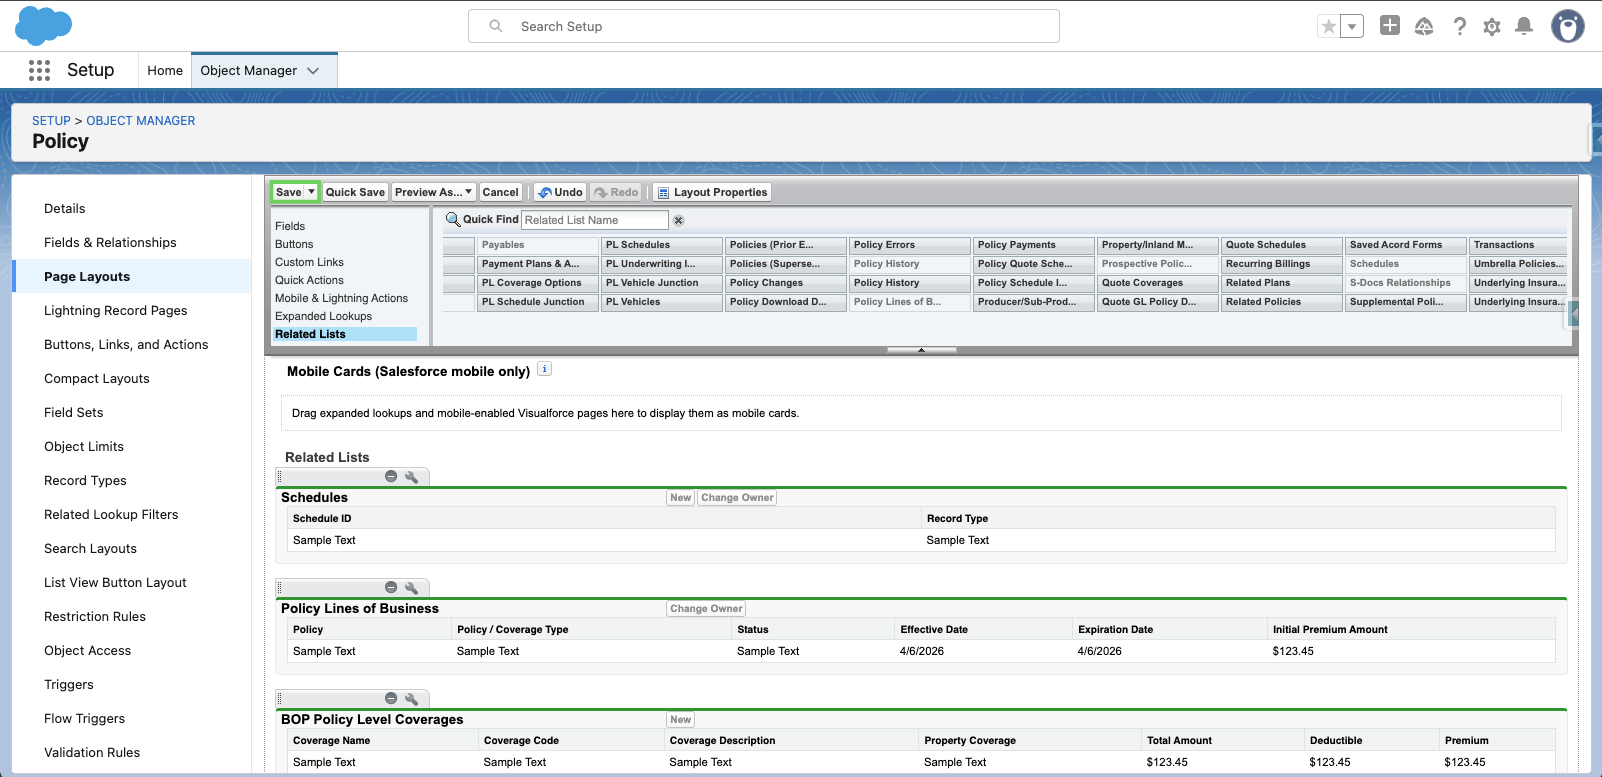
Select Lightening Record Pages.

Select the page you want to edit.
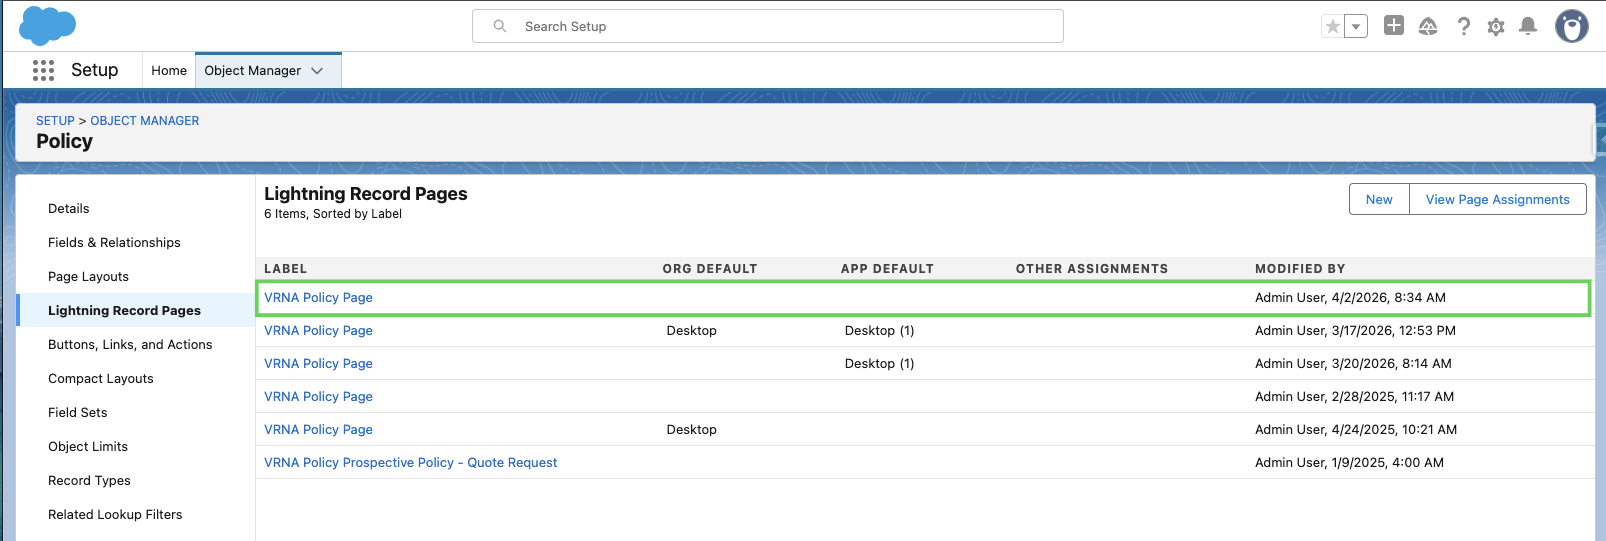
Then, select Edit.
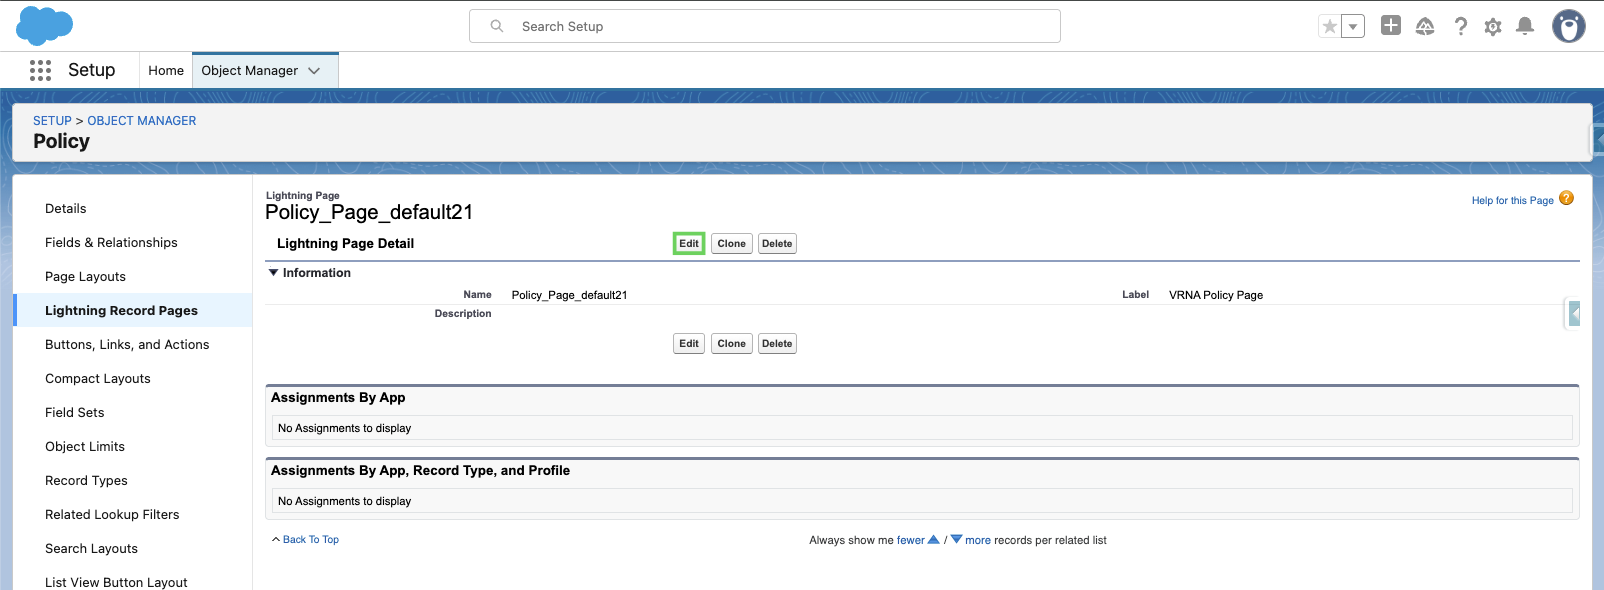
Select the Schedules tab.
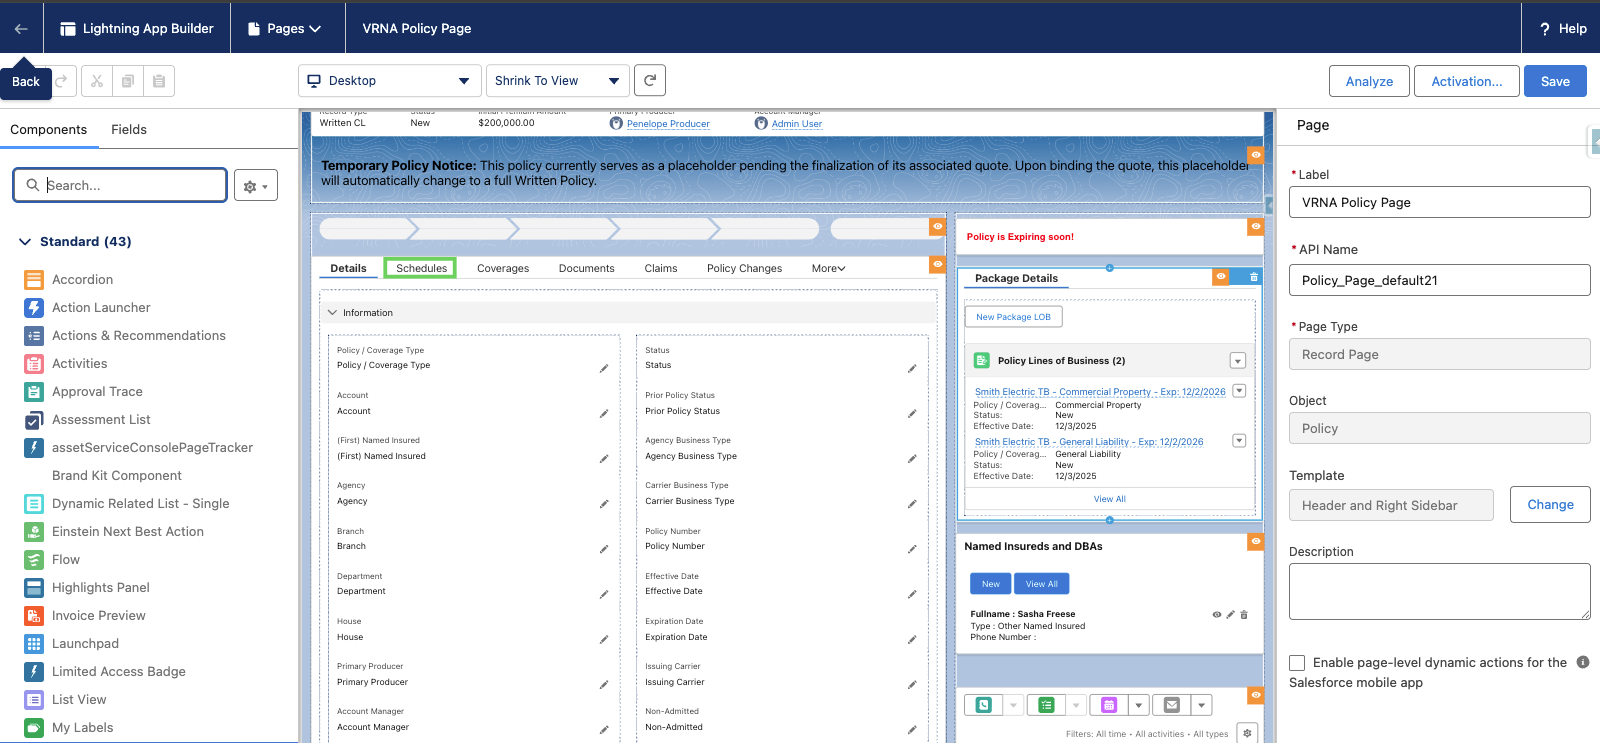
Use the Search to find Related List- Single.
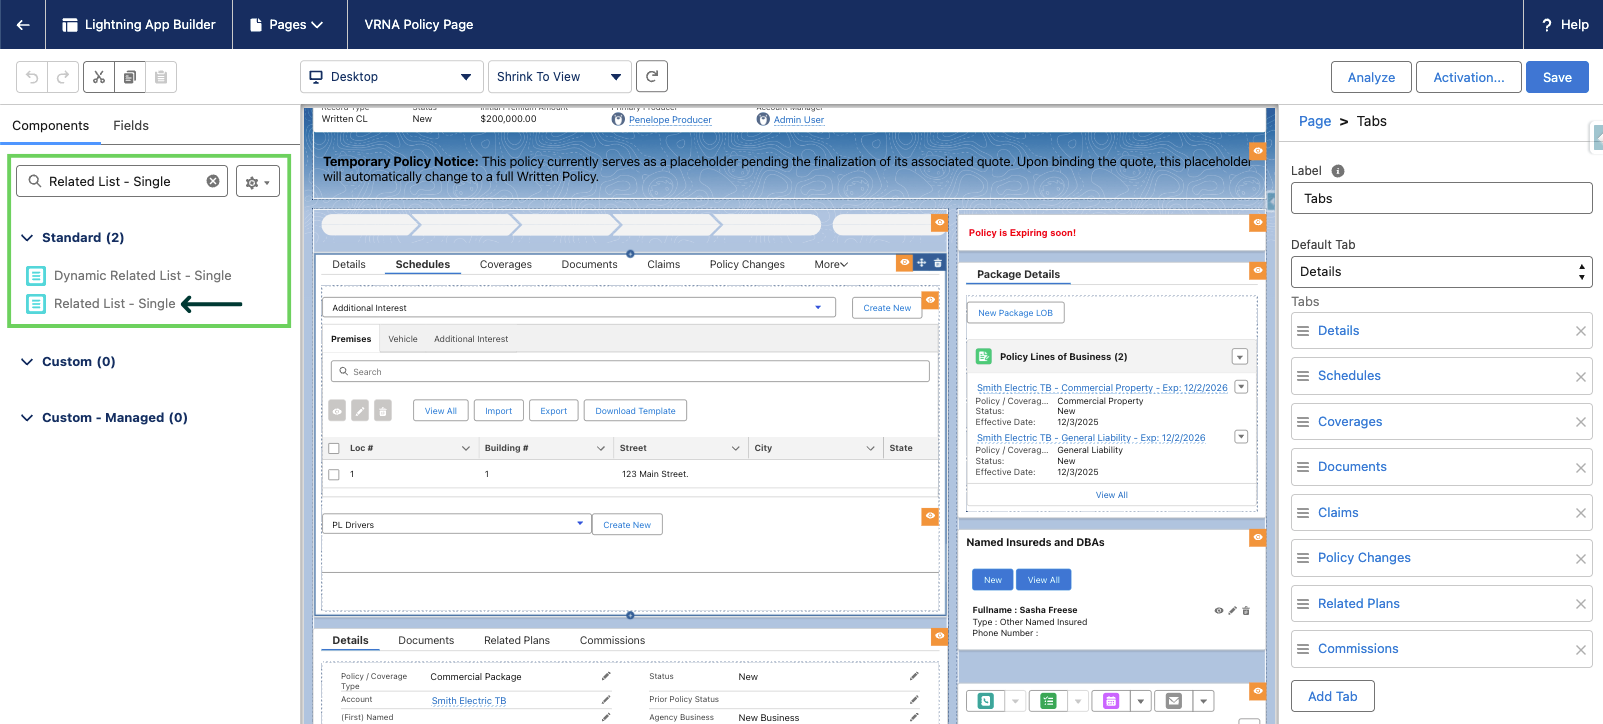
Then, drag and drop Related List - Single under the Additional Interest component.
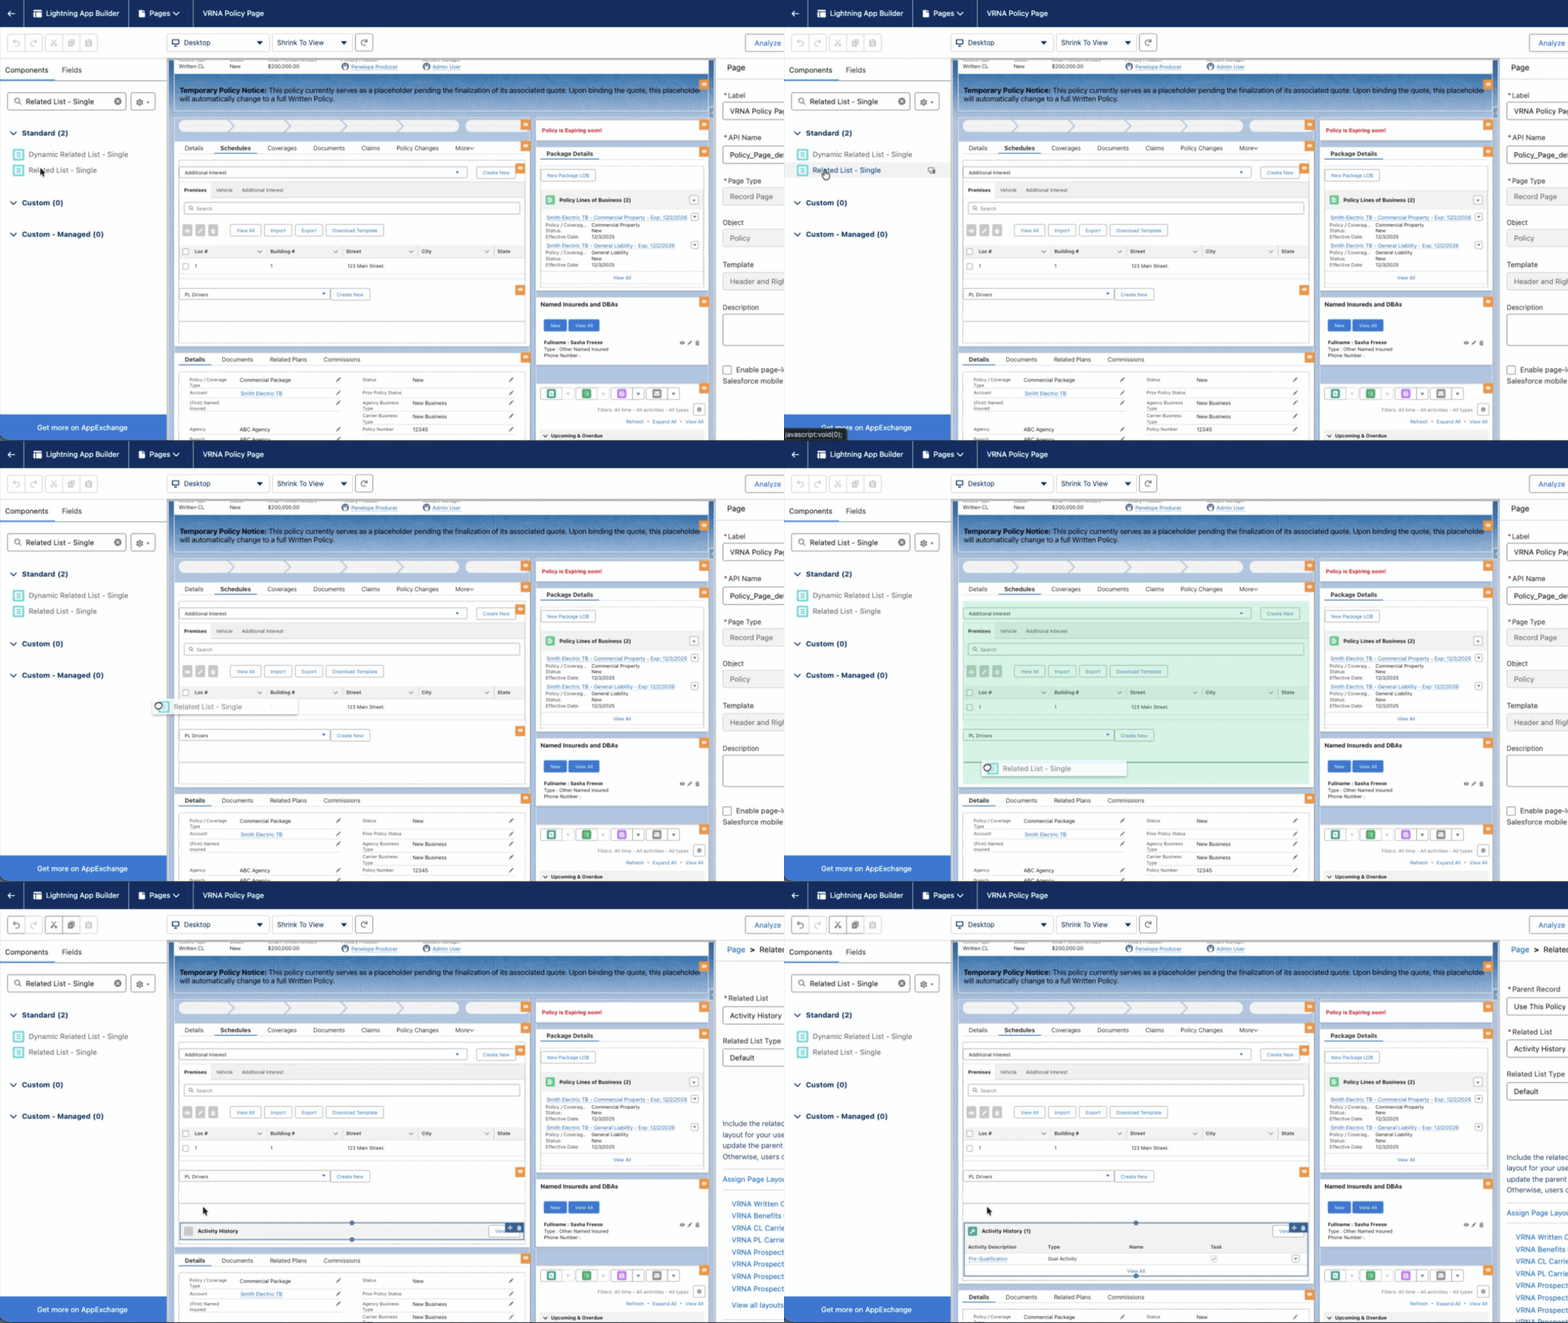
In the Related List dropdown, search and select Schedules.

Under Set Component Visibility, select Add Filter.
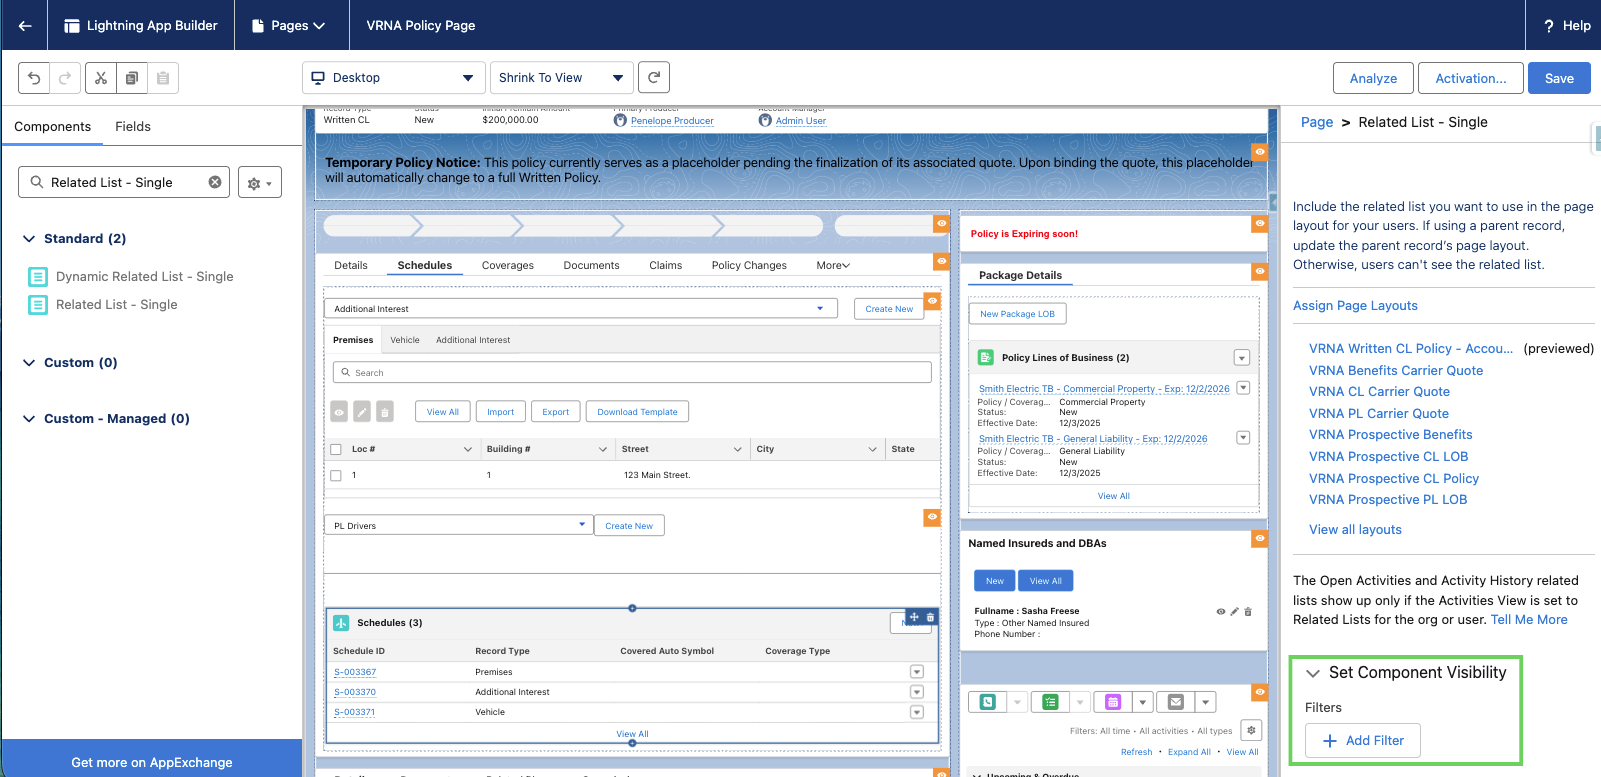
Select Advanced under Filter Type.

Click on Select under Field.

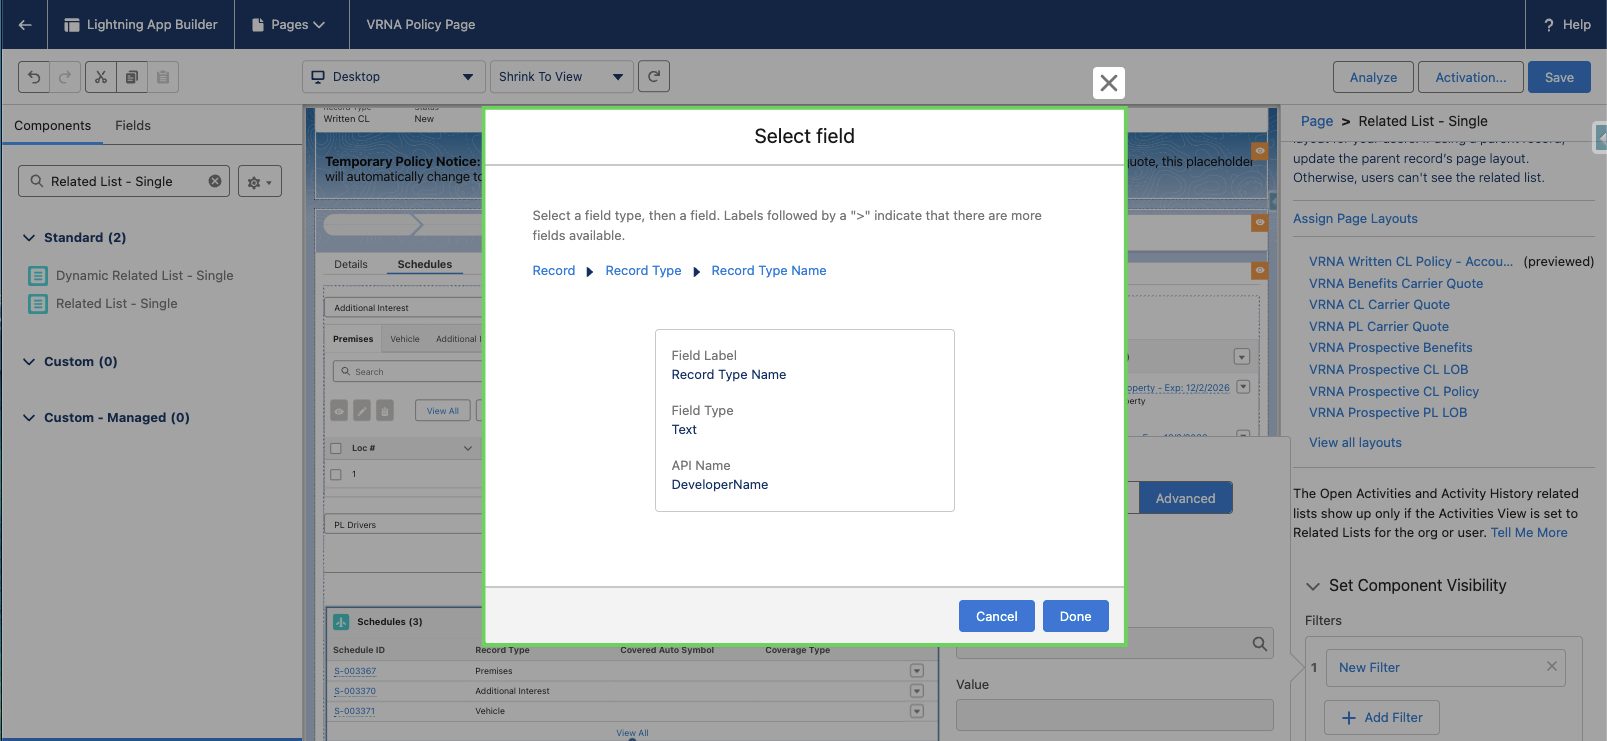
In the Select field modal, select the following:
Record
Record Type
Record Type Name
Then, click Done.
In the Value field, enter:
CL (for commercial lines)
PL (for personal lines)
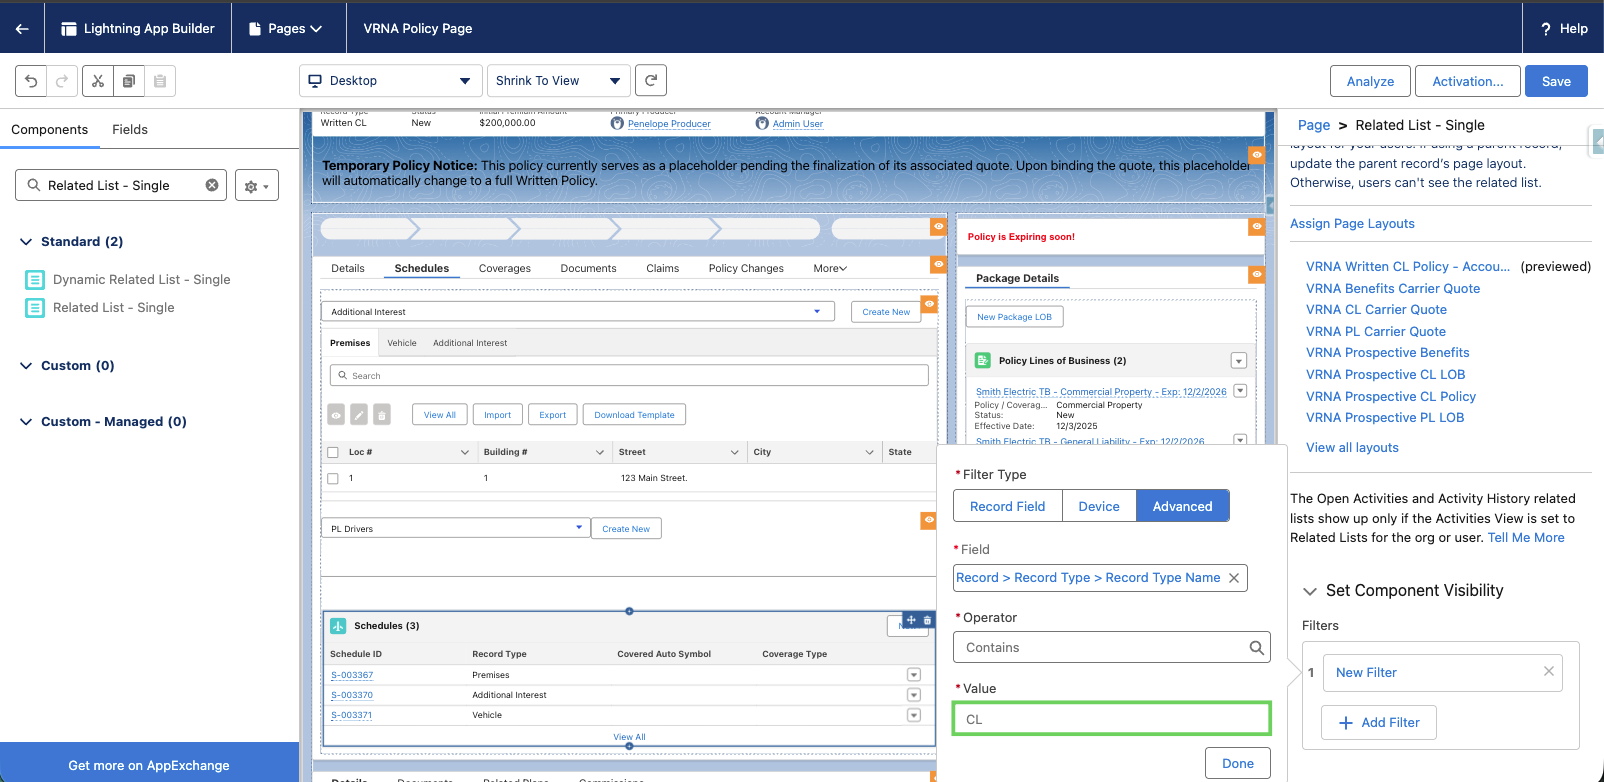
Then, select Done.

Click Save.
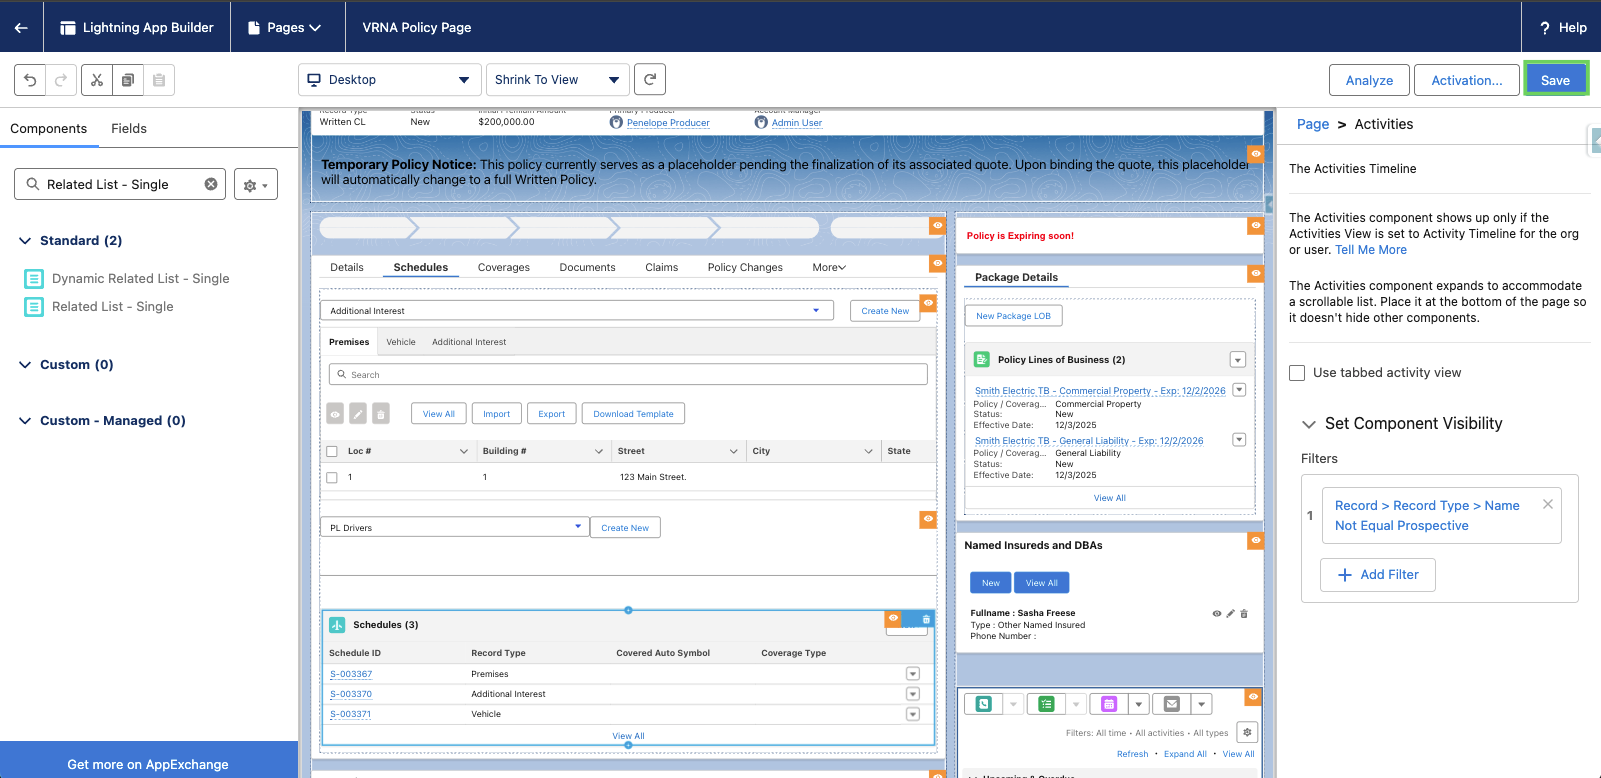
Drag "Related List - Single" under the Schedules component.
On the right side, change the Related List to "Schedules".
Click "Upgrade Now" in the Dynamic Related List box.
Scroll down and add the additional fields.
Add the component visibility filter.

Troubleshooting
If you encounter issues with this setup:
Related list shows deleted schedules: Ensure you've added the "Schedule Junction equals 1" filter to exclude vehicles that are no longer associated with the policy.
Related list not visible: Check that you've properly configured the component visibility filters and that the user has appropriate permissions.