Managing additional interests
Last updated: March 5, 2026
Overview
You can create, view, and edit Additional Interests from the Schedules tab on a policy record. Additional Interests are not limited to premises. You can also associate them with:
Vehicles (for example, as a loss payee)
Scheduled equipment
Other policy items
Each Additional Interest record links consistently across policy items. This ensures information stays aligned throughout the policy.
Accurate Additional Interest data is required for proper ACORD form mapping. This supports ACORD application and certificate templates 23, 27, and 28 on the account record. Maintaining complete and consistent records helps ensure forms generate correctly and reflect the intended coverage details.
Create an additional interest
Follow these steps to add an Additional Interest to a policy.
Navigate to the appropriate Policy record.
Select the Schedules tab.

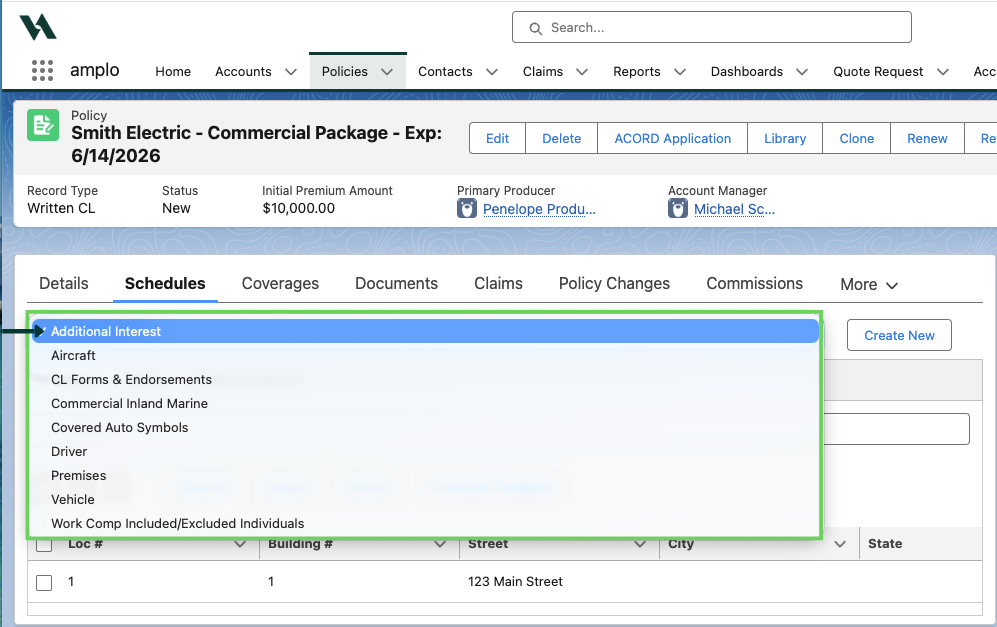
In the Schedule Type dropdown, select Additional Interest.
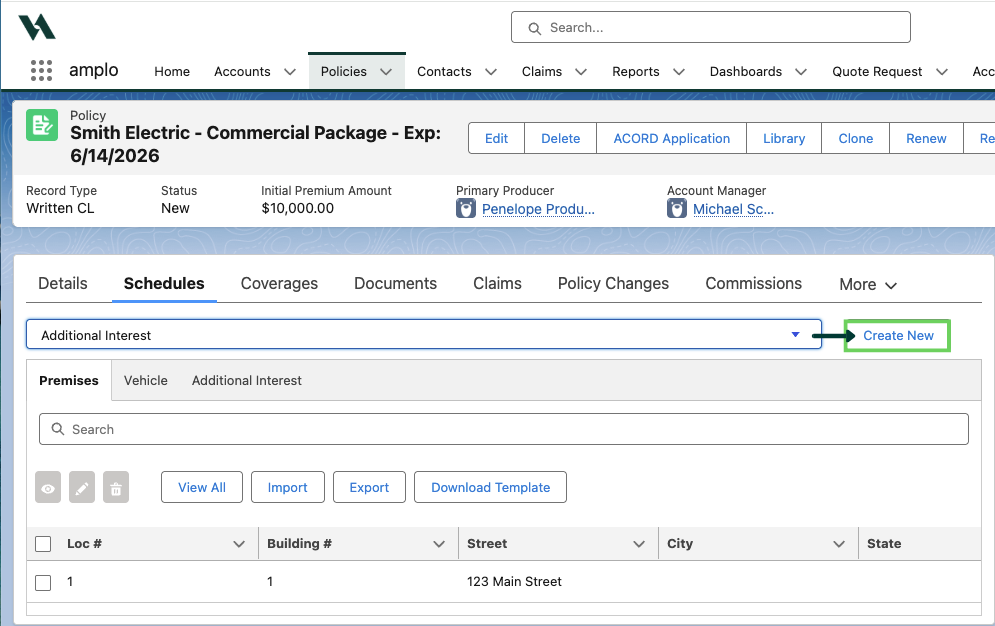
Select Create New.
Complete the New Additional Interest form, including:
Reason for Interest
Interest Details
Interest Type
Any other required fields

Select Save, or Save & New if you are creating more than one new Additional Interest.
Additional interest mapping applies to:
ACORD form 140
ACORD form 125
Certificate templates 23, 27, and 28
These forms and templates pull directly from the Additional Interest record. Make sure all fields are complete and accurate to ensure the information maps correctly.
Link an additional interest to a premise
Linking an Additional Interest to a premise helps producers quickly identify which lender or interest applies to each location — especially when multiple interests exist. Follow these steps to link a record:
Navigate to the Policy record.
Select the Schedules tab.
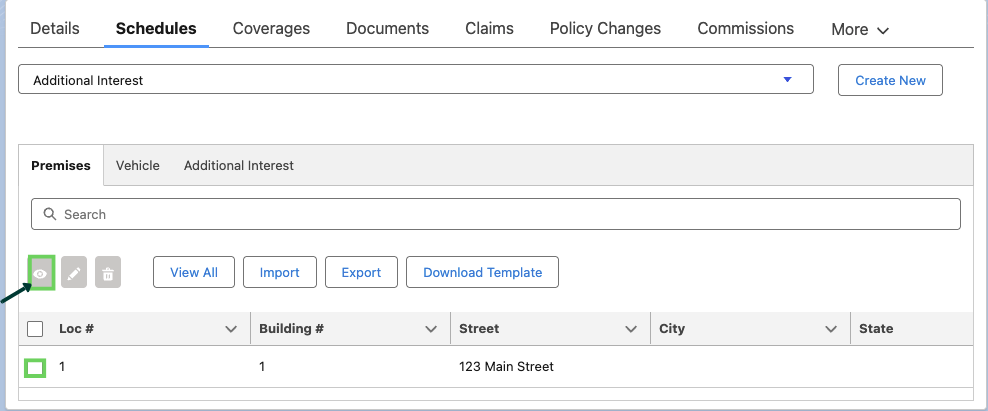
Open the relevant Premise record by selecting the eye icon.
Select Link/Unlink Additional Interest.

Choose the Additional Interest you want to link, and click Save.

After saving, the Additional Interest appears in the Related Additional Interest section when viewing the premise.
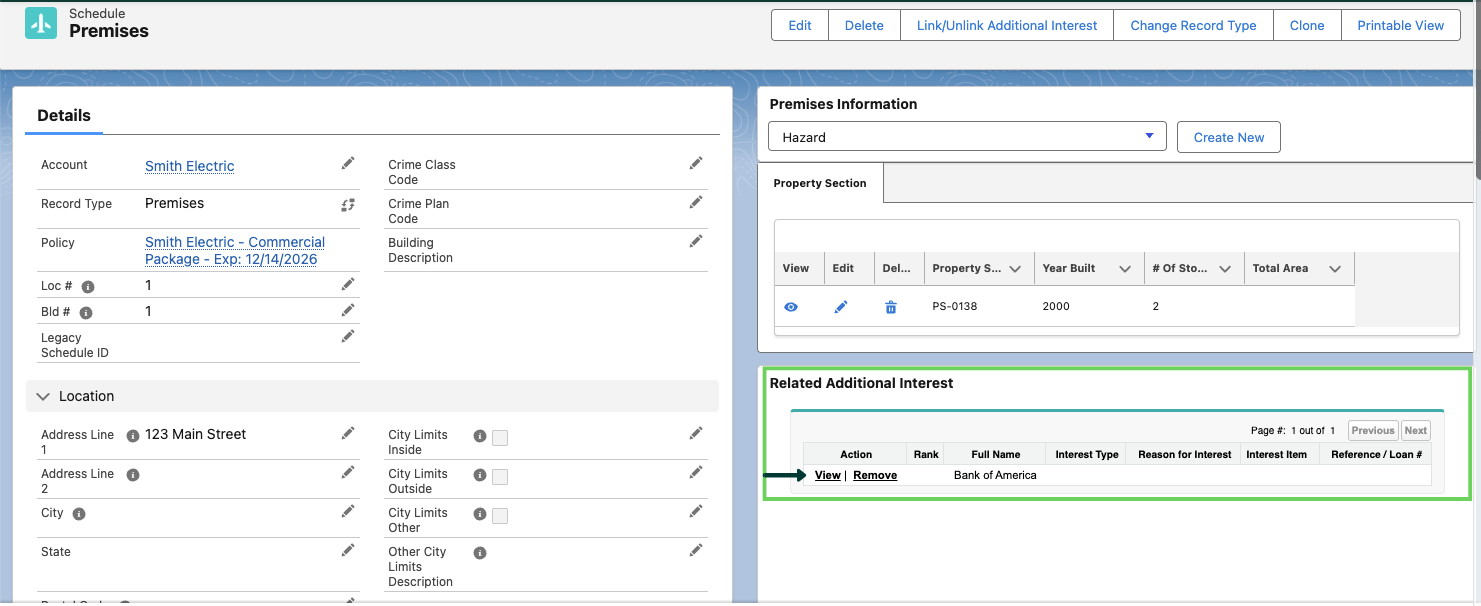
Note: The Link/Unlink Additional Interest button is available on both the Premise and Additional Interest schedules. You can start from either record to link or unlink them.