Configuring custom fees
Last updated: February 26, 2026
Custom fees help your agency track and manage charges outside standard insurance premiums. These may include state-mandated surcharges, inspection fees, or association dues. Setting up custom fees ensures:
Accurate mapping to general ledger (GL) accounts
Clear financial reporting
Consistent transaction coding across billing and payables
There are eight available Custom Fee fields in amplo.
Add Transaction Code values
Before configuring a custom fee in Accounting Settings, add your fee name to the required Transaction Code picklists. You’ll complete this in three places:
Billing Line
Payable Line
Accounting Settings (Custom Fee field)
Update Billing Line
Click the gear icon on the top navigation bar, then click Setup.
Search for and select Object Manager.
Search and select Billing Line.

Click Fields & Relationships.

Search for and select Transaction Code.

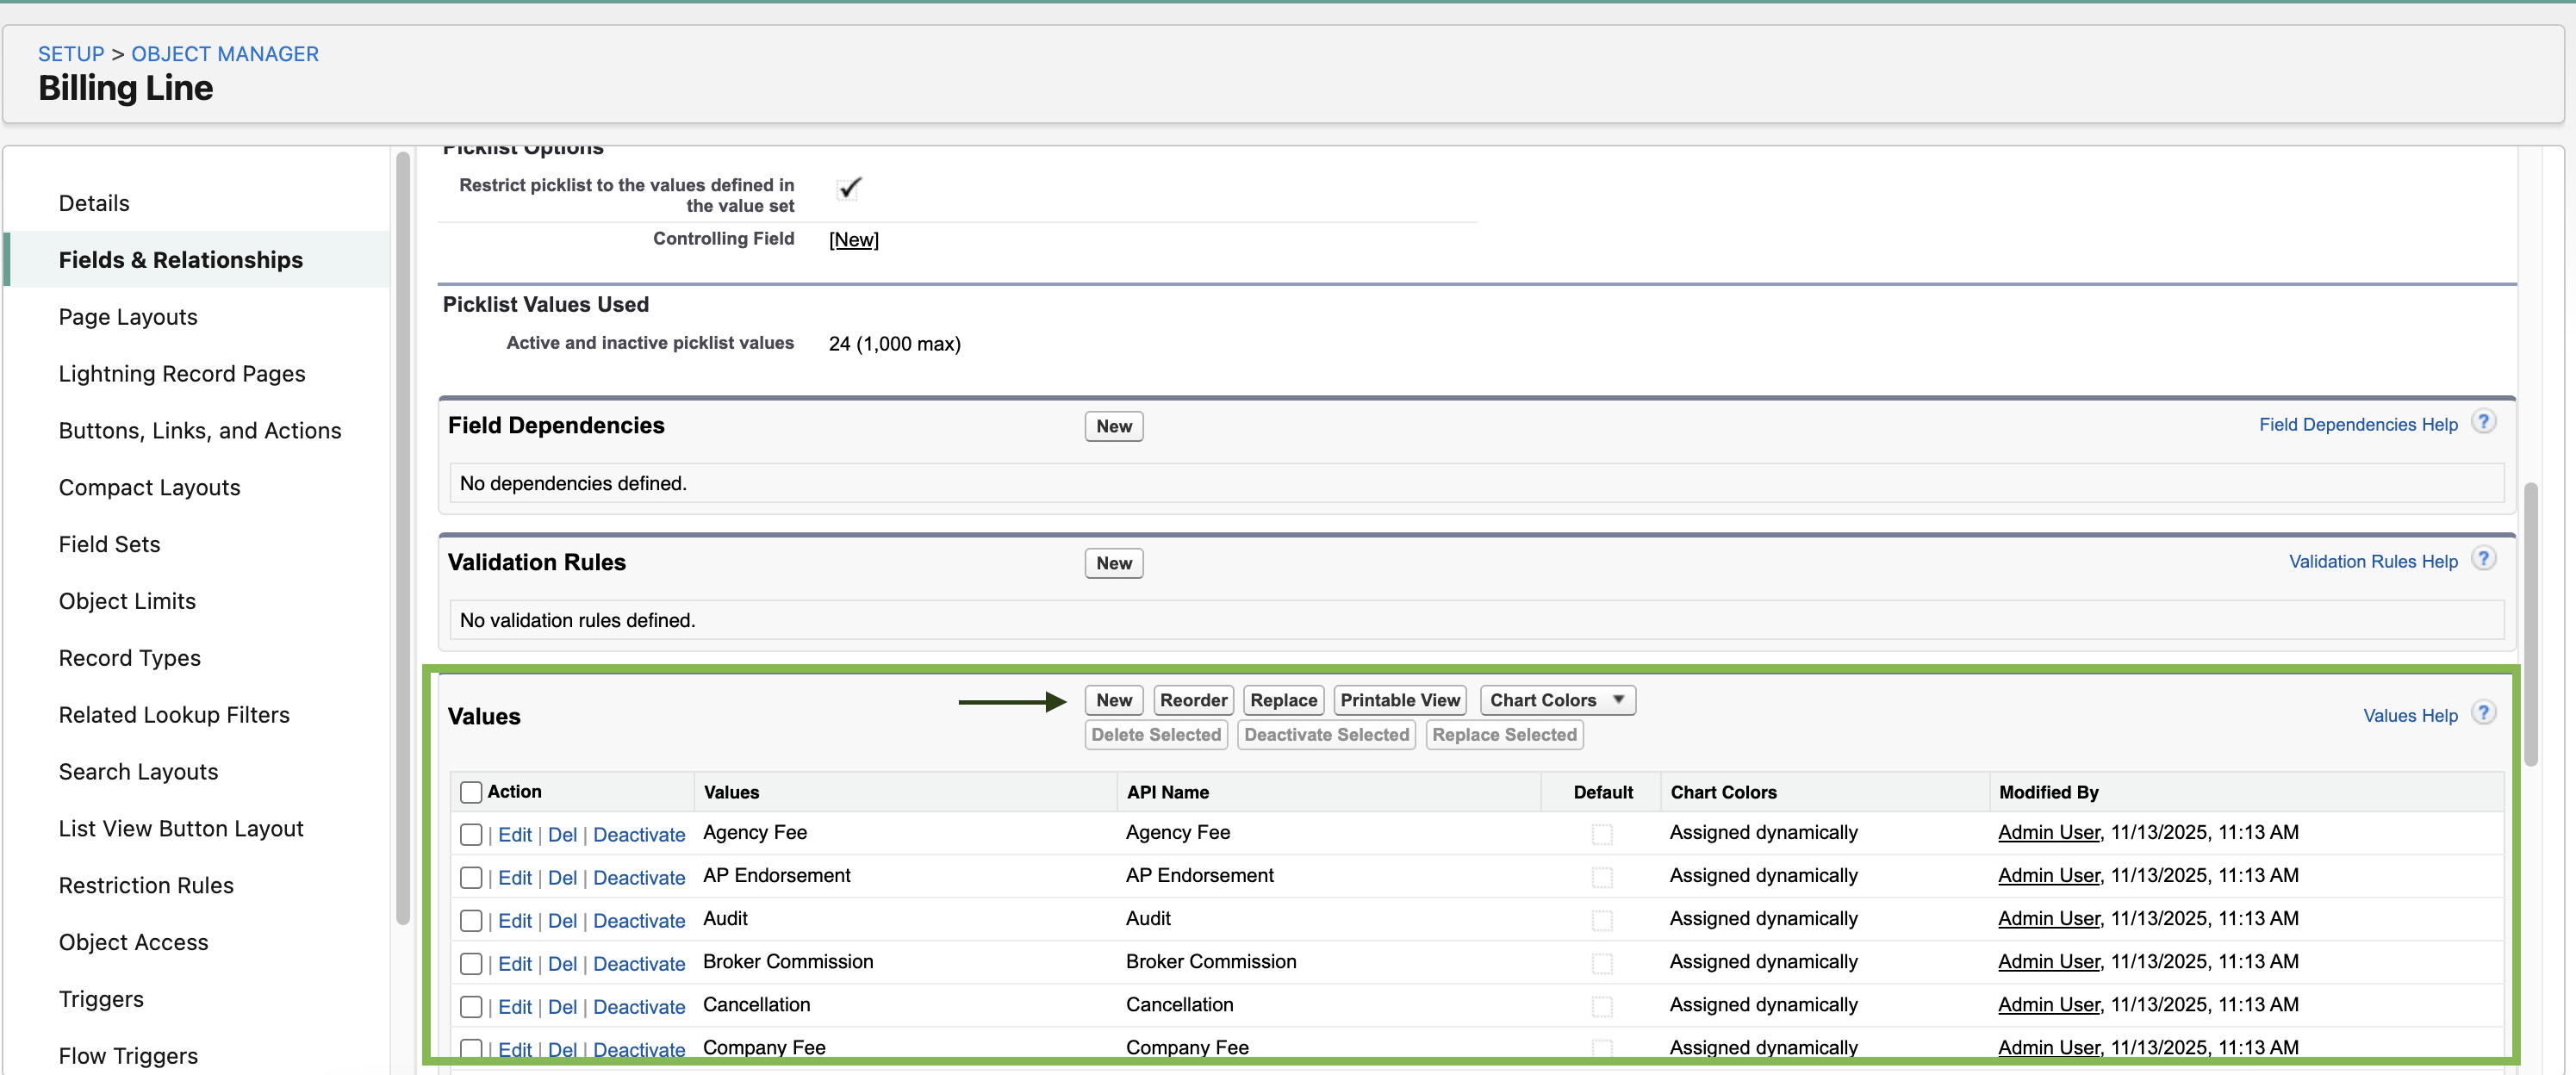
Scroll down to the Values section and click New.
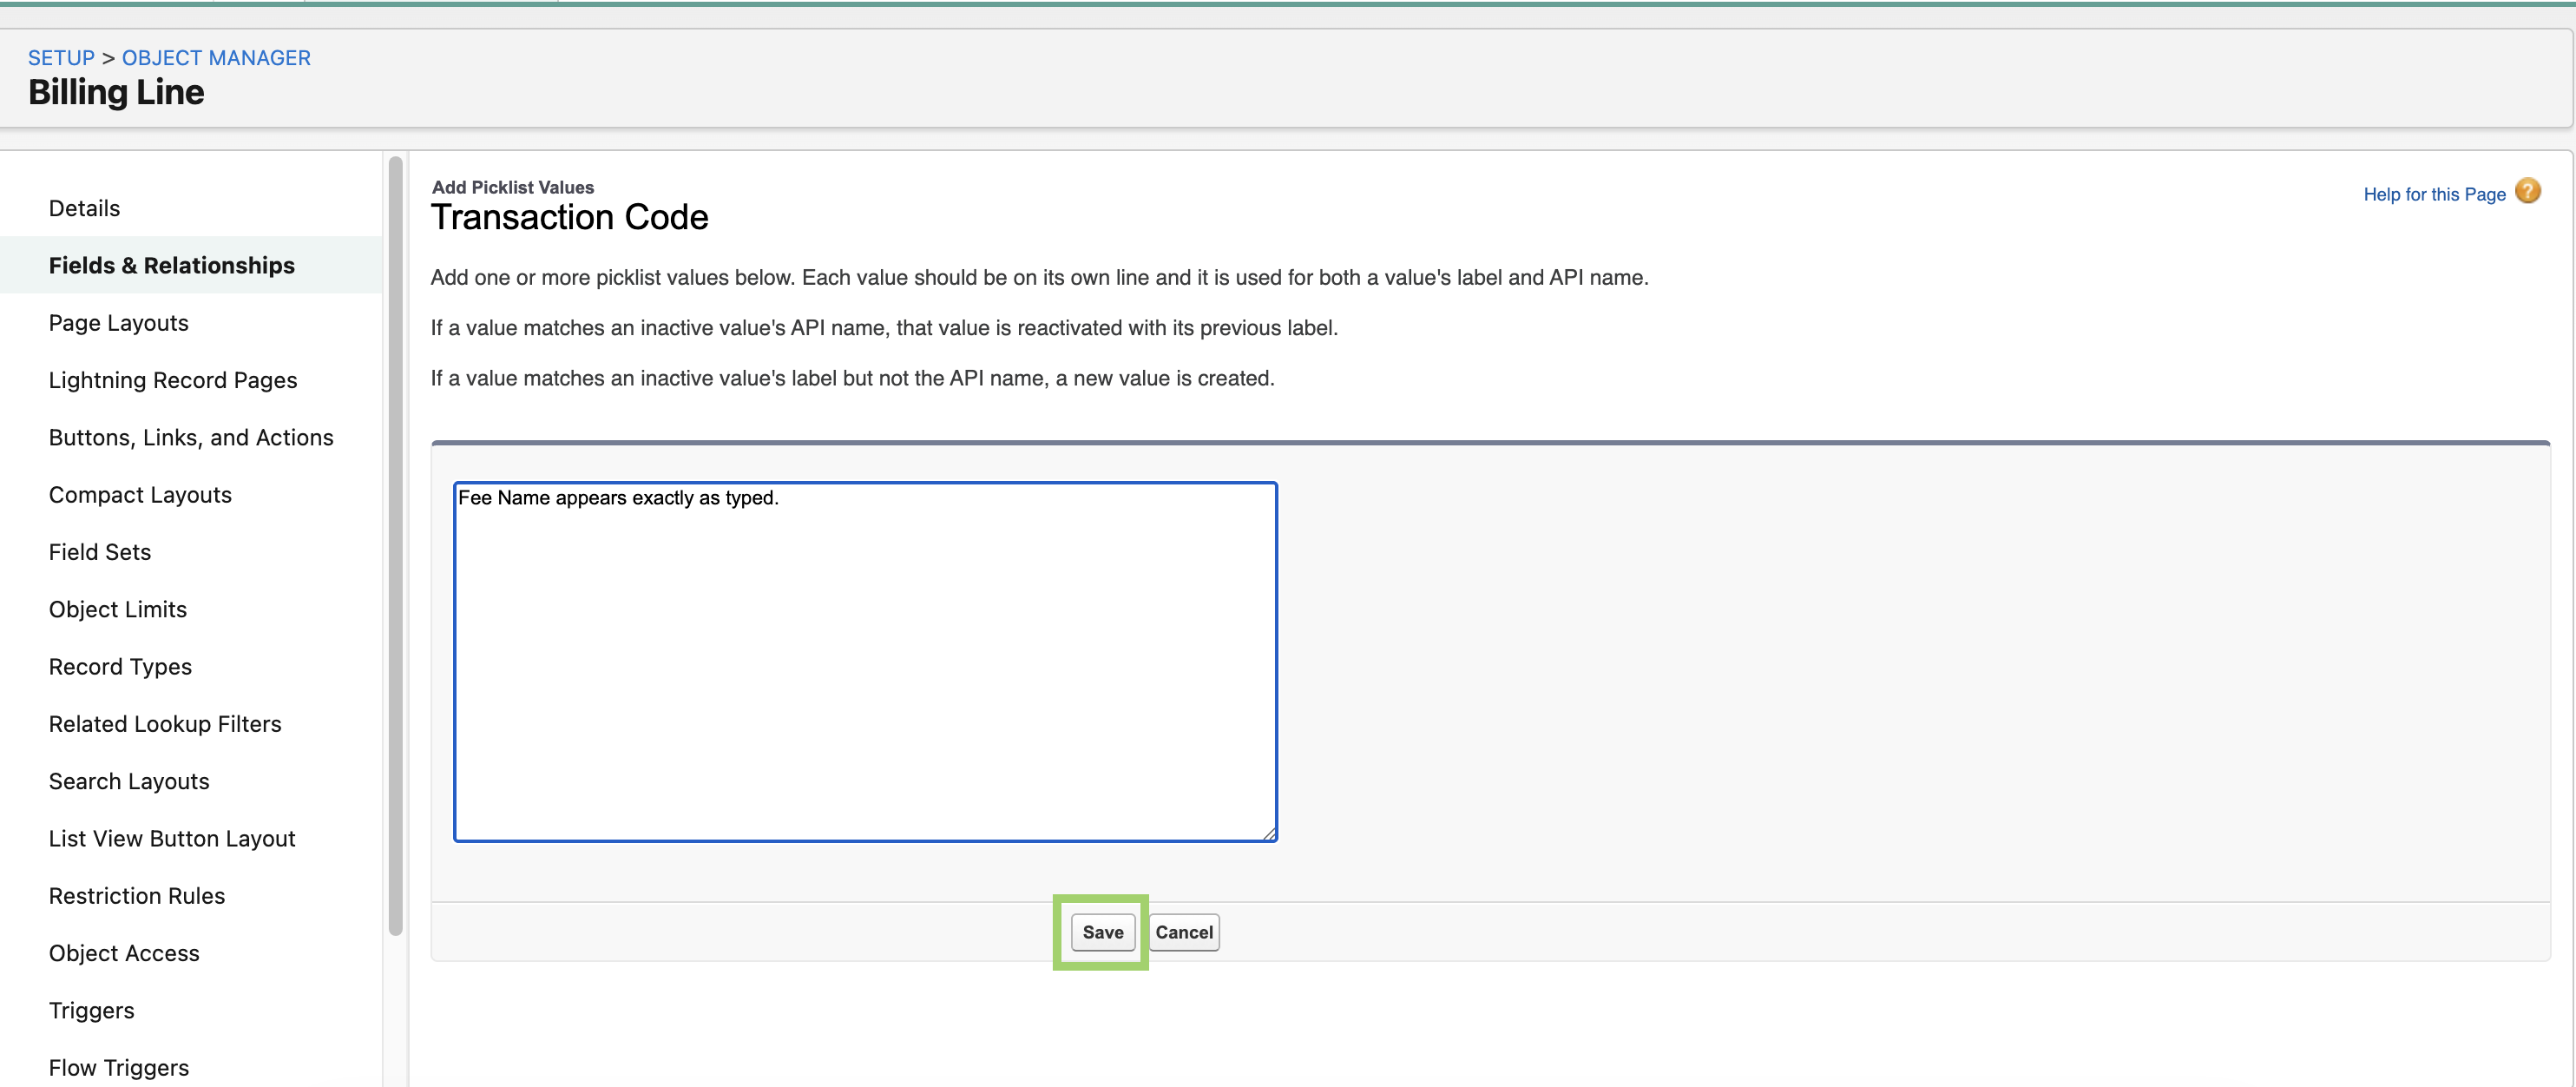
Enter the name of your fee and click Save.
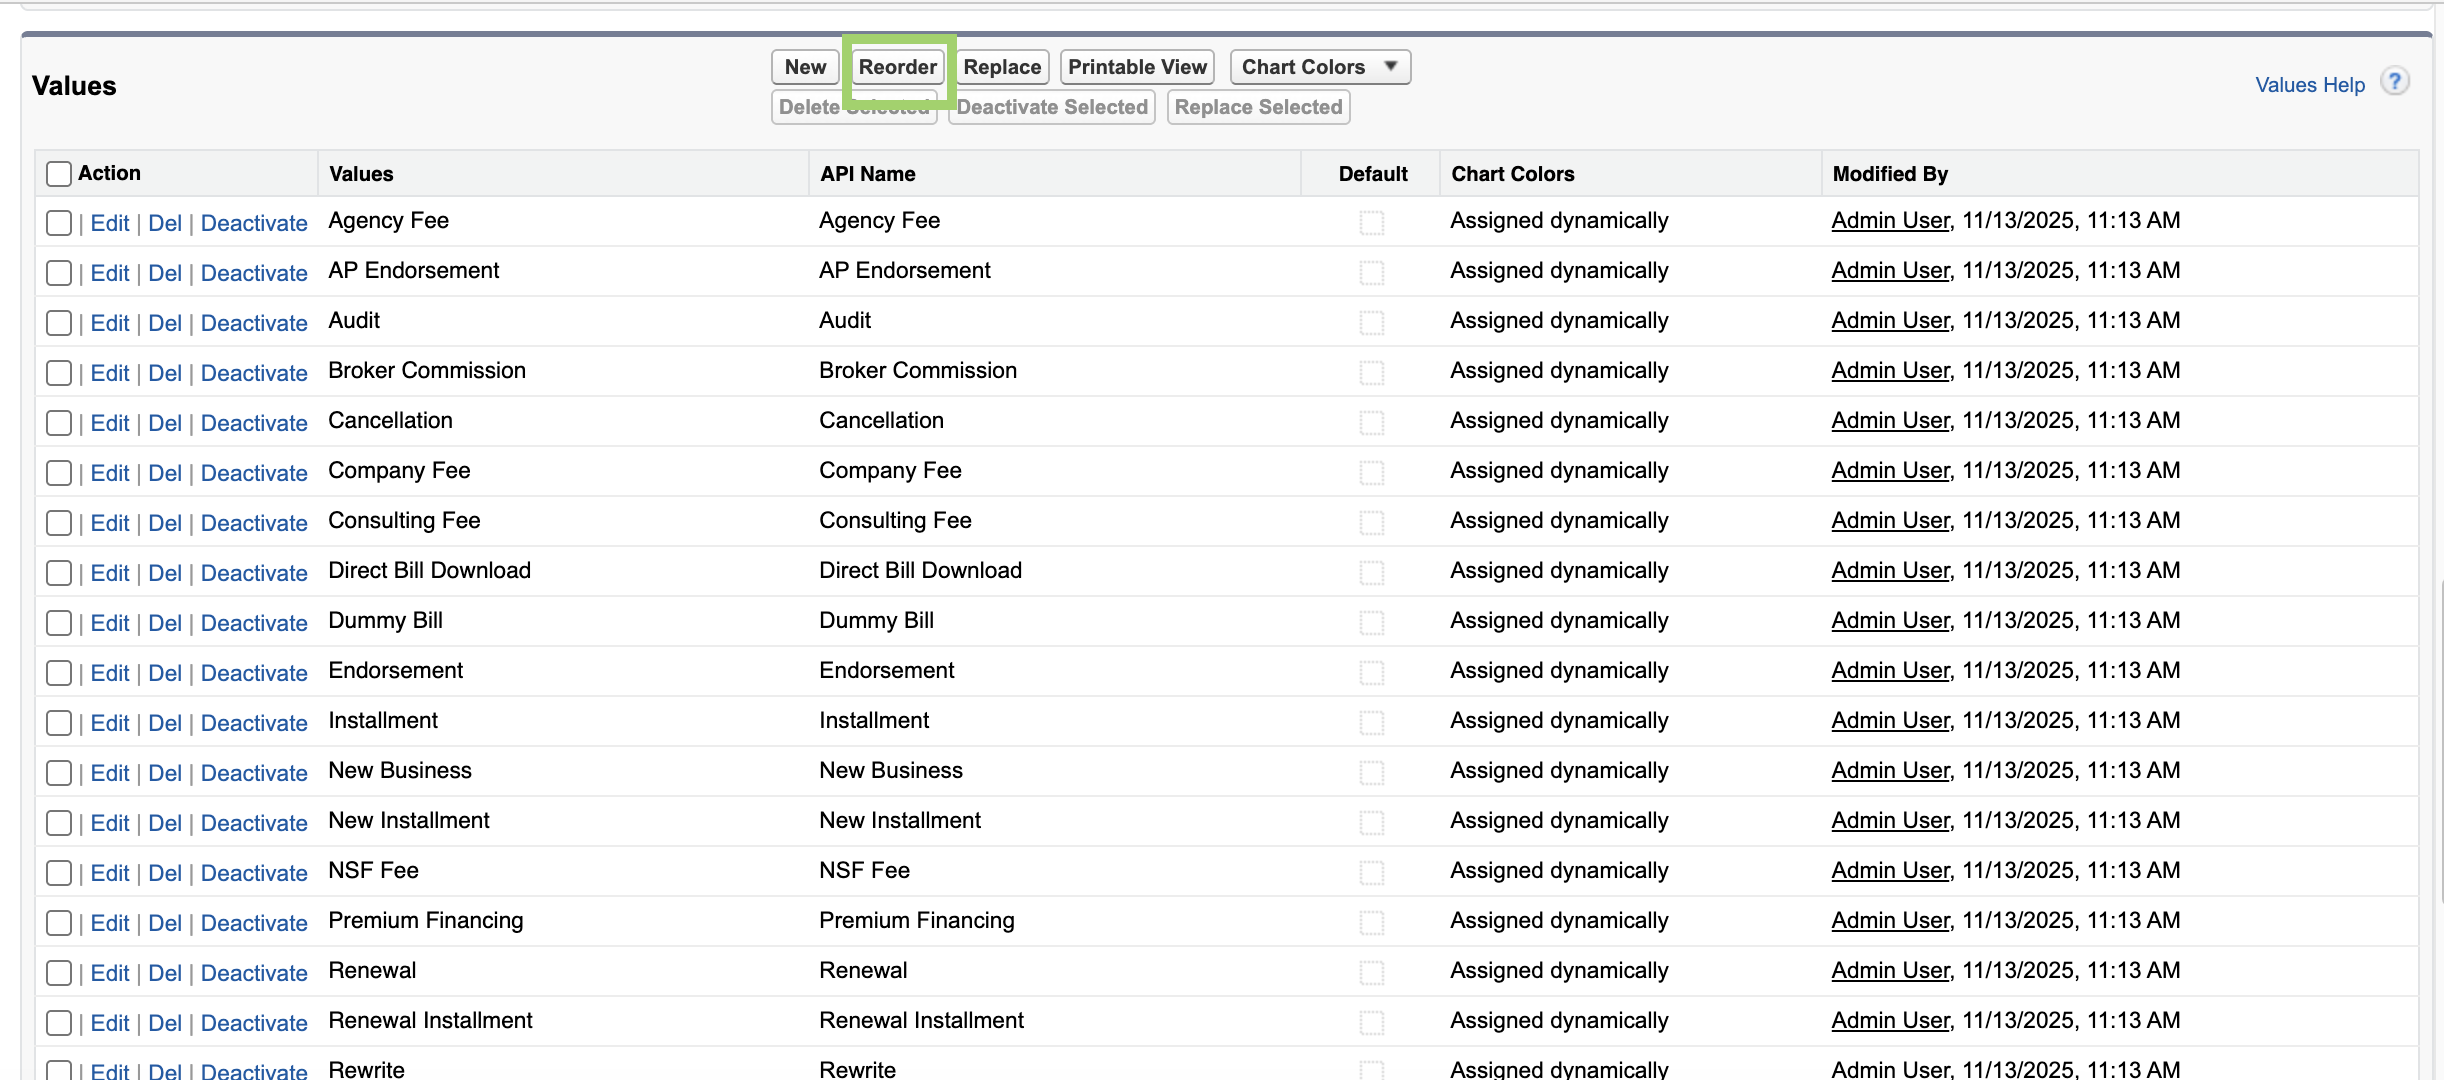
Navigate back to the Values section and click Reorder.
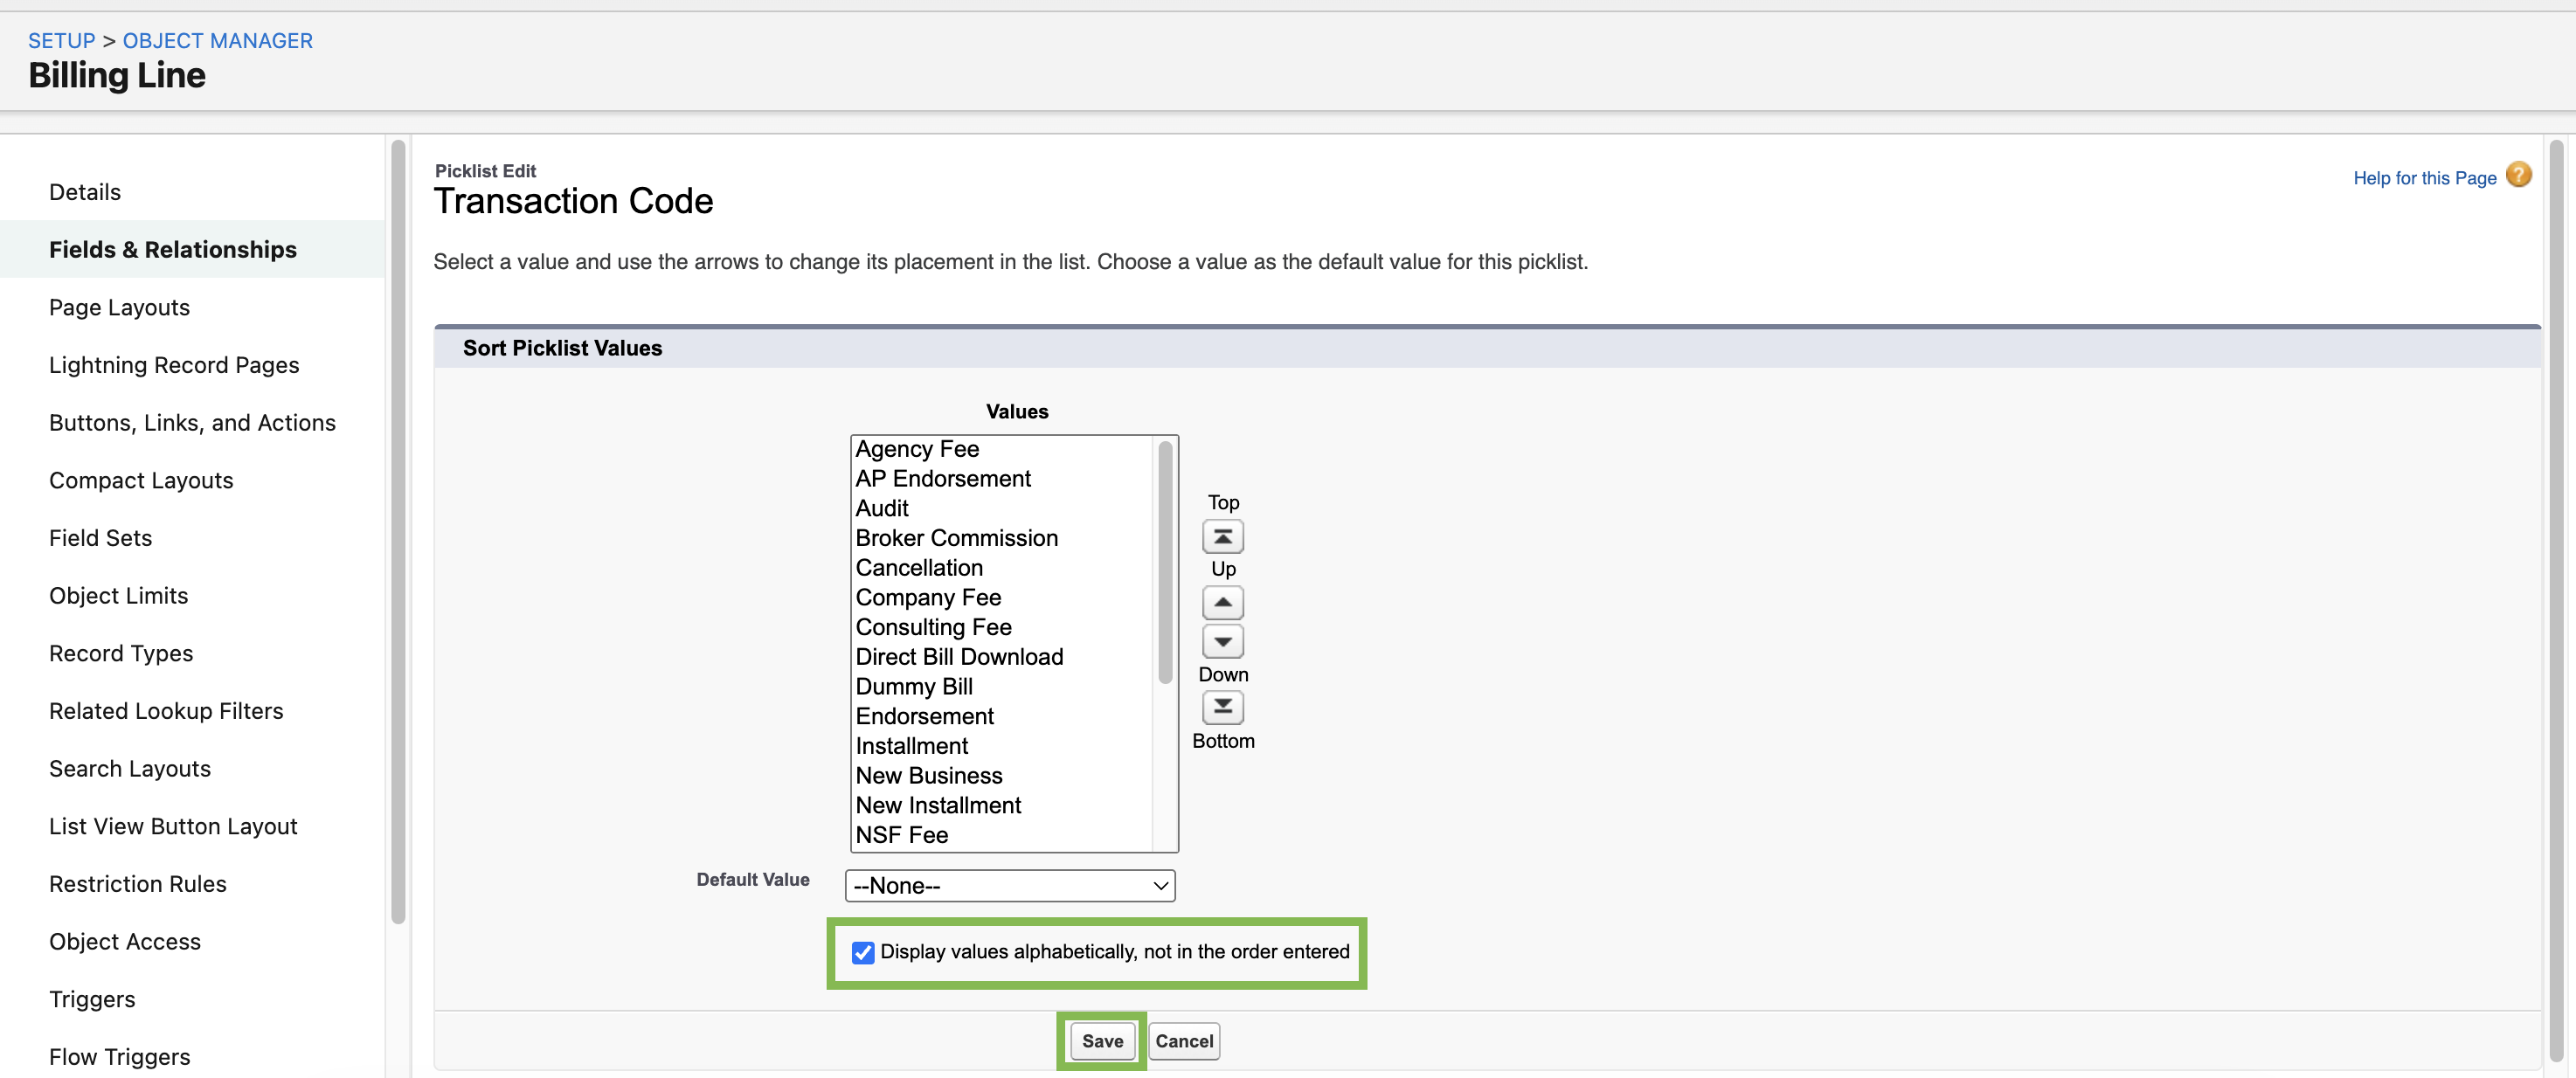
Enable the checkbox next to Display values alphabetically, not in the order entered, and click Save.
Update Payable Line
Still within Object Manager setup, search and select Payable Line.

Click Fields & Relationships, then search and select Transaction Code.

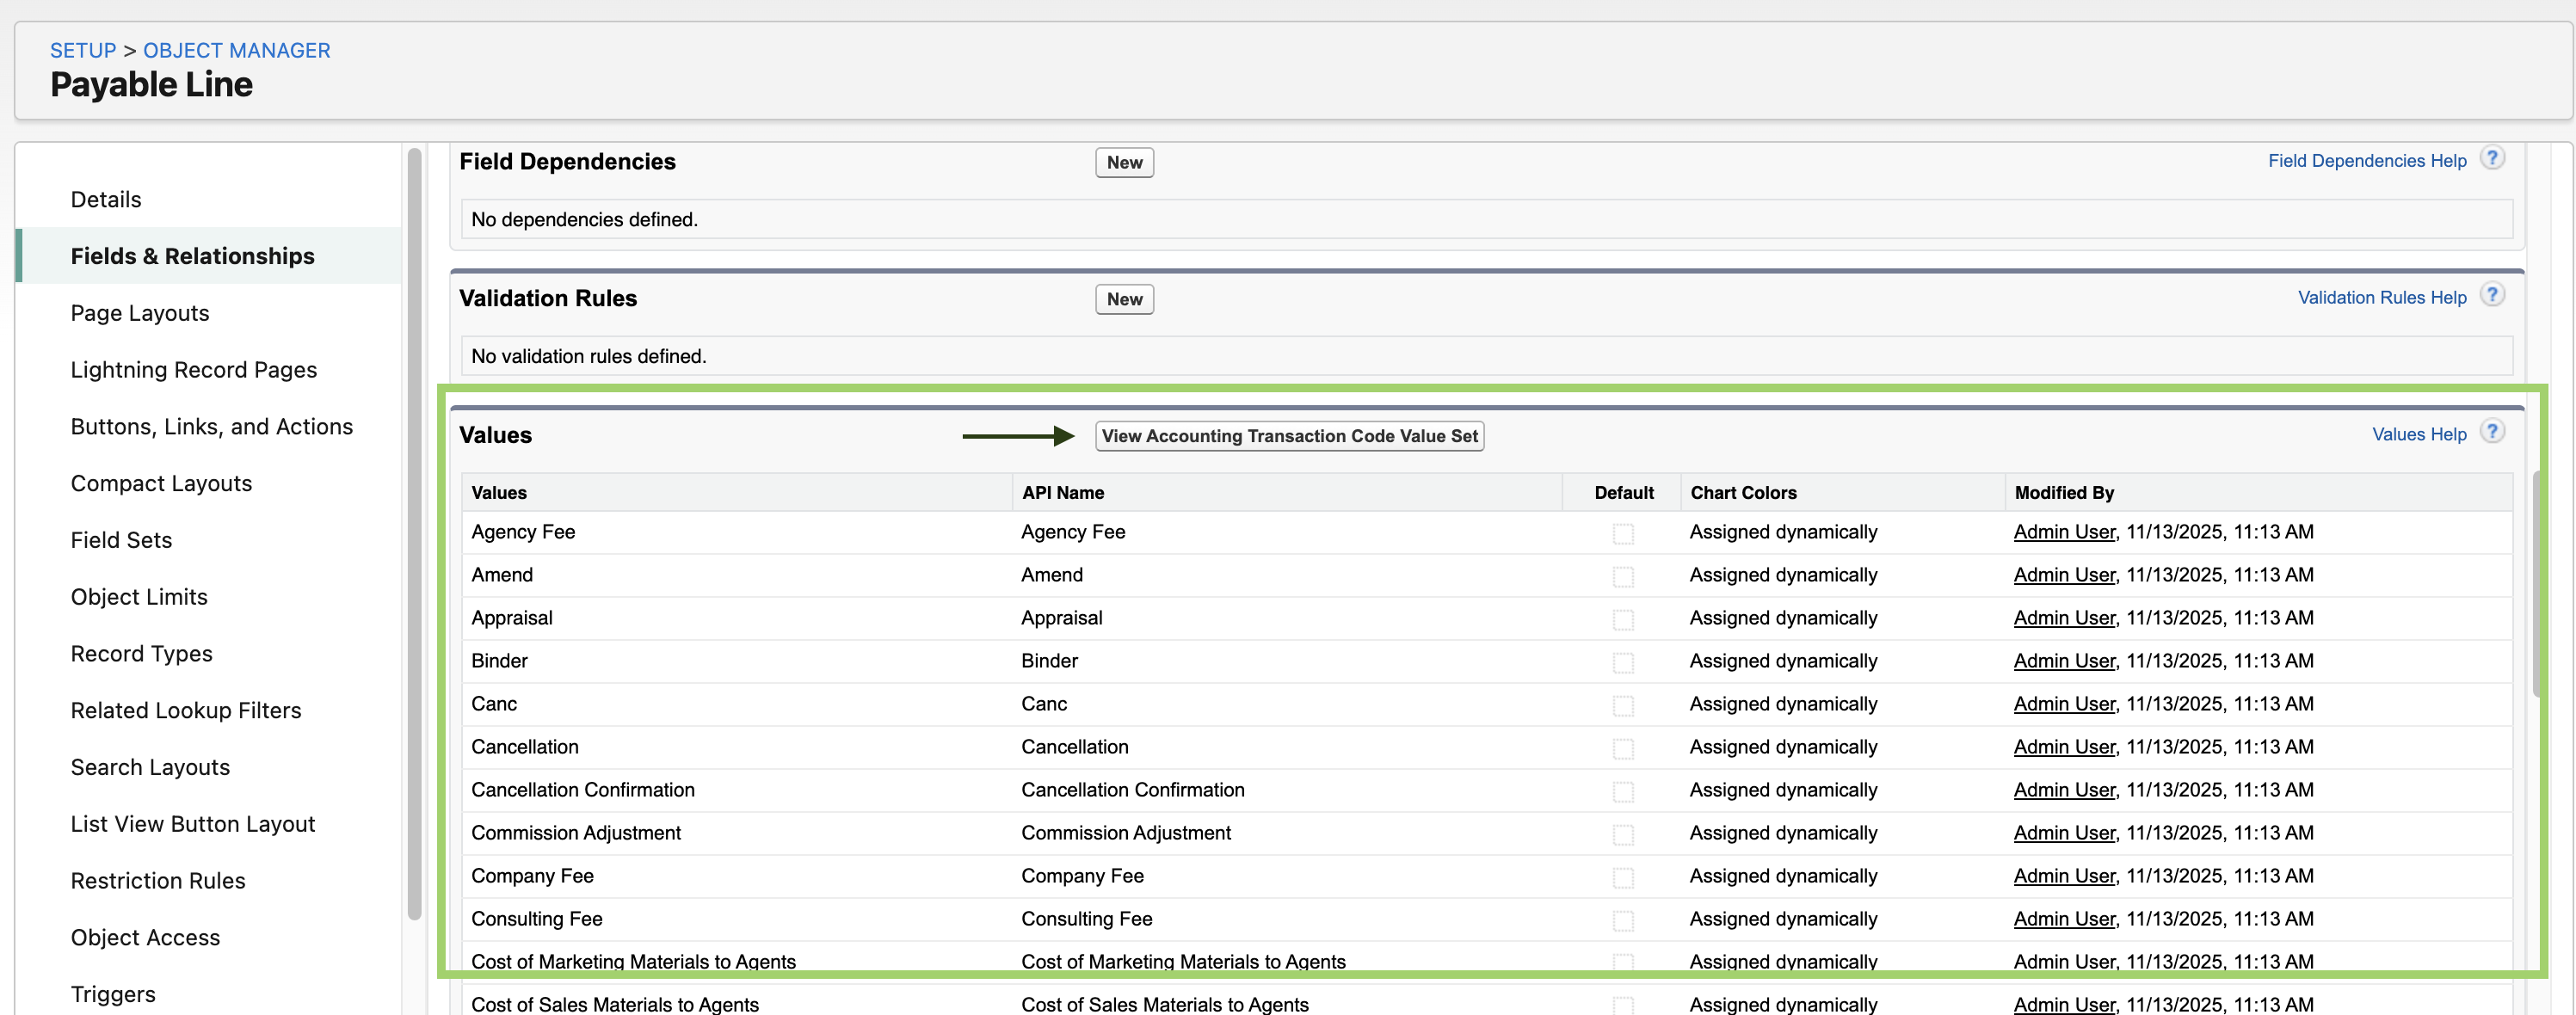
Scroll down to the Values section, then click View Accounting Transaction Code Value Set.
In the Values section, click Click New.
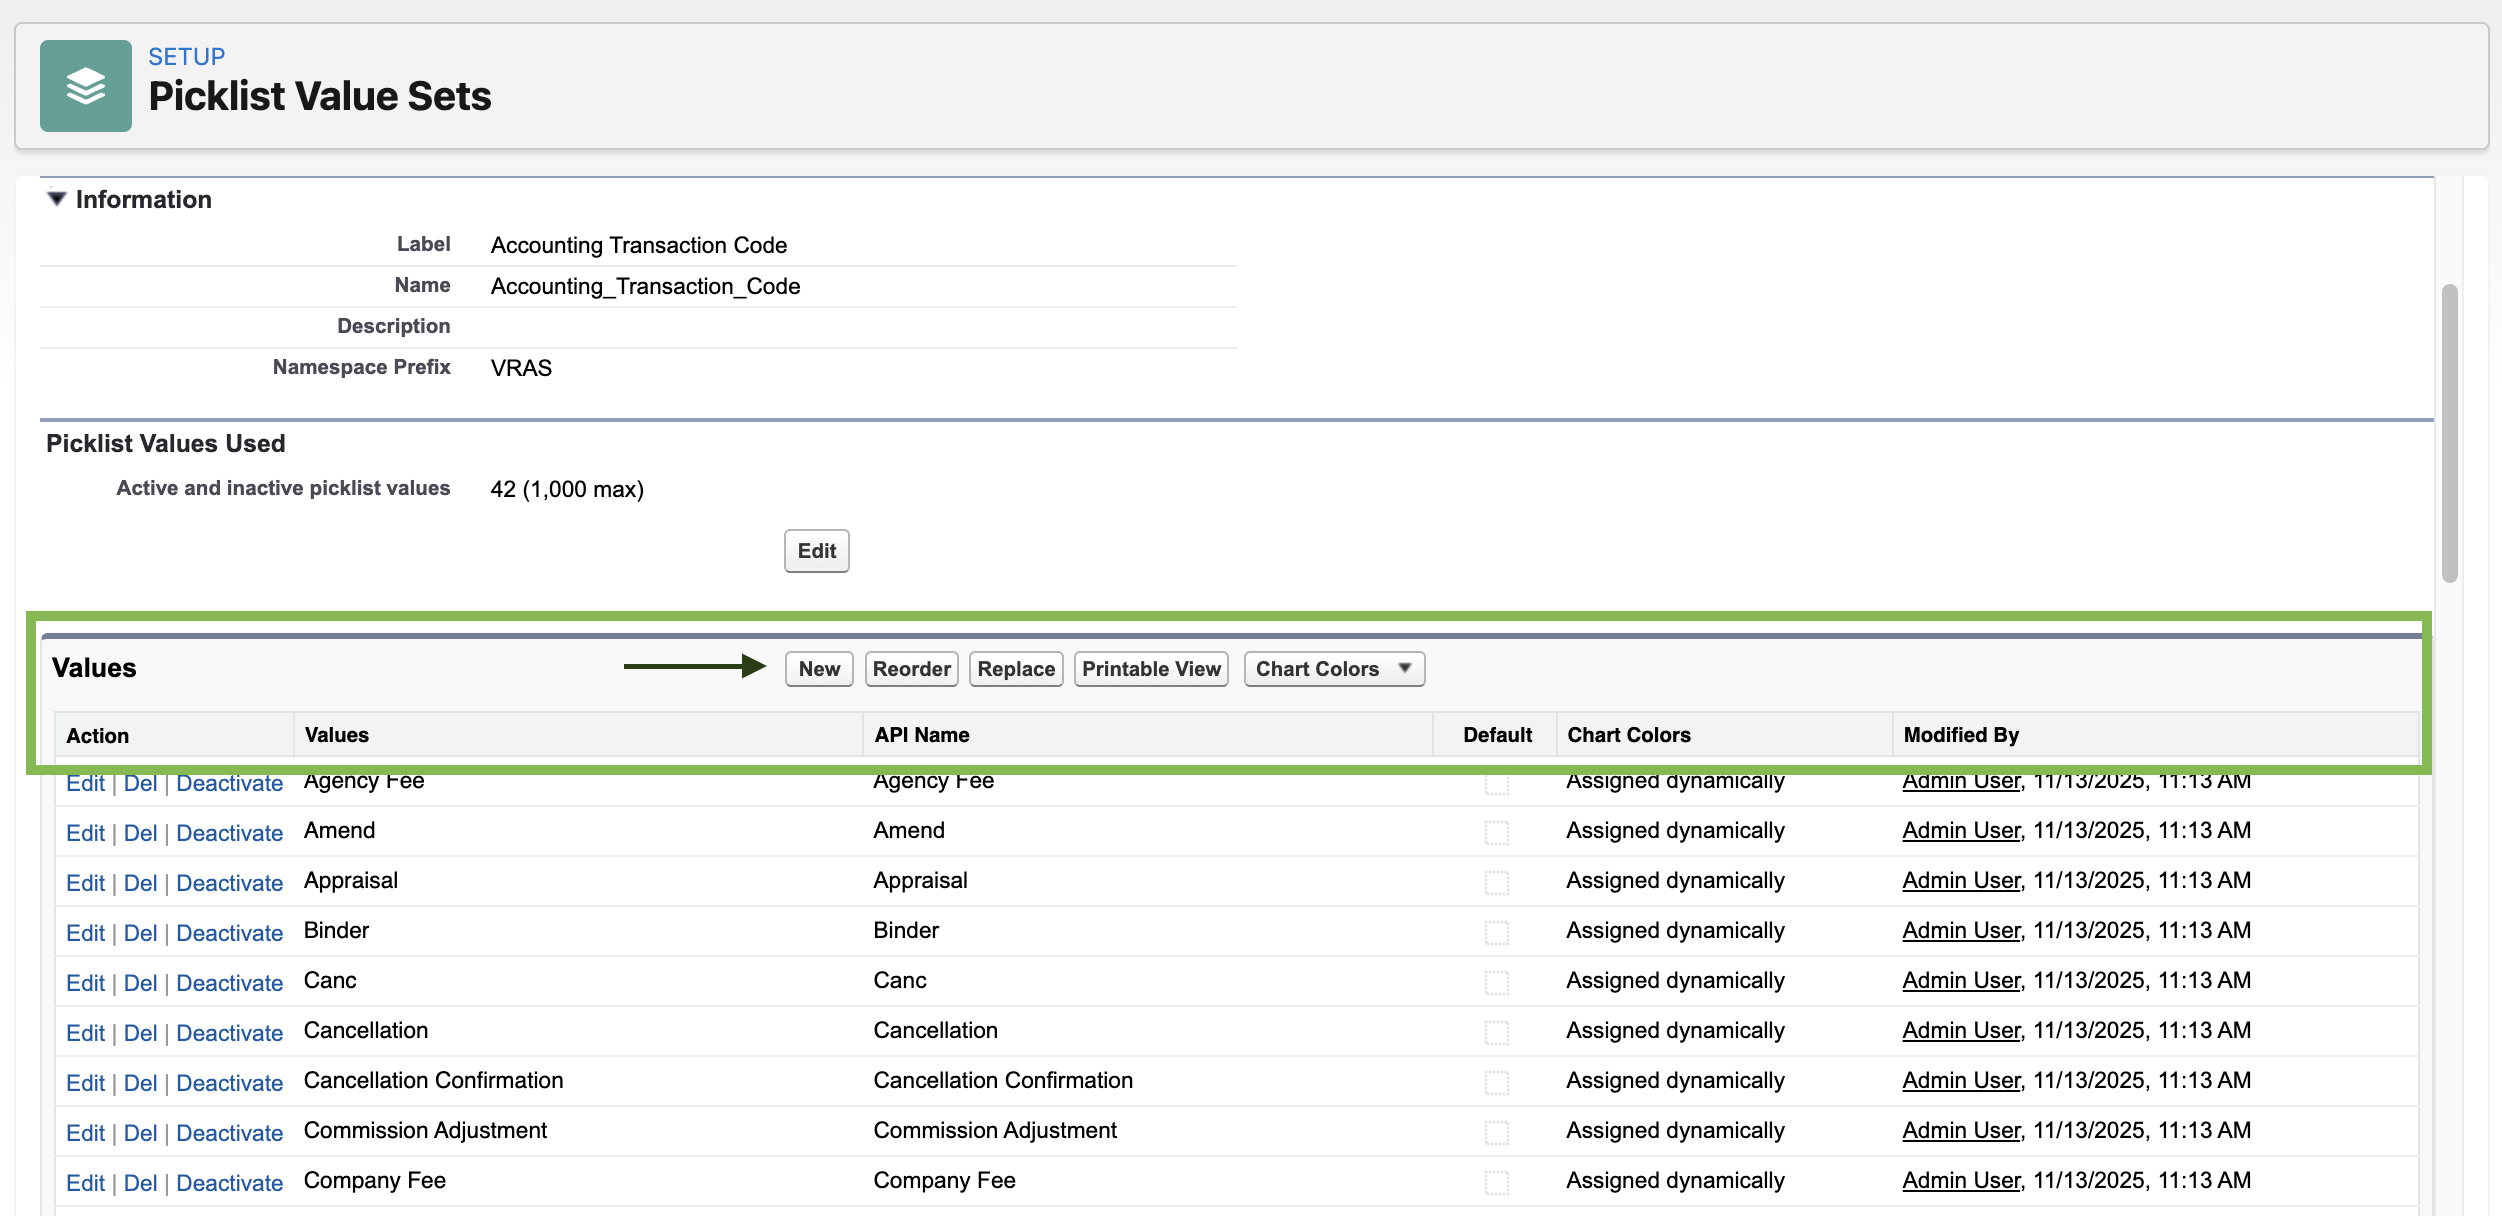
Add the name of the same fee value from the Billing Line, and click Save.
Repeat Step 9 from Billing Line to reorder alphabetically, then click Save.
Add the custom fee value
Still within Object Manager setup, search and select Accounting Settings.

Click on Fields & Relationships, then search "Fee" to select for an empty custom fee field to add a new custom fee.
In the Values section, click New.

Add the same fee name from the previous steps, then click Save.
Repeat Step 9 from Billing Line to reorder alphabetically, then click Save.
Configure accounting settings
Now configure the new fee in your accounting settings. You’ll need:
The Transaction Code value you created
The appropriate GL account
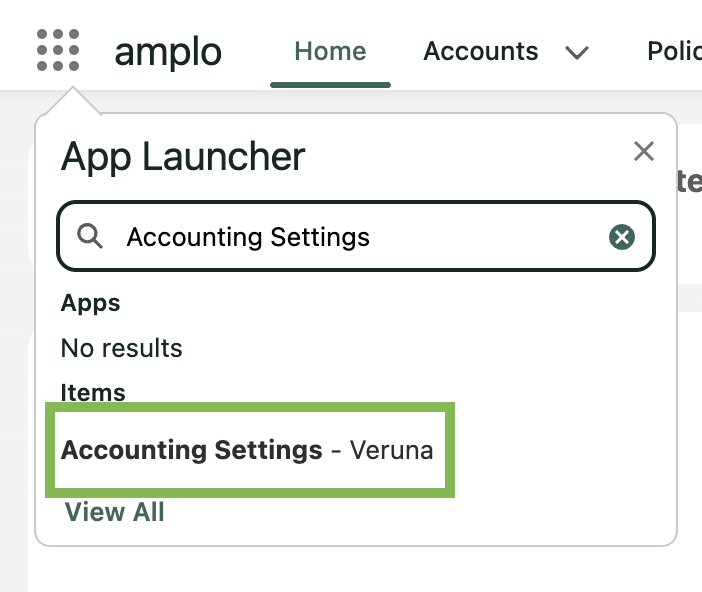
In the App Launcher, search for and select Accounting Settings – Veruna.
Click Edit.
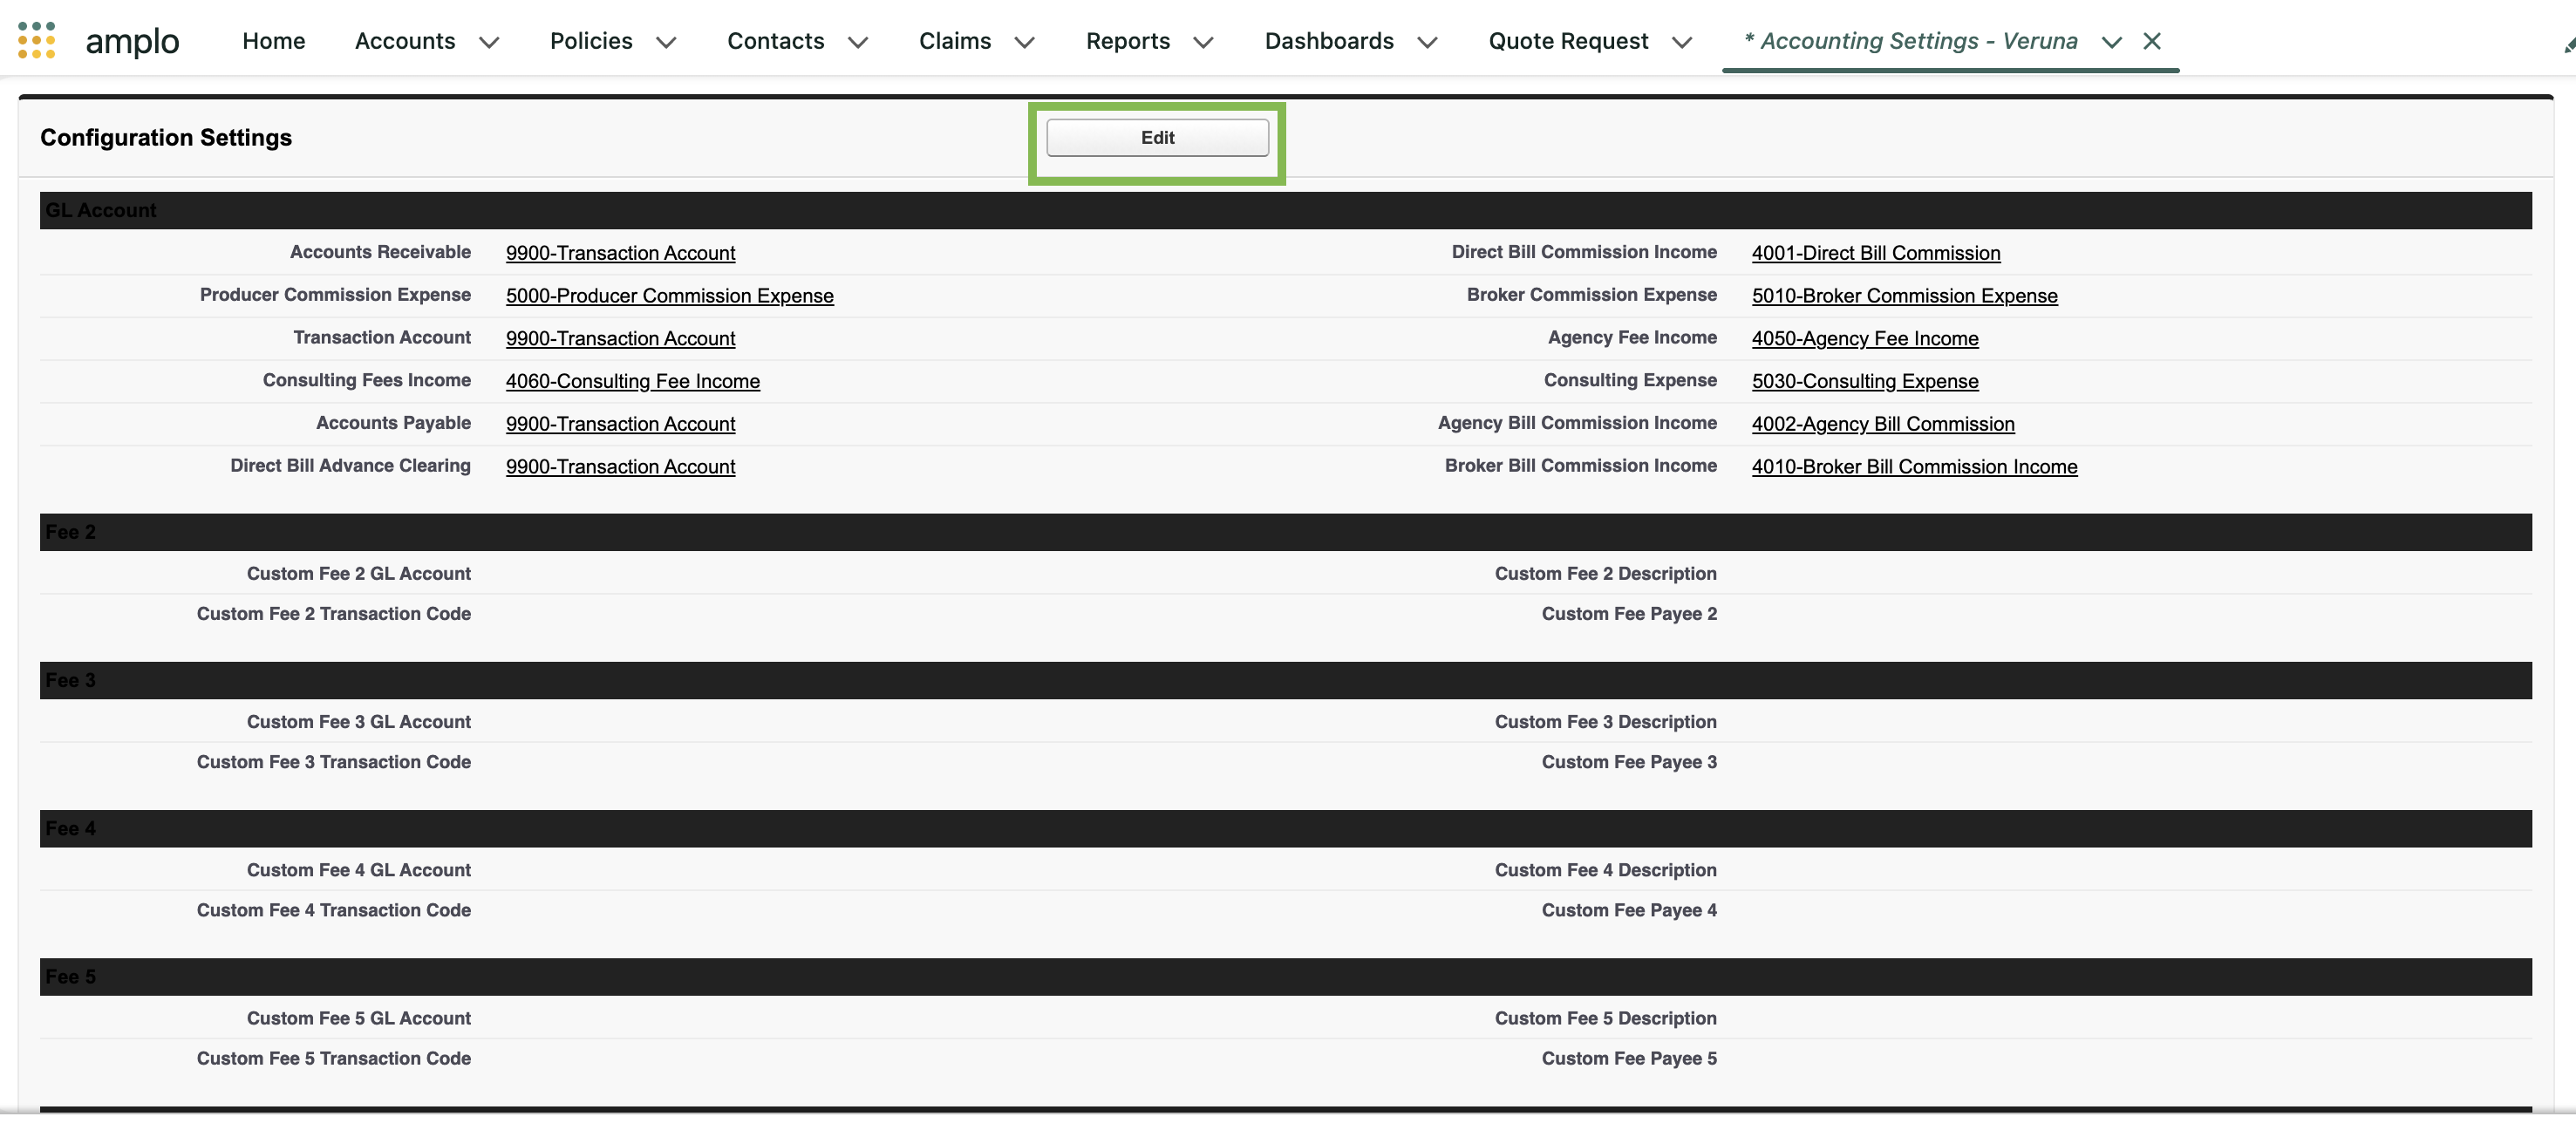
Complete any blank Custom Fee (
Custom FeeX) section:Search for the GL Account: Add or select the account for this fee.
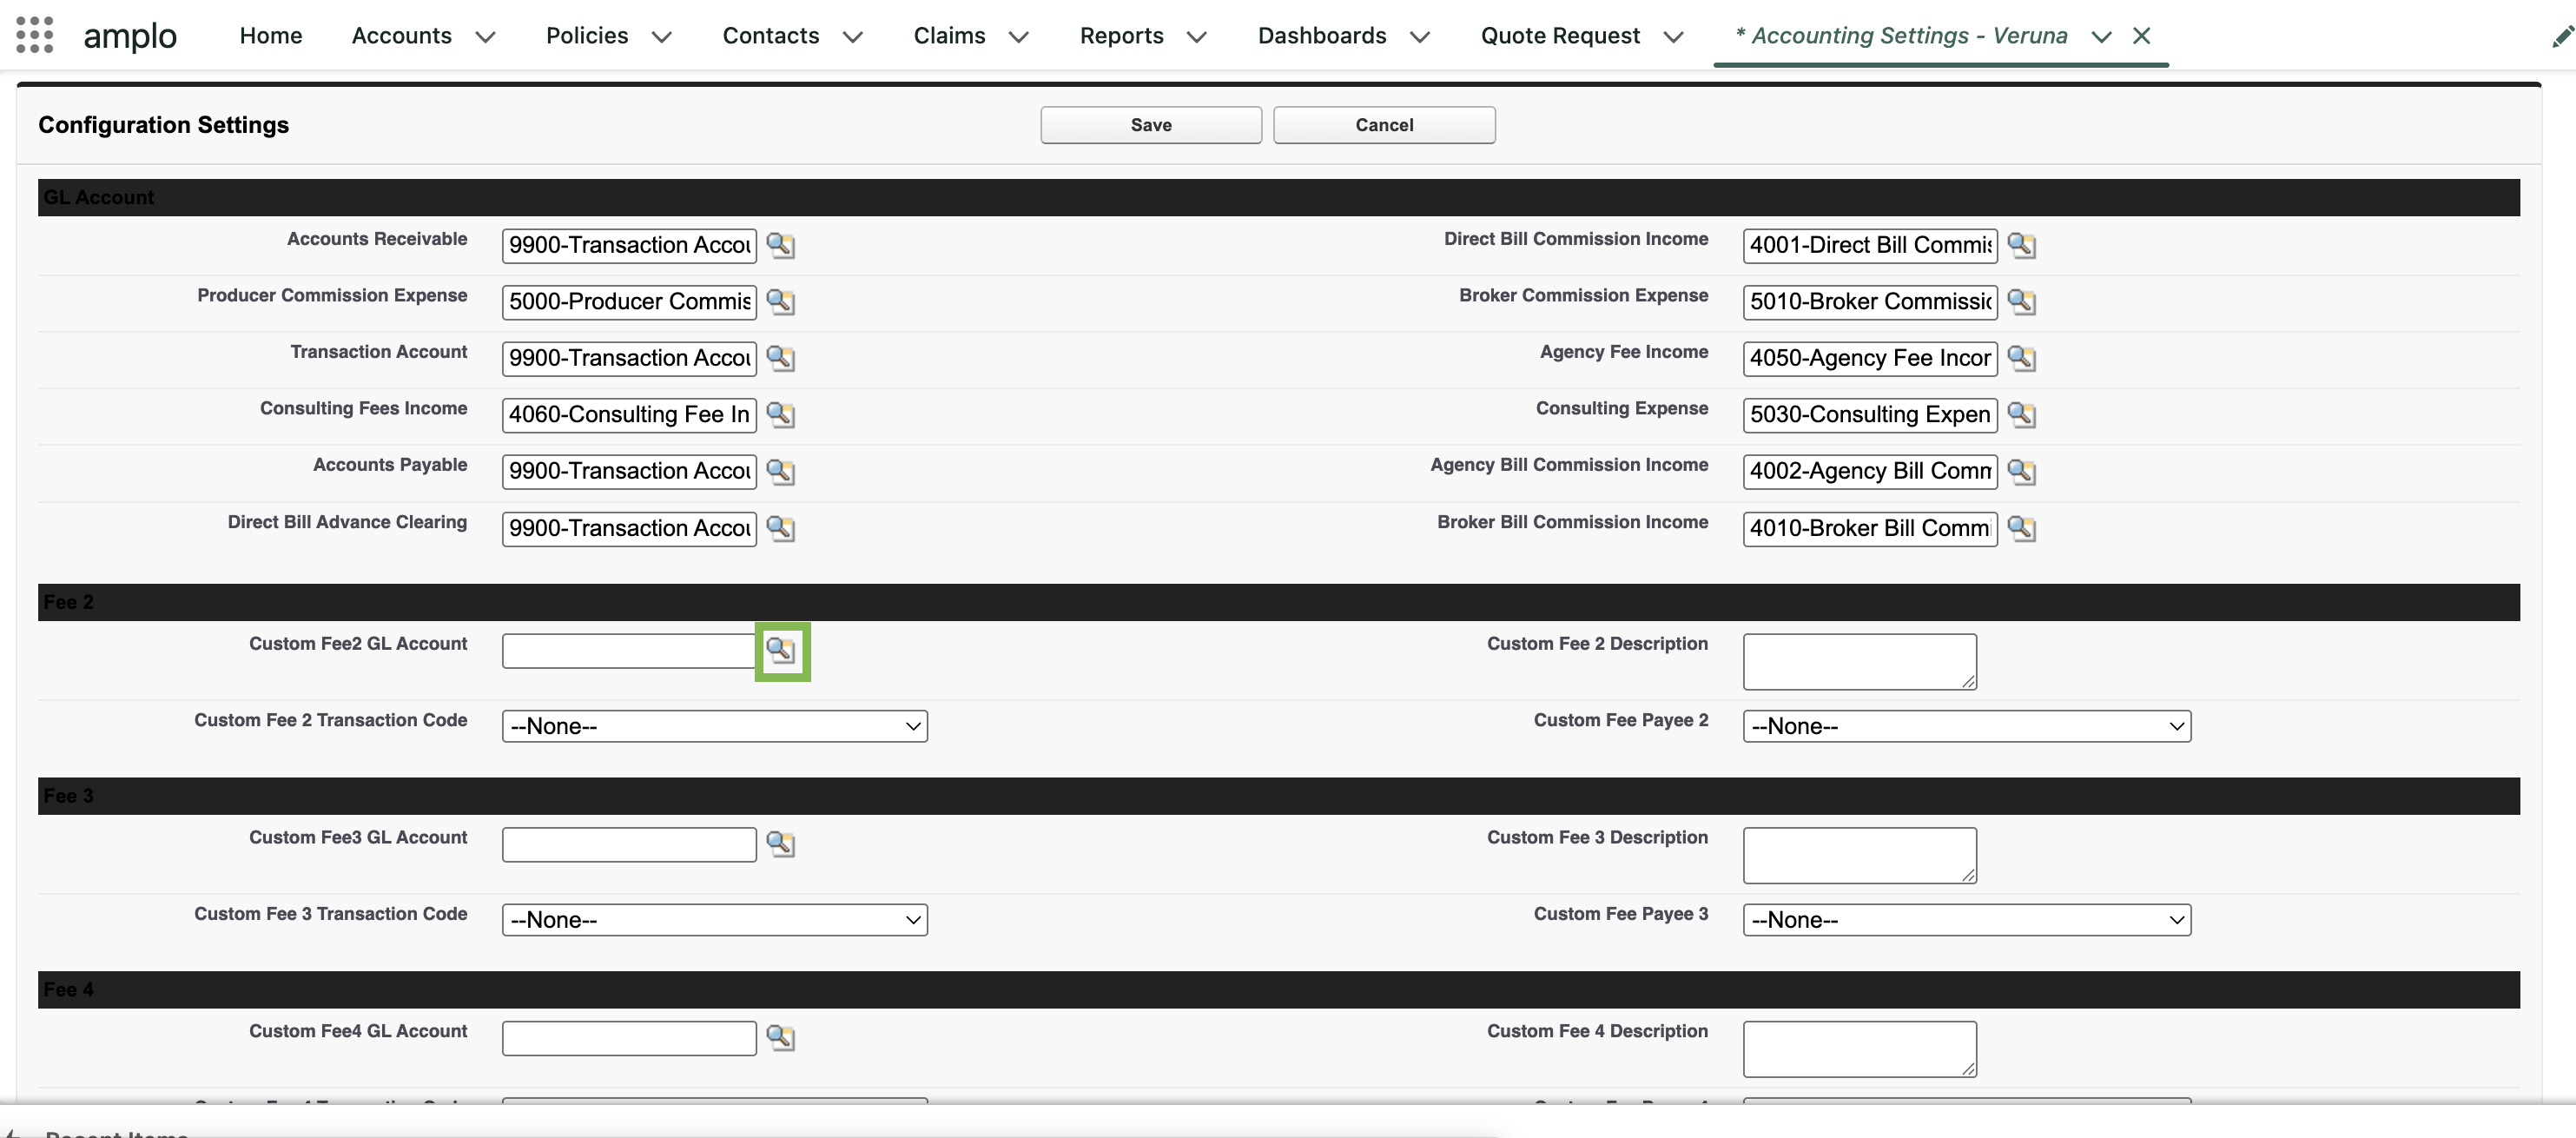
Transaction Code: Select the custom fee value you created.
Description: Enter the fee name (for clarity and reporting).
Payee: Choose Agency or Billing Company.

Set the field label
This step defines the user-friendly name that appears on Policy records.
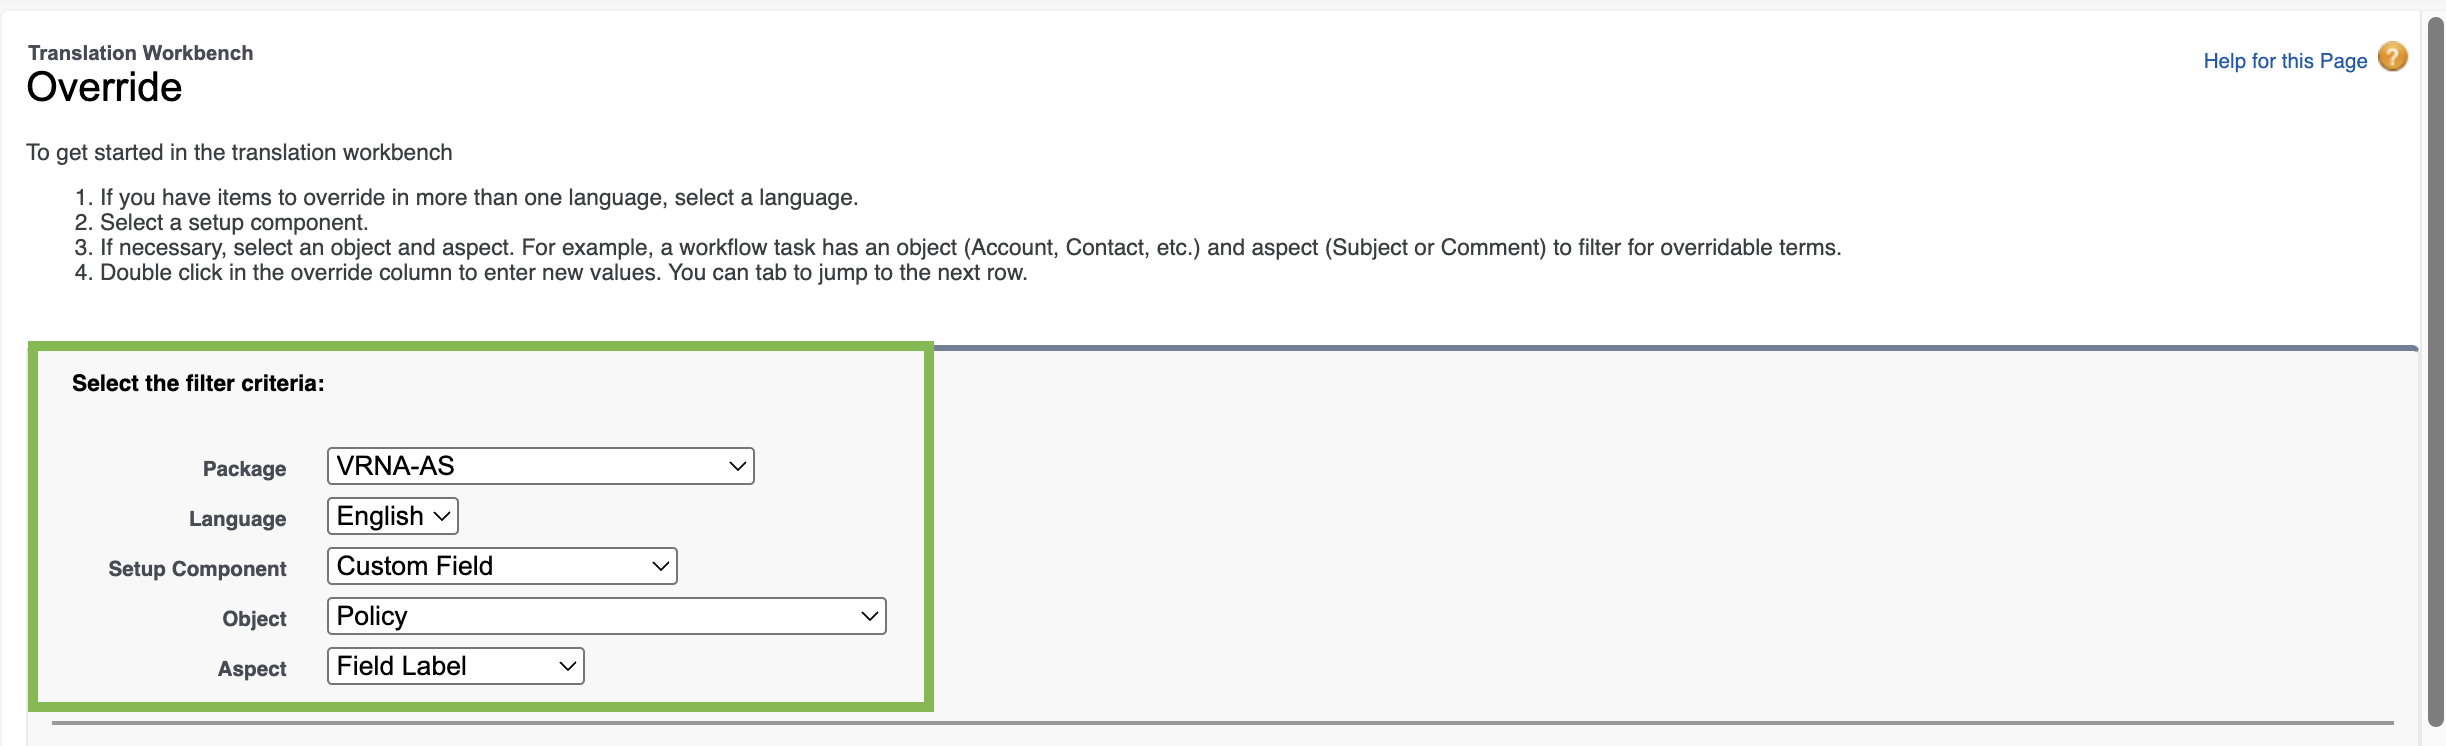
In Setup, search and select Override.
Select the following filter criteria:
Package: VRNA-AS
Note: If you are configuring Custom Fee 2, and then choose VerunaCore instead.
Setup Component: Custom Field
Object: Policy
In the Master Field Label column, find the Custom Fee # field from the previous steps, then double-click the pencil icon to edit the field.

Enter the same fee name used in previous steps, and click Save.
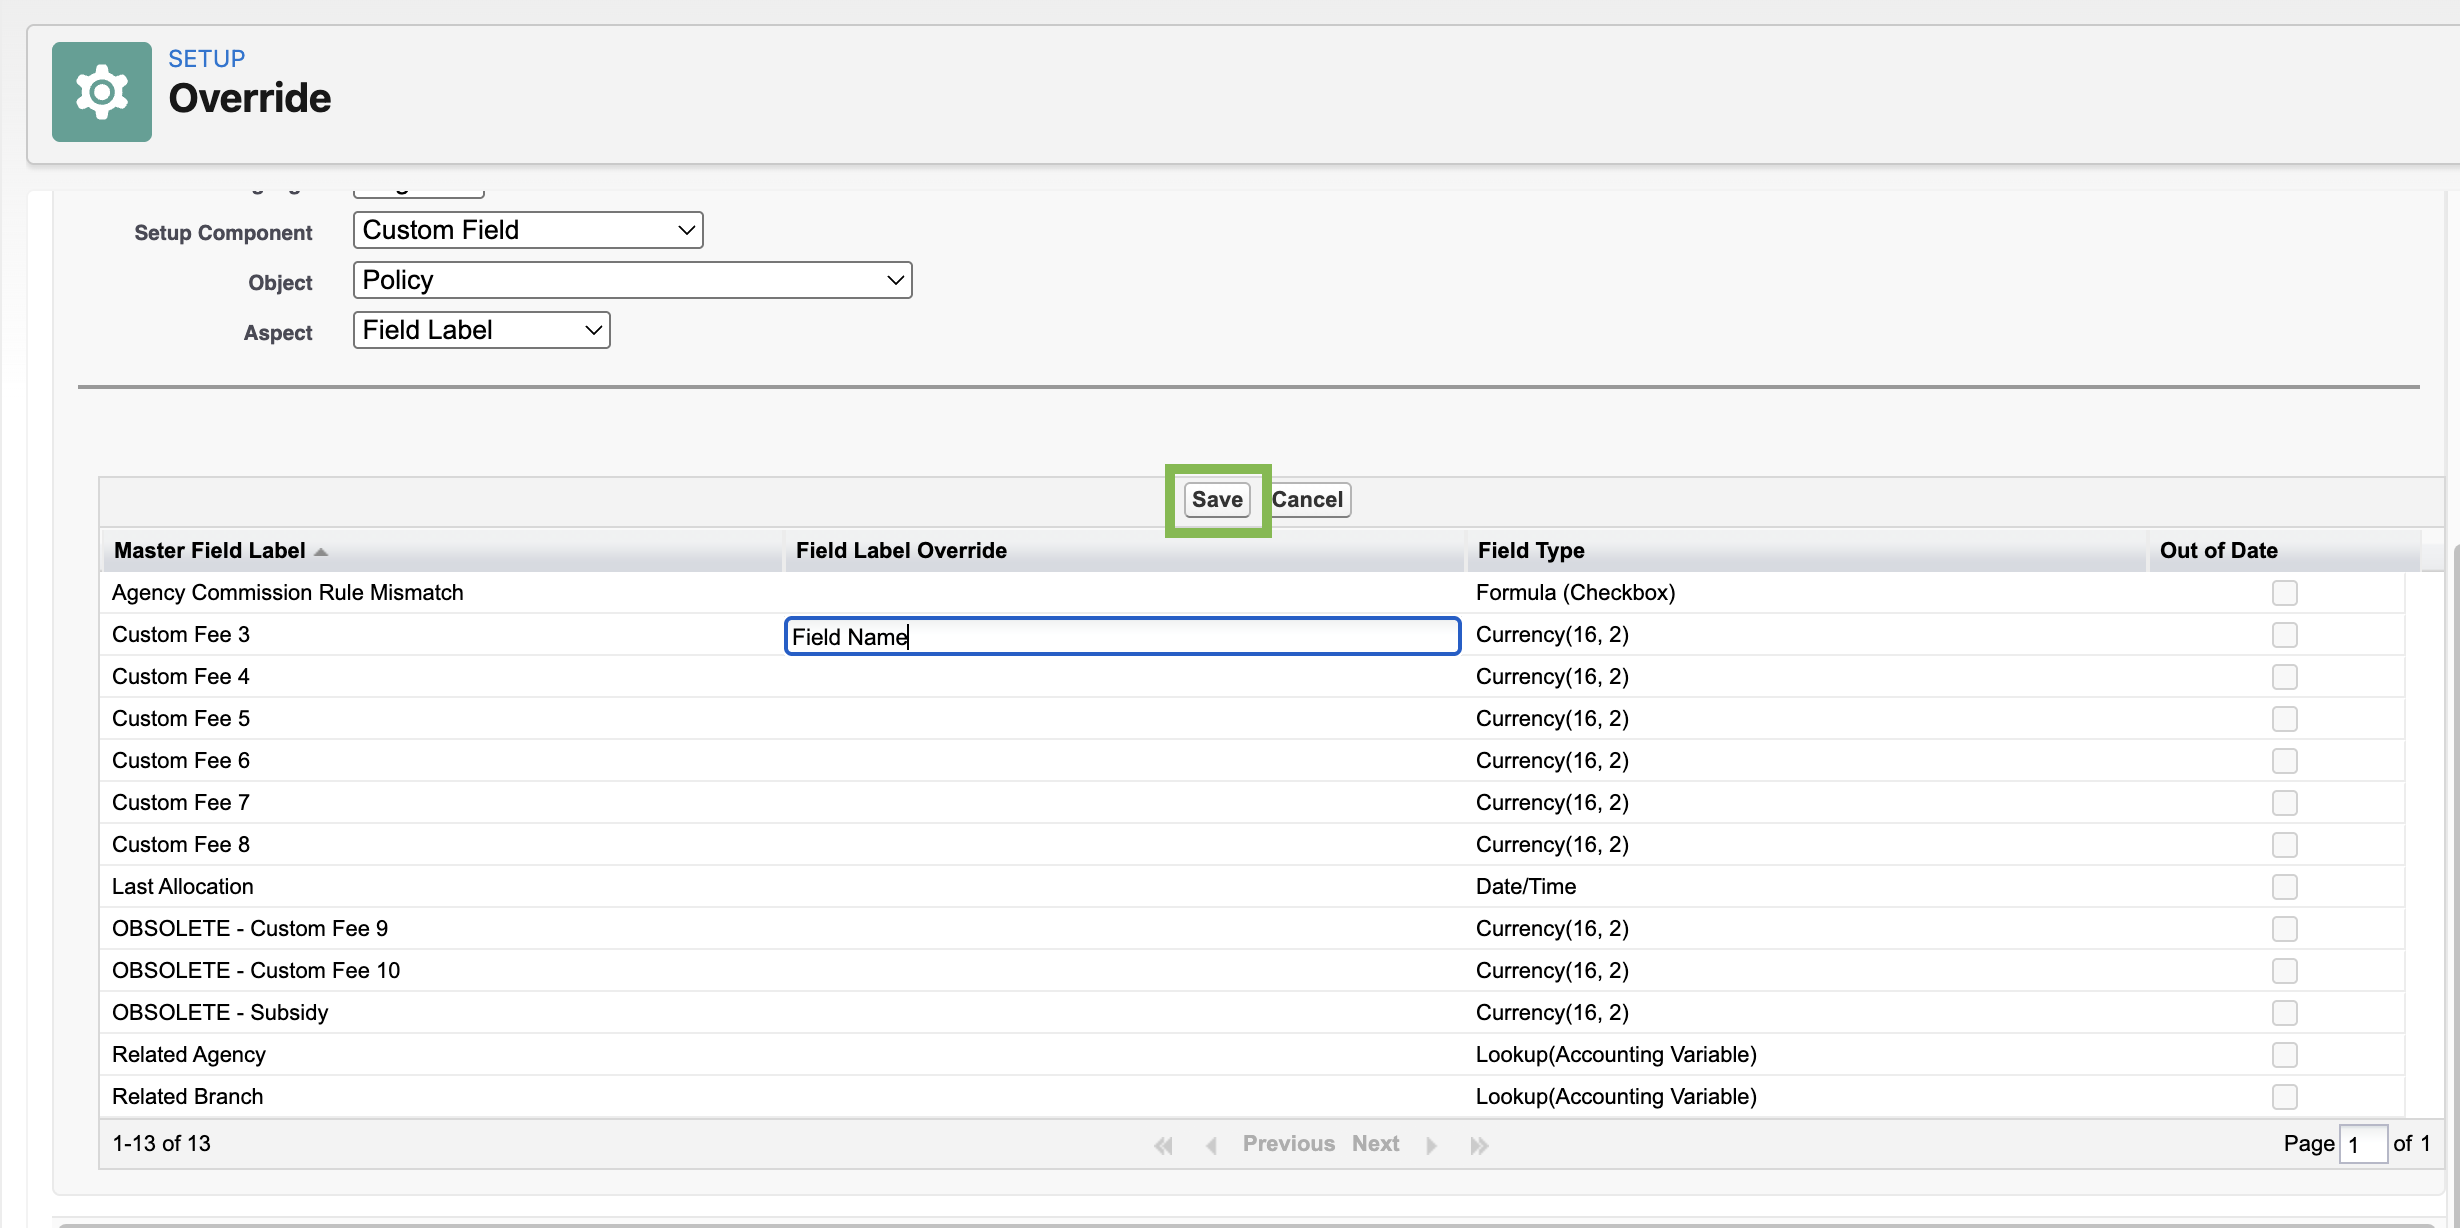
Repeat steps 2-4, but choose Policy Change in the Object filter.

Add the field label to page layouts
To make the custom fee visible to users, add the field to the appropriate Policy and Policy Change page layouts. This ensures the fee appears in the Accounting section when creating or updating records.
Update Policy page layouts
In Object Manager, search and select Policy.

Click Page Layouts.
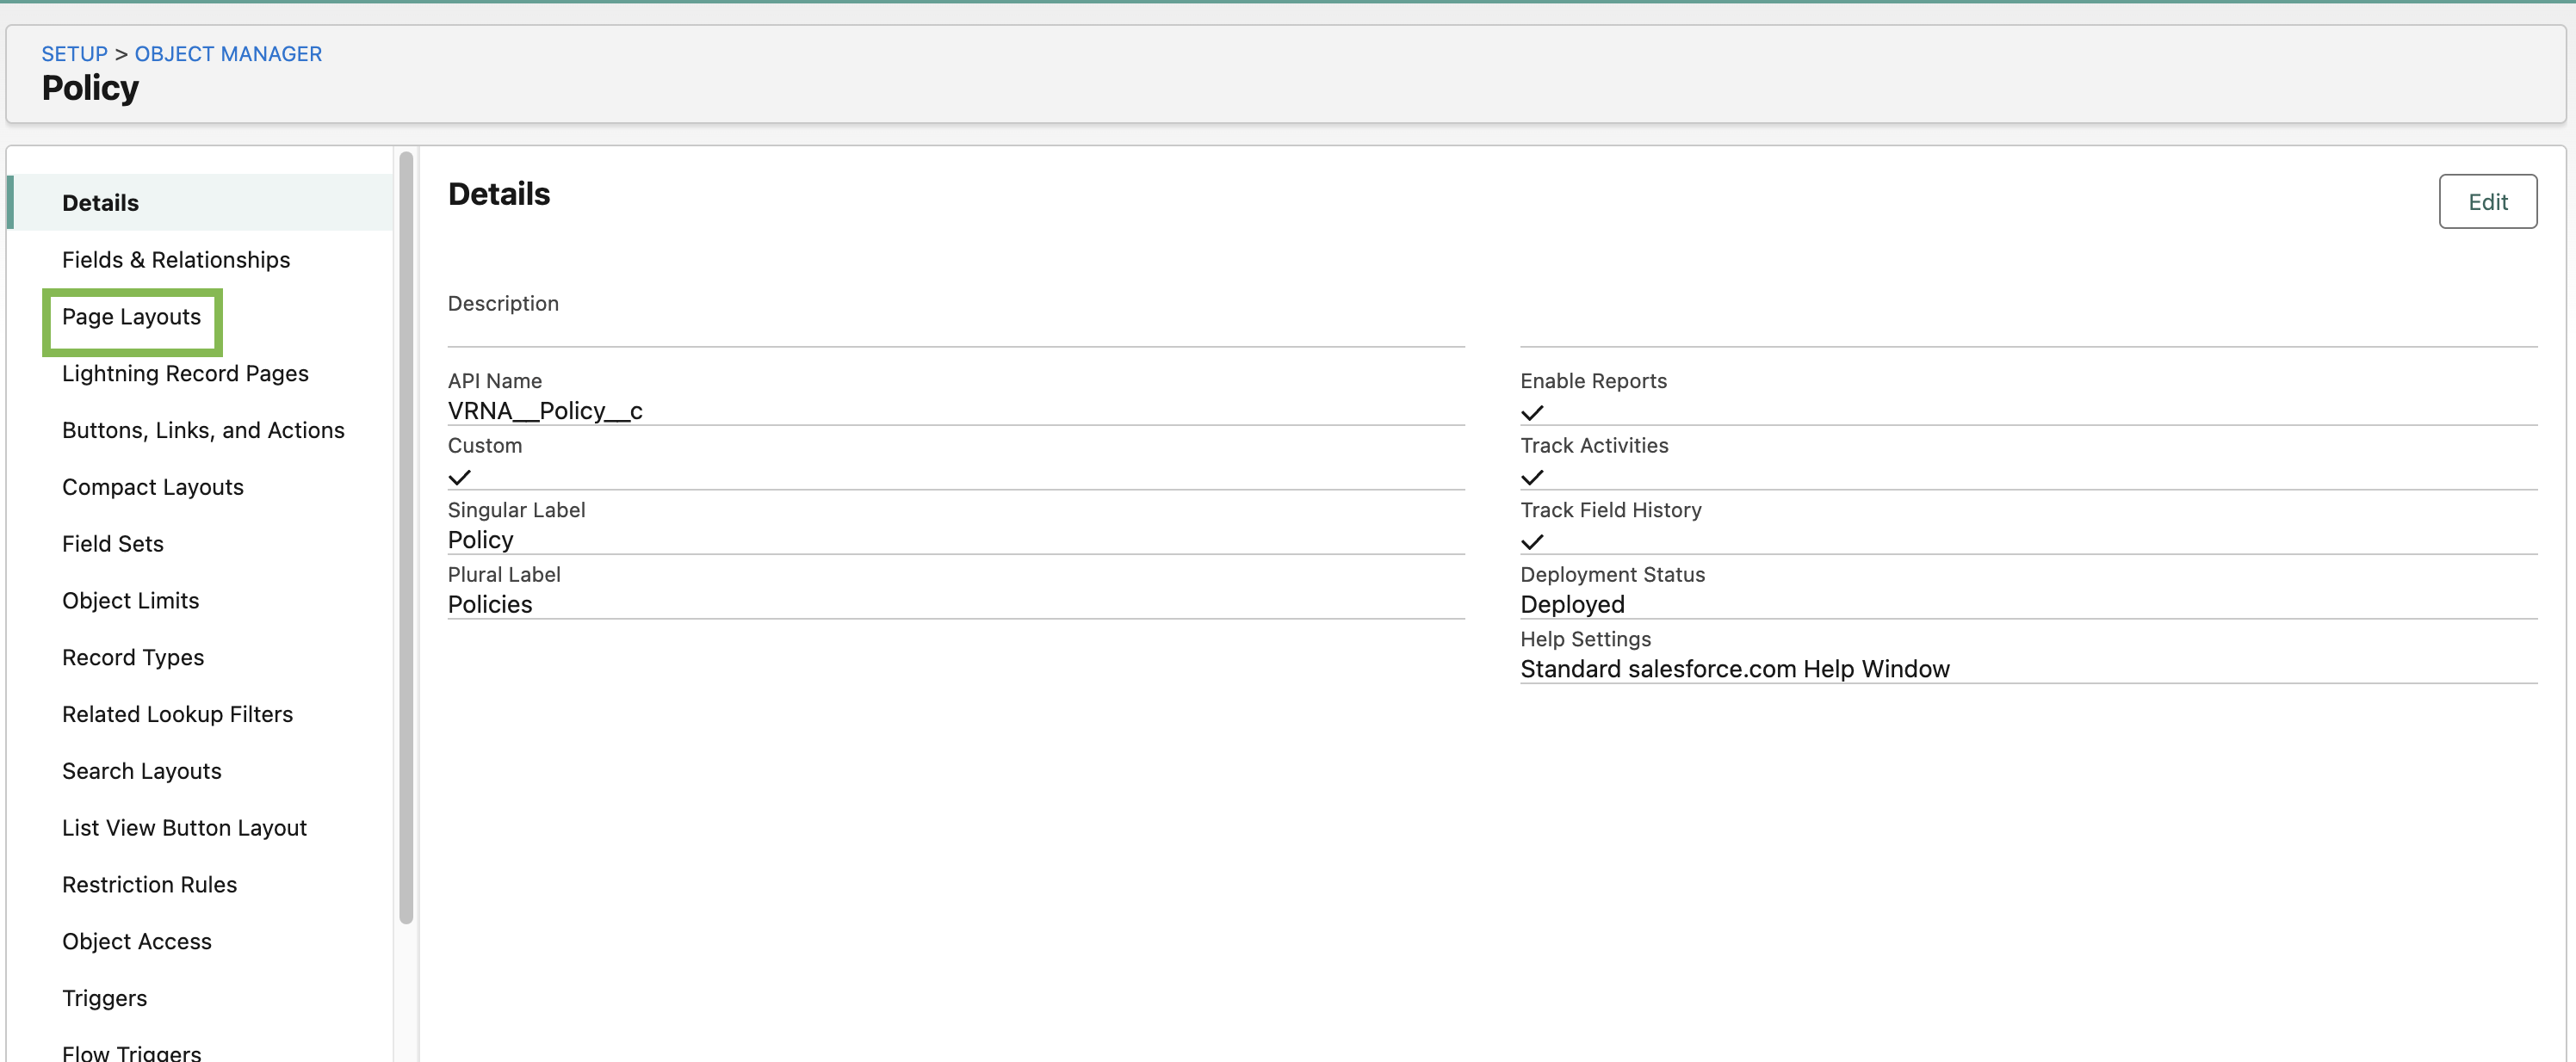
Click on Page Layout Assignment.

Click Next> 3-4 times to find the Written page layout(s):
Written Benefits
Written CL
Written CL LOB
Written PL
Written PL LOB
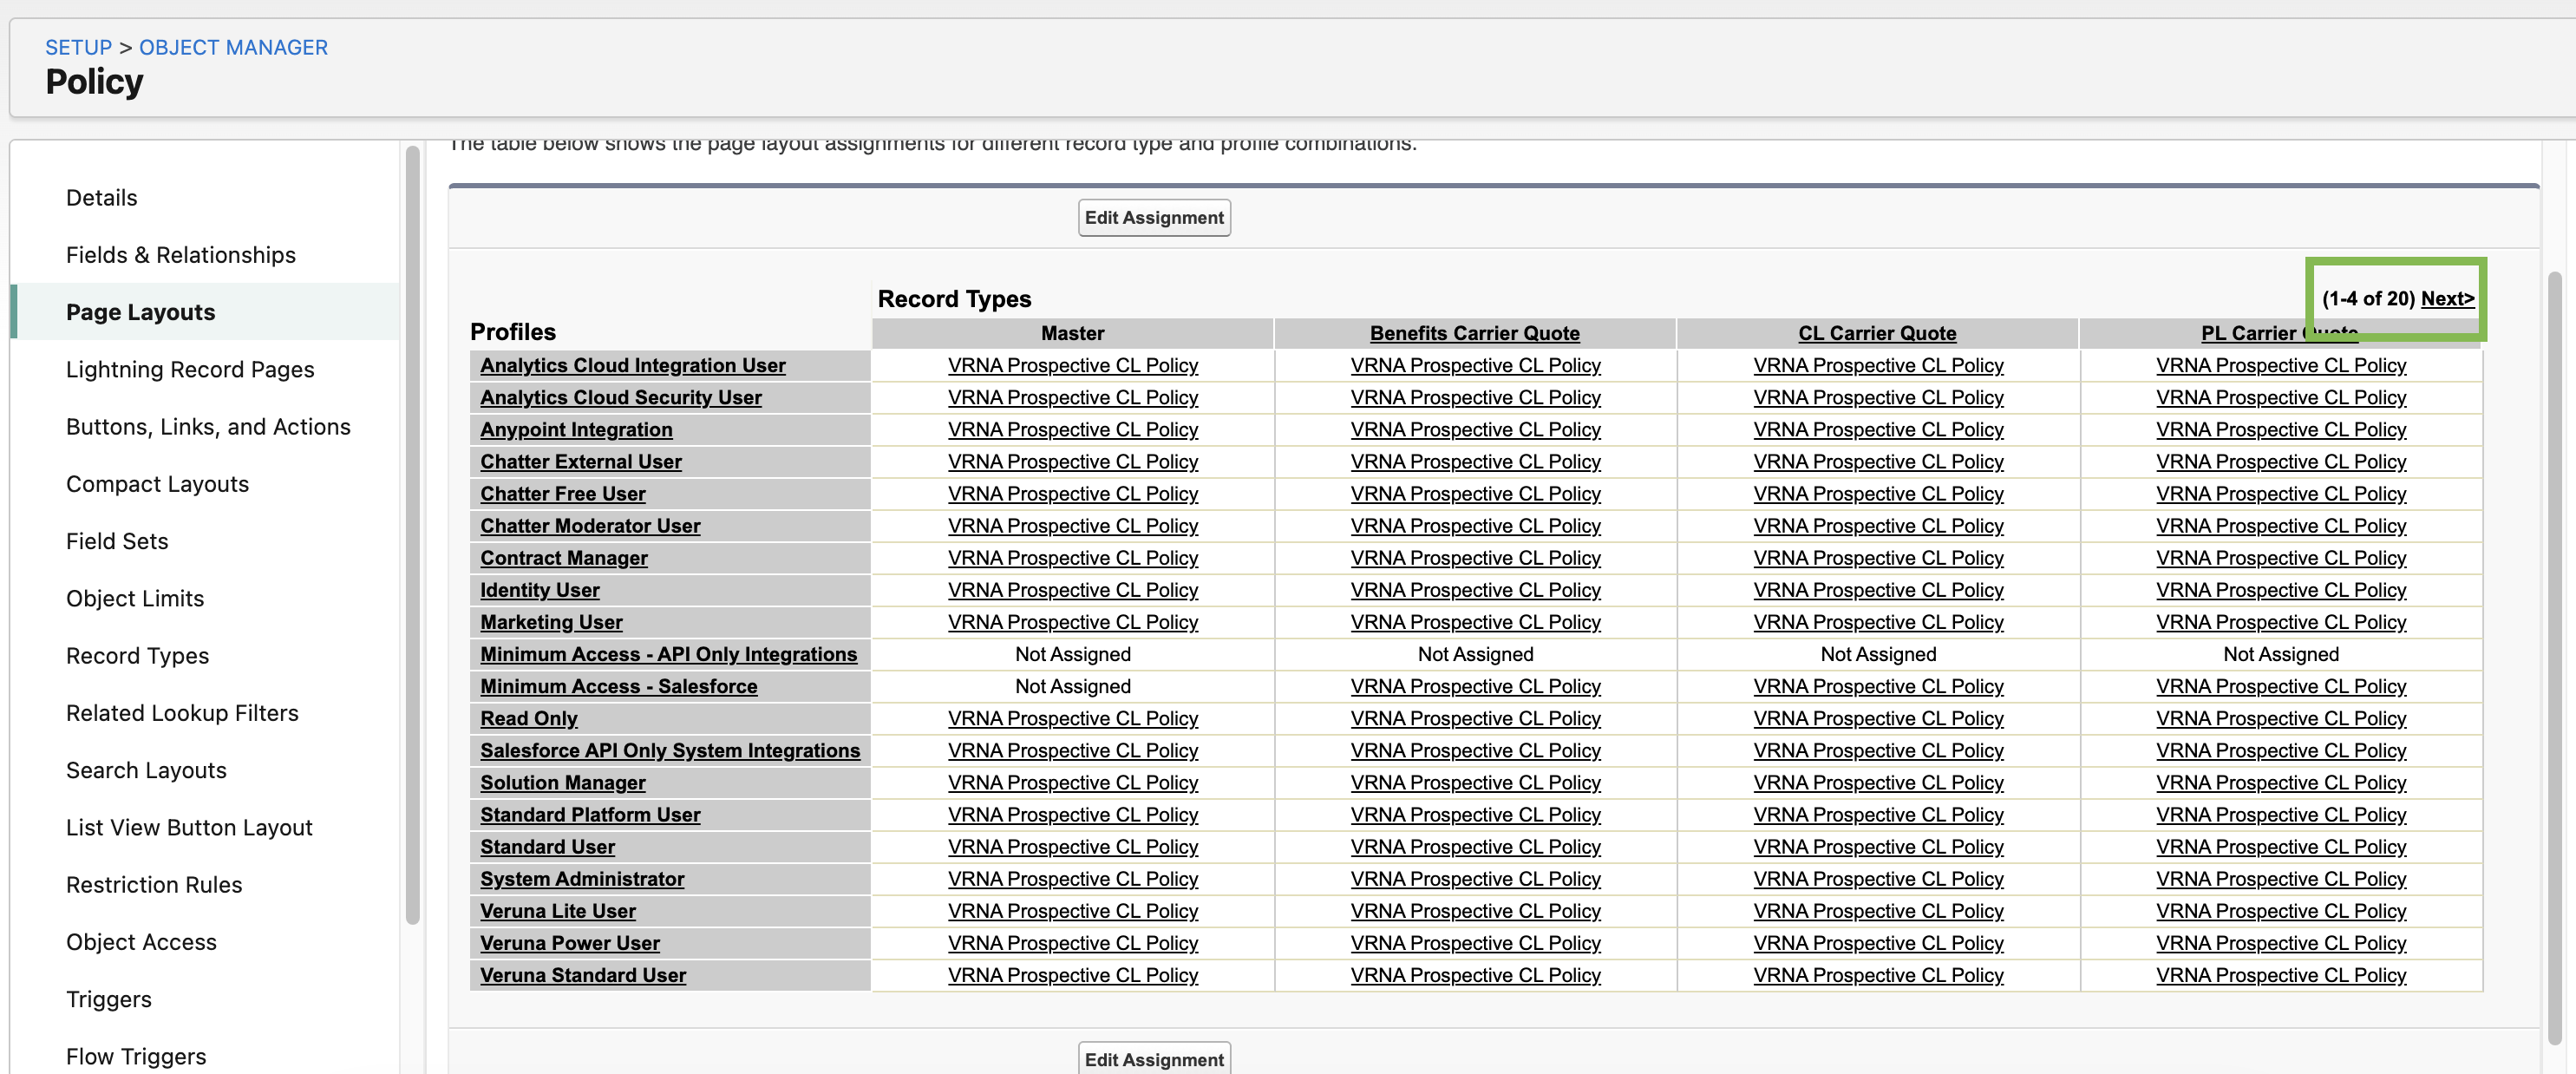
Click on the Page Layout for the policy type and profile to update. For example, if adjusting the Page Layout for the Veruna Power User profile for Written CL policies.

Locate the new Custom Fee from the steps above and drag to the Accounting section of the page layout.

Click Save.
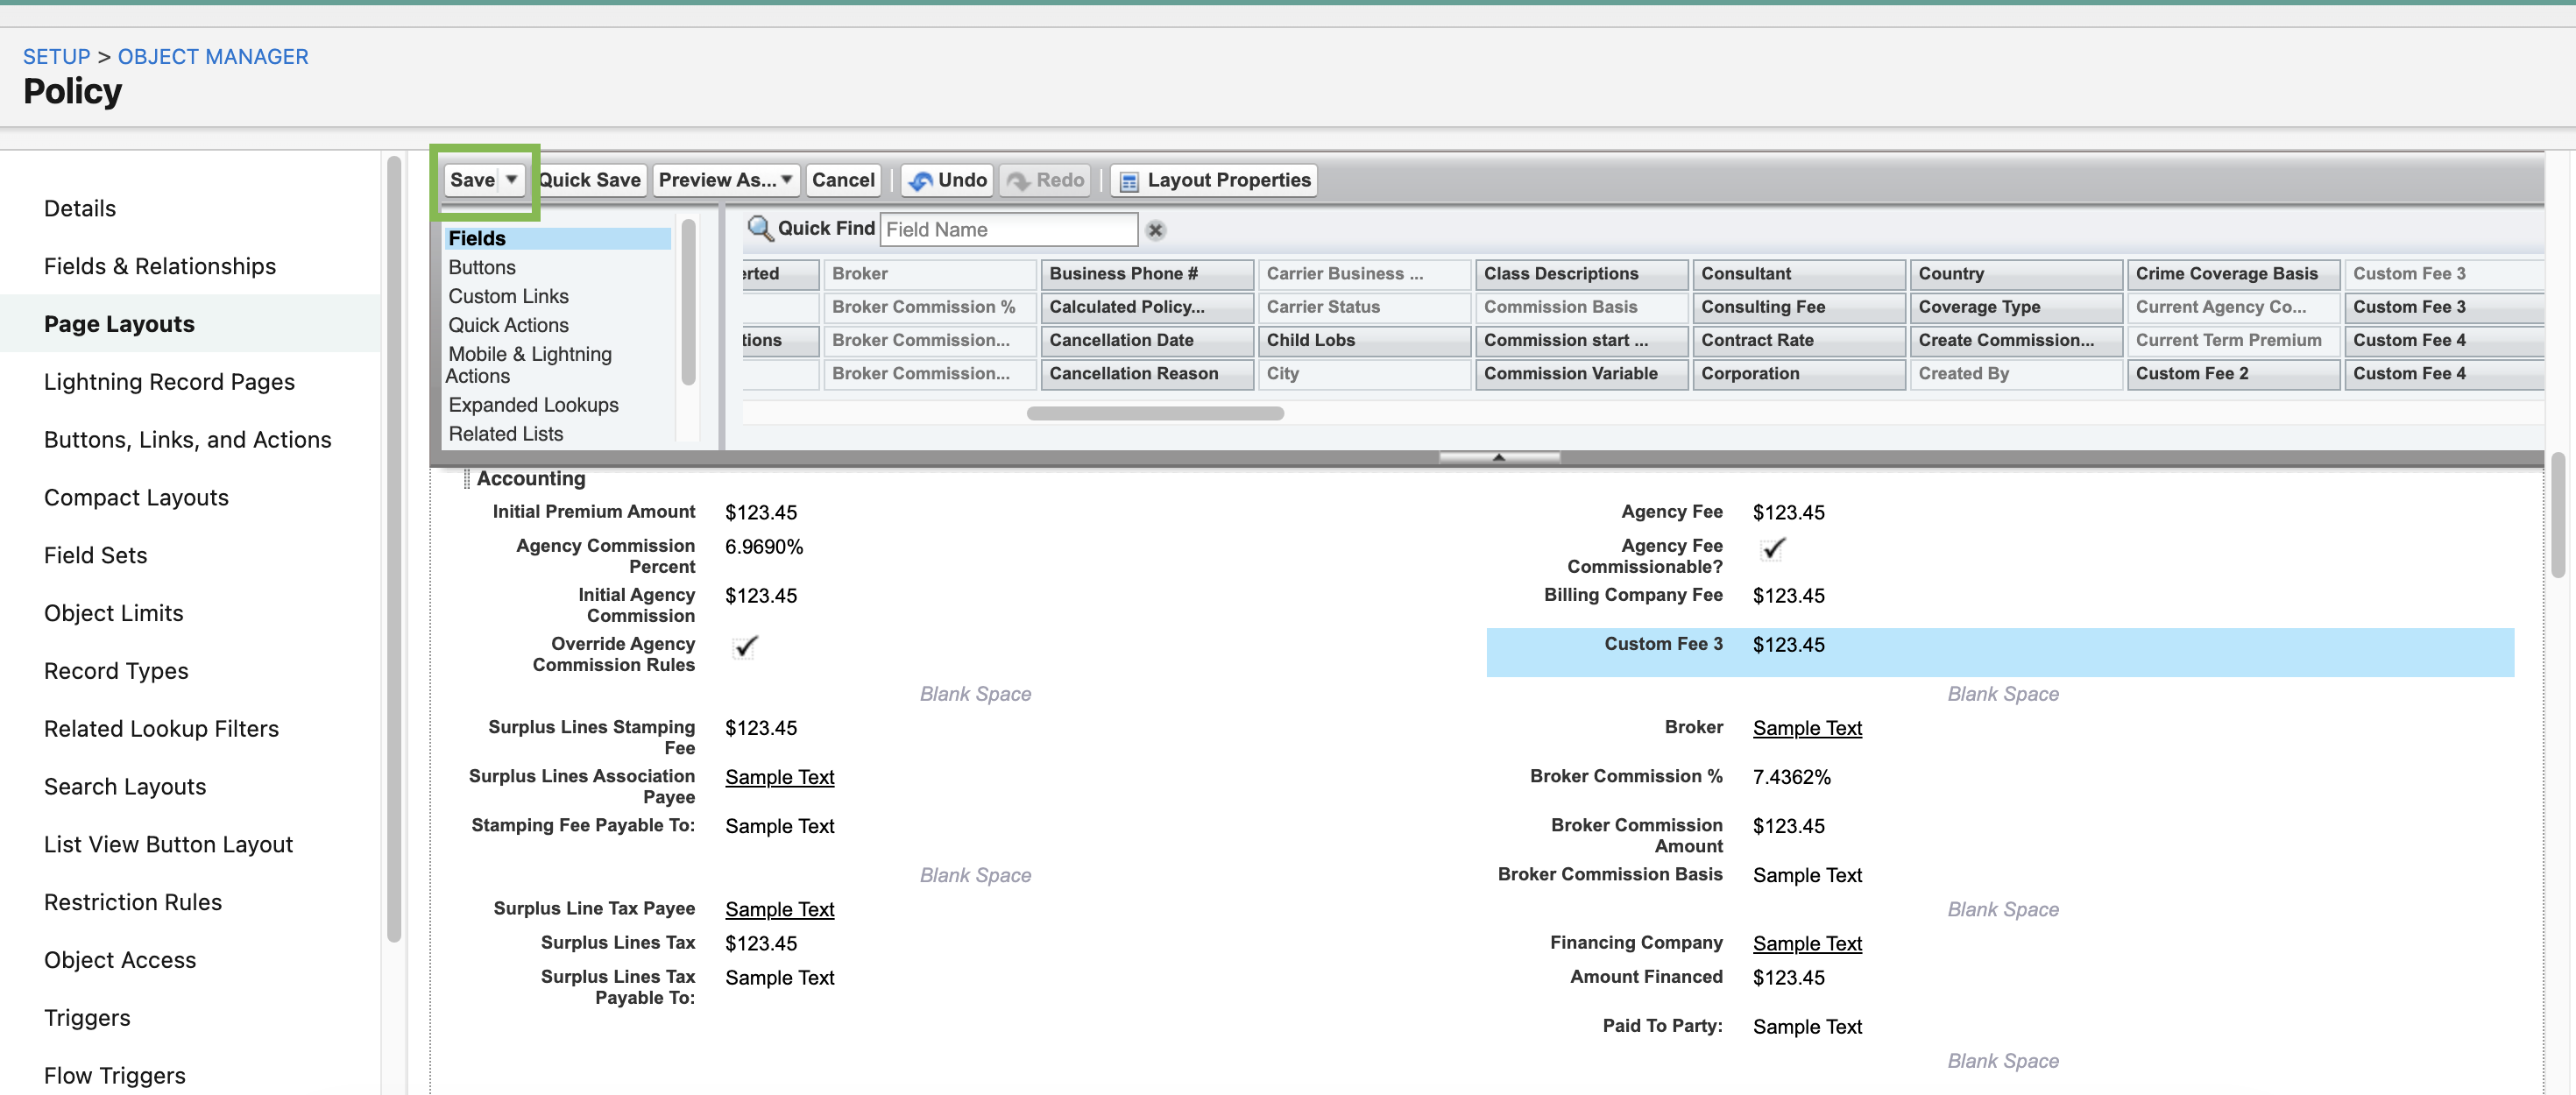
Repeat these steps for any other Written page layouts, as needed.
Update Policy Change page layouts
In Object Manager, search and select Policy Change.
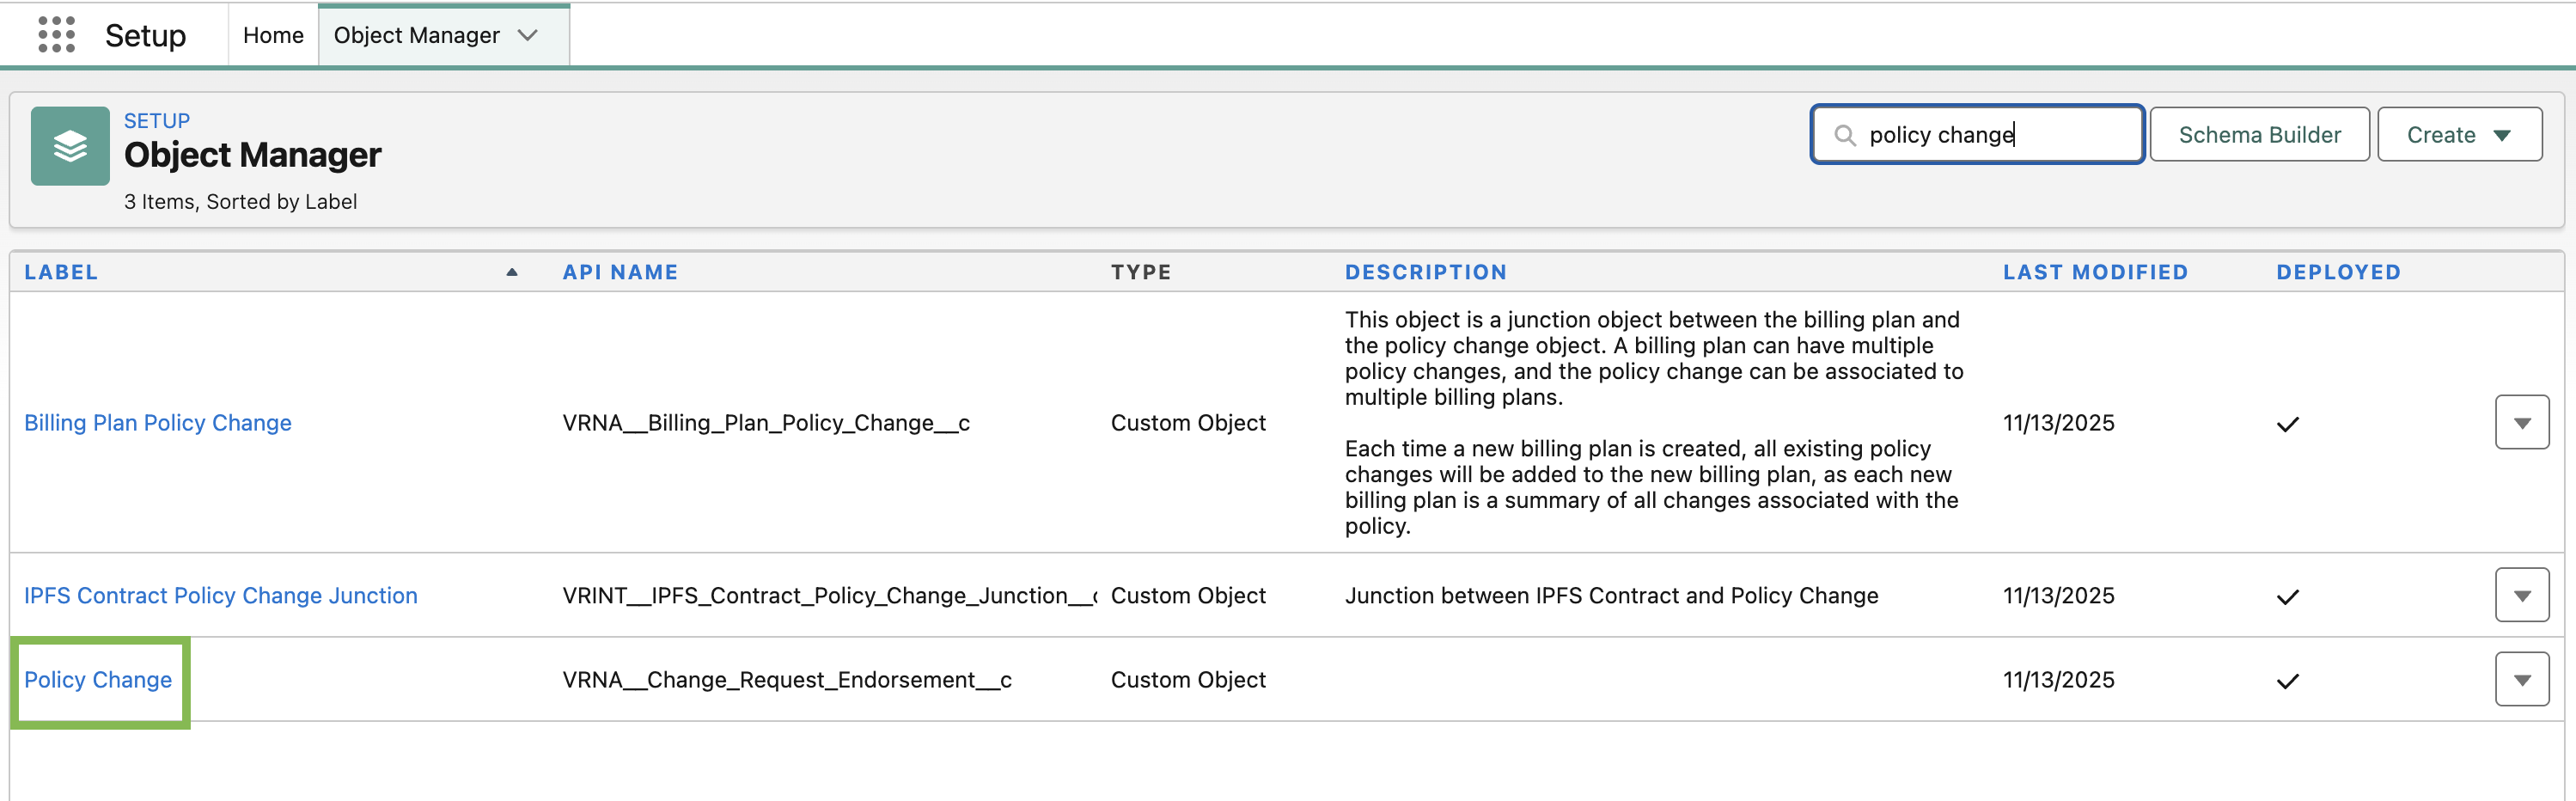
Click Page Layouts, then Page Layout Assignment.

Two Page Layout names appear - both need to be updated.
Change Request & Endorsement Billing Layout
PL Change Request & Endorsement Billing Layout

Click the drop down arrow next to either Layout, and select Edit.
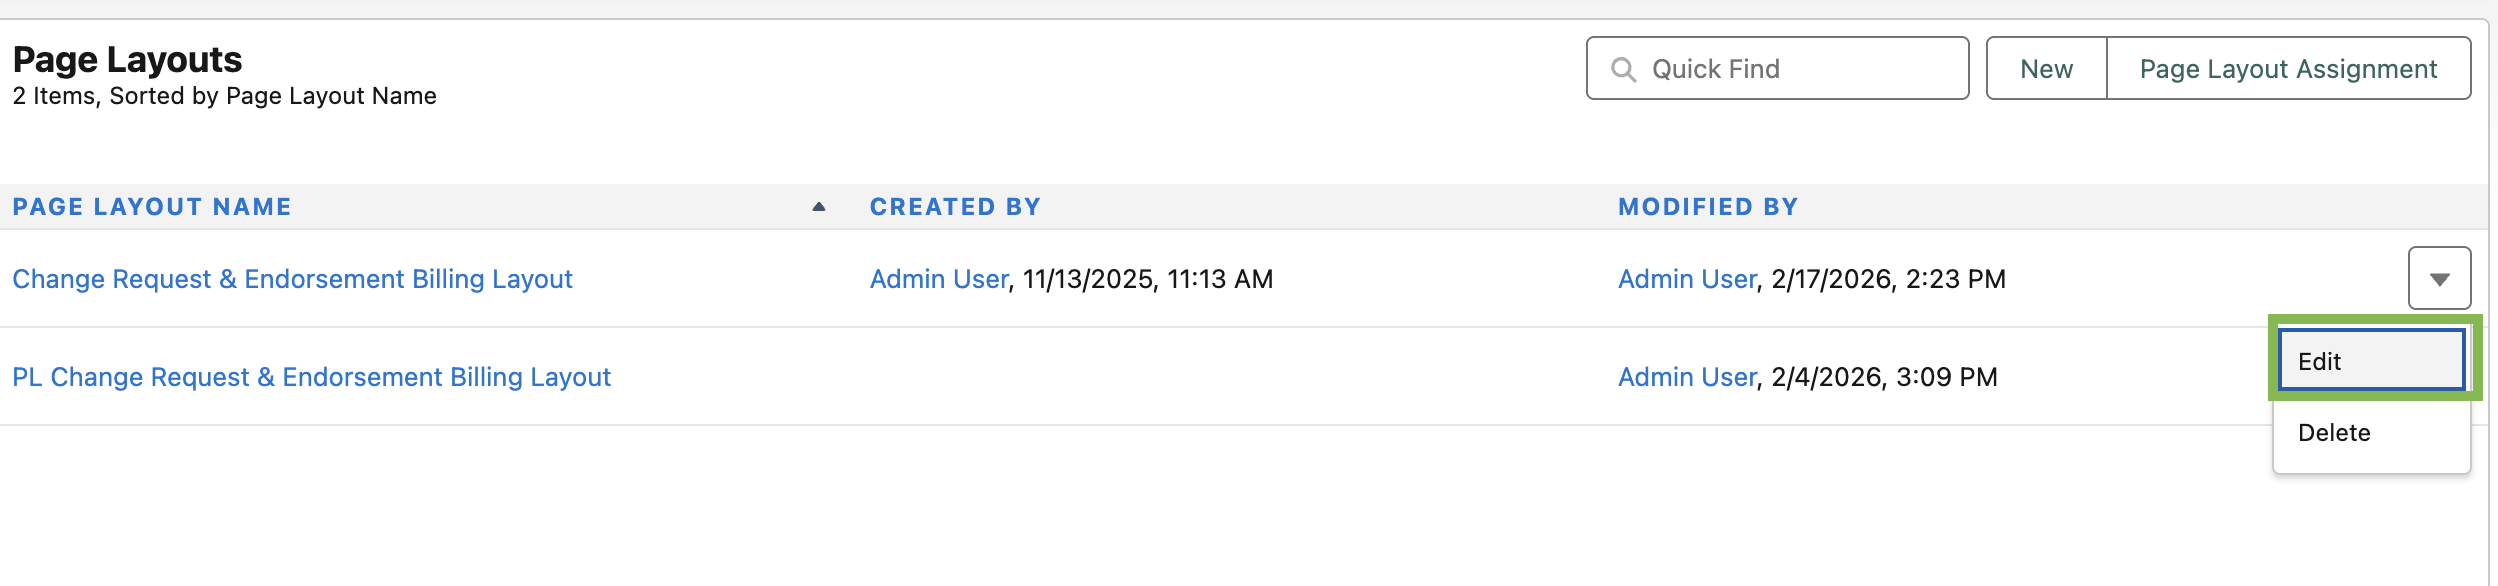
Drag and drop the new Custom Fee to the Accounting section.
Click Save.
Repeat these steps for the other Page Layout.
Confirm your changes
After making configuration changes, test thoroughly to ensure everything works as expected. We recommend:
Create a test policy.
Add billing records to the policy.
Confirm the custom fee calculates correctly.
Verify the fee appears on Billing Lines and Payable Lines.
Confirm the correct GL account is applied.